Archive for the ‘* Best Value $1 or Less per Serving’ Category
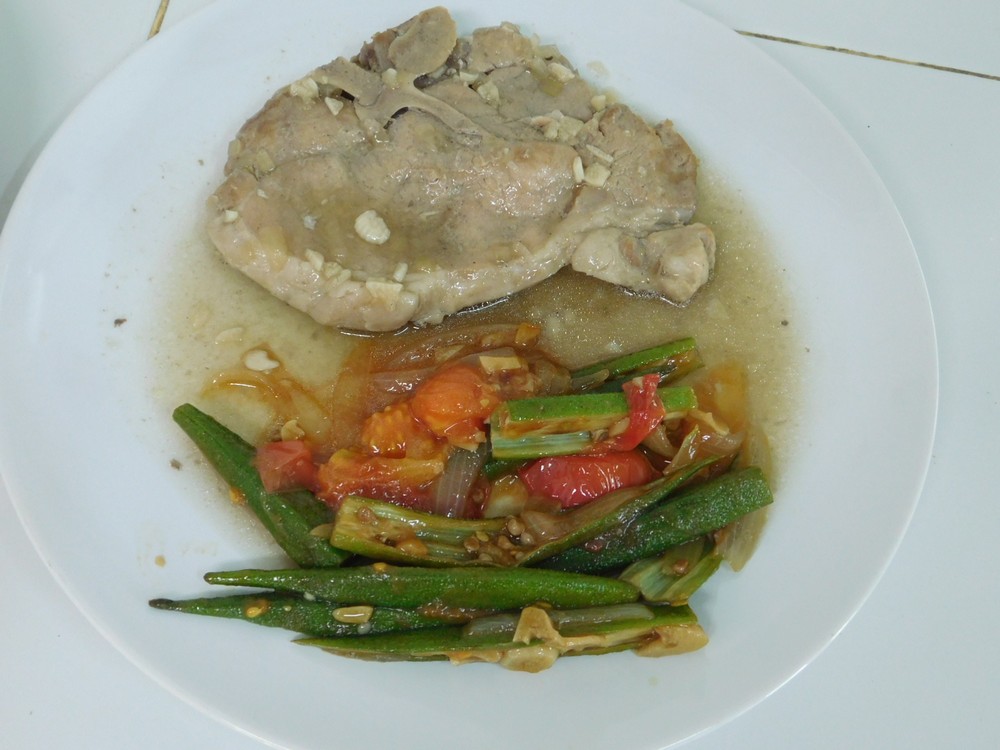
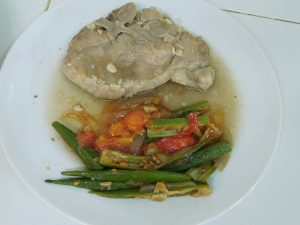
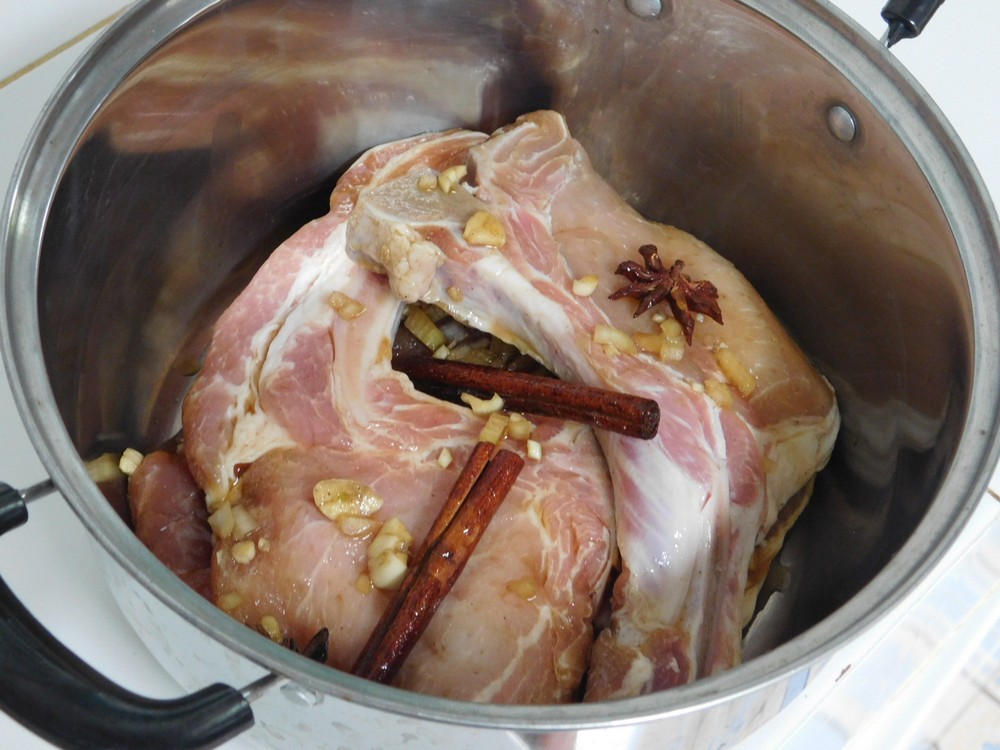
Cinnamon & Star Anise Pork Chops
The flavors are wonderful and is a good change from regular pork chops. This is a Thai recipe for pork chops that poaches them, which is a fancy word for simmering. I made this on 16 July 2018, and this is a keeper!
Ingredients
- 3 pork chops, bone in
- 3 pieces whole star anise
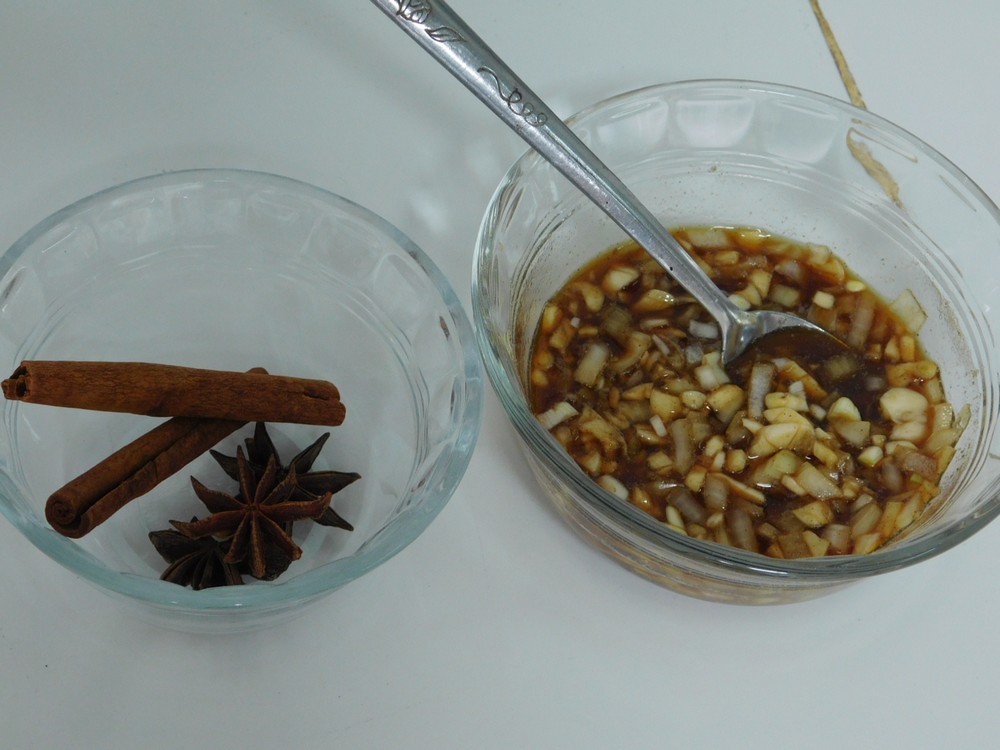
- 1-2 sticks cinnamon, 1 thick or 2 thin
- 1/2 small onion, finely diced
- 4 cloves garlic, smashed and minced
- 1 teaspoon salt
- 1/2 teaspoon white pepper powder
- 1/2 teaspoon sugar
- 2 tablespoons light soy sauce
- 1/2 teaspoon dark soy sauce
- 1 tablespoon cornstarch
- water, as needed
Instructions
- Mix together the salt, sugar, onion, garlic, white pepper, and soy sauces. I used two thin pieces of cinnamon.

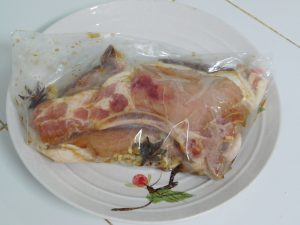
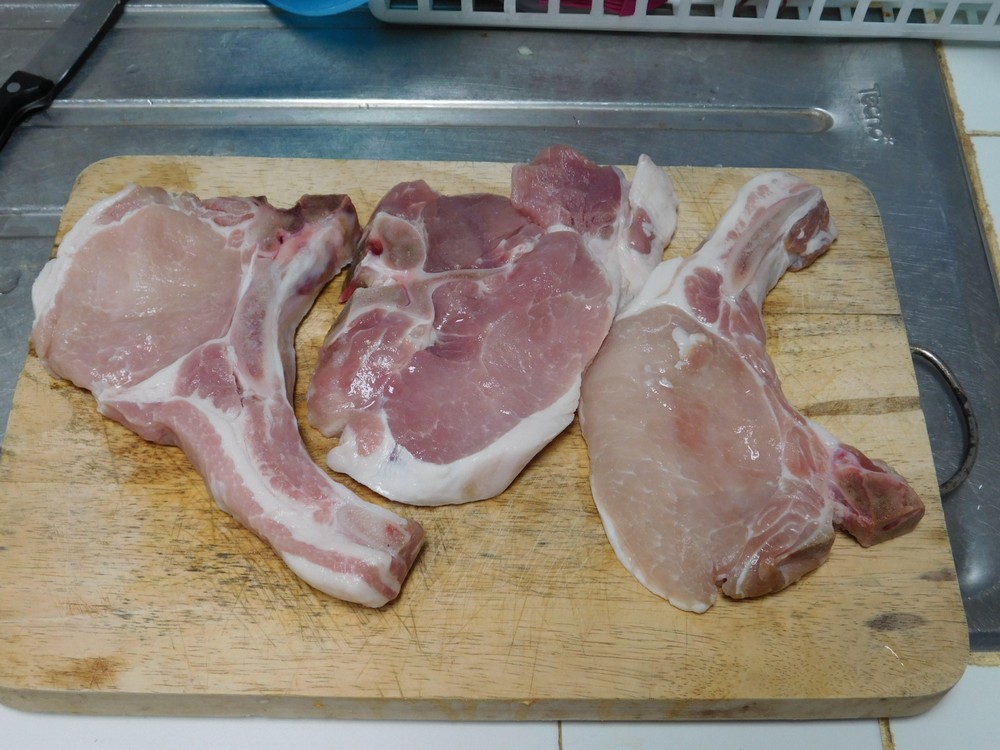
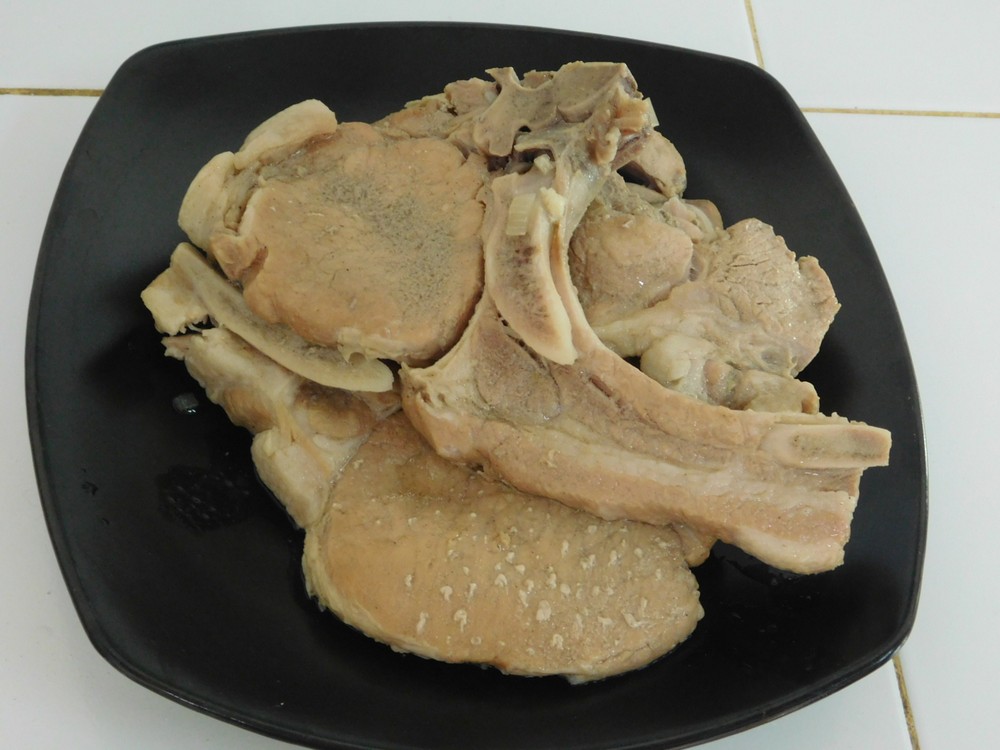
- Rinse the pork chops. This photo shows how the pork chops can vary.

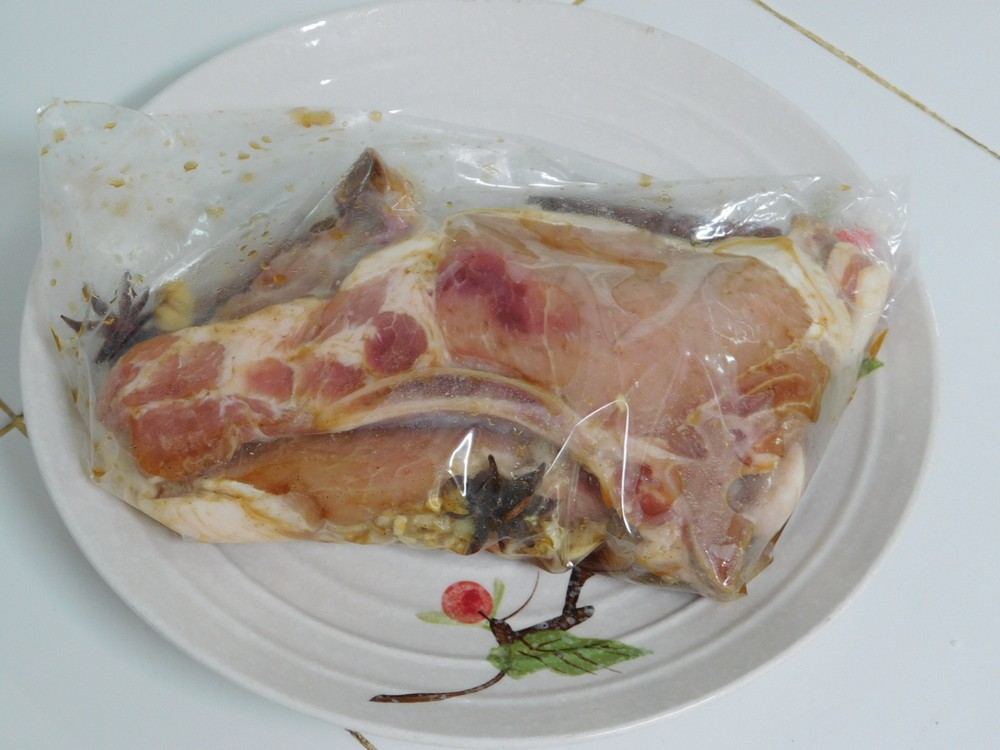
- You can tenderize if you like with a mallet or needle tenderizer. Add the chops to a sturdy zip lock bag. I use a needle tenderizer, both sides, not to tenderize the meat but to allow the marinade to soak into the meat.

- Add the remaining liquid mix and the star anise and cinnamon to the zip lock bag, squish the chops around, mindful of the where the bones are next to the bag. Remove as much as air as you can from the bag and zip close. Place the bag in the fridge for at least 3 hours but overnight is recommended. For 3-6 hours, flip the bag once an hour.
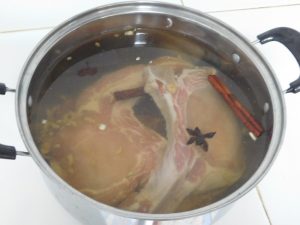
- Place the chops and the marinade in a pot,

- Add water to just cover the chops. Bring to a boil then reduce to a low boil, and let the chops cook until the liquid is reduced by half and the chops are tender.
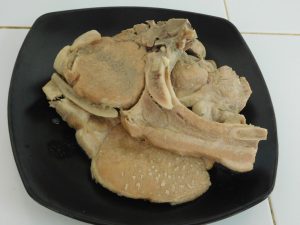
- Remove the chops to a dish with a slotted spoon leaving the liquid in the pot.
- Mix together the cornstarch and 2 tablespoons of water to make a slurry. Whisk the slurry into the liquid while the pot is on medium heat, whisk or stir for several minutes to slightly thicken the sauce. Remove the star anise and cinnamon sticks.
- Serve the chops with rice on the side and spoon the sauce over the chops.


Notes
I will price this when I get pork chops again in the city, I will say low price now.
This recipe for Cinnamon & Star Anise Pork Chop is adapted from Appon's Thai Food.
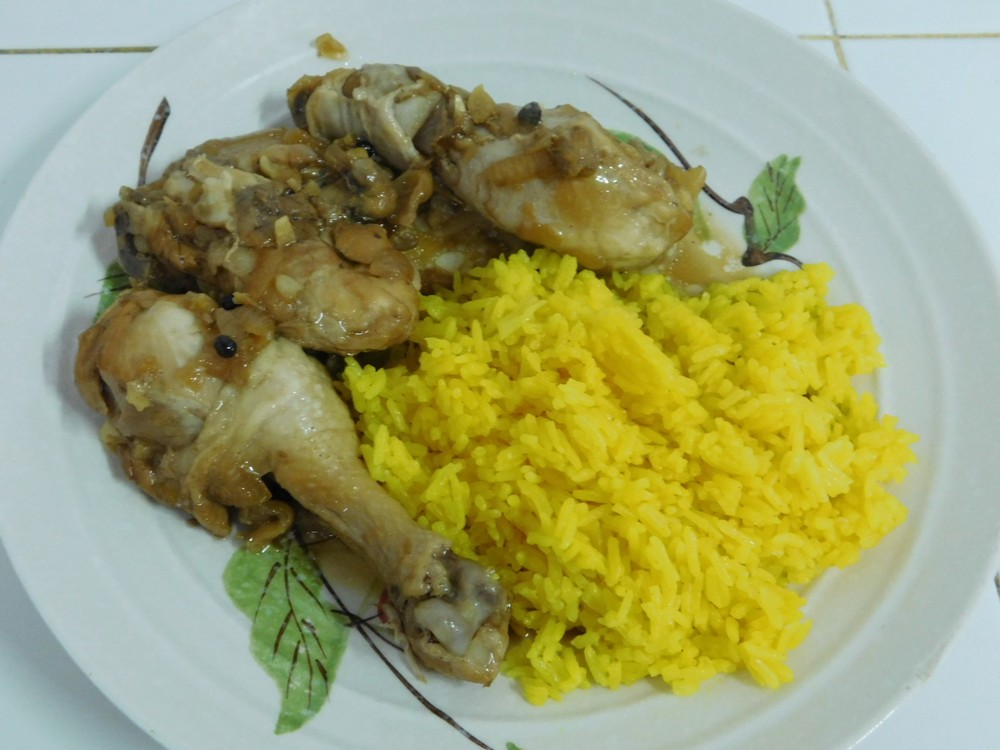
Chicken Adobo (Pressure Cooker)
This recipes comes from a good friend in Thailand, and it is very good. the vinegar used is a good combination, but I think when I make this again, I will play around the they types of vinegar. This is a pressure cooker recipe and I will verify use my large 9 liter (9½ quart) stove top model. Follow the safety precautions for your model of pressure cooker at all times.
Equipment
- Pressure Cooker
Ingredients
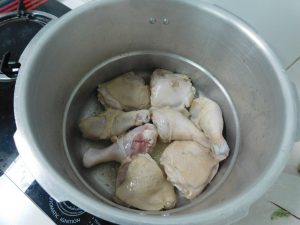
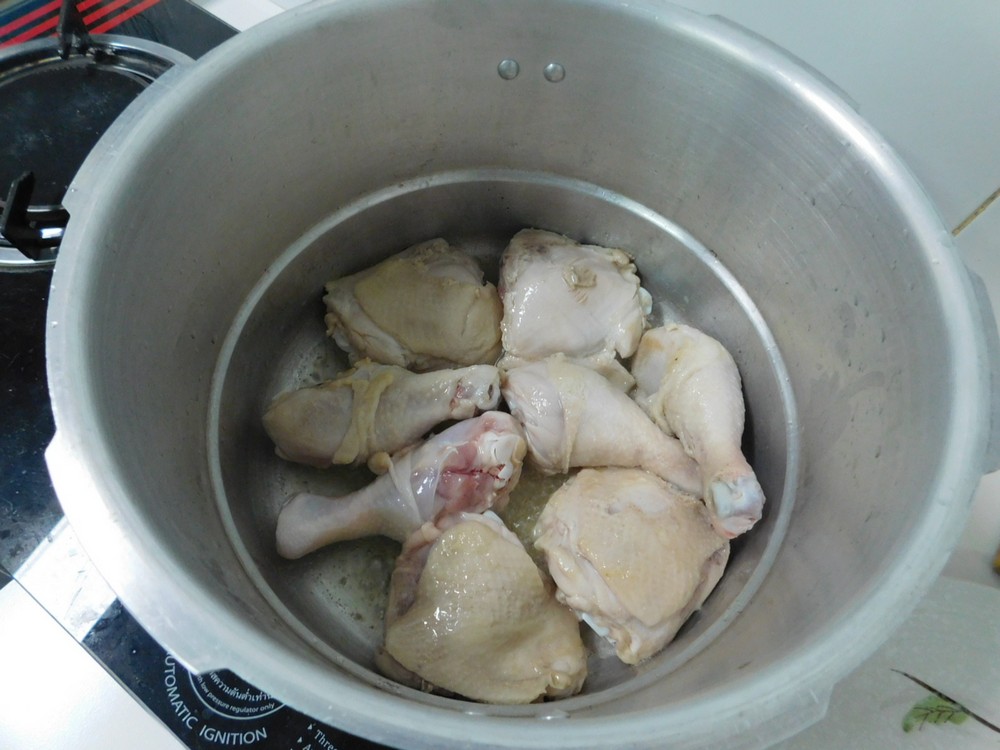
- 8-10 pieces legs and thighs, think quarters, 4-5, cut apart
- 2 tablespoons cooking oil
- 1 onion, sliced
- 5-10 cloves garlic, smashed and minced, 10 recommended
- 4-5 bay leaves
- 1 teaspoon black peppercorns
- 1 tablespoon brown sugar
- ½ cup soy sauce
- ¼ cup rice vinegar
- ¼ cup apple cider vinegar
Instructions
- Place your pressure cooker, no lid used yet, on medium high heat and heat the oil, when hot, lightly brown the chicken, you are not looking to cook through, just brown it on both sides.
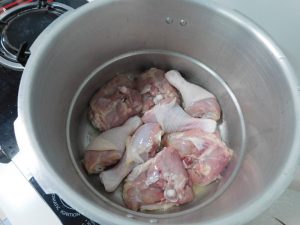
- Remove the chicken and cook in batches if needed until all are browned. When taking the chicken out, any pieces stuck to the bottom, no worries, just loosen them up when making the sauce.
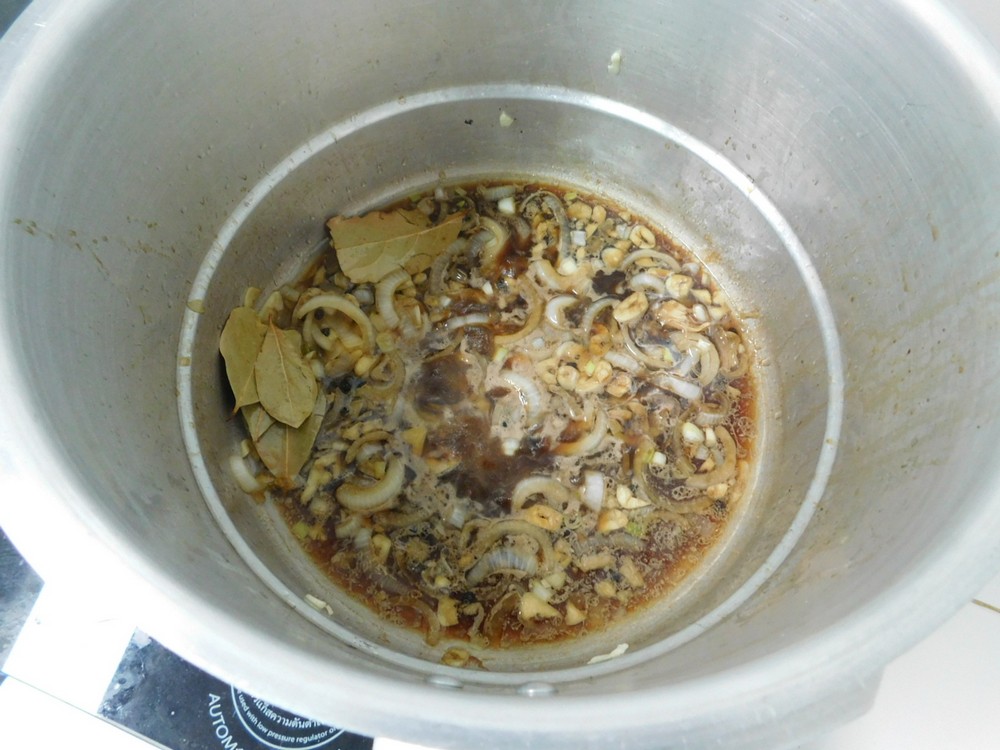
- Add the onion and saute until starting to soften, then add the garlic and saute for another minute until fragrant.
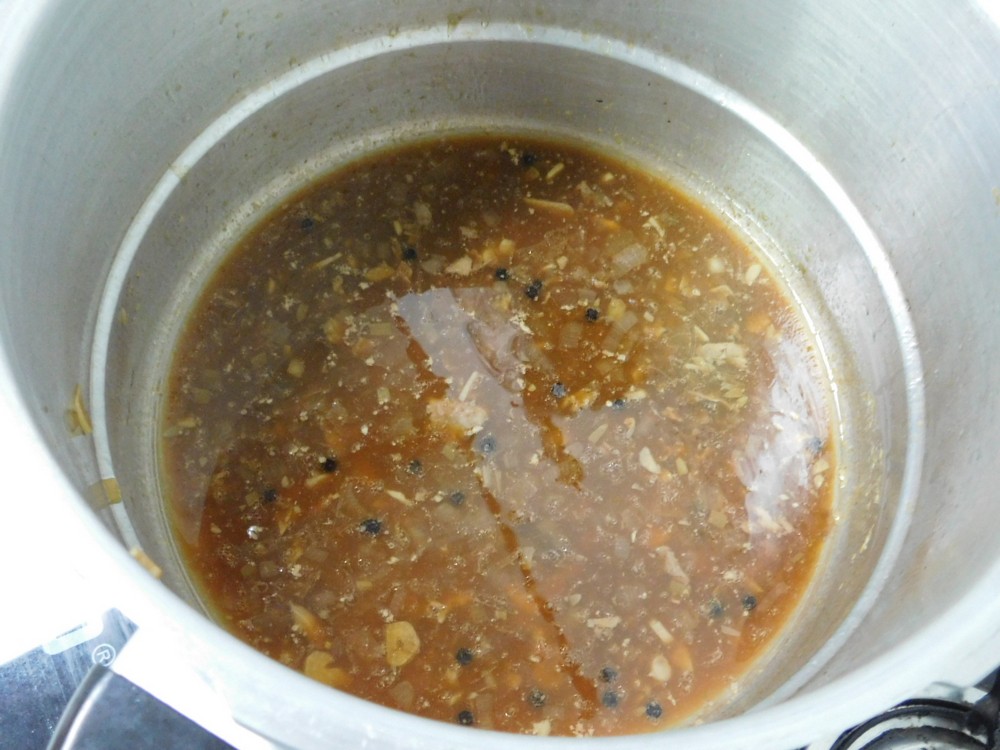
- Add the soy sauce, both vinegars, bay leaves, peppercorns, and brown sugar.
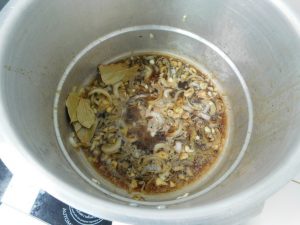
- Bring to a simmer then add the chicken back to the pot.

- Place the lid on the pot and lock that and add the weight (jiggler), turn heat to high and bring to high pressure, when the jiggler starts to move, indicating full pressure, reduce the heat to low or medium low to keep the jiggler still moving and venting pressure.
- Start timing for 8 minutes. When 8 minutes have passed, turn off the heat and carefully move the cooker to an unused burner and allow the pressure to release naturally, about 10-15 minutes.
- When you have indication of zero pressure in the cooker (for my stove top model there is a pin that will drop), remove the jiggler, then open the lid.

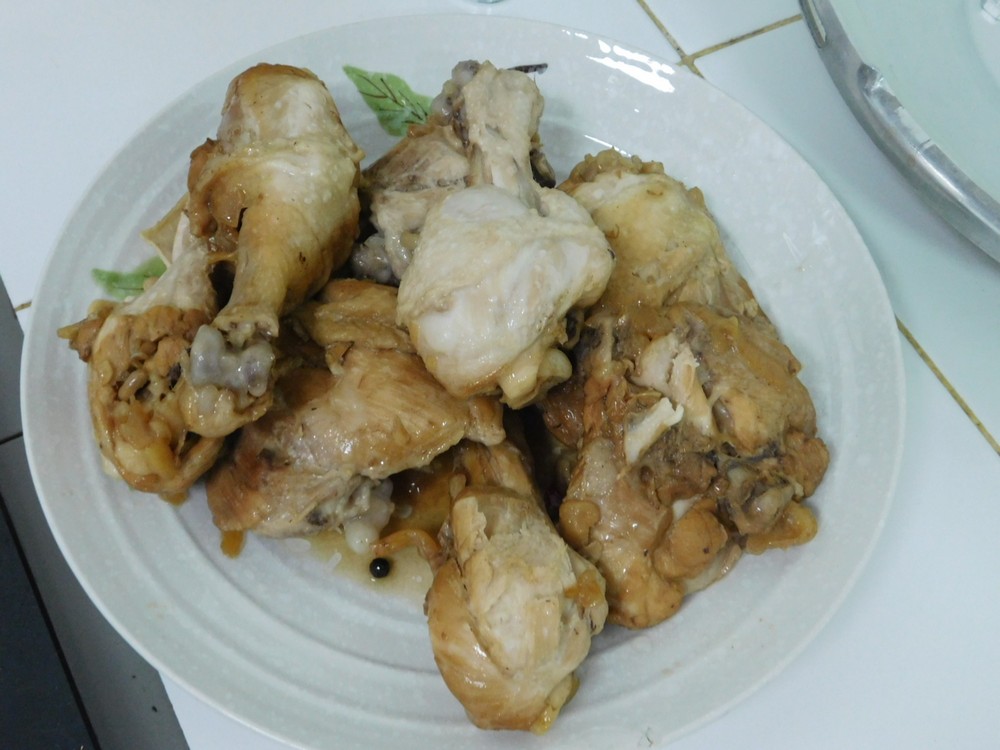
- Remove the chicken with a slotted spoon to a serving plate. Tender and juicy chicken adobo, but we are not done yet.

- Place the cooker, without the lid, back on medium high heat, stir often and reduce the sauce to thicken it.

- Spoon sauce over the chicken and serve. If having white rice as a side dish, spoon some sauce over the rice as well. Enjoy.


Notes
Go with about 105 Baht for 4-5 quarters (2 kilos, 4 lb). For 4 servings this is about 80 cents per serving.
Fried Okra
A good sounding southern US side dish, that is very good. Not sure how okra ended up in Thailand, or even how it is used in Thai cooking. I have modified this with my findings. Link to the shortcut is listed in the Recipe Notes section.
Ingredients
- 10 pods fresh okra, sliced into 1/4 inch pieces
- 1 egg, beaten
- 1/2 cup yellow cornmeal
- 1/4 teaspoon salt
- 1/4 teaspoon black pepper
- 1/2 cup lard, or cooking oil, OR make from a shortcut
Instructions
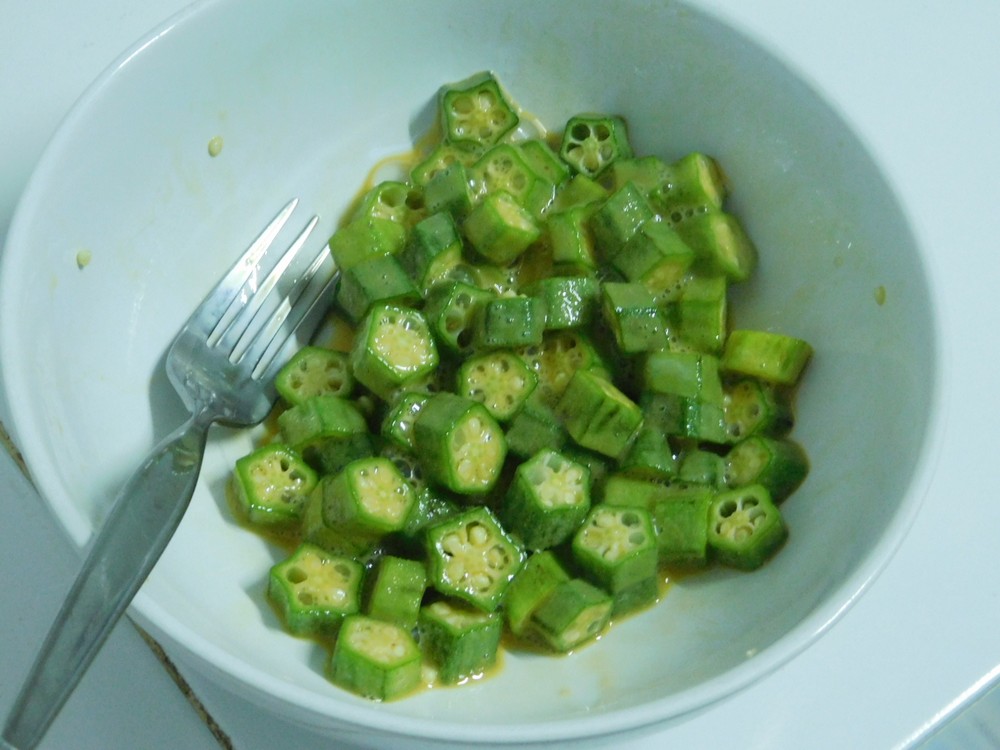
- Beat the egg in a bowl then add the sliced okra, mix and allow the okra to sit in the beaten egg for 10 minutes, stir occasionally.

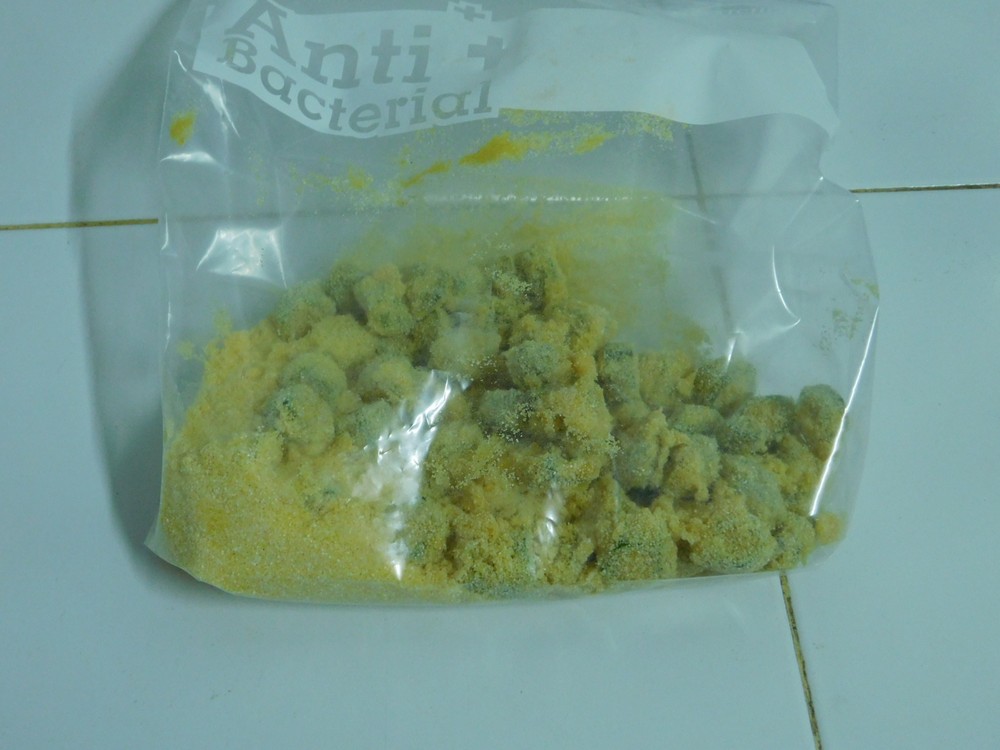
- Place the cornmeal, salt, and pepper in a zip lock bag, seal and shake to mix. Add the okra, seal, and shake to coat, does not take long, okra is pretty slimy on its own. (Original recipe called for 1 cup of cornmeal, after making this, 1/2 cup would be plenty.)

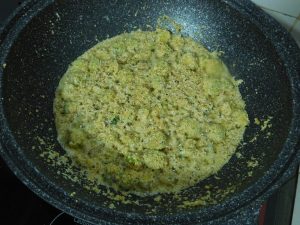
- Heat the lard (or oil) in a large non stick pan on medium high heat. Important to get the lard very hot. Using tongs, remove the okra from the bag and place in the hot lard.
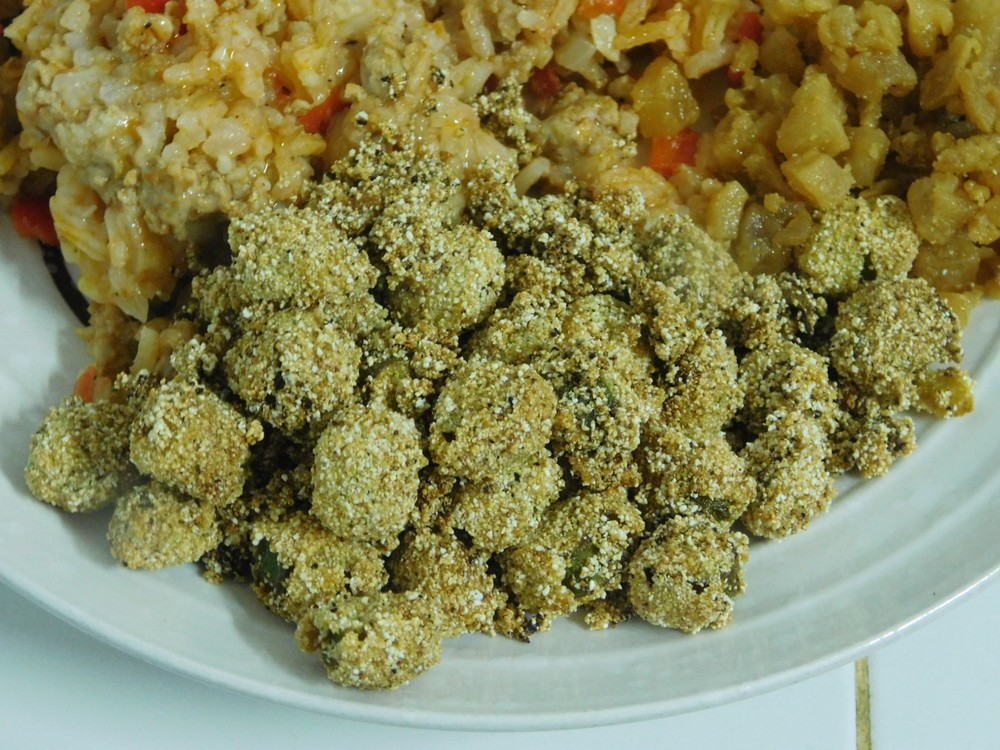
- Gently stir and when nice and golden brown, remove using a slotted spoon to paper towels to drain. Some of the cornmeal will fall from the okra, no worries, that is expected.
- Serve as a side with your preferred main dish.


Notes
Huli Huli Chicken
This sounds like some delicious grilled chicken! This comes from a good friend and is highly recommended. On my to cook list.
Ingredients
- 2 kilos chicken breast, boneless, skinless, (4 lbs)
- spring onion, sliced for garnish
For the Marinade
- 1 cup pineapple juice, unsweatened
- 1/2 cup soy sauce
- 1/2 cup brown sugar, packed
- 1/3 cup ketchup
- 1/4 cup chicken broth, fresh or from powder
- 1 teaspoon fresh ginger, grated
- 1 1/2 teaspoons garlic, smashed and minced
Instructions
- In a large bowl, add all of the Marinade ingredients and whisk together. Reserve 1 cup of marinade for basting chicken later. (Cover the cup and place in the fridge until needed.)
- Add the chicken to a large zip lock bag then pour in the marinade. Squeeze out the air and zip the bag closed. Squish the chicken around to coat everything well. Place in the fridge for at least 3 hours or overnight for a more robust flavor.
- Grill chicken (using the cover as well) on medium heat and cook for 6-8 minutes each side, until no longer pink inside and juices run clear. Use the reserved marinade and baste the chicken during the last 5 minutes of grilling.
- Garnish with sliced spring onion and serve.
Notes
The chicken will cost 125 Baht/2 kilos. For 6 servings, this is about 65 cents per serving.
Recipe provided by good friend, Patti Stone.
United States.
United States.
Sinfully Delicious Chicken Casserole
This comes from a good friend and is highly recommended, and it certainly sounds delicious! I made this on 5 July 2018, and now I highly recommend this! The use of the Shortcuts is highly recommend. Links to the shortcuts are listed in the Recipe Notes section.
Ingredients
- 1 whole chicken, see Step 1
- 1 can condensed cream of chicken soup, OR make from a shortcut
- 1 can condensed cream of celery soup, OR make from a shortcut
- 1 cup sour cream, OR make from a shortcut
- onion powder, to taste
- 1 box Stove Top stuffing, chicken flavored, OR make from a shortcut
Instructions
- For the chicken, 1. You can use a whole chicken or 2 kilos (4 lbs) of pieces, think bone in skin on quarters separated, and breasts. 2. You can boil it or pressure cook it, pressure cooked will be used by me. Either way, once the chicken is cooked, leave it in the pot with the broth to cool to give you juicy chicken. Shortcuts are in the Recipe Notes section.
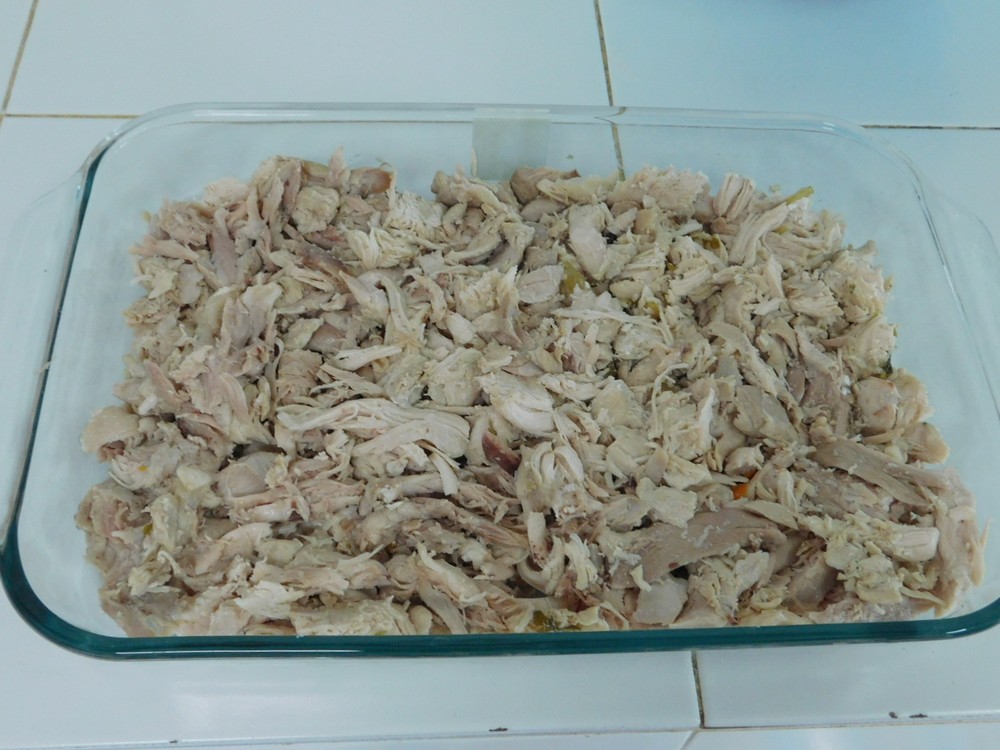
- Once the chicken is cooked, remove the skin, bones, cartilage, and shred, place evenly in the bottom of a casserole dish.

- Preheat your oven to 180 C (350 F).
- In a large bowl, add the soups, sour cream, and onion powder as desired. Whisk to combine. Here I have the chicken ready, the soups (homemade) mixed, and the stuffing (homemade) ready to assemble.
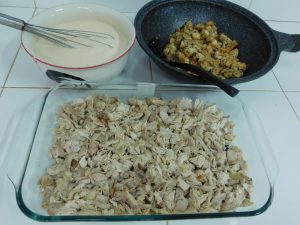
- Prepare the stuffing according to the directions on the package.
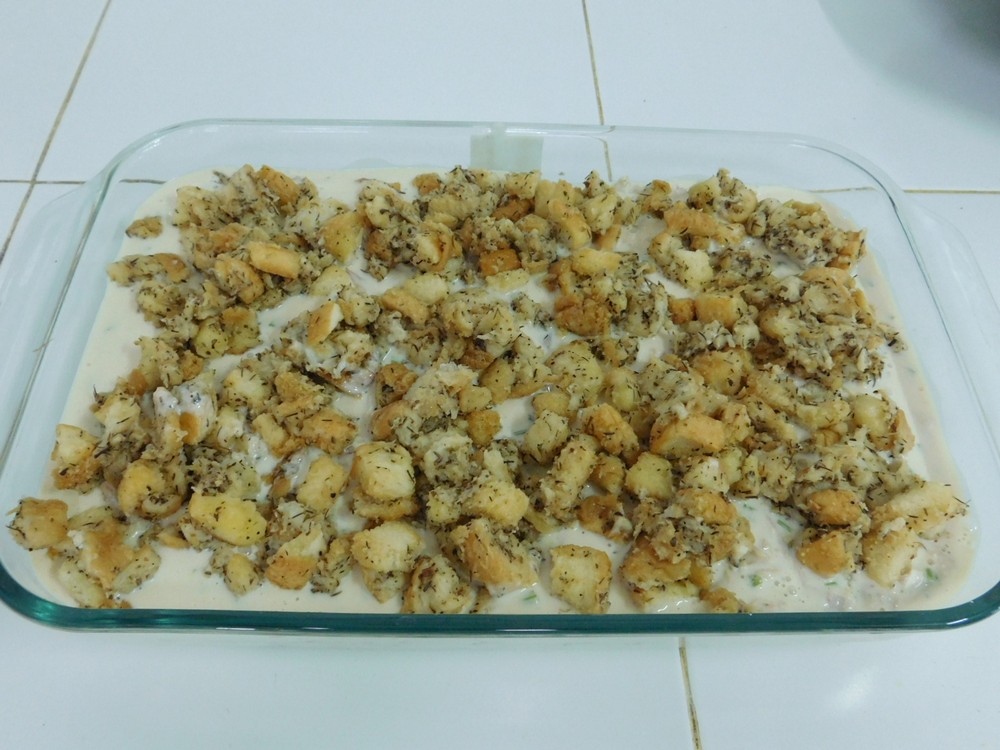
- Pour the soup mixture evenly over the chicken.
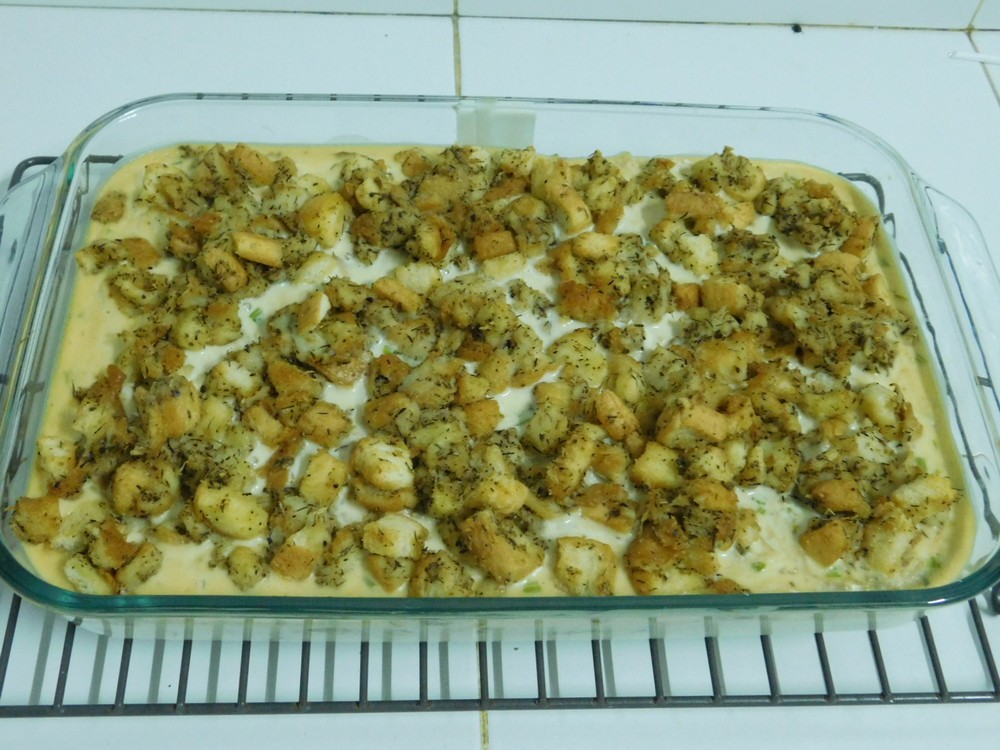
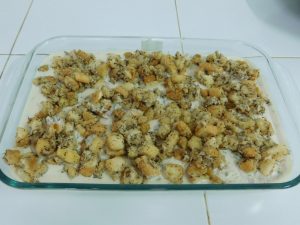
- Spread the stuffing evenly over the top of the casserole. Bake for 45 minutes.
- Let rest for 5 minutes,

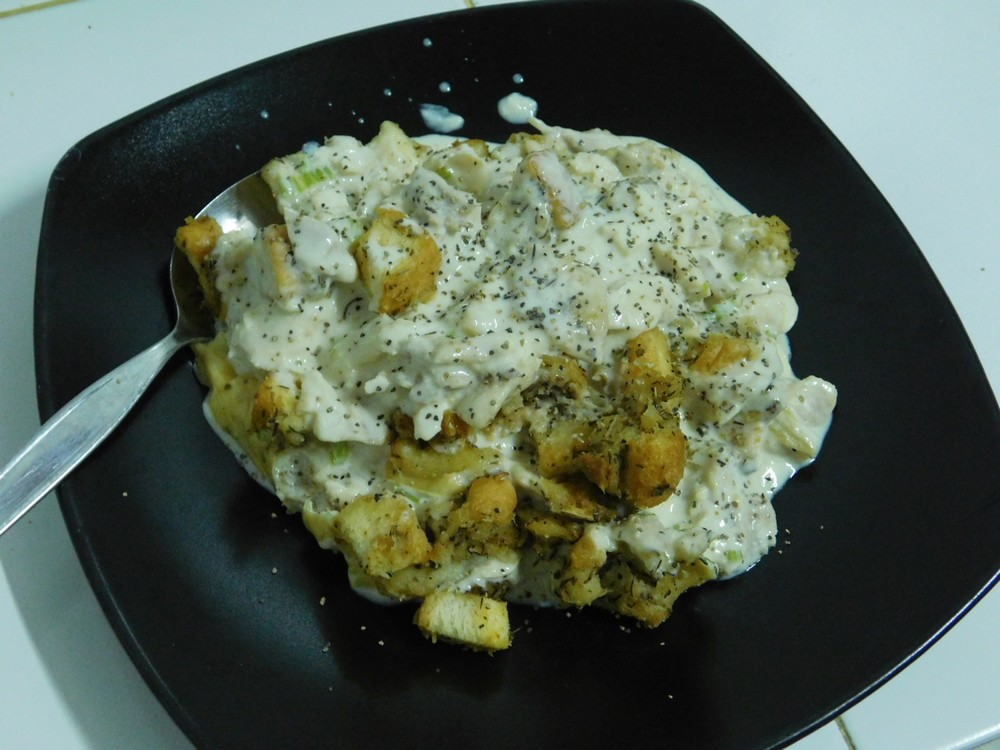
- Serve and enjoy.


Notes
The whole chicken will cost about 150 Baht. For 6 servings, this is about 78 cents per serving.
Shortcuts: Pressure Cooked Whole Chicken, Quick Chicken Broth, Condensed Cream of Chicken Soup, Condensed Cream of Celery Soup, Sour Cream, Stove Top Stuffing.
Recipe provided by good friend, Tim Payton.
United States.
United States.
Minestrone Soup (Pressure Cooker)
Sounds very tasty, and will be since the beans are cooked in the pressure cooker, meaning more flavor. I made this on 8 July 2018, nothing short of excellent! I used my 9 liter (9½ quart) stove top pressure cooker. Follow all safety precautions for your model of pressure cooker.
Equipment
- Pressure Cooker
Ingredients
- 1 tablespoon olive oil
- 1 onion, diced
- 1 carrot, diced
- 1 stalk import celery, chopped
- 1 clove garlic, smashed and finely minced
- 1 sprig fresh rosemary, or 1 teaspoon dried
- 1 sprig fresh sage, or ½ teaspoon dried
- 1 bay leaf
- 1 cup dry chickpeas, soaked overnight, and drained
- 4 cups water
- 1 tablespoon tomato paste
For USE AFTER Pressure Cooking
- 1 cup dry small pasta, small shells, macaroni, spirals, etc.
- 3 cups water
- 1½ teaspoons salt
- ¼ teaspoon black pepper
Instructions
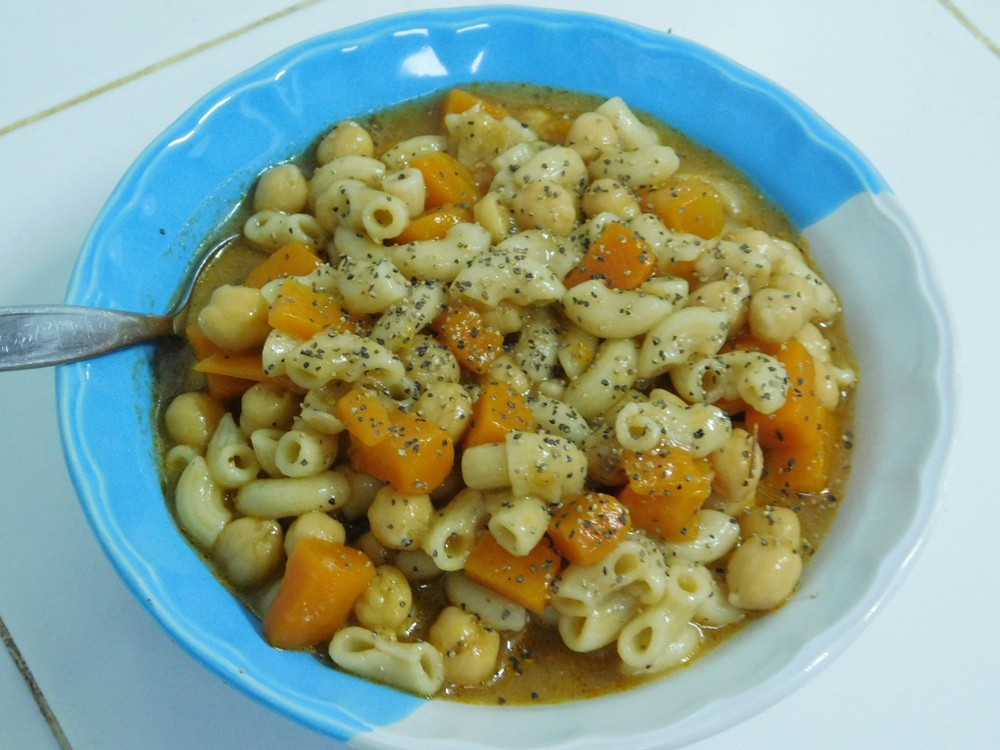
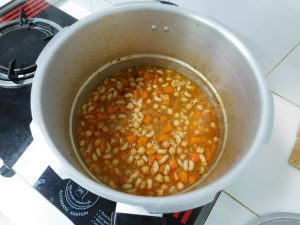
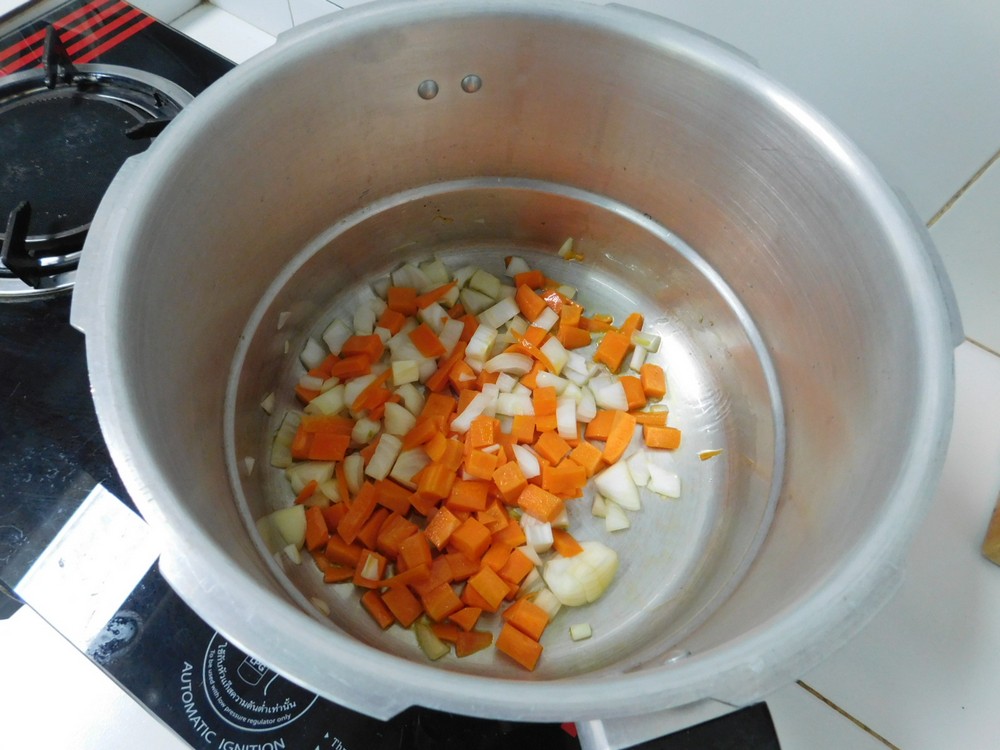
- Heat the oil in your pressure cooker with the lid off, then add the onion, carrot, and celery. Cook to just soften them. Add the rosemary, sage, and bay leaf. Cook for about 1 minute.

- Add the soaked and drained chickpeas, water, and tomato paste. Place the top on the cooker and lock the lid, place the weight (jiggler) on top. Turn the heat up to high until the jigglar starts moving and venting pressure, start timing for 13 minutes. (For those using electric pressure cookers, set your time for 18 minutes on high pressure.)

- When the time is up, turn off the heat and move the pressure cooker to an unused burner and allow the pressure to release naturally, about 10-15 minutes. (For those with electric models, turn off the keep warm setting or unplug the cooker, pressure should be released in about 20-30 minutes.)
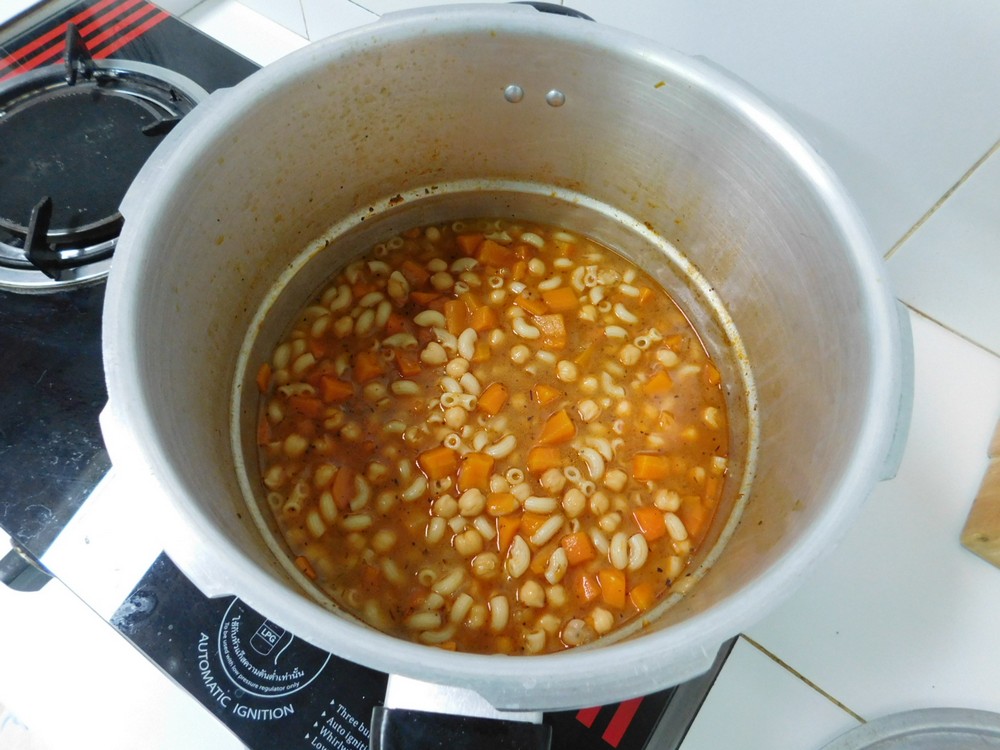
- When indications show you the pressure is released, open the pressure cooker. Remove the stems of the herbs if using fresh, and remove the bay leaf. Pour in the 3 cups of water, dry pasta, salt, and pepper as desired.

- Bring the cooker to a boil, without the lid, then add the pasta, and cook, without the lid, until the pasta is tender.
- Serve.


Notes
Low cost.
Shortcut: Quick Chicken Broth.
Variant: 1. Use chicken broth in place of the water when cooking the pasta.
Chicken Chorba
This is Moroccan in origin and popular across North Africa. Simple ingredients and delicious! I made this on 18 July 2018, very well liked by the family. Although the photos show my pressure cooker, this is NOT a pressure cooker dish, I was simply using the cooker as a thick walled, heavy pot.
Ingredients
- 1 tablespoon olive oil
- 2 onions, halved and finely sliced
- 1 kilo chicken wings, (2 lbs)
- 2 teaspoons ground turmeric
- 1 pinch saffron threads, (6-7 threads)
- 1 teaspoon salt, or to taste
- ½ teaspoon black pepper
- 150 grams dry chickpeas, (5 oz), see Step 1
- 2 medium tomatoes, grated, if using plum tomatoes, use 4-5
- 1½ tablespoons tomato paste
- 2 large potatoes, scrubbed and diced
- 100 grams dry spaghetti, broken into 1½ inch pieces, (3 1/2 oz)
- 3 tablespoons fresh parsley, chopped, and more for serving
- 6⅓ cups water
Instructions
- For the dry chickpeas, 150 grams (5 oz), soak overnight then drain. For canned chickpeas, use a 400 g / 14 oz can, drained.
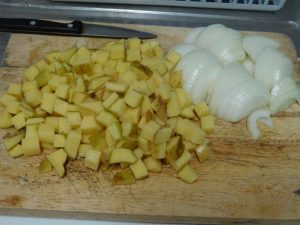
- Potatoes and onions prepped. For the potatoes, I use a french fry cutter first, then a knife to cut the cubes from the "fry" shapes.
- This was a first for me, grating tomatoes, and I will say, it does a perfect job. Simply cut the end opposite the stem end, off and start with the cut end on the largest holes on a box grater. The tomato is grated and the leftover part is the skin and stem end. I grated 3 plum tomatoes.

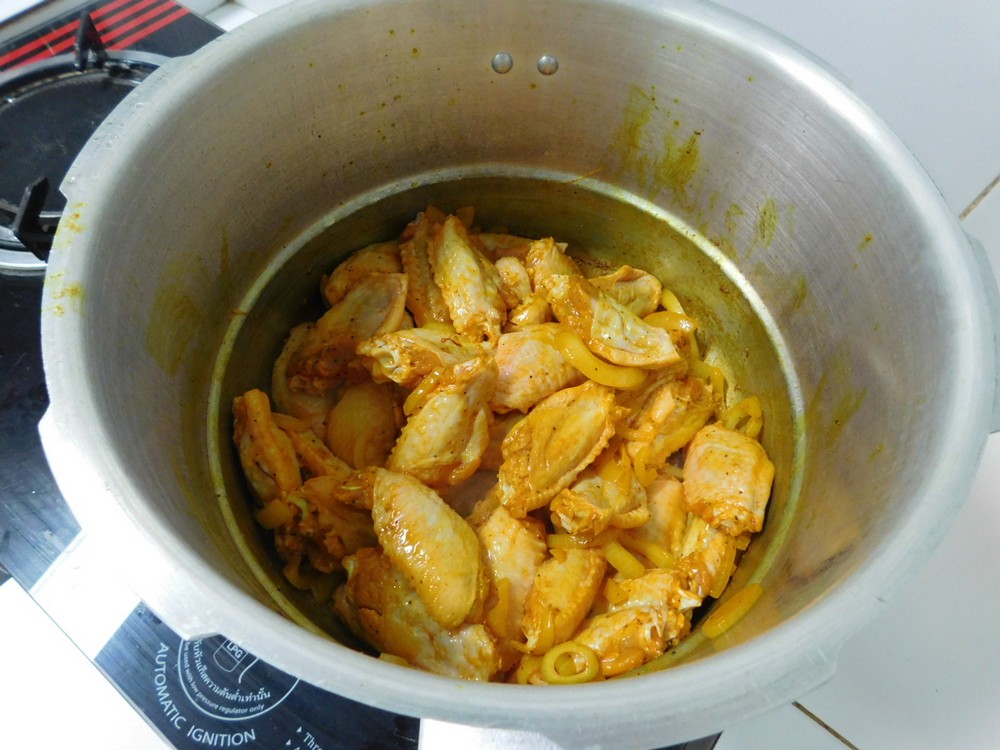
- In a large pot, heat the oil on medium high heat, when hot, add the onion, turmeric, saffron, salt, pepper, and chicken, and give the pot a stir. Cook the chicken for 8-10 minutes, stirring the chicken once in a while, this is to just brown the chicken a bit, not trying to cook them through.

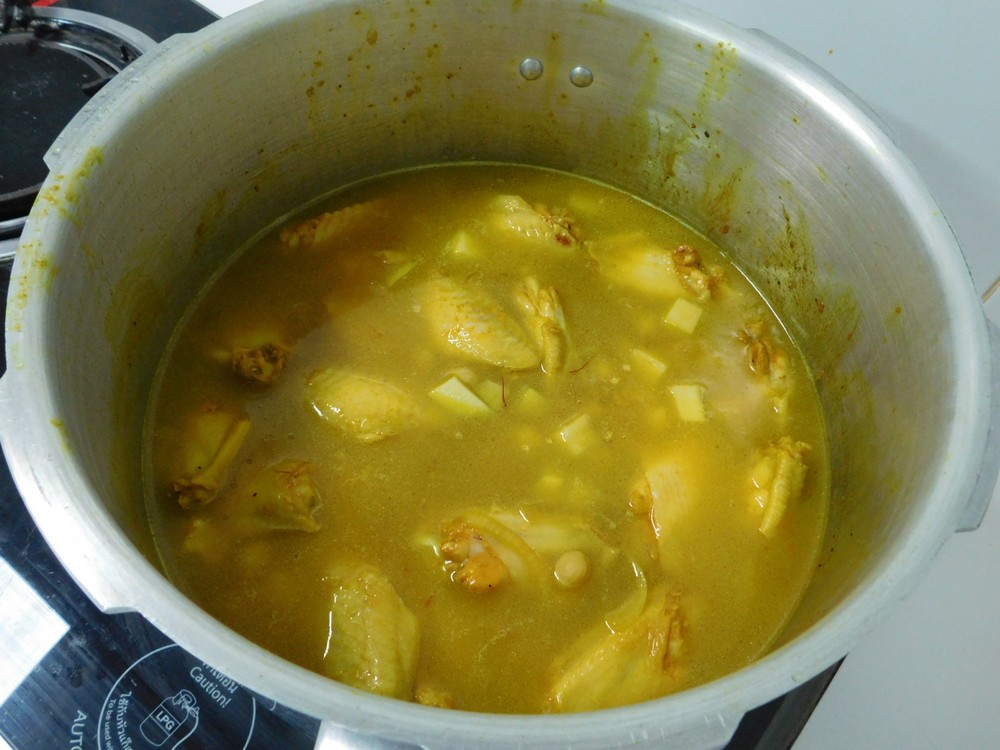
- Add the chickpeas, potatoes, and water and bring to a boil then reduce to a low simmer. Cover the pot and let simmer for about 40 minutes, stirring occasionally. (I cheated and cooked the chickpeas first in the pressure cooker and used those, not cooked in the liquid.)

- Add the grated tomatoes and tomato paste to the pot and stir in. Bring to a boil, then reduce to a low simmer for 15 minutes to blend that in.
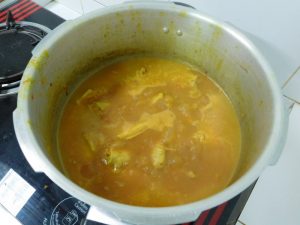
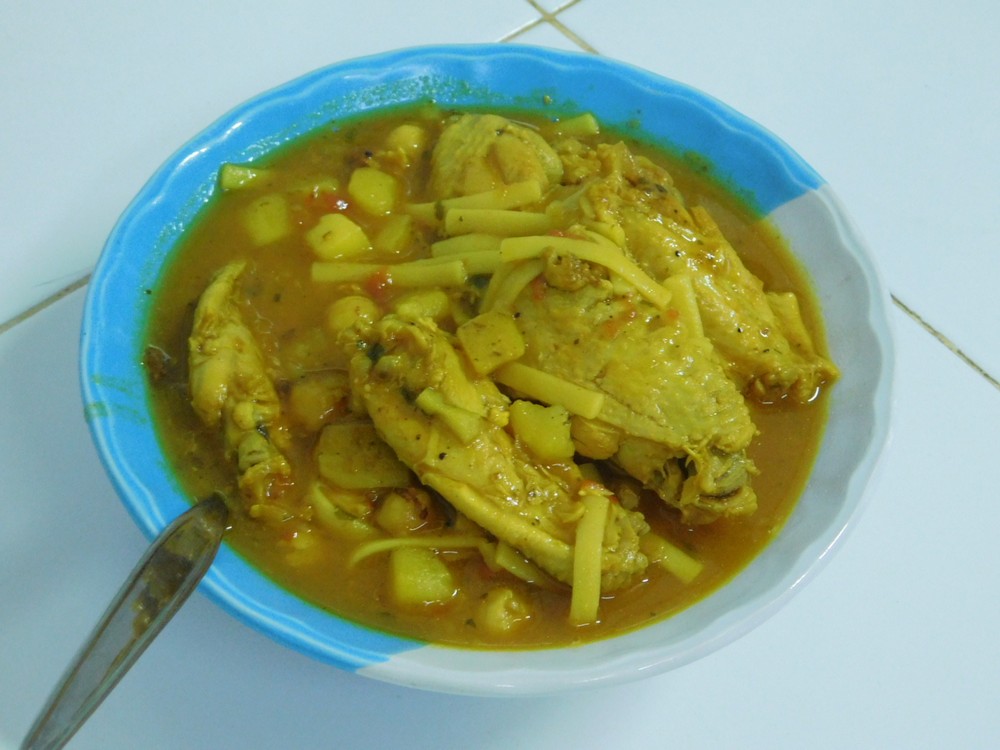
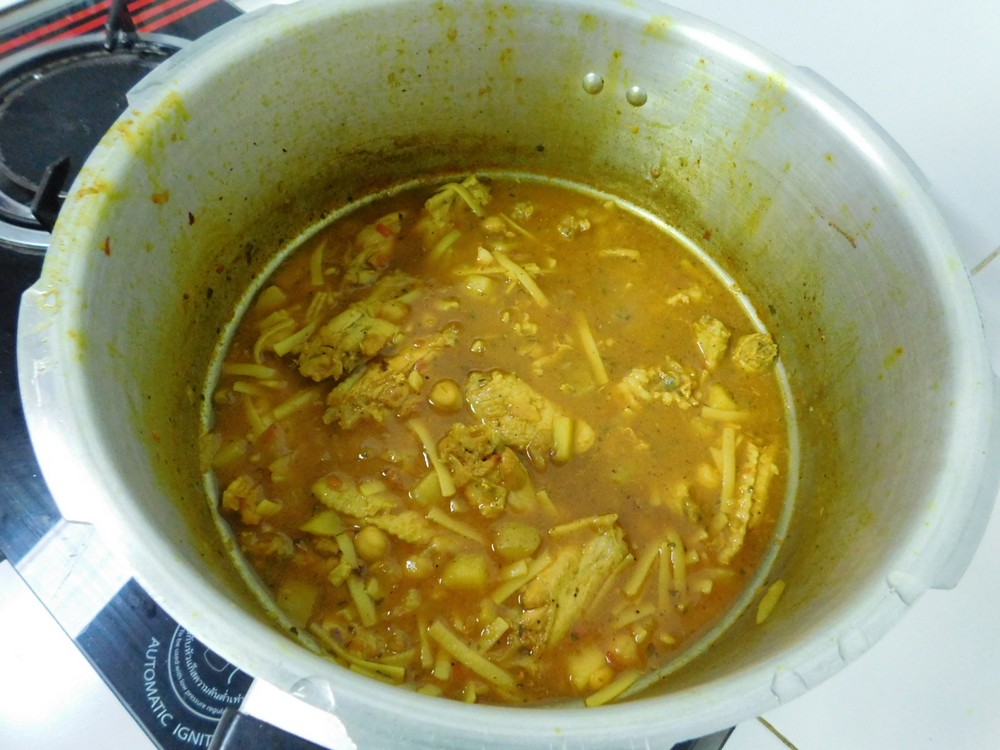
- Stir in the broken spaghetti and parsley and let simmer until the spaghetti is tender. Here, the pasta is done, I used linguine, and the kitchen was smelling great!

- Ladle into bowls, garnish with parsley if desired, and serve.


Notes
Chicken wing sticks (the drumettes) cost about 66 Baht/kilo. The chickpeas, canned are 69 Baht. When I get dry chickpeas I will do a price comparison between canned and dry. For 6 servings, this is about 71 cents per serving.
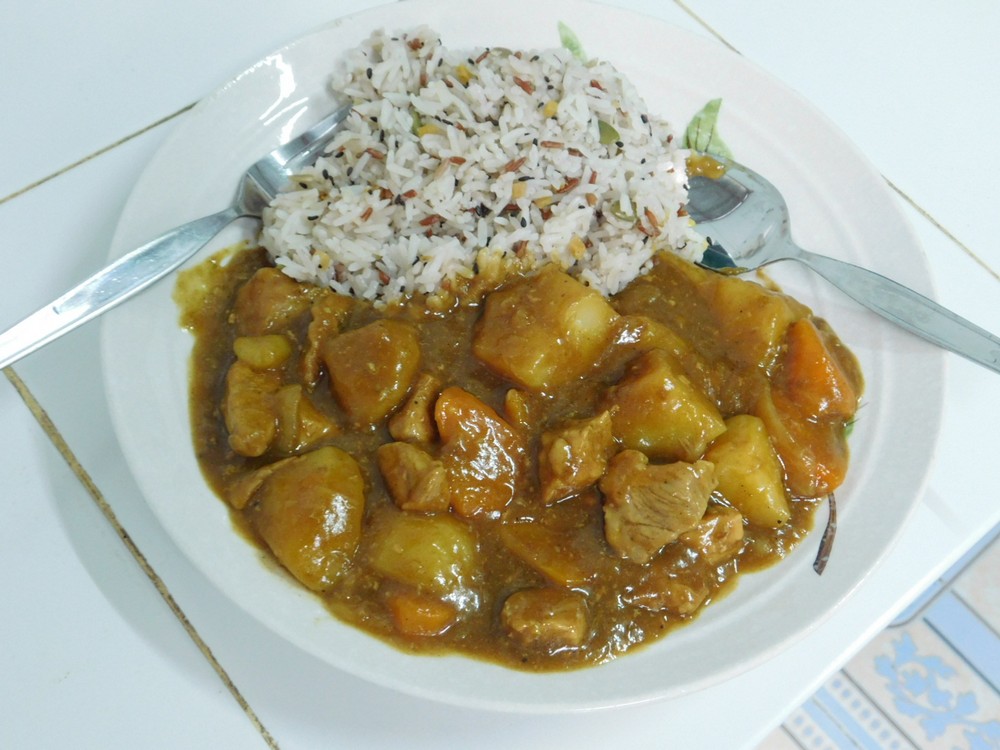
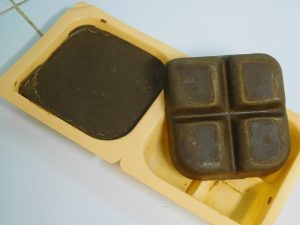
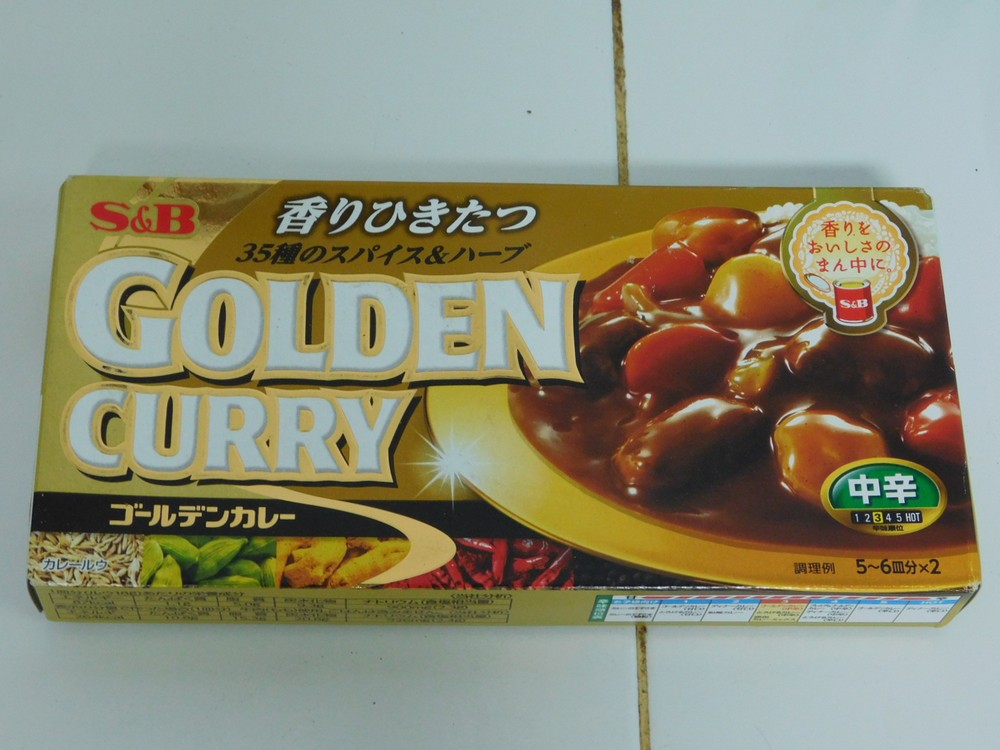
Japanese Curry (Pressure Cooker) (カレーライス)
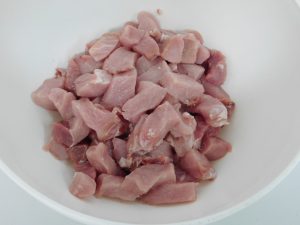
This not only sounds incredibly good, it really is! A Japanese curry roux is used, brand is up to you, Golden Curry, Vermont House, House, etc. I will be using medium spicy Golden Curry which is excellent. I used my large 9 liter (9½ quart) stove top pressure cooker for this. Follow the safety procedures for your model of pressure cooker at all times. This will be the only way I make this from now on, hands down. This works equally well with pork or beef in the same amount stated for the chicken. For the photos below, I used fresh pork loin.
Equipment
- Pressure Cooker (6 quart or more)
Ingredients
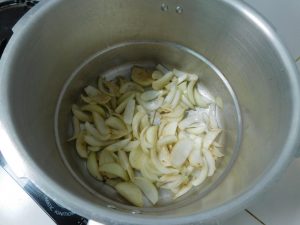
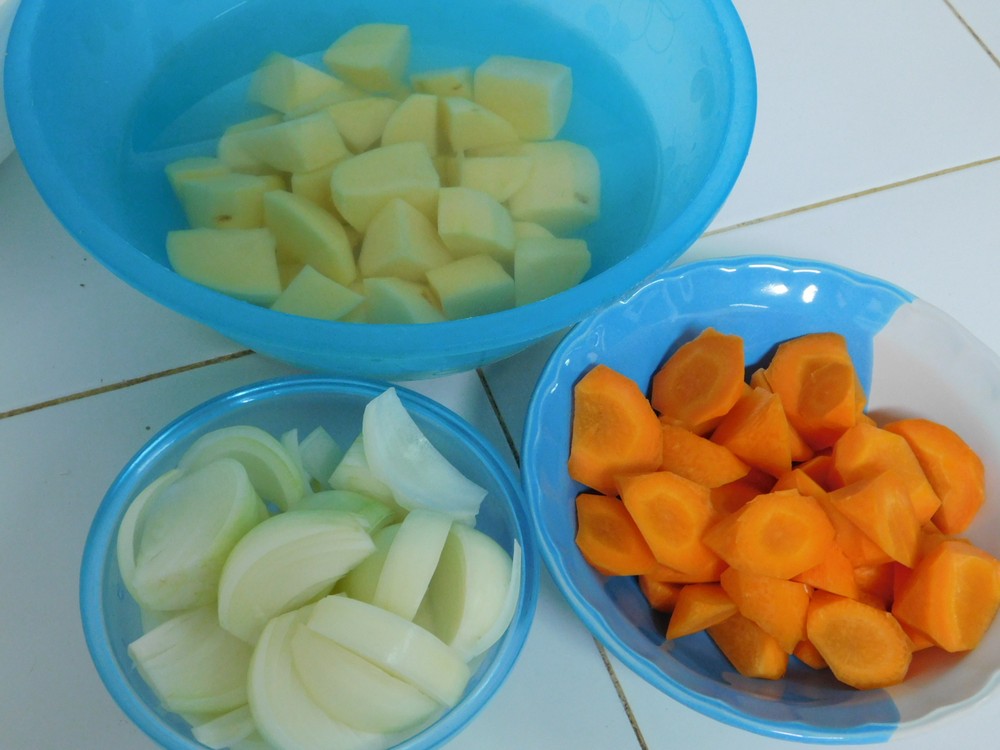
- 3 onions, halved, then each 5 wedges
- 1½ carrots, peeled, see Step 2
- 3 medium potatoes, peeled, cut into quarters
- 2 cloves garlic, smashed and finely mined
- 1 teaspoon fresh ginger, grated, or ½ teaspoon ginger powder
- 750 grams chicken thighs, boneless, skinless, (1½ lb)
- salt and pepper, as desired
- 1 tablespoon vegetable oil
- 3 cups chicken stock, fresh or from powder
- 240 grams Japanese Curry paste, large package is 240 grams, small is 120 grams
- 1 tablespoon ketchup
- 1 tablespoon soy sauce
- 1 tablespoon oyster sauce
Instructions
- Place the peeled and quartered potatoes in a bowl of water to remove some of the starch. Keep them in the water until they are needed.
- To chop the carrots, this is pretty cool. Cut a piece of the carrot off at an angle, then rotate the carrot ¼ turn, cut another piece off at an angle, repeat the turning and cutting. This makes for bite size pieces and the technique is Japanese in origin, called Rangiri.

- Cut the chicken into bite size pieces. Once everything is prepped, we're ready to start.
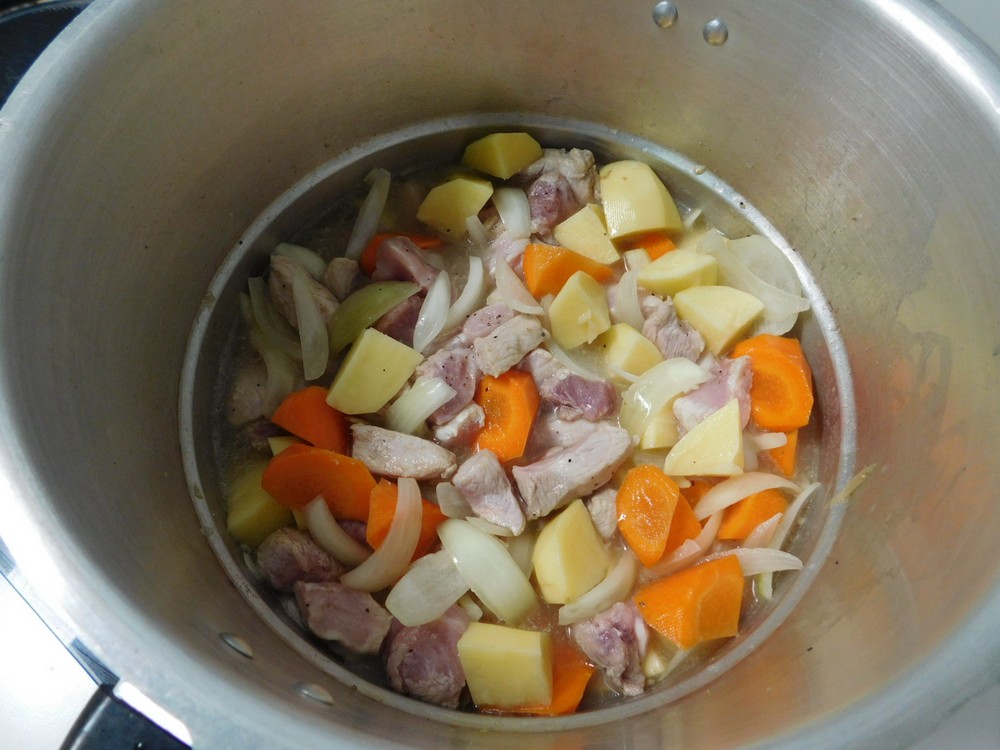
- Place your stove top pressure cooker on a burner on medium heat, lid off, and add the cooking oil. When the oil is hot, add the onion, garlic, and ginger. Saute for just a minute or two until the garlic and ginger is fragrant.
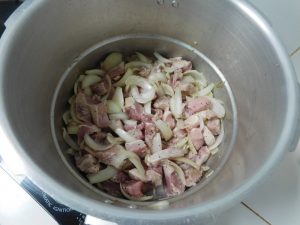
- Add the chicken to the cooker and mix around to coat the pieces with some of the oil. Season with salt and pepper as desired.
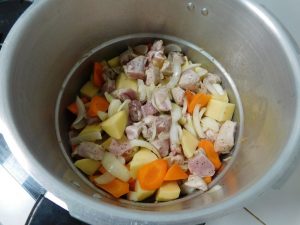
- Drain the potatoes and add those and the carrots to the cooker, mix everything together.
- Pour in the stock and stir into the mixture, it is not necessary to have everything covered with stock.

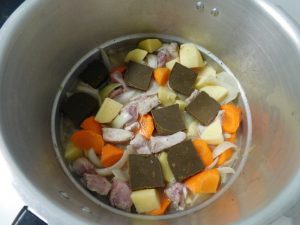
- I used a large, 240 gram package of Golden Curry.

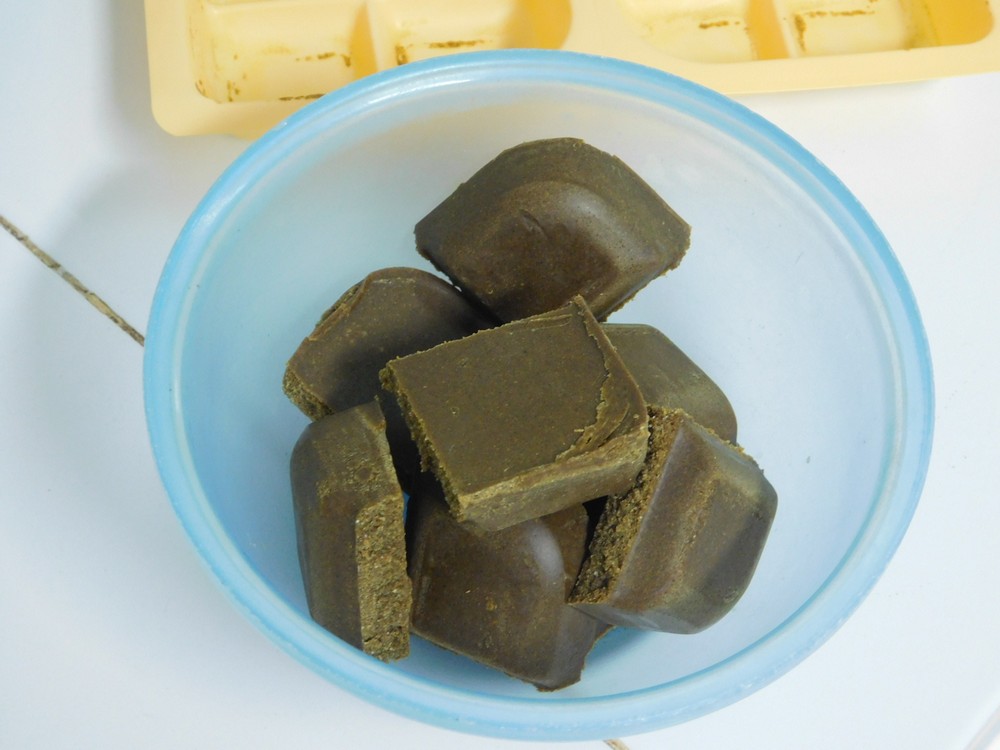
- Japanese curry comes in 110 gram and 240 gram packages, it looks very much like a chocolate bar. Use either 2 small packages or 1 large package. Open the foil seals and break the sections into the pieces as indicated by the packaging. For Golden Curry, large pack, you will use the entire pack, it is in two sections, and each section has 4 pieces, so 8 pieces total.
- Break the curry up as shown by the markings, very much like a chocolate bar.

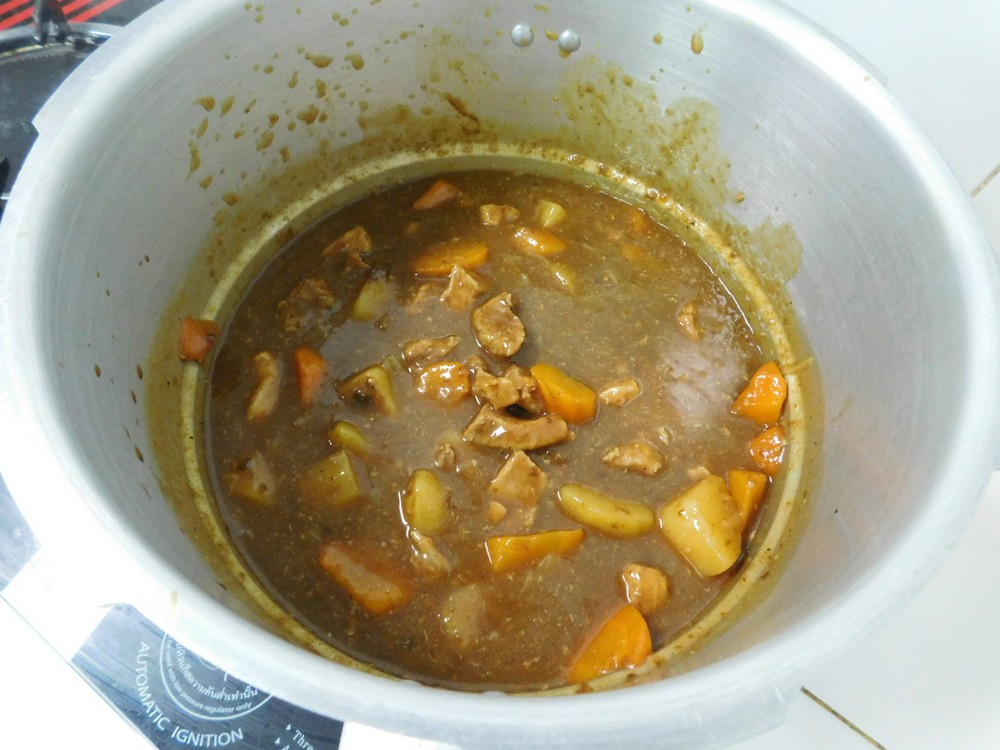
- Place the curry cubes on the top of the cooker contents, do not mix these in, but you can push down into the stock.
- Now place the lid and jiggler on the cooker and lock the lid. Bring the temp to high. Once the jiggler starts moving and venting pressure, start your timer for 5 minutes. (For those using an electric type pressure cooker, select meat/stew setting and change the time for 15 minutes and press start.) Note: if using bone in wings set your timer for 7 minutes, if using bone in legs and or thighs set your timer for 10 minutes.
- When the time has has passed, remove from heat to an unused burner to allow a natural release, about 10-15 minutes.
- When it is safe to remove the lid, remove that, and stir in the ketchup, soy sauce, and oyster sauce.

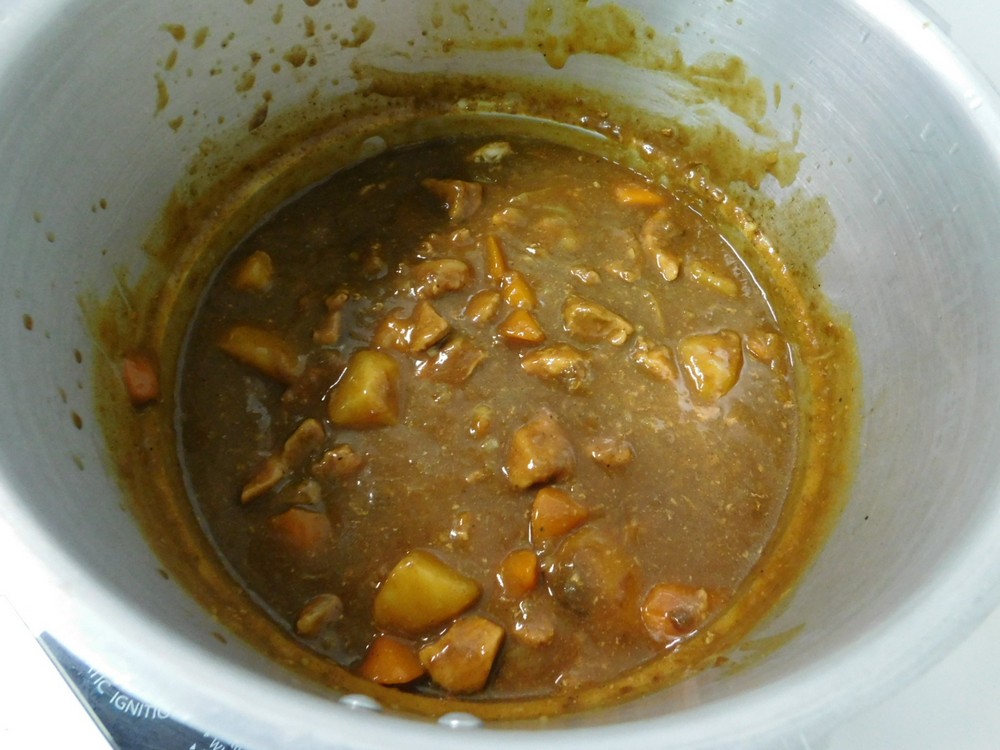
- Place the cooker, no lid, on low heat and simmer the curry for about 5 minutes, making sure all the curry blocks are dissolved and mixed in. Perfect!

- To serve, spoon rice into half a bowl, and ladle in some curry on the other side. Enjoy.


Notes
Low cost per serving.
Variant: 1. Use beef or pork, same weight as chicken.
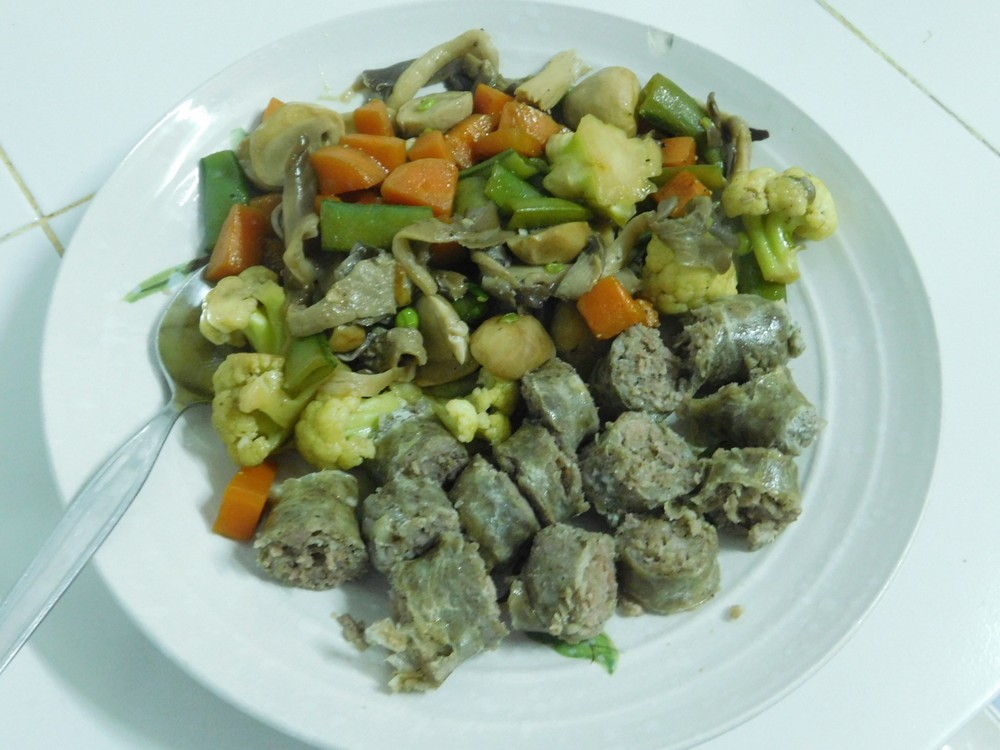
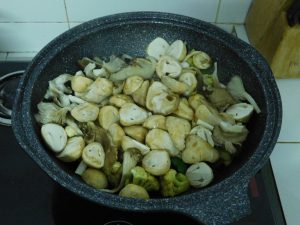
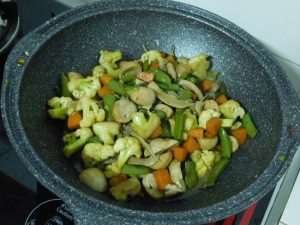
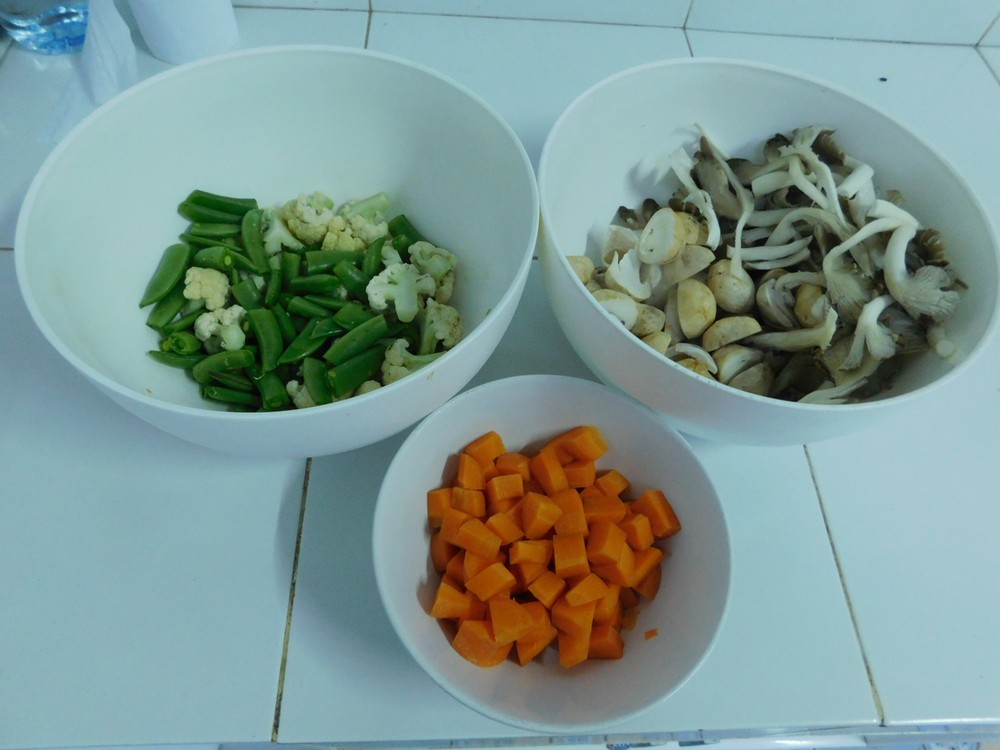
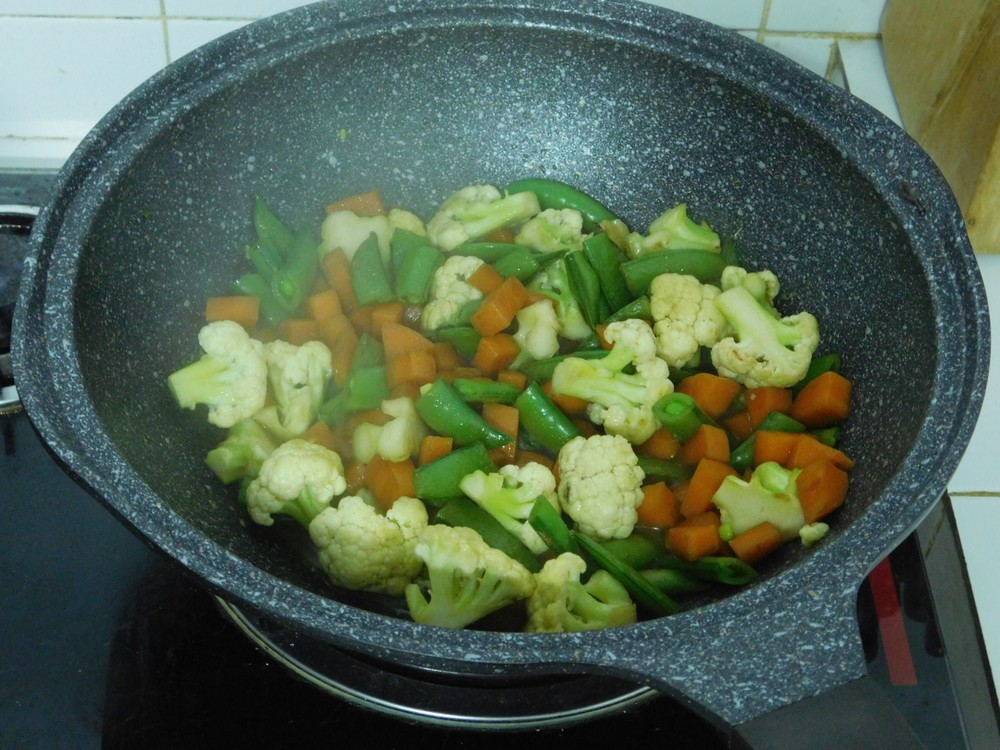
Mushroom Stir Fry
A good stir fry needs at least 2 things, good fresh vegetables and a sauce. For this recipe, ingredients and even the types used are up to you, but the mushrooms are key here, and for this I am using fresh Straw and Oyster mushrooms and fresh vegetables. So with Mushroom Stir Fry, we are going to use mushroom sauce, soy sauce, and oyster sauce. The ingredients listed is exactly what I used for this dish, feel free to change the amounts as desired.
Ingredients
- 1 head fresh cauliflower, 260 grams (9 oz), chopped
- 1 carrot, diced
- 2 packs snap peas, 160 grams (6 oz) total, trimmed, cut in half
- 275 grams fresh Straw mushrooms, (10 oz), cut in half lengthwise
- 130 grams fresh oyster mushrooms, (5 oz), torn into 2-3 pieces each
- light soy sauce, as needed
- mushroom sauce, as needed
- oyster sauce, as needed
- black pepper, to taste
- white pepper, to taste
- water, as needed
- cooking oil, as needed
Instructions
- Prep all the veggies and put them in bowls according to cook time needed. Sauces and peppers are also line up on the counter for ready use. First item to cook will be the carrots, then the peas and cauliflower, then lastly the mushrooms.

- Heat a non stick pan with a tablespoon or two of oil. When hot, add the carrot and stir fry for about 5 minutes or so until they are starting to soften. Then add the peas, cauliflower, a few dashes of soy sauce, mushroom sauce, and season with black and white pepper as desired. Stir fry for about 5 minutes or so. Add about 1/4 cup of water to help steam them and let them cook for a few more minutes, stirring often to soften them up.

- Add the mushrooms, and other dash or so of soy sauce, mushroom sauce, and season with black and white peppers as desired. Stir everything together to mix the sauces in and let the mushrooms cook down, stirring often, as they release water.
- When the mushrooms have cooked down and nearly all the water is cooked off, taste and adjust seasoning with a dash or so of oyster sauce and peppers as desired and mix together.
- Serve as a side with a meat dish or simple with rice.


Notes
Low cost.
Common Asian method for cooking vegetables, nothing new here.
Chive Pancake
I cannot remember the last time I had pancakes, and with a good amount of chives, these sound especially delicious. On my to cook list.
Ingredients
- 1 bunch fresh chives, cut into 1 inch pieces
- 1 cup all purpose flour
- 1 cup water
- 2 eggs
- 1/2 teaspoon salt
- 1 tablespoon cooking oil, and as needed
- soy sauce, for serving
Instructions
- In a mixing bowl, add the flour and eggs, add the water slowly while mixing to ensure a well mixed batter.
- Add the salt and chives and mix those in.
- Heat the oil in a non stick pan, when hot, pour in 1/3 of the batter and cook for about 4-5 minutes per side then remove from the pan, repeating the steps for two more pancakes.
- Serve with soy sauce for dipping and enjoy.
Notes
Low cost.