Tomato & Onion Salad II

Tomato & Onion Salad II

Basic healthy salad.
Prep Time 5 minutes
Total Time 5 minutes
Course Side
Cuisine American
Servings 4 servings

Ingredients
  

  • 1 cup onion, halved then thinly sliced
  • 1/2 cup tomato, halved then sliced
  • 2 tablespoons fresh cilantro, chopped
  • 1-3 teaspoons lemon or lime juice, depending on taste

Instructions
 

  • Toss everything together in a mixing bowl, serve as a side and enjoy.

Notes

Low cost.
Adapted from an internet recipe.
Garlic Brown Lentil Dal (Pressure Cooker)

Garlic Brown Lentil Dal (Pressure Cooker)

Adapted from an internet recipe.
This is an Indian inspired recipe for dal as there is no major spices used. This will use a pressure cooker as well as a pan on the stove top. I will be using my 9 liter (9½ quart), 12 psi (80 kPa) stove top pressure cooker. Follow all safety precautions for your model of pressure cooker.
Prep Time 5 minutes
Cook Time 7 minutes
Total Time 2 hours 12 minutes
Course Lunch, Main Dish
Cuisine Indian
Servings 6 servings

Ingredients
  

  • 1 cup whole brown lentils
  • water, as needed
  • 1 tablespoon cooking oil
  • 6 cloves garlic, divided
  • ½ teaspoon red pepper flakes, divided
  • 1 teaspoon salt, and to taste
  • ¼ cup ghee, or 2 tablespoons oil AND 2 tablespoons butter
  • ¼ cup onion, thinly sliced
  • ½ teaspoon cumin seeds, or ¼ teaspoon ground cumin
  • hot cooked rice, for serving

Instructions
 

  • Rinse the lentils, place in a mixing bowl and cover with 1 inch of water, set aside to soak for 2 hours.
  • When you are ready to cook, first let's prep the onion and garlic. Mince 2 cloves of garlic and toss those into the pressure cooker. Thinly slice 4 cloves of garlic and set those aside, then thinly slice the onion and set that aside.
  • Drain and rinse the lentils, place them in your pressure cooker. Add ¼ teaspoon of red pepper flakes to the pressure as well. Add 4 cups of water and the oil to the pressure cooker.
  • Place the lid on and lock, add the weight (jiggler), turn on high heat. when the jiggler starts to move and vent pressure, start timing for 7 minutes, and reduce heat to low or medium low to just keep the jiggler moving and venting. Time for 6 minutes for firmer lentils, and if using lentils you have had in your pantry for a long time, you may want to increase the time 8 minutes. When the time is up, turn off the heat and move the pressure cooker to an unused burn to allow a natural pressure release, meaning just let it set and cool until you have indications there is zero pressure inside the cooker.
  • While the lentils are cooking (and releasing pressure), heat the ghee in a non stick pan on medium heat, when hot, add the onion and cook, stir often, for 3-4 minutes and let the onion start to brown.
  • Add the garlic, cumin seeds, and another ¼ teaspoon of red pepper flakes, cook while stirring for another 2-3 minutes or until the garlic is fragrant.
  • When the pressure is released from the pressure cooker and it is safe to open, remove the lid and stir the lentils.
  • Add the onion mixture, ghee and all, into the lentils, stir to mix everything, stir in the salt. Taste and season with additional salt as needed.
  • Serve over hot cooked rice with a salad on the side. Enjoy.

Notes

Low cost per serving.
Chicken & Rice Noodle Soup

Chicken & Rice Noodle Soup

Asian soups are very easy to prepare and I come up with this soup on a whim. Not only is it good, the family loved it! And it is healthy.
Course Lunch, Main Dish
Cuisine Asian
Servings 4 servings

Ingredients
  

  • 1 quart bean broth, (4 cups)
  • 1 quart water
  • 2 chicken breasts, boneless, skinless, diced
  • 1 carrot, diced
  • 1 package baby corn, chopped, about 8-9 ears
  • 1 package fresh Shimeji mushrooms, roots removed, separated
  • 2-3 spring onions, chopped 1/2 inch pieces, white and green
  • 1-2 bunches fresh cilantro, chopped
  • 1 package dry wide rice noodles, 220 gram package
  • white pepper, as desired
  • hard boiled eggs, as needed, for serving, 1 per bowl
  • fried wonton skins, for garnish, as desired

Instructions
 

  • This is the rice noodle brand I used for this, Chuan Chim brand, blue pack, which is the wide noodles. This is a Thai product available at Tesco. Excellent noodles.
  • Heat the broth and water in a pot until boiling, add the chicken and reduce heat to a simmer. Skim any foam from the broth.
  • Simmer for about 5 minutes then add the carrot and corn. Simmer for another 10 minutes or until the carrot is just tender.
  • Add the rice noodles. The noodles are white in the package, when you add them to the hot broth, first they will look like spaghetti, give the noodles a stir to get them separated.
  • As the noodles cook, they will swell, turn white again, and they take on the flavor of the broth. Continue to simmer until the noodles are just barely tender.
  • Add the mushrooms, spring onion, and cilantro, simmer until the noodles are tender, about 5 more minutes. Remove from heat.
  • The completed soup, the noodles are tender and flavorful, the chicken is tender and juicy. Perfect.
  • Ladle soup into bowls, add a hard boiled egg, sliced in half, yolks up, and add 2-3 fried wonton skins on the side of the soup as garnish as desired, serve hot. Enjoy.

Notes

The noodles are 35 Baht for a pack of 220 grams, the chicken is 57 Baht/kilo, for 2 breasts I will say 50 Baht max. For 4 servings this is about 70 cents per serving.
Created on a whim using common soup making principles in Thailand, Lee Thayer.
Thailand. 
Seasoned Oyster Crackers

Seasoned Oyster Crackers

This is a great sounding snack cracker or addition for a nice chili or soup. Link to the Shortcut is listed in the Recipe Notes section.
Prep Time 5 minutes
Cook Time 15 minutes
Total Time 1 hour 20 minutes
Course Appetizer
Cuisine American
Servings 0 a lot

Ingredients
  

  • 2 packages oyster crackers, 12 oz each
  • 3/4 - 1 cup extra virgin olive oil
  • 1 teaspoon dried dill
  • 1/2 teaspoon garlic powder
  • 1 packet dry ranch dressing mix, (Shortcut)

Instructions
 

  • In a large mixing bowl, add the crackers, toss the crackers as you drizzle in the olive oil, the keep tossing and sprinkle in the dill, garlic powder, and dressing mix.
  • Set the bowl aside for 1 hour. Before the hour is up, preheat your oven to 120 C (250 F), line a baking sheet with foil for easy clean up.
  • When the hour has passed, spread the crackers onto the foil, and bake for 15-20 minutes.
  • Allow to cool, enjoy as is or with chili or a nice soup.

Notes

Cannot price this until I find oyster crackers in Thailand again, I have only seen them one time and that was about 6 years ago. For now, I will say low cost.
Shortcut: Ranch Dressing Mix I, Ranch Dressing Mix II.
Provided by Tessa Pasquill of Just A Pinch Recipe Club and his recipe is here.
United Kingdom.
Vermicelli Rice (Rice Cooker)

Vermicelli Rice (Rice Cooker)

Pups with Chopsticks, Joyce.
This is a Middle Eastern/Lebanese dish, sort of, and for those in Asia, this does not use vermicelli rice noodles, this uses vermicelli pasta noodles. If you don't have vermicelli pasta noodles, angle hair pasta will work just as well, in a pinch, spaghetti works too.
Prep Time 15 minutes
Cook Time 20 minutes
Total Time 35 minutes
Course Side
Cuisine Middle Eastern
Servings 4 servings

Equipment

  • Rice Cooker

Ingredients
  

  • cups dry Jasmine rice, or your choice of long grained white rice
  • ½ cup dry vermicelli pasta, broken into ½ inch or smaller pieces
  • cups water
  • ½ onion, diced
  • 2 tablespoons butter
  • 2 tablespoons extra light olive oil
  • 1 teaspoon salt

Instructions
 

  • Rinse the rice several times until the water runs clear, this is removing some of the starch. When rinsed well, set aside.
  • Heat your rice cooker by pressing the Cook switch, add the oil and onion, cook, stirring often the onion until soft.
  • Add the butter, when melted, add the vermicelli pasta and stir constantly, until nicely toasted and golden brown. The smell will be that of popcorn.
  • When the pasta is golden brown, add the rice and salt and stir to coat with the butter and oil.
  • Add the water and stir together, add the lid and let the rice cooker cook a normal cycle. When the rice cooker switches to Warm mode, unplug and leave the rice cooker covered for 15-20 minutes, don't worry, you will still have hot rice.
  • Fluff the rice with a rice paddle and serve.

Notes

Low cost per serving.
Variants: 1. Use chicken or beef broth in place of water.
Dorito Taco Salad

Dorito Taco Salad

Excellent salad and the family loved it, and oddly enough, I prefer a taco salad over tacos, any day. I did use a variant by using chickpeas in place of pinto beans. Links to the Shortcuts are listed in the Recipe Notes section.
Prep Time 20 minutes
Cook Time 10 minutes
Total Time 30 minutes
Course Lunch, Main Dish
Cuisine American
Servings 8 servings

Ingredients
  

  • 500 grams ground beef, or ground pork, (1 lb)
  • 1 packet taco seasoning mix, (Shortcut)
  • 1/2 cup water
  • 1 head lettuce, chopped into bite size pieces
  • 1 red bell pepper, diced
  • 1 green bell pepper, diced
  • 1/2 cup black olives, sliced
  • 1 can Pinto beans, rinsed, drained, or 1 1/2 cups cooked, (Shortcut)
  • 1 cup tomatoes, diced
  • 1/4 cup spring onion, sliced, reserve some for garnish
  • 1 cup Cheddar cheese, shredded
  • 1 bag Nacho Cheese Doritos, slightly crushed, (200 grams / 10 oz for US)
  • 2 cups catalina dressing, (Shortcut)
  • sour cream, optional, as desired for garnish

Instructions
 

  • Heat a non stick pan and add the ground meat and onion. I used mince pork. Cook until no pink is visible then drain off the fat, return the pan to the burner.
  • Add the taco seasoning mix and the water, stir to mix together.
  • Simmer until the water is evaporated, stirring occasionally. After it is cooked, set the pan aside to cool while you prep the rest of the ingredients.
  • Prep the lettuce, bell peppers, olives, spring onions, tomatoes, and beans as stated in the ingredients list. Place each item as prepped into a large mixing bowl and mix together.
  • Add the cooled seasoned meat and cheese and mix together. Then mix in the partially crushed Doritos, then finally, pour on the dressing and mix that it.
  • Garnish with sour cream as desired and the reserved spring onion. Serve immediately and enjoy.

Notes

Low cost per serving for 8 servings.
Shortcuts: Taco Seasoning Mix, Pinto Beans (Pressure Cooker), Catalina Dressing, Chickpeas (Pressure Cooker).
Variants: 1. Use chickpeas in place of pinto beans. 2. Add fresh chopped cilantro. 3. Do not mix in the Doritos, just have them on the side and people can sprinkle them on as they like.
Inspired by Spend With Pennies and the link to this recipe is here.
United States.
Dorito Chicken Strips

Dorito Chicken Strips

Sounds good, and easy, and only 4 ingredients! On my to make and taste list.
Prep Time 5 minutes
Cook Time 15 minutes
Total Time 20 minutes
Course Appetizer
Cuisine American
Servings 3 servings

Ingredients
  

  • 2 chicken breasts, boneless, skinless
  • 1 bag Nacho Cheese Doritos, or any flavor you prefer, (200 grams / 10 oz for US)
  • 1 egg
  • 2 tablespoons milk

Instructions
 

  • Preheat your oven to 200 C (400 F) and line a baking sheet with foil.
  • Cut chicken breasts into 3/4 inch strips.
  • Crush the chips quite small but not into a powder, looking for texture on the chicken with these. In a shallow dish, mix together the egg and milk.
  • Using tongs (prevents clumpy fingers) dip a chicken strip into the egg mixture, then roll in the chips, use the tongs and pat the chips onto the chicken on all sides, then place on the baking sheet. Repeat for all the strips.
  • Lightly spray the strips with cooking spray or mist with some extra light olive oil. Bake for 15-17 minutes or until cooked through, you don't want to over cook the chicken, simply at 15 minutes, remove on from the oven and cut in half to check for doneness.
  • Serve with ranch dressing, sour cream, or my choice, Kewpie mayo. Enjoy.

Notes

Low cost per serving, chicken is low cost.
Variants: 1. Before cooking, cut the strips into cubes and you have nuggets. 2. Use thighs or even whole chicken breasts.
Inspired by Spend With Pennies and the link to this recipe is here.
United States.
Sweet Ginger Soy Fried Cabbage

Sweet Ginger Soy Fried Cabbage

This recipe for Sweet Ginger Soy Fried Cabbage inspired by Pups with Chopsticks.
I love fried cabbage and this recipe is a great option from plain fried cabbage, and tasty.
Prep Time 15 minutes
Cook Time 7 minutes
Total Time 22 minutes
Course Side
Cuisine Asian, Chinese
Servings 3 servings

Ingredients
  

  • 1/2 head green cabbage
  • 1 onion, brown or red
  • 2 cloves garlic, smashed and chopped
  • piece fresh garlic, 3/4 inch piece, grated, or 1 teaspoon ground
  • 1 1/2 teaspoons butter
  • 1 1/2 teaspoons cooking oil

For the Sauce

  • 3 tablespoons light soy sauce
  • 2 tablespoons honey
  • 1 teaspoon dashi powder, optional
  • 1 teaspoon warm water, if using dashi powder

Instructions
 

  • Cut the head of cabbage in half, store one half in the fridge. Take the half you are going to use and lat flat on your cutting board, and cut in half again. remove the core by simply holding each piece up cutting downwards to remove the core section.
  • Now slice the cabbage into 1/2 inch slices. and break it up a bit with your hands.
  • Peel the onion, cut in half and slice each half. Grate the ginger. Peel and mince the garlic. (I ran out of fresh ginger so opted to use powdered, it works but fresh would have been much better.)
  • Make the sauce by combining the soy sauce and honey in a small bowl. If using the dashing powder, first dissolve that in the warm water, then mix in the soy sauce and honey.
  • Add the butter and oil to a large non stick pan and place on medium high heat, when hot, add the ginger and garlic and basically stir fry for 1 minute, just lightly browning it and not burning.
  • Follow these steps closely as you are going to lightly char the cabbage. Add the cabbage to the pan and using a spatula, turn the cabbage to put most of the garlic and ginger on the top of the cabbage, then add the onion on top of the cabbage. Let the cabbage cook, do not turn or stir it, for 1-2 minutes, to let the cabbage lightly char.
  • Now flip and stir the cabbage to mix the onions into the cabbage. When it is mixed well, once again, let it cook for 1-2 minutes with touching it, again to lightly char the cabbage.
  • Now drizzle in the sauce and mix into the cabbage and continue to cook the cabbage, stirring often for another 1 minute or until the cabbage is tender.
  • Serve as a side with any dish, enjoy.

Notes

Low cost per serving.
Crab & Cheese Spring Rolls

Crab & Cheese Spring Rolls

Pups with Chopsticks, Joyce.
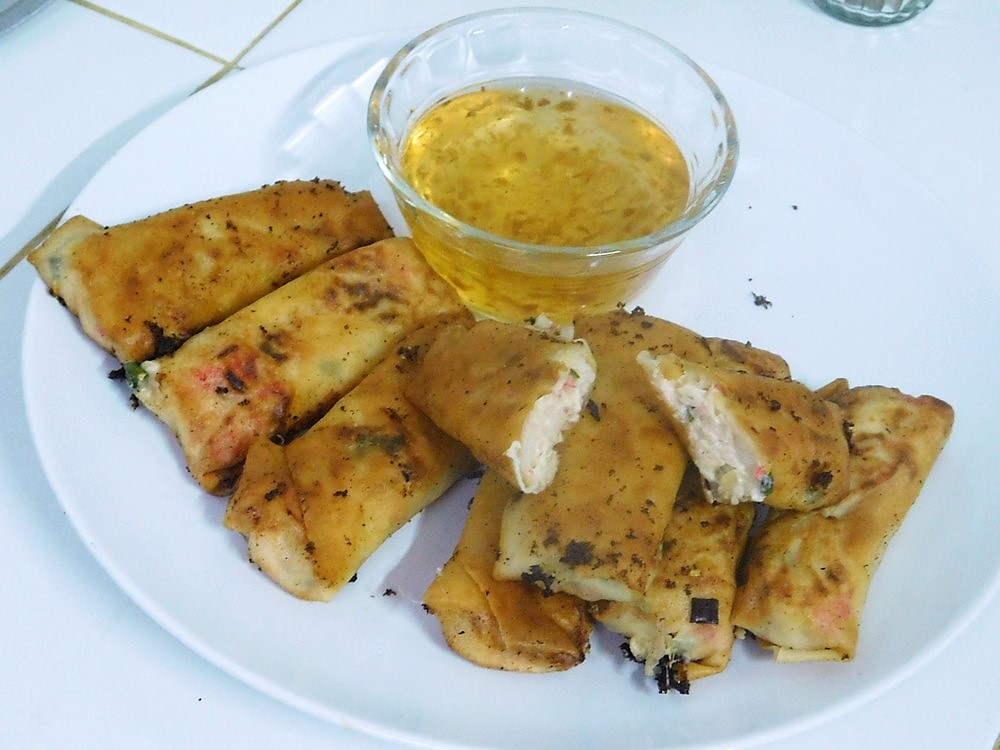
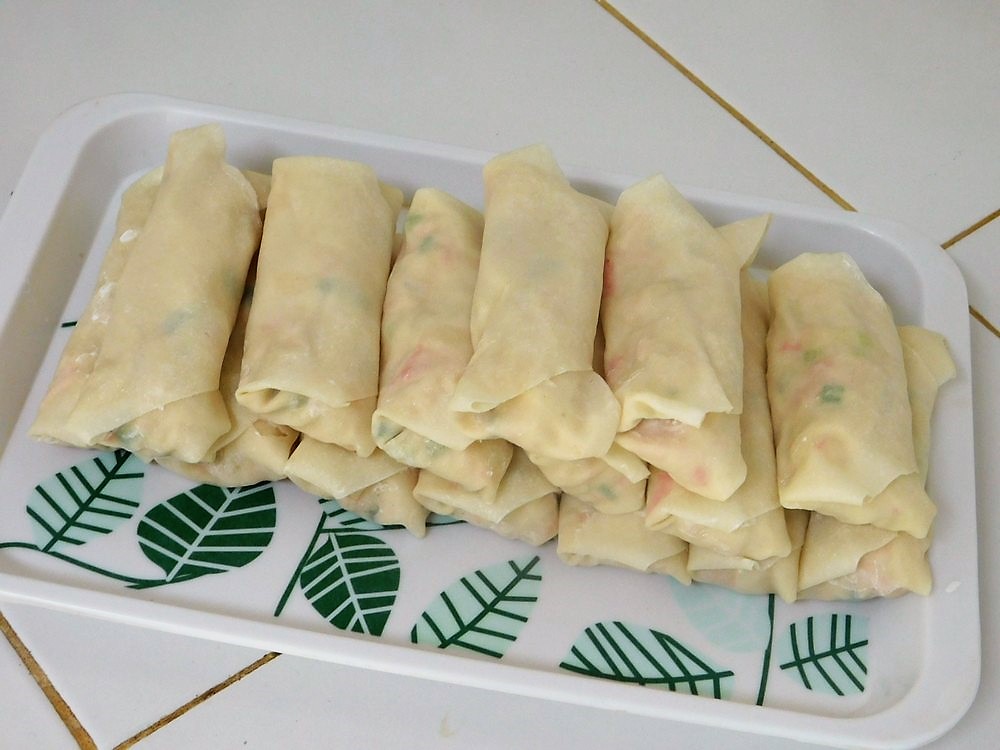
These are delicious and easy to prepare. Keep in mind, this is in no way Chinese. The number of spring rolls you make from this will depend on the size of the wrappers you use, either 8.5 x 8.5 inch or 5.5 x 5.5 inch, either size will work. I used 5.5 x 5.5 inch wrappers and made 15 spring rolls, so using the larger ones, you will make less.
Prep Time 20 minutes
Cook Time 10 minutes
Total Time 30 minutes
Course Appetizer, Main Dish
Cuisine American
Servings 15 spring rolls

Ingredients
  

  • 15 spring roll wrappers
  • 250 grams imitation crab sticks, (8 oz)
  • 250 grams Cream cheese, room temp, (8 oz)
  • ¾ cup Mozzarella Cheese, shredded
  • 2-3 tabelspoons mayo
  • 3 teaspoons Worcestershire sauce
  • 1 teaspoon rice vinegar
  • 1 teaspoon sugar
  • 2-3 spring onions, sliced, white and green parts
  • 2 cloves garlic, smashed, finely minced
  • 1 tablespoon corn starch
  • 1-2 tablespoons water
  • sweet chili sauce, for serving, or dipping sauces of your choice

Instructions
 

  • If your spring roll wrappers are frozen, take them out and place on the counter for 1-2 hours before you start. Take out the cream cheese, unwrap that and place in a mixing bowl for about an hour, to come up to room temperature and soften, or use a spreadable cream cheese.
  • Unwrap the crab sticks and chop them, then shred or break them apart with your fingers. Here they are just chopped, not shredded yet.
  • Prep the spring onion and garlic.
  • Mash up the cream cheese up with a heavy spoon to get it mixable.
  • To the bowl, add the mayo, Mozzarella cheese, Worcestershire sauce, rice vinegar, and sugar. Mix to combine.
  • Add the crab, garlic, and spring onion.
  • Mix to combine, now your filling is ready. Go ahead and mix together the corn starch and water in a small bowl, this is your glue to seal the edges of the spring rolls.
  • Rolling, for this step, it is best to have two people, one to pull the wrappers, one to roll. Lay a spring roll wrapper, smooth side down on the counter with one corner pointed towards you. Place about 1-1 1/2 tablespoons of filling near the corner closest to you. Fold the corner nearest you up and over the filling and roll away until you are at the widest point of the wrapper. Use your fingers and dip into the glue and rub that on the two side that are away from you, be generous. Now fold one side, left or right, towards the middle, the repeat with the other side, now it should look like an open envelope. Now continue rolling away from you to complete the roll. If the point flap does not stay glued down, just dab a bit more glue on it. Repeat until the filling is all used. Once you have done this a few times this actually goes pretty fast. The reason for the two people is you do not want the wrappers drying or they will tear when pulling them apart. If only you are making these, cover the wrappers with a damp towel while you roll each one.
  • Completed spring rolls.
  • When you are ready to fry them, heat about ½ inch of oil in a pan, you want it hot but not smoking. When the oil is hot, fry 4 to 5 rolls at a time until golden brown then turn over until the other side is golden brown. Drain on paper towels and continue frying in batches until all are cooked. Keep in mind, the filling in these is soft and some rolls may ooze a bit of cheese and filling into oil, that accounts for the dark specks you see on the rolls, just cosmetic, no harm.
  • Serve with sweet chili sauce for dipping, or other sauces of your choice. Enjoy as an appetizer or even as a main dish. These are excellent even without a dipping sauce.

Notes

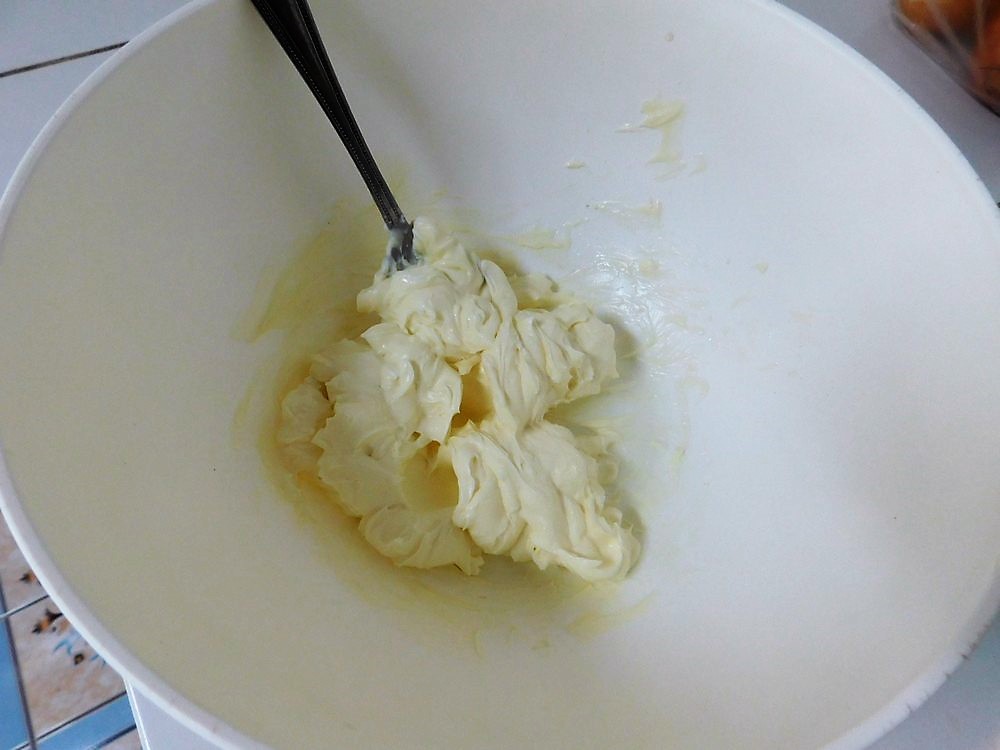
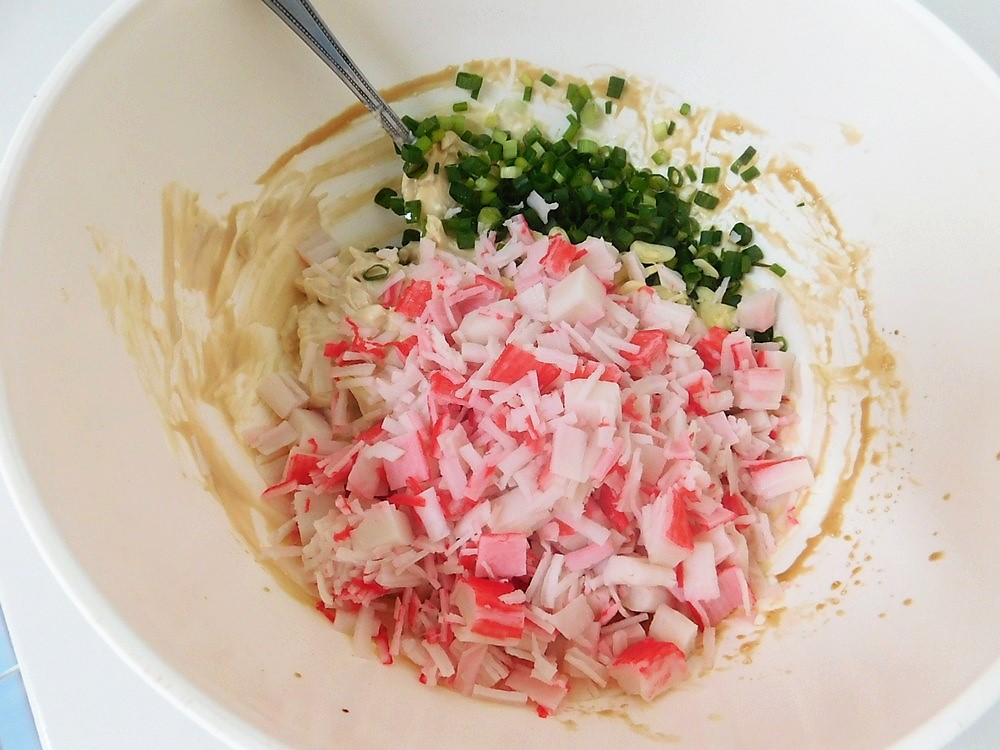
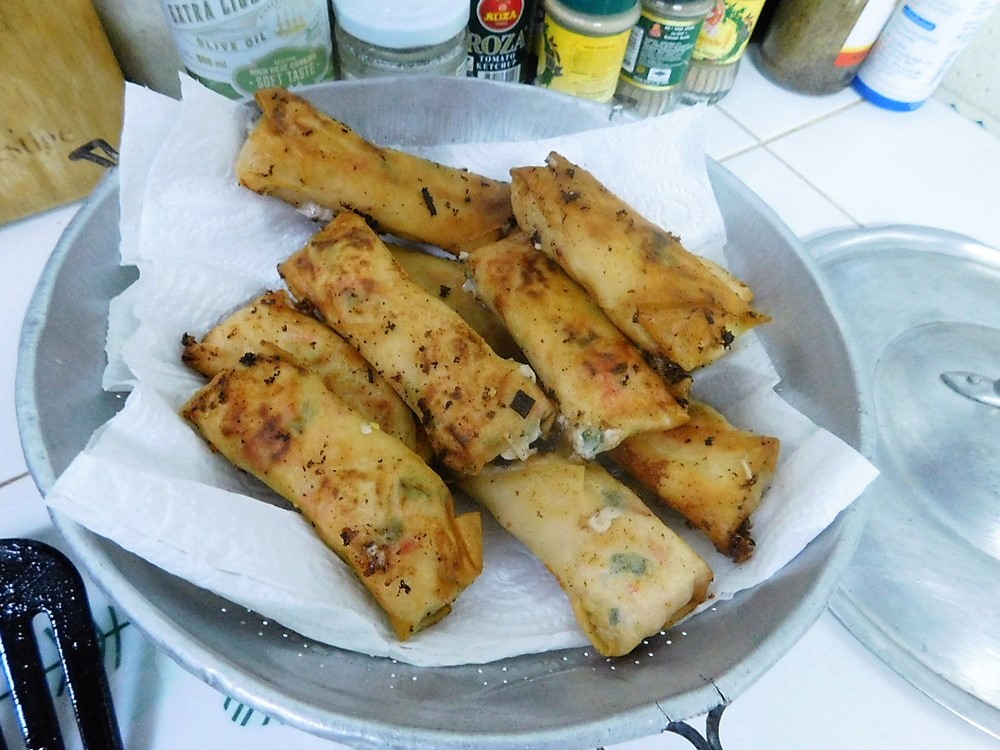
The crab sticks are 52 Baht, the cream cheese is 108 Baht for Caroline brand (Thai), and figure about 60 Baht for the Mozzarella. For 15 spring rolls, this is about 48 cents per spring roll. If using and import brand of cream cheese, figure about 60 cents per spring roll. Figure 1-2 rolls as a serving as an appetizer (Low cost), and 3-4 rolls as a main dish with a nice side. (High cost).
Chicken with Noodles & Gravy

Chicken with Noodles & Gravy

Just as you guessed it, it is that simple, chicken, egg noodles, and chicken gravy. This is a base recipe, tailor it to your liking and call it your own. I made this on 5 May 2019, perfect! Link to the Shortcut is listed in the Recipe Notes section.
Prep Time 10 minutes
Cook Time 20 minutes
Total Time 30 minutes
Course Main Dish
Cuisine American
Servings 6 servings

Ingredients
  

  • 340 grams dry egg noodles, (12 oz)
  • 700 grams chicken breasts, boneless, skinless, cut into bite size pieces, (1 1/2 lbs, I used 3 breasts)
  • extra light olive oil, as needed
  • 3 packets chicken gravy, (yield is 1 cup gravy per packet), (Shortcut)
  • 3 cups frozen peas, thawed, (don't use canned peas!)
  • salt and pepper, black pepper or white pepper, as desired

Instructions
 

  • This is the gravy packet I use, Thai brand, Thai made, and it is quite good. And is low cost.
  • First thing we need to do is get the noodles cooking, so heat a pot of salted water to boiling, then add the egg noodles and boil until just tender. Drain.
  • I used a variant which adds a step here. I sauteed about 1 cup of sliced (Japanese Sogigiri or angle sliced) Shiitake mushrooms, and reduced the peas to 2 cups. After the mushrooms were sauteed, I just wiped out the pan and that is ready for the chicken now.
  • While the water is heating for the egg noodles, heat a non stick pan on medium heat with the oil, when hot add the chicken, season with salt and pepper as desired (I used white pepper), saute, turning them often.
  • When no pink is visible and they have released their water, as seen in the photo, remove and drain off the water, and set the pan aside. Don't over cook the chicken or you will have tough chicken. The will still cook when the pan is off the heat and you will have perfect tender chicken.
  • In a large sauce pan, prepare the gravy per the packet instructions, normally 1 cup water per packet, so 3 cups water and whisk in the 3 packets. When the gravy has thickened to your liking, reduce heat to a simmer and stir in the peas, and mushrooms if you prepared those.
  • Whens the peas are warmed through, takes just a few minutes, add the chicken and drained noodles, stir and let this simmer for a few minutes to heat everything through.
  • Serve and enjoy.

Notes

Low cost per serving.
Shortcuts: Gravy Mix. Although I do list the shortcut here, for those in Thailand, Lobo has excellent gravy packets, which is what I primarily use.
Variants: 1. Use a combination of peas and carrots. 2. Use mixed vegetables in place of peas. 3. Reduce the amount of peas and add some sauteed mushrooms. (Highly recommended!)
Adapted from an internet recipe.