Pork Chops & Tomato Sauce

Pork Chops & Tomato Sauce

Adapted from an internet recipe.
This is a Singaporean way to prepare pork chops, and it does sound. On my to cook list. Link to the Shortcut is listed in the Recipe Notes section.
Prep Time 20 minutes
Cook Time 30 minutes
Total Time 50 minutes
Course Main Dish
Cuisine Singaporean
Servings 4 servings

Ingredients
  

  • 4 pork chops
  • 1 potato, cubed, skin on or off is up to you
  • 1 small can green peas, drained
  • 1 onion, chopped
  • 1 tomato, chopped
  • 1 egg, beaten
  • butter crackers, crushed, as needed

For the Marinade

  • 1 teaspoon soy sauce, and as needed
  • black pepper, as desired
  • 1 tablespoon corn flour

For the Sauce

  • 3 tablespoons tomato sauce, Shortcut
  • 1 tablespoon sugar
  • 1 teaspoon soy sauce
  • ¾ cup water, pinch over ¾ cup (200 ml is goal)

Instructions
 

  • Mix the Marinade ingredients in a shallow dish (like a baking dish), coat the chops with the marinade, add more soy sauce as needed, and let set for 30 minutes.
  • While the chops are marinating, shallow fry the cubed potato, when nicely browned, drain and set aside.
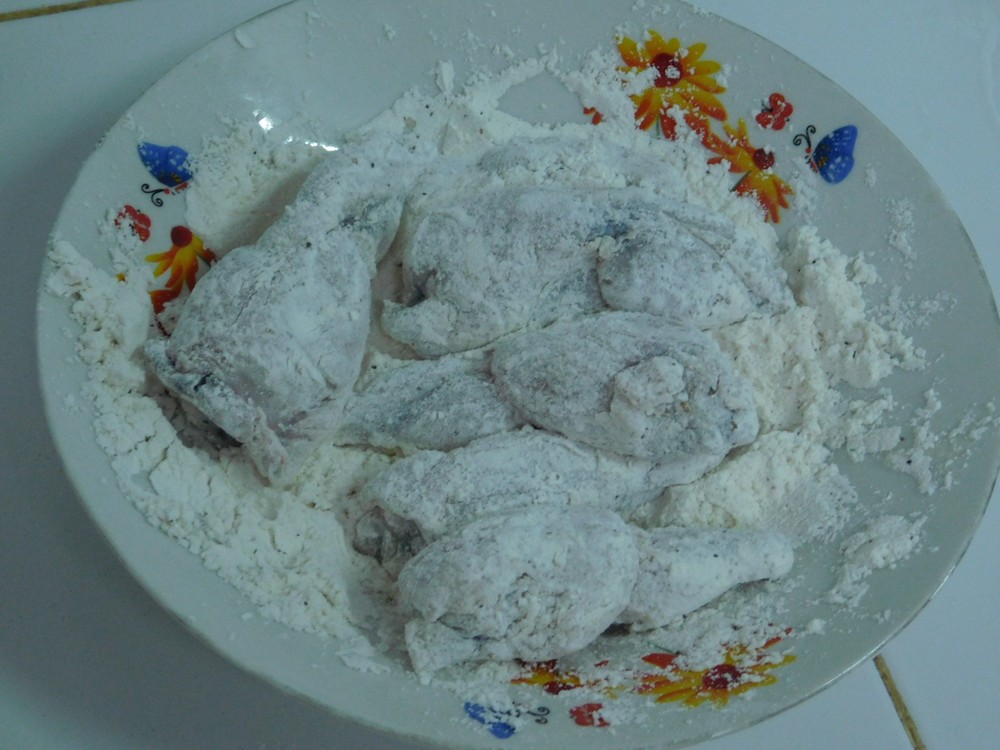
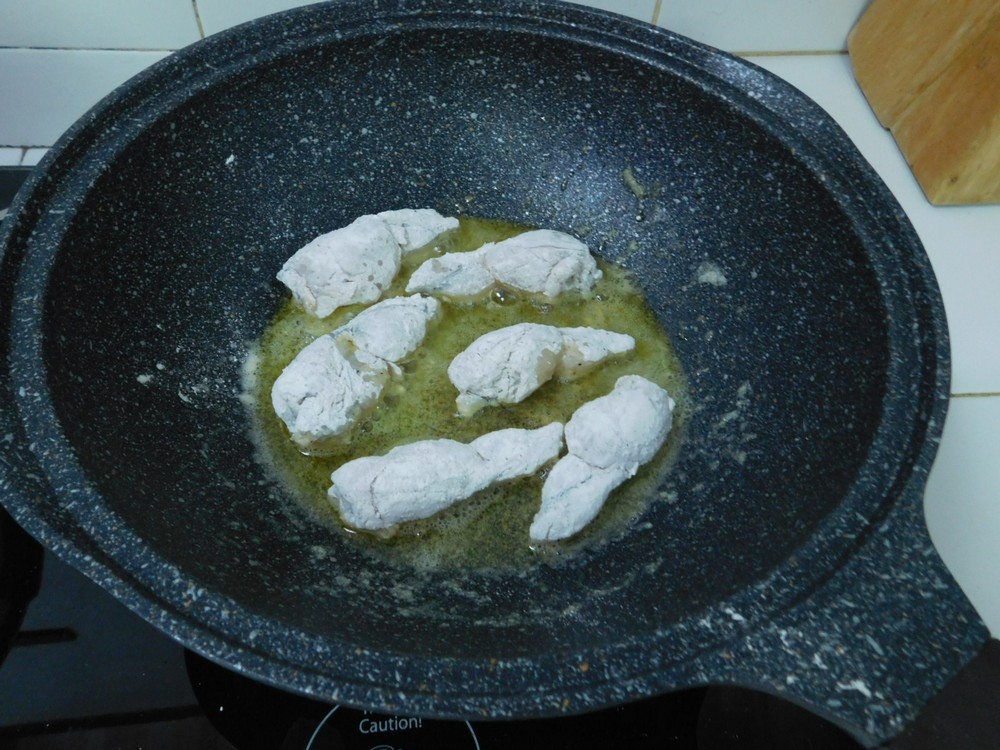
  • Coat a chop in the beaten egg and coat it with crushed butter crackers, repeat for all chops.
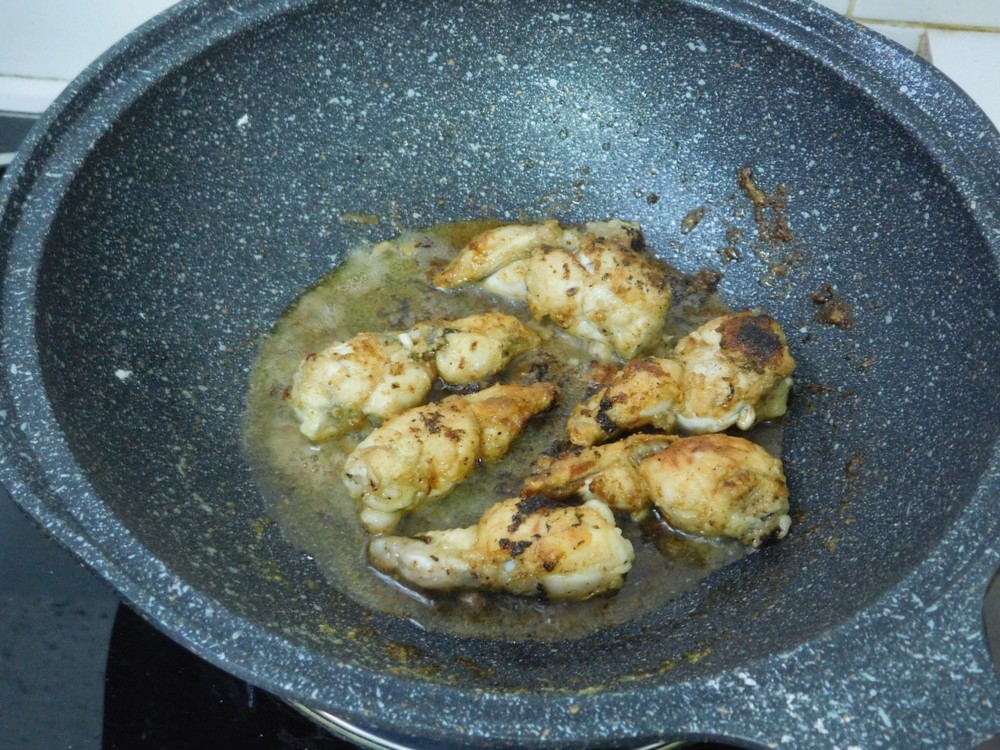
  • Shallow fry the pork chops until golden brown on both sides, drain on paper towels.
  • For boneless chops just cut into bite size pieces. For bone in chops, cut meat from the bones and then cut the meat into bite size pieces. Place the pieces on a serving dish, cover with foil.
  • In a large non stick pan or a wok, stir fry the potatoes, peas, onion, and tomato until the onion is softened, about 2-3 minutes.
  • Add the Sauce ingredients, stir together, and bring to a boil then reduce to a simmer, stir often until the sauce thickens.
  • When the sauce is thicken to your liking, pour over the pork chop pieces.
  • Serve with cooked rice for a side and enjoy.

Notes

I will price this when I get pork chops in the city next time. For now I will say Fair priced per serving.
Shortcut: Tomato Sauce.
Honey Za’atar Hot Wings

Honey Za’atar Hot Wings

Adapted from an internet recipe.
Hot wings with a Mediterranean / Middle Eastern touch from two ingredients used. I made these on 10 Sep 2018, the chicken is outstanding, tender, juicy, excellent flavor.
Prep Time 10 minutes
Cook Time 1 hour
Total Time 1 hour 10 minutes
Course Appetizer, Main Dish
Cuisine Mediterranean
Servings 4 servings

Equipment

  • Oven
  • Baking Sheet with Rack
  • Foil

Ingredients
  

  • 24 chicken wing sticks, or middle wings, skin on

For the Rub

  • 2 tablespoons baking powder
  • 2 tablespoons brown sugar
  • 2 teaspoons salt
  • 2 teaspoons black pepper
  • 2 teaspoons garlic powder
  • 2 teaspoons onion powder
  • 2 teaspoons smoked paprika, or paprika
  • 2 teaspoons chili powder, ½ to 1 teaspoon if using Thai chili powder
  • 2 teaspoons ground cumin
  • 2 teaspoons za'atar

For the Sauce

  • 2 tablespoons butter
  • 2 tablespoons harissa paste, or 2 tablespoons of Sriracha sauce
  • ½ cup honey
  • 1 tablespoon molasses
  • white sesame seeds, optional, for garnish

Instructions
 

  • Preheat your oven to 200° C (400° F). Line a baking sheet with foil and place a rack on the sheet. Oil the rack with some olive oil.
  • In a large mixing bowl, add all the Rub ingredients and mix together.
  • Dry the wings with paper towels, add to the mixing bowl and toss together with the rub until all the wings are evenly coated.
  • Place wings on the rack evenly so they are not touching.
  • Bake for 45-50 minutes. Then place the baking sheet under your broiler (for counter top ovens, turn off the bottom coil and turn on the top coil) and broil until crispy, watch them so they do not burn. Remove from the broiler or oven.
  • Now melt the butter in a sauce pan on medium heat, when melted, add the remaining Sauce ingredients. Stir and bring to a boil then reduce to a simmer and stir occasionally until slightly thickened, about 3 to 5 minutes.
  • Place the chicken wings in a large bowl and pour on the sauce and gently toss together until the wings are evenly coated.
  • Place wings on a serving tray, garnish with sesame seeds if desired. (This is without the sauce, which I did not make, family is not keen on sweet sauces with honey.)
  • Serve with rice or sides of your choice and enjoy.

Notes

I bought 24 wings that weighed 2 kilos (just under 4½ lbs) for 139 Baht. For 4 servings, which is very conservative, this is about $1.05 per serving.
Mushroom Ragout

Mushroom Ragout

This is from a good friend in the US and this sounds very tasty! Anything with mushrooms, I like it. The mushrooms in the first part is written as it was provided, the second part is using local Japanese mushrooms here in Thailand. I will make this and give me report soon.
Prep Time 20 minutes
Cook Time 25 minutes
Total Time 45 minutes
Course Main Dish
Cuisine American
Servings 4 servings

Ingredients
  

  • 1 tablespoon olive oil
  • 125 grams pancetta, chopped, or bacon (1/4 lb)
  • 3/4 cup shallots, cut in half
  • 1 1/2 tablespoons garlic, minced
  • 1 1/2 tablespoons fresh rosemary, minced, or 1 1/2 teaspoons dried
  • 2 tablespoons tomato paste
  • 2 tablespoons butter
  • 225 grams portobello mushrooms, stems and gills removed, caps chopped, (8 oz)
  • 500 grams cremini mushrooms, sliced, (1 lb)
  • 225 grams white button mushrooms, sliced, (8 oz)
  • 225 grams fresh Shiitake mushrooms, stems removed, caps sliced, (8 oz)
  • 1 cup chicken stock, or vegetable stock, fresh or from powder
  • 1 teaspoon salt
  • 1/2 teaspoon black pepper
  • 2 tablespoons fresh parsley, chopped, more for serving
  • 1/4 cup Romano cheese, grated, or Parmesan, more for serving
  • 500 grams dry Fettuccine pasta

Using Japanese Mushrooms

  • 225 grams fresh Shiitake mushrooms, stems removed, caps sliced, (8 oz)
  • 300 grams Buna Shimeji mushrooms, roots removed, separated, (10 oz)
  • 150 grams White Shimeji mushrooms, roots removed, separated, (5 oz)
  • 300 grams Enoki mushrooms, roots removed, separated, 10 oz)

Instructions
 

  • In very large skillet, heat oil over medium heat, when hot, and add the Pancetta. Cook for 10 minutes or until crisp. Add shallots and cook for 3 more minutes, then add garlic and rosemary, and cook for 1 minute. Add the tomato paste and cook for 2 minutes.
  • Add butter and all the mushrooms and stir. Increase heat to medium high. Cover and cook for 5 minutes. Remove lid and cook for another 5 minutes.
  • Add the broth, season with salt and pepper as desired and cook uncovered for 15 minutes or until most of the liquid is gone and mushrooms are nice and tender.
  • While the mushrooms are cooking, heat a pot of salted water to boiling, then cook the fettuccine to just tender. Scoop out 1 cup of pasta water and reserve, drain the rest of the water and set the pasta aside.
  • Add the parsley and Romano cheese to the mushrooms. Add a little of the pasta water to make a creamy and thick sauce. Add only a little water at a time until you achieve the creamy consistency as desired.
  • Serve over the hot pasta and garnish with parsley and Romano cheese as desired. Enjoy.

Using the Japanese Mushrooms

  • The steps stay the same. Note about the Enoki and Shimeji mushrooms, these two types have root bundles, so adjust the weights of the mushrooms as needed, I know I will but extra just to make sure.

Notes

I will price this on the Japanese mushrooms once I have them on hand, for now, this is fair cost. And for pancetta, never seen it it here so I will use bacon.
Recipe provided by good friend, Patti Stone.
United States.
Homemade Hot Dogs

Homemade Hot Dogs

Adapted from several internet recipes.
This was an experiment, and it turned out very well! I only used collagen casings and that was spot on, I am not a fan of hot dogs with a skin. These can be all beef, all pork, or a combination. For this first experiment, I made them as listed here, which is a combo of beef and pork. No food processor will be used, just ample use of my electric grinder and a mortar and pestle. Keeping the grinder and meats cold is essential. I used collagen casings which are removed after simmering in water. Feel free to use casings of your choice.
5 from 1 vote
Prep Time 1 hour
Cook Time 20 minutes
Total Time 1 hour 20 minutes
Course Lunch, Main Dish
Cuisine American, German
Servings 16 6 inch hot dogs

Ingredients
  

  • 500 grams lean pork, cubed, (1 lb)
  • 350 grams lean beef, cubed, (¾ lb)
  • 120 grams pork fat, cubed, (¼ lb)
  • ¼ cup onion, diced
  • 1 clove garlic, peeled, sliced
  • 1 teaspoon ground coriander
  • ¼ teaspoon ground marjoram
  • ¼ teaspoon ground mace, or nutmeg
  • ½ teaspoon mustard seed
  • 1 teaspoon sweet paprika
  • 1 teaspoon white pepper powder
  • 1 egg white
  • teaspoons sugar
  • 1 teaspoon salt
  • ¼ cup milk
  • ½ teaspoon liquid smoke
  • sausage casings, your preference, as needed

Instructions
 

  • Place the onion, garlic, and mustard seed into a mortar. Feel free to use a food processor for this. The mortar we have is the granite type, weighs in at about 20 pounds. Need something mashed quick, use the granite mortars.
  • Pound to a sort of smooth paste.
  • Place the contents of the mortar into a mixing bowl then add the egg white, sugar, salt, coriander, marjoram, mace, paprika, white pepper, sugar, and salt. Mix well. Add the milk and mix that in well. Place seasoning mixture in the fridge while you continue.
  • Thoroughly wash, rinse, and dry the grinder parts that will have contact with the meat, the plate you are going to use is the fine plate, then place the parts (not the motor assembly) in the fridge to chill.
  • Cut the beef, pork, and fat, one at a time, into cubes that will fit into your grinder. As each item is cubed, place in the fridge to chill.
  • Assemble your grinder using the fine plate. Remove and grind the meats and fat separately, place all in a large mixing bowl. For this photo, I ground the beef first, visible a little on the left, then the fat, then the pork on top.
  • Using your clean hands or wearing gloves, mix the meats together, then mix in the seasoning mix, then mix in the liquid smoke.
  • Run the mixture through the grinder again. Place mixture in the fridge to chill. Now wash, rinse, and dry the grinder parts that had contact with the meat. When dried, place in the fridge as well.
  • When 30 minutes have passed, assemble the grinder again, and then, you guessed it, run the meat mixture through the grinder again, also using the fine plate. The mixture is pretty much a near paste now, which is desired.
  • Stuff the casings in your preferred way, using the grinder, a funnel, or sausage stuffer.
  • I measure out the collagen casings in 14 inch sections.
  • Lightly oil the stuffer tube for first use and thread the casing onto the tube, tie the end off with string, then puncture a hole right near the knot to let air escape when you start. Fill the casing to the end, after all casings are stuffed, tie a string at the 6 inch mark, no need to twist, just tie, then tie another at the 12 inch mark, cut off the tails of the strings and squeeze out the remaining sausage mix after where you tied it, put that back in the bowl with the sausage mixture. Repeat this using all the meat mixture. Leave the sausages in 12 inch lengths, do not cut them apart.
  • Heat a pot of water to simmering, when hot, place the links in the water for 20 minutes.
  • Remove the links and place in a large bowl or pot of ice water and allow the links to shock and chill, this stops the cooking.
  • Remove the links from the ice water
  • Cut off the opposite ends of the links, no need to cut the center, and squeeze out the hot dogs, place on a rack to cool further. There is only 15 here, I am the cook, I am allowed to try things. 🙂
  • Now the hot dogs are ready for use. You can store in the fridge (they are cooked) for up to 3-4 days, or freeze them for later use. To prepare them, just pan fry or grill, enjoy in a bun with your favorite sauces and toppings.
  • Fried.
  • Ready to be devoured, simple dish with spicy mustard and ketchup on one, regular mustard and ketchup on another one. Tasty!

Notes

I will price this when I prepare these. I will say Fair cost for now.
Broccoli & Ham Cheese Casserole

Broccoli & Ham Cheese Casserole

Almost went into a food coma just adding this. I am a fan of a good, or any, mac & cheese, and broccoli with cheese is a bonus, then add ham, wow! Homemade cheese sauce, always a bonus. On my to cook list. And this is versatile, read the variants. Link to the shortcut is listed in the Recipe Notes section.
Prep Time 20 minutes
Cook Time 20 minutes
Total Time 40 minutes
Course Main Dish
Cuisine American
Servings 8 servings

Ingredients
  

  • 340 grams dry macaroni, (12 oz)
  • 1/4 cup butter, 1/4 block, (1/2 stick)
  • 1/4 cup all purpose flour
  • 1 cup cream, heavy, whipping, or light
  • 1/2 teaspoon mustard powder
  • 2 cups Sharp Cheddar cheese, shredded
  • 1 cup Gruyere cheese, shredded, or Jarlsberg, Gouda, or Cheddar
  • 1/2 cup Parmesan cheese, grated
  • 3 cups broccoli florets, plus stem, the stem is just as good
  • 2 cups cooked ham, cubed

For the Topping

  • 1 cup bread crumbs, OR make from a shortcut
  • 1 tablespoon butter, melted
  • 1/3 cup Parmesan cheese, grated

Instructions
 

  • Preheat your oven to 200 C (400 F). Get out a 9x13 baking dish and grease that with butter, set the dish aside.
  • Cook pasta in a pot of boiling salted water, add the broccoli during the last 2 minutes of cooking the pasta to make them tender yet crisp. Drain the pasta and broccoli under cold water to stop the cooking.
  • In a large sauce pan, melt the butter. When melted, whisk in the flour and allow to cook for 2 minutes, while whisking. Slowly whisk in the cream of your choice, plus the milk, onion and mustard powders. Continue to whisk until thickened. Remove from heat and stir in the cheeses until melted, there, you just made a cheese sauce.
  • Add the drained pasta and broccoli to a large mixing bowl, mix in the ham, then mix in the cheese sauce. Pour the mixture in the prepared baking dish.
  • Mix together the Topping ingredients and sprinkle over the baking dish.
  • Bake for 20-25 minutes or until just heated through. Do not over cook this, that advice comes from the author of the recipe, so best to pay attention to that.

Notes

I will price this when I get ham again in the city. For now, I will say Fair cost per serving based on the cheeses used.
Shortcut: Breadcrumbs.
Variants: 1. Use cheeses of your choice.
Inspired by Spend With Pennies and the link to this recipe is here.
United States.
Baked Frog Legs

Baked Frog Legs

Adapted from an internet recipe.
Sounds interesting and is on my to cook list. First recipe I have seen for cheese to be used with frog legs. I buy local caught frogs and use the legs only, but the rest of the body is used by some family members so there is very little waste.
Prep Time 15 minutes
Cook Time 30 minutes
Total Time 45 minutes
Course Lunch, Main Dish
Cuisine American
Servings 4 servings

Equipment

  • Oven
  • Baking Pan
  • Parchment Paper

Ingredients
  

  • 12 frog legs, skinned, cleaned, (6 pair)
  • 3 slices bread, torn into fine crumbs
  • ½ cup butter, softened, (½ block / 1 stick)
  • 1 egg
  • ¾ cup Parmesan cheese, grated
  • ¼ onion, finely diced
  • 1 teaspoon garlic, smashed and minced
  • pinch ground cumin
  • pinch dried rosemary
  • pinch dried tarragon
  • salt, as desired

Instructions
 

  • Preheat your oven to 180° C (350° F). Fit some foil or parchment paper in the bottom of a 7x11 inch baking dish. (I will verify the size of the dish needed.)
  • Add the ingredients from butter down to salt into a bowl and mix well. Place the bread crumbs in a shallow bowl.
  • Dip a frog leg into the cheese and egg mixture coating it well, let excess drip off. Roll the leg in the bread crumbs, then place in the baking dish.
  • Repeat for remaining legs, keeping the legs evenly spaced in a single layer in the dish. Spoon any remaining cheese egg mixture evenly over the legs.
  • Bake until golden brown, 30-50 minutes. (I will verify the time when I make these.)
  • Serve.

Notes

I bought 3 whole (skinned, cleaned) frogs at the village market for 60 Baht ($1.81) and just the legs, with feet removed, came out to 190 grams (6.7 oz). I will say 6 legs is a serving, so this is fair priced. (The rest of the frogs, those went to a brother in law for him to cook, nothing wasted, as I would not have bought them to just remove the legs and discard the rest.)
Deep Fried Frog Legs

Deep Fried Frog Legs

Adapted from an internet recipe.
Frogs are available in village markets, and frog legs frozen at Makro, with a price. The local village frogs are fine. I only use the legs, offer the rest of the frogs to a local friend and more than likely they will take them off your hands.
Prep Time 15 minutes
Cook Time 10 minutes
Total Time 25 minutes
Course Main Dish
Cuisine American
Servings 2 servings

Ingredients
  

  • 12 frog legs, skinned, cleaned, (6 pair)
  • 30 saltine crackers, finely crushed
  • 1 cup all purpose flour
  • ½ cup yellow cornmeal
  • 1 teaspoon onion powder
  • 2 teaspoons salt
  • 1 tablespoon black pepper
  • 2 eggs
  • ½ cup milk
  • cooking oil, for frying

Instructions
 

  • Skin the frog legs if not already skinned and cut off the feet. Make a slight cut behind the knees to cut the tendons (keeps the legs from moving in the pan for fresh legs).
  • Add the flour, cracker crumbs, cornmeal, onion powder, salt, and pepper to a large zip bag. Zip the bag closed and shake to mix.
  • In a bowl, whisk together the eggs and milk.
  • Heat some oil in a large non stick pan, you want about ½ inch of oil. You want the oil hot but not smoking.
  • When the oil is hot. Dip a few frog legs in the egg mixture and let the excess drip off, then place in the zip log bag with the flour mixture, close, and shake.
  • Remove the legs with tongs (prevents you from getting clumpy, sticky fingers) and carefully place in the hot oil. Repeat with the legs until all are coated and ready.
  • Cook the legs until golden brown on each side, about 3-4 minutes per side.
  • Remove the legs to paper towels to drain.
  • Serve.

Notes

I bought 3 whole (skinned, cleaned) frogs at the village market for 60 Baht ($1.81) and just the legs, with feet removed, came out to 190 grams (6.7 oz). I will say 6 legs is a serving, so this is fair priced. (The rest of the frogs, those went to a brother in law for him to cook, nothing wasted, as I would not have bought them to just remove the legs and discard the rest.)
Simple Frog Legs I

Simple Frog Legs I

Basic recipe to prepare frog legs. In Thailand, the legs are much smaller than the states. There is large frog legs at Makro at times, imported, and with a hefty price as well, so I prefer the local harvested frogs from the village. No set amounts here, this is a make as much as you want guide. Link to the shortcut is listed in the Recipe Notes section.
5 from 1 vote
Prep Time 5 minutes
Cook Time 10 minutes
Total Time 1 hour 15 minutes
Course Main Dish
Cuisine American
Servings 0

Ingredients
  

  • milk, as needed, or buttermilk
  • frog legs
  • salt and pepper, as desired
  • all purpose flour, as needed
  • butter, as needed

Instructions
 

  • Skin the frog legs if not already skinned and cut off the feet. Make a slight cut behind the knees to cut the tendons (keeps the legs from moving in the pan for fresh legs). Place the legs in a bowl or container.
  • Pour in some milk to just cover the legs, and place in the fridge for 30 minutes. Mix the legs around a few times as they chill.
  • Remove the legs from the milk, add salt and pepper as desired to some flour, then roll the legs in the flour to coat them well.
  • Heat a non stick pan with 3-4 tablespoons of butter. When the butter is sizzling, add the legs.
  • Cook uncovered and turn as needed until golden brown on both sides.
  • Serve and enjoy.

Notes

I bought 3 whole (skinned) frogs at the village market for 60 Baht ($1.81) and just the legs, cleaned with feet removed, came out to 190 grams (6.7 oz). I will say 6 small legs is a serving, so this is fair priced. (The rest of the frogs, those went to a brother in law for him to cook, nothing wasted, as I would not have bought them to just remove the legs and discard the rest.)
Shortcut: Buttermilk.
Petah’s Cajun Sausage Dish

Petah's Cajun Sausage Dish

Petah Wheetstraw, United States.
This comes from a good friend and is made with what he had on hand at the time, I will say he nailed this, it sounds delicious. On my to cook list. I will adjust the prep and cooking times when I make this. Link to the shortcut is listed in the Recipe Notes section.
Prep Time 15 minutes
Cook Time 30 minutes
Total Time 45 minutes
Course Main Dish
Cuisine American
Servings 4 servings

Ingredients
  

  • 2 packages Johsonville Cajun Chicken Sausage, (12 oz / 4 links each)
  • 250 grams raw shrimp, peeled, deveined, tails removed, (8 oz)
  • 1 cup chicken stock, fresh or from powder, or vegetable stock
  • 2 onions, chopped
  • 3 fresh Jalapeno peppers, chopped
  • 4 sweet peppers, your choice, chopped, red bell would be tasty
  • 4 cloves garlic, smashed and minced
  • 1 can diced tomatoes, (16 oz / 454 g)
  • salt and pepper, to taste
  • Cajun seasoning, Shortcut
  • olive oil, as needed

Instructions
 

  • Slice the sausages on an angle, about ¼ inch thick slices. Heat a splash of olive oil in a large non stick pan and cook the sausage until nicely browned. Remove from the pan and set aside.
  • Same pan, heat a little more olive oil then add the onion, peppers, and garlic. Season with salt, pepper, and Cajun seasoning to taste, and cook until the veggies are just soft.
  • Add the stock to the pan and bring to a boil.
  • Add the sausage and diced tomatoes, stir occasionally until it returns to a low boil.
  • Add the shrimp and simmer until they turn pink then remove from heat.
  • Serve over rice or with a baguette. Enjoy. Photo provided by Petah Wheetstraw.

Notes

I will say Fair cost for now until I can locate that particular sausage or a suitable substitute.
Shortcut: Cajun Seasoning.
Variant: 1. Use Creole seasoning in place of the Cajun seasoning.
Tuna Casserole IV

Tuna Casserole IV

This comes from a good friend in Thailand and is highly recommended. I like the use of the cheese pasta sauce. I made this on 27 June 2018, outstanding! Link to the shortcut is listed in the Recipe Notes section.
Prep Time 15 minutes
Cook Time 15 minutes
Total Time 30 minutes
Course Main Dish
Cuisine American
Servings 6 servings

Ingredients
  

  • 3-4 cups bow tie pasta, or any bite size pasta
  • 2-3 cans tuna, drained, or 1 - 1 1/2 cups fresh cooked
  • 1/2 can corn nibblets, or 3/4 cup fresh cooked
  • 1 jar Artisan 3 Cheese Pasta Sauce, 411 gram jar
  • 1-2 cups Cheddar cheese, shredded
  • salt and pepper, as desired

Instructions
 

  • Preheat your oven to 200 C (400 F). Spray a 9x13 baking dish with olive oil.
  • Cook the pasta in a pot of boiling salted water until just tender. Drain and add pasta to the baking dish.
  • Add the tuna, corn, cheese pasta sauce and mix together well. Season with salt and pepper as desired.
  • Spread the mixture out evenly and sprinkle the shredded cheese on the top, use as much cheese as you like.
  • Bake for 15-20 minutes or until the casserole is bubbly.
  • Serve and enjoy.

Notes

The cheese sauce, in Thailand, is available from Lazada if you reside outside of a major city, cost is 178 Baht for a jar, which is not bad, it is a very good sauce. The Cheddar cheese will use 1/2 of a 200 gram block, about 90 Baht for that. For 6 servings, this is about $1.40 per serving.
Shortcuts: Fresh Tuna, Fresh Corn (Pressure Cooker).
Variants: 1. Use peas in place of the corn. 2. Use the higher quantities of Cheddar and tuna (highly recommended). 3. Add some sauteed onions. 4. Add some sauteed diced red bell pepper. 5. (Highly recommended.) Use the following measurements: 10 oz / 285 g dry bow tie pasta, 22 oz / 624 g jar Prego Homestyle Alfredo Sauce, 3 cups of shredded Cheddar cheese, 1 standard can of peas, I made this combination on 4 Aug 2019 and it was perfect.
Recipe and variants 3-4 provided by good friend, Kurt Hammerschmidt.
Thailand.