Archive for the ‘#1 Go-To Recipes’ Category
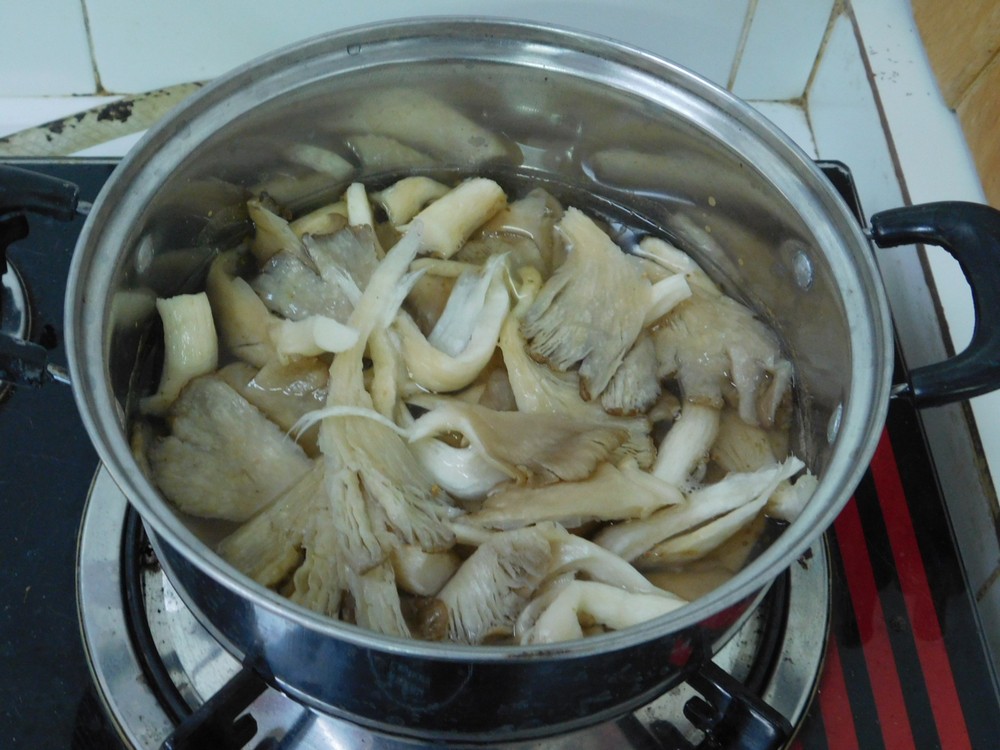
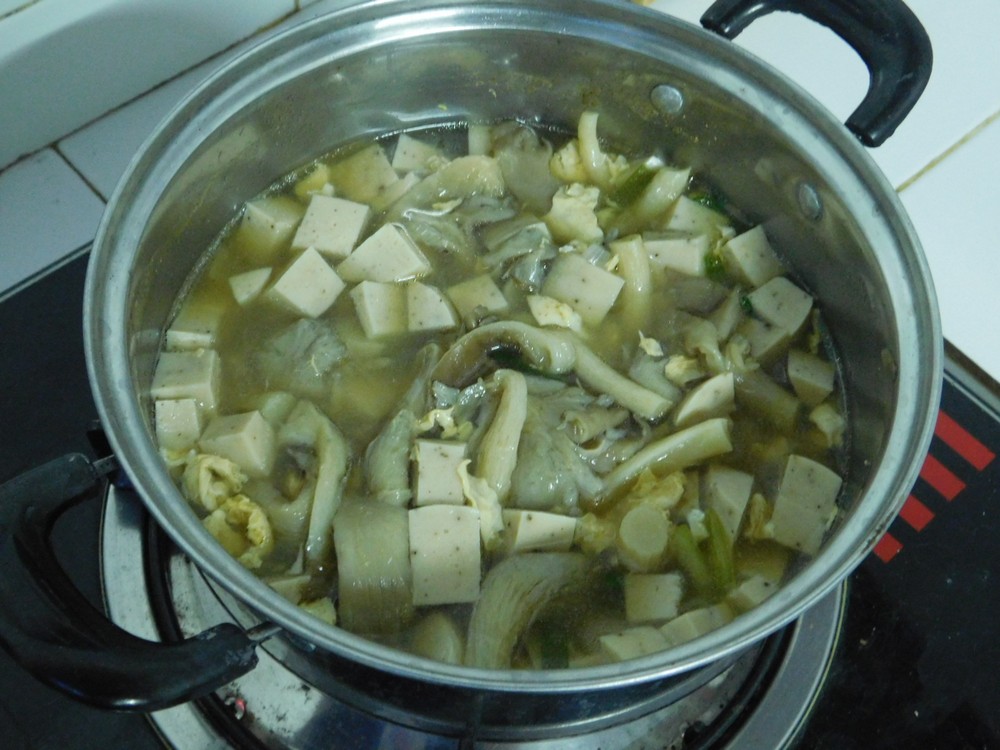
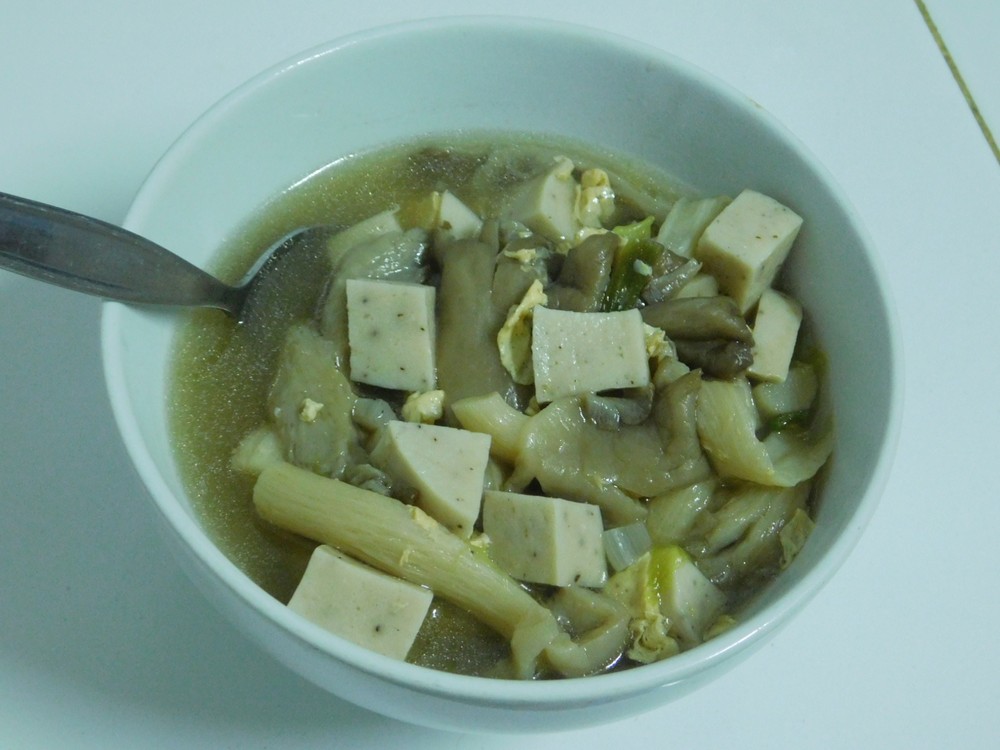
Oyster Mushroom Soup
This is an excellent soup and is a great use of these delicious mushrooms. This has lots of possibilities and can be tailored to your liking. I look forward to creating some tasty soups with this recipe as a base. I made this on 5 June 2018 with a variant, I added peppered Vietnamese sausage (Cha Hue), diced, to the soup. Perfect.
Ingredients
- 300 grams fresh oyster mushrooms, (11 oz)
- 1 egg, beaten
- 3 cups water
- 3-4 slices fresh ginger, or 1 teaspoon ground ginger
- 3 spring onions, sliced
- 1/2 teaspoon salt
- sesame oil, as desired
- white pepper powder, as desired
Instructions
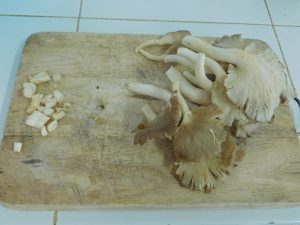
- Trim off the root ends of the mushrooms, rinse and squeeze dry, then tear the larger ones into 2-4 pieces, chop any of the large stems.
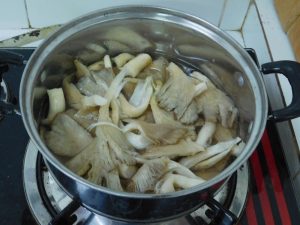
- In a medium size pot, add the water, ginger, and mushrooms and bring to a boil. Once at a boil add the salt boil for 2 minutes.
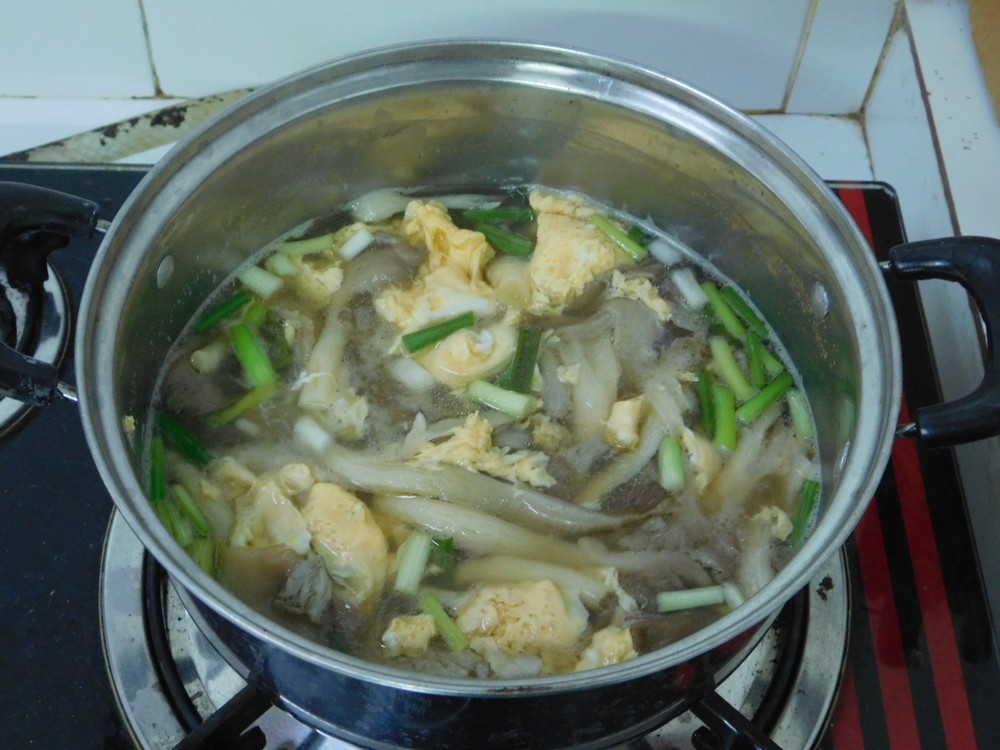
- Reduce heat to a simmer and slowly pour in the beaten egg around the pot, no stirring yet, wait until the egg is starting to set, about 1 minute then sprinkle in the spring onion and give the pot a gentle stir.

- I went with a Variant and added some diced peppered Vietnamese sausage (Cha Hue). Simmered for about 15 minutes to let the sausage heat through.

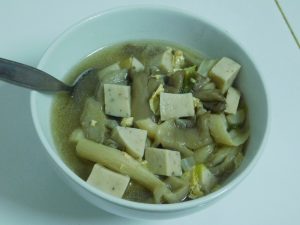
- Ladle the soup into serving bowls and drizzle with sesame oil as desired, and sprinkle with white pepper, also to taste.
- Serve with additional spring onions if desired.

Notes
Low cost.
Variant: 1. Add 160 to 250 grams diced Vietnamese sausage.
Inspired by the recipe Quick Oyster Mushroom Soup from Spice the Plate.
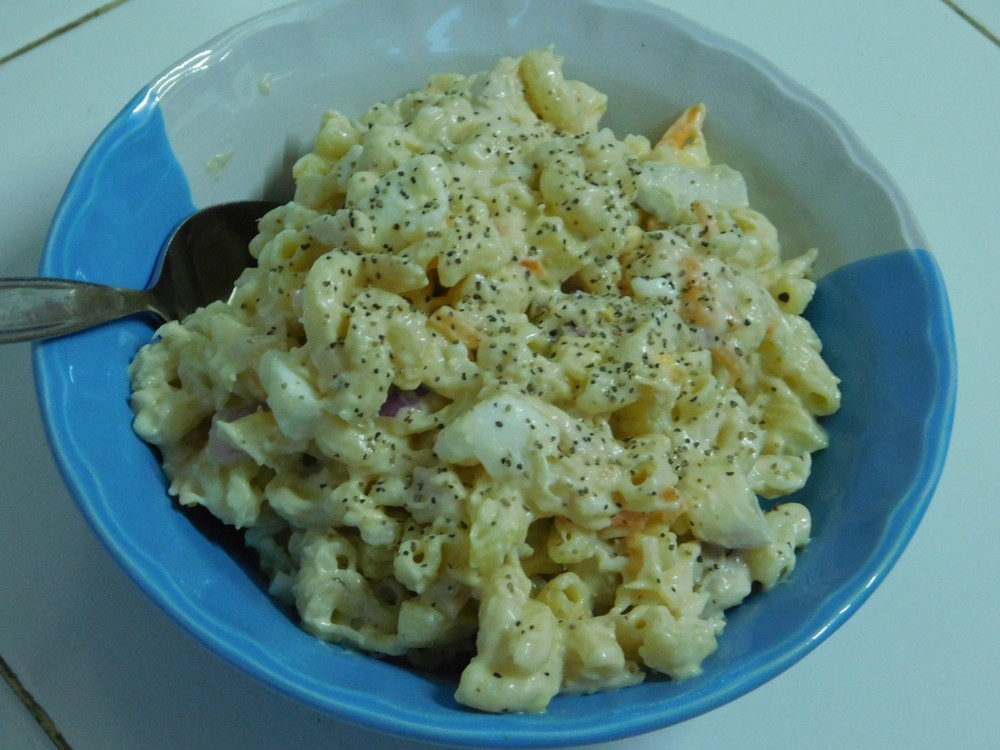
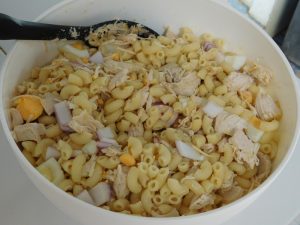
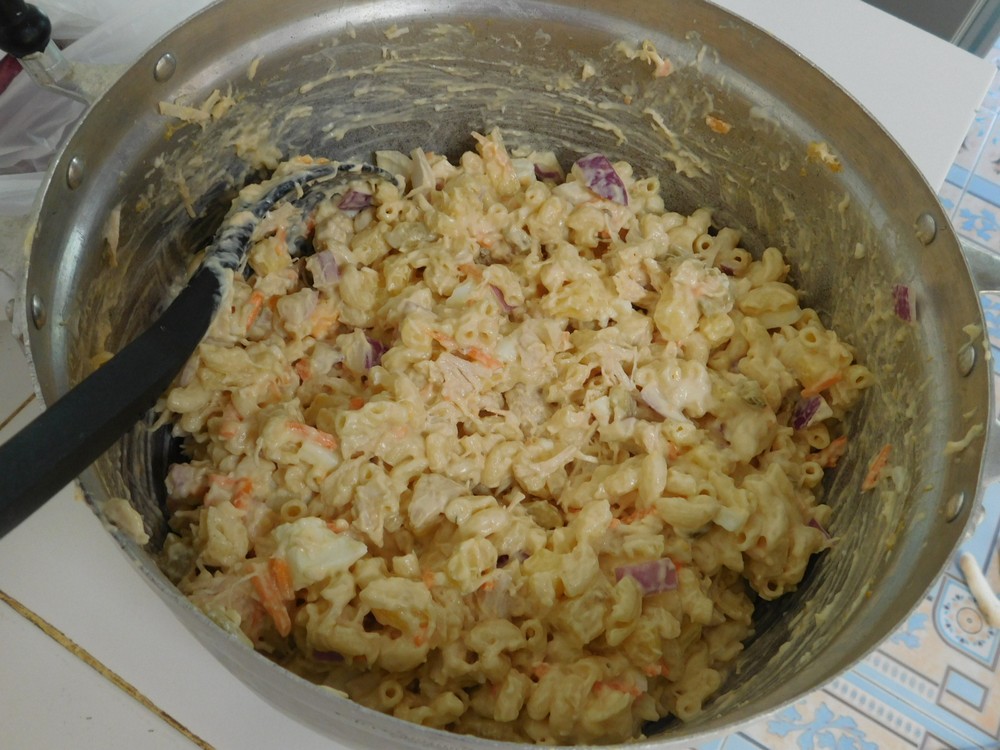
Chicken Macaroni Salad
This is a Filipino version of macaroni salad, many cultures have their own versions, just like chicken noodle soup is found many cultures. This is a delicious and filing pasta salad which can be a side dish or a main dish. Links to the Shortcuts are listed in the Notes section.
Ingredients
- 2 cups dry elbow macaroni
- 1½ cups mayo
- 500 grams chicken breast, boneless, skinless, (1 lb), Shortcut
- 2 cups fresh pineapple, chopped and drained
- ¼ cup sweet pickle relish
- 3 hard boiled eggs, peeled and chopped, Shortcut
- 1 medium red onion, minced
- 1 carrot, julienned, and cut strips into ½ inch pieces
- 1 cup Cheddar cheese, cubed
- salt and pepper, to taste
Instructions
- Heat a pot of salted water to boiling then cook the macaroni to tender, drain and set aside.
- Cook the chicken any way that you like, steamed, boiled, oven baked. If boiling, and you have the time, add trinity and make some broth while you are at, also, let the pot cool to cool temp before taking the chicken out, this will result in juicy chicken. A Shortcut is listed in Recipe Notes to follow if you want to use a pressure cooker and make broth for another recipe.
- Drain the pickle relish and the pineapple, this is so you do not make a soggy salad, no one likes a soggy salad 😉
- After everything is cooked, drained, chopped, and cooled, place everything, except the mayo, in a large mixing bowl and gently toss to mix. I started with a mixing bowl, and I lightly mix as each item is prepared and added, I had to transfer to a large pot, as this is a lot of salad.
- Add the mayo and gently mix to make sure everything is coated well. Cover and place in the fridge to chill until serving, chill for about 2-3 hours.

- Serve as a side dish with chicken from the BBQ, grilled sausages, etc. Or serve as a meal itself.


Notes
Low cost.
Shortcuts: Quick Chicken Broth, Perfect Hard Boiled Chicken Eggs.

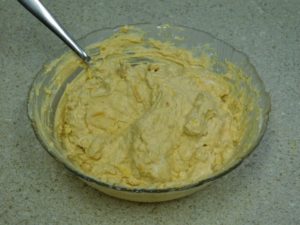
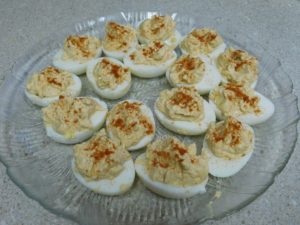
Mexican Deviled Eggs I
I like hard boiled eggs and I love deviled eggs, so this sounds really good. On my to make list. Although this is low cost, there is shortcuts for even greater savings. Links to the shortcuts are listed in the Recipe Notes section.
Ingredients
- 8 hard boiled eggs, chicken or duck, peeled, Shortcuts
- ⅓ cup mayo
- ½ cup Cheddar cheese, shredded
- 2 tablespoons sour cream, Shortcut
- 1 tablespoon chives, chopped, or spring onion
- 2 teaspoons taco seasoning mix, Shortcut
- fresh cilantro, finely chopped, for garnish
Instructions
- Cut the cooled and peeled eggs in half, remove the yolks to a medium mixing bowl and place the whites on a serving tray or plate.
- Mash the yolks with a fork then add the cheese, mayo, sour cream, chives (or spring onion), just 1½ teaspoons of the taco seasoning. Mix together.
- Spoon or pipe the mixture into the egg whites.
- Dust lightly with the remaining taco seasoning and sprinkle lightly with cilantro. Chill in the fridge until you serve. Enjoy.

Notes
Shortcuts: Perfect Hard Boiled Chicken Eggs, Perfect Hard Boiled Duck Eggs, Taco Seasoning Mix, Sour Cream.
Variant: 1. Use hard boiled quail eggs for tiny versions of this recipe.
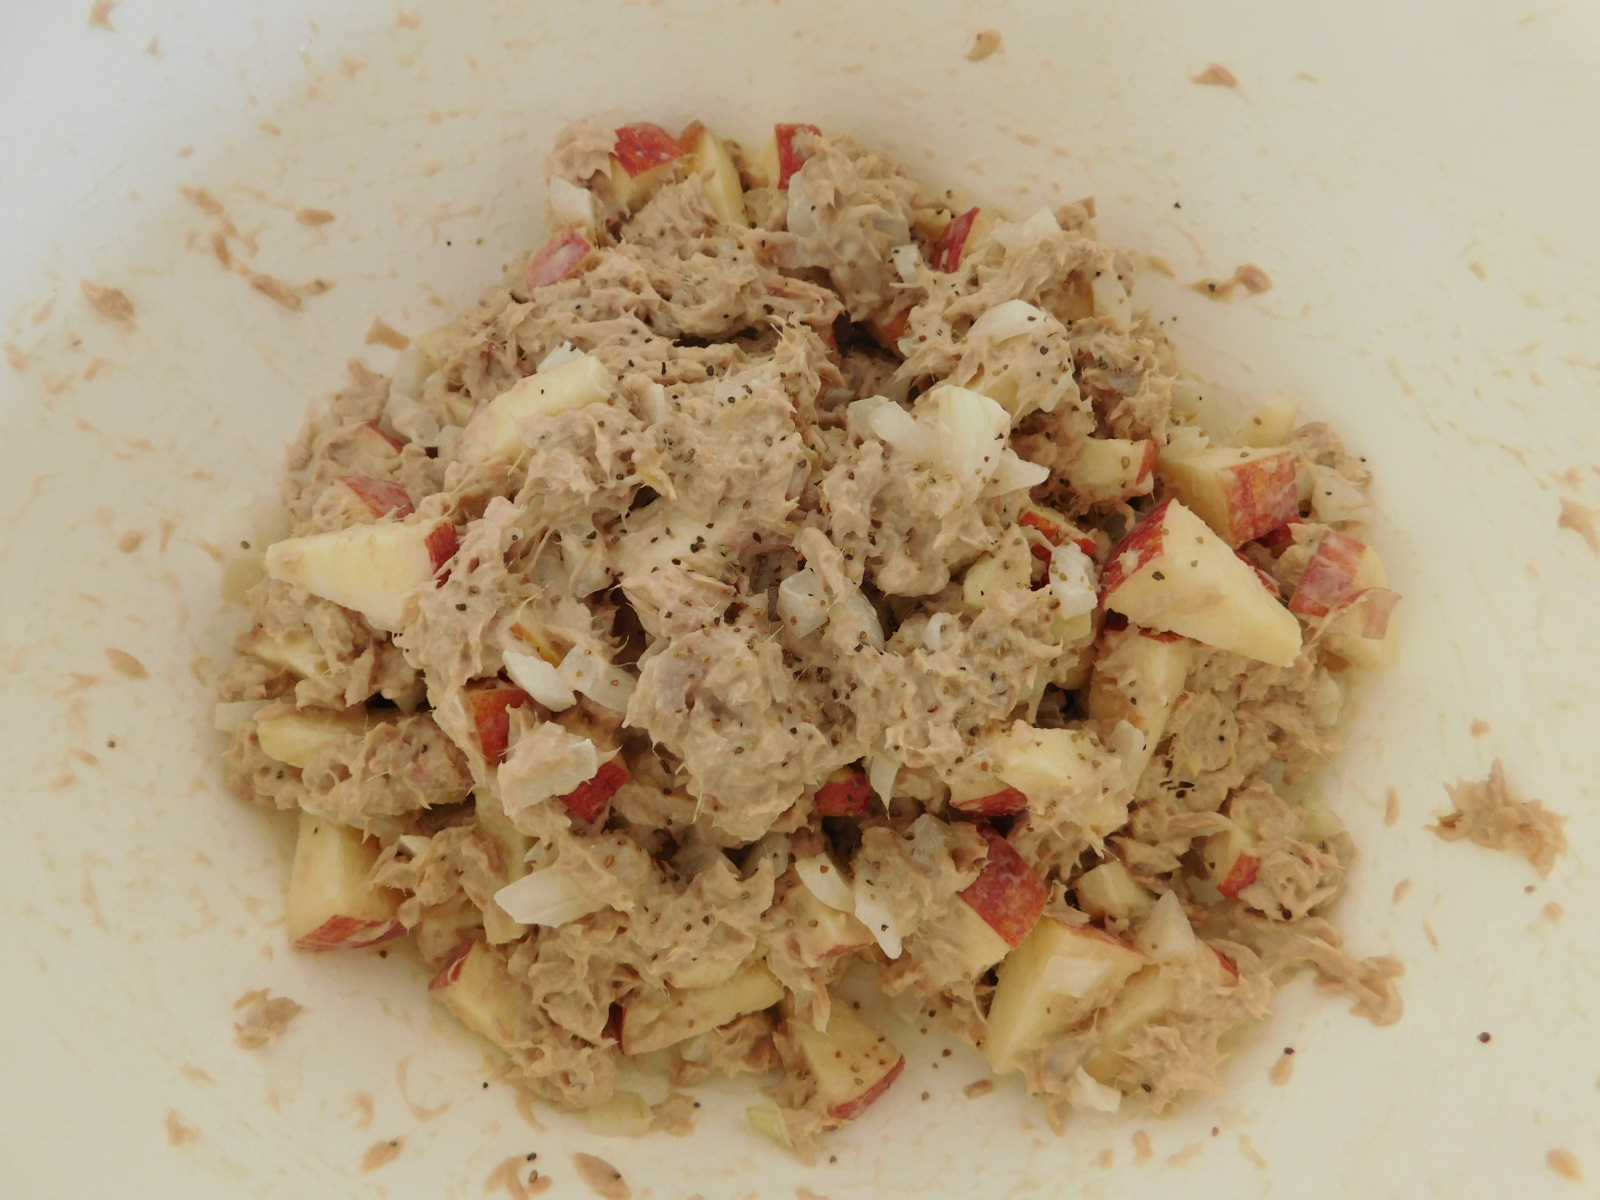
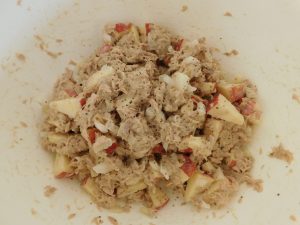
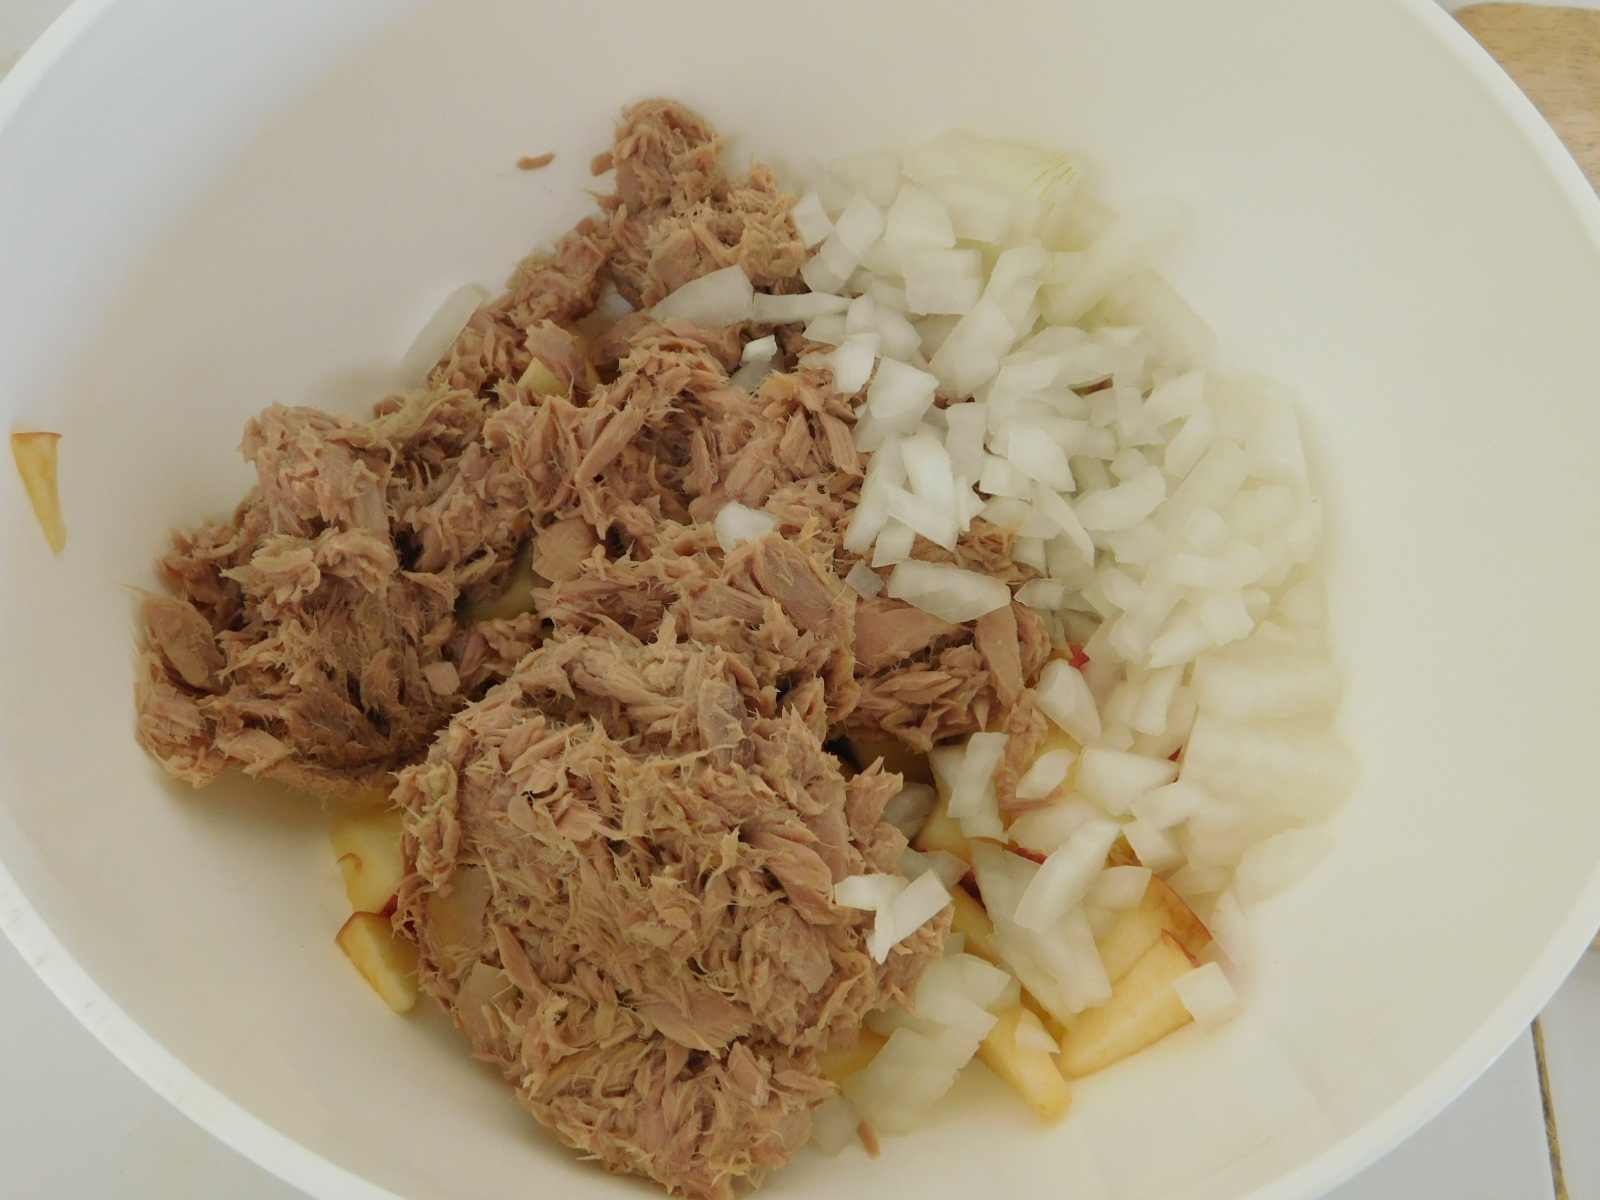
Tuna Salad
This recipe comes from a good friend, and she has never been wrong with a recipe, and this recipe is excellent as well. Makes for tasty sandwiches. Link to the Shortcut is listed in the Recipe Notes section.
Ingredients
- 4 cans tuna in water, standard size cans, or 2 cups fresh, Shortcut
- 1 medium brown onion, finely diced
- 1 medium Granny Smith apple, cored, seeded, diced
- 1 avocado, peeled, seeded, diced
- 1 cup mayo, or to taste
- ½ teaspoon lemon or lime juice, or to taste
- ½ cup toasted nuts, sliced almonds or chopped pecans, optional
- ⅛ teaspoon black pepper, or to taste
Instructions
- Core and chop the apple. I use an apple corer and slicer that removes the core and makes 8 slices. I took each slice, slice it again lengthwise, then chopped. Add the lime or lemon juice at this time to prevent the chopped pieces from turning brown.
- Toast the nuts, your choice of almonds or walnuts, these are optional.
- Drain the tuna well or prepare fresh cooked tuna and let that drain after you have removed the bones and flaked it. If using fresh tuna, use 2 cups or 2 1/2 cups. Three cans of tuna (140 grams each), the onion, and apple with lime juice ready for mixing.
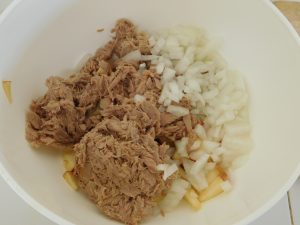
- Add all the ingredients to a large mixing bowl and mix to combine, taste and adjust mayo, pepper, and lemon/lime juice to your liking. Mixed and ready to chill, no nuts or avocado used this time.
- Cover and chill for a few hours, serve in sandwiches or as a dip.
Notes
Figure about 42 Baht per average size can of tuna, for 8 servings, this is about 66 cents per serving.
Shortcut: Tuna.
Variants: 1. Replace the tuna with 2 cups of cooked, chopped chicken. 2. Use a red onion in place of the brown onion. 3. Use a Fuji apple in place of the Granny Smith apple.

Rajma - Kidney Bean Curry (Pressure Cooker)
This is a great main or side dish, I made this on 30 April 2018 was truly surprised, excellent flavor! This originates in Northern India and Nepal. This is a modified recipe and not authentic.
Equipment
- Pressure Cooker
Ingredients
- 2 cups dry red kidney beans
- 2 tablespoons vegetable oil
- 2 teaspoons butter
- 1 large onion, minced
- 4 cloves garlic, smashed and finely minced
- ¼ teaspoon ground ginger
- ¼ teaspoon Thai chili powder
- ½ teaspoon ground cloves
- 1 teaspoon ground turmeric
- 1 teaspoon ground cumin
- 1 teaspoon ground coriander
- 4 plum tomatoes, chopped
- 1 teaspoon sugar
- salt, to taste
- water, as needed
- 2 teaspoons garam masala, optional
- 1 teaspoon ground red pepper, optional
- ¼ cup fresh cilantro leaves, chopped, for garnish
Instructions
- Rinse the kidney beans and remove and bad ones and any debris, place in a large bowl and cover with 2 inches of water. Cover the bowl and let that sit for 6 hours.
- After 6 hours, drain and rinse the beans, just leave in the strainer for now.
- In your pressure cooking, without using the lid, heat the oil and butter on medium heat. Add the onion and garlic and saute until fragrant, then add in the ginger, cloves, chili powder, turmeric, cumin, and coriander. Cook for a few minutes then add the tomatoes and cook for about 1 minute.
- Add the drained beans and water to just cover the beans then add 1 more cup of water. Stir in the sugar and salt to to taste.
- Place the lid on the pot and bring the heat up to high. When the jiggler starts moving and releasing pressure, start timing for 8 minutes and turn the heat down to low or medium low to just maintain the jiggler moving and pressure releasing.
- At 8 minutes, turn off the heat and move the pressure cooker to an unused burner and allow a natural release of pressure. When the pressure is released, open the lid.
- Serve as a side dish or a main dish over rice.

Notes
Low cost.
Variants: 1. For a non-vegetarian, add in sliced sausage at Step 4 (this is what I do). 2. Add a spoon or two of lime juice and mix that in before serving.

Pie Crust
This is my basic standard pie crust. For fruit, pumpkin, and sweet potato pies this is not pre-baked (blind baked), for cream type pies you need to bake the crust first after stabbing the crust a number of times on the sides and bottom, keeps the center from raising up. The ingredients are listed for a Single Crust, and for a Double Crust. I recommend if you need 4 crusts, prepare the Double Crust recipe twice, as in two separate batches.
Equipment
- Pastry Cutter , not required but very handy
- Rolling Pin
Ingredients
Single Crust - such as for a pumpkin pie
- 1⅓ cups all-purpose flour
- ½ teaspoon salt
- ½ cup cold butter, cubed, or shortening, or lard (preferred)
- 3½ tablespoons cold water
Double Crust - such as for an apple pie
- 2⅔ cups all-purpose flour
- 1 teaspoon salt
- 1 cup cold butter, cubed, or shortening, or lard (preferred)
- 7 tablespoons cold water
Instructions
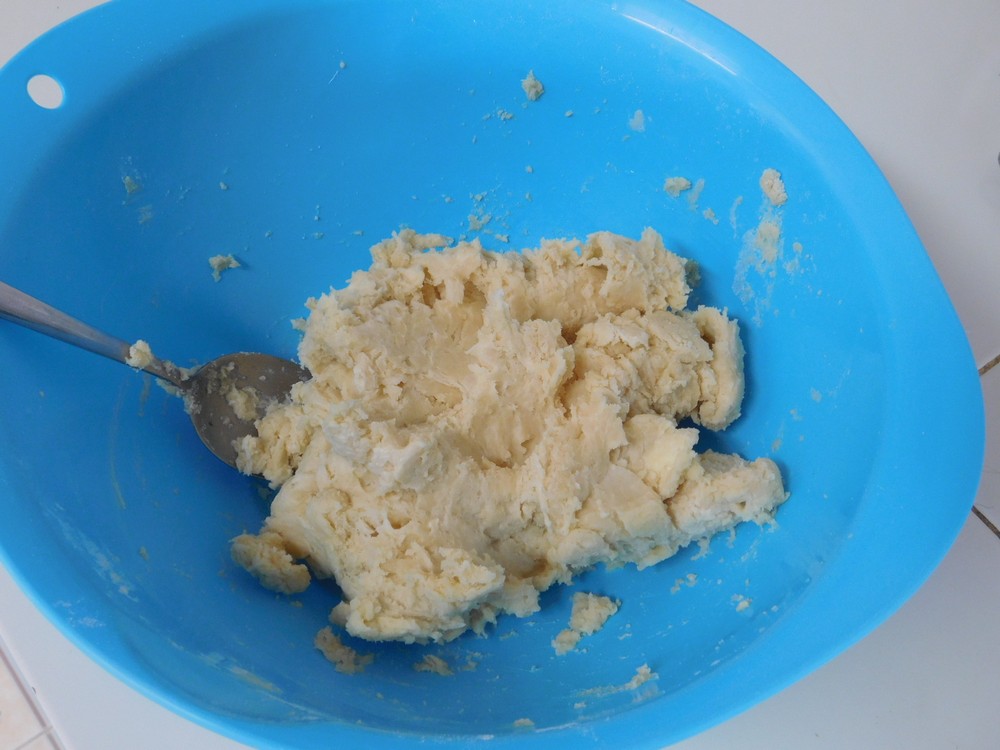
- Add the flour and salt to a mixing, whisk together. Add the butter and use a pastry cutter or a large fork, and cut the butter into flour until it resembles large crumbs.

- Add cold water 1 tablespoon at a time and mix until the dough is moist enough to hold together and can be shaped into a ball with your hands.

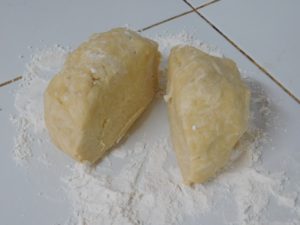
- Shape into a ball and place on a floured work counter.If you are making the Single Crust, just proceed to the next Step. If you are making the Double Crust, at this point cut the ball in half, as shown in the photo, and set one aside, and use just one piece at a time for the next Step.
- Lightly flour the top of the ball and your rolling pin. Flatten the ball down with your hand, then roll to about 1/8 inch thick and larger than your pie dish, roll the dough on the rolling pin and transfer to the pie dish and unroll. Press the dough in, trim away excess, and flute the edges your preferred way. Ready for a fruit, pumpkin, or sweet potato filling. If making the Double Crust, after you get the first into the pie dish, repeat the rolling process for the second piece of dough, the other half you set aside. After it is rolled, use as needed for the dish you are making.


Notes
Used in Recipes Listed on this Site:
- French Meat Pie, made it, GO-TO recipe.
- Peach Pie, made it, GO-TO recipe.
- Fresh Apple Pie, made it, GO-TO recipe.
- Pear Pie, made it, GO-TO recipe.
- Ham & Swiss Broccoli Quiche.
- Applesauce Pie, made it, GO-TO recipe.
- Chicken Pot Pie, made it, GO-TO recipe.
- Mushroom Pie, made it, GO-TO recipe.
- Chess Pie.
- Fresh Pear Pie.
- Sweet Potato Pie.
- Seattle Salmon Pie, made it, GO-TO recipe.

Fajita Peppers
I have some bell peppers I need to put to good use so I thought up this idea last night, basically stir frying the chicken, onion, and bell pepper tops with fajita seasoning and stuffing into bell peppers with cheese and baking. I made this on 26 Apr 2018 and they are very good! Link to the shortcut is listed in the Recipe Notes section.
Ingredients
- 500 grams chicken breasts, (1 lb)
- 1 packet fajita seasoning mix, Shortcut
- 3 tablespoons lemon or lime juice
- 2 tablespoons olive oil
- 5 bell peppers, 2 red, 2 yellow, 1 green
- 1 small onion, sliced
- 1 1/2 - 2 cups Monterey Jack cheese, or a good 4 cheese blend, shredded
Instructions
To Marinate the Chicken
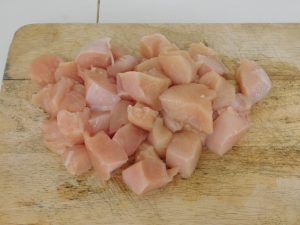
- Cut the chicken breasts into 4 strips lengthwise, then cut each strip into 1 inch pieces, i.e., bite size 🙂
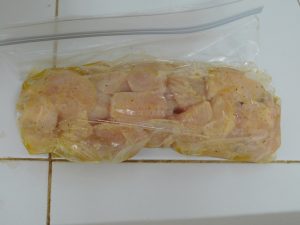
- Place the chicken, olive oil, lemon juice, and seasoning mix in a large zip lock bag, squeeze out the air and squish everything to mix and coat the chicken. Place in the fridge for 1 hour or even overnight to marinate.


To Prepare
- Cut the tops off the yellow and red bell peppers and empty out the seeds and remove the membranes as well. Place peppers in an 8x8 baking dish.
- Preheat your oven to 180 C (350 F). Remove the stems from the tops and dice the tops. Dice the entire green bell pepper.

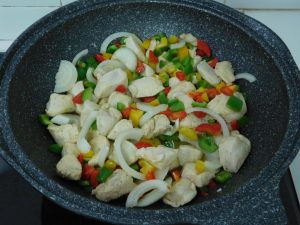
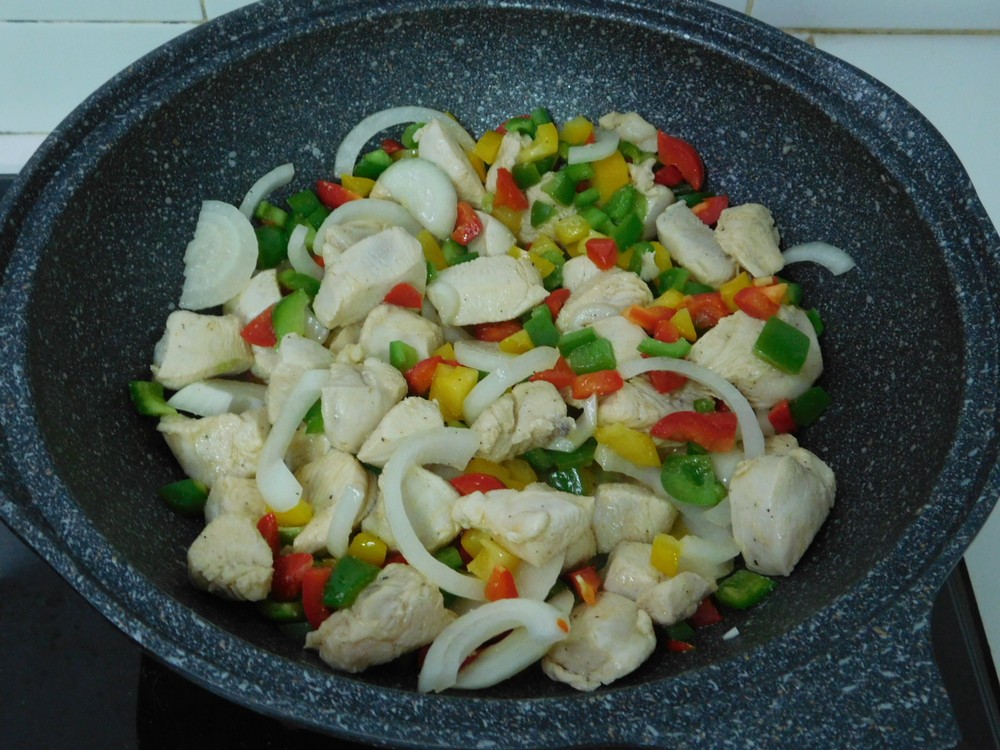
- Drain off any liquid from the marinated chicken. Heat a large non stick pan with a splash of olive oil, when hot, add the sliced onion and the diced peppers, when starting to soften, add the drained chicken. Cook until the chicken is cooked on the outside and the onion and bell pepper is softened (the chicken cooks more in the oven).
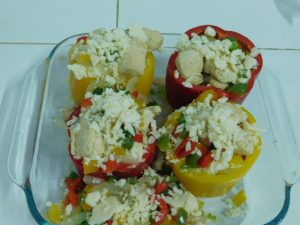
- Fill each bell pepper halfway with the chicken mixture, then add some shredded cheese, then top that and fill the peppers to the top, be generous and spoon some extra chicken on the top to round them off. Sprinkle with a bit more cheese.
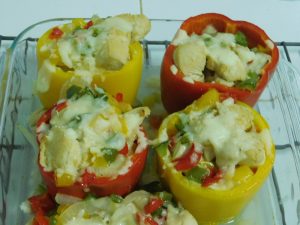
- Add about 1/2 inch water to the baking dish, cover with foil and bake for 30 minutes. Remove foil and continue to bake until the cheese is just starting to brown up, about 10 to 15 minutes.
- Remove from oven and serve with your favorite vegetable side dish or a salad. Enjoy.


Notes
Chicken breasts will cost about 30 Baht/500 grams. The peppers are about 40 Baht for 2, so 5 peppers would be about 90 Baht. For 4 servings, this is about 94 cents per serving.
Shortcut: Fajita Seasoning Mix.
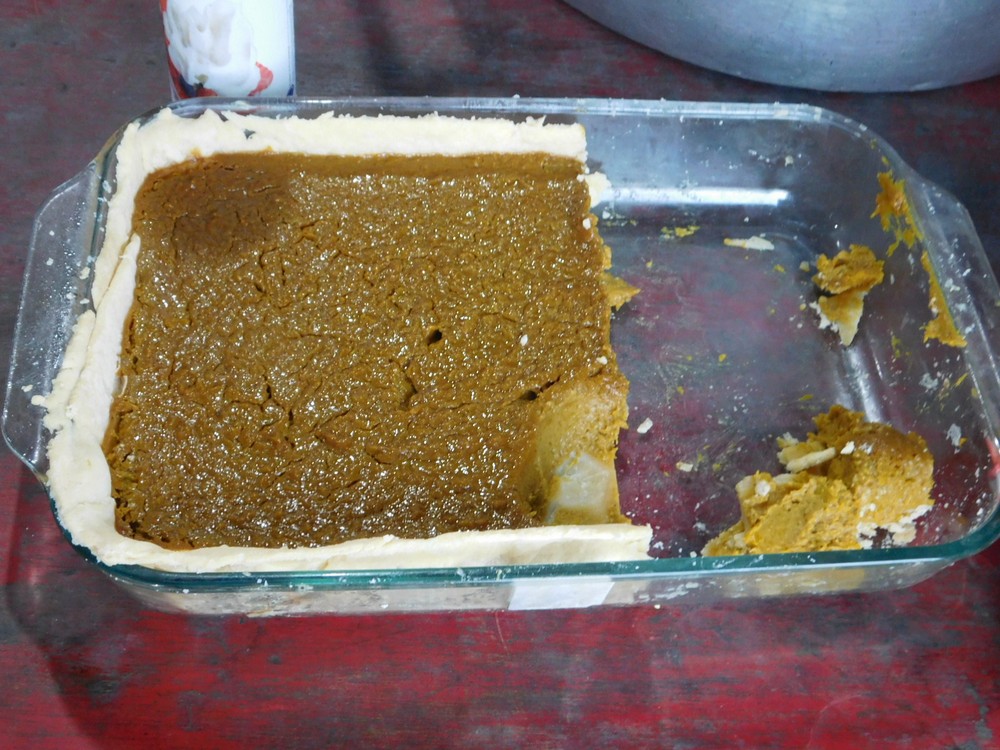
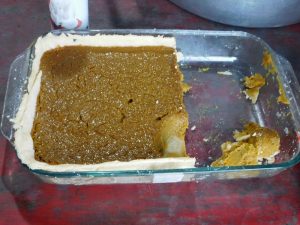
Square Pumpkin Pie
Rectangle pie really, as this uses a 9x13 baking dish. Pumpkin pie was requested by the family for a wedding party and since I only have one pie dish, I opted to go with a 9x13 pan and modified my other pumpkin pie recipe to make this work. This is from scratch recipe, meaning you will make the filling and the crust, so this does take time but well worth it.
Ingredients
For the Crust
- 2 1/3 cup all purpose flour
- 1 teaspoon salt
- 1 cup butter, cold, shredded, 1 standard block
- 7 tablespoons cold water, or as needed
For the Filling
- 1 small pumpkin, winter squash, 2-2 1/2 kilos (4-5 lbs)
- 1 1/4 cup evaporated milk
- 4 eggs, beaten
- 1 cup brown sugar, packed
- 1 1/2 teaspoons ground cinnamon
- 1 1/2 teaspoons ground ginger
- 1 1/2 teaspoons ground nutmeg
- 1 teaspoon salt
Instructions
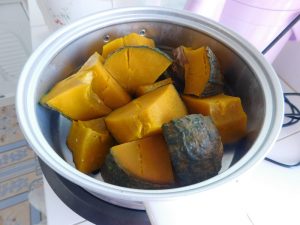
- First thing we need to do is steam the pumpkin. Cut the pumpkin into quarters, then cut each quarter into chunks, no need to peel, it is much easier when it has been steamed. Place the chunks in a steamer (I use my rice cooker with a steamer tray) and once the water is boiling, steam for about 15 minutes or so until the pumpkin is fork tender, work in batches if needed depending on the size of your steamer. Once the pumpkin is steamed, remove to a bowl and let cool.
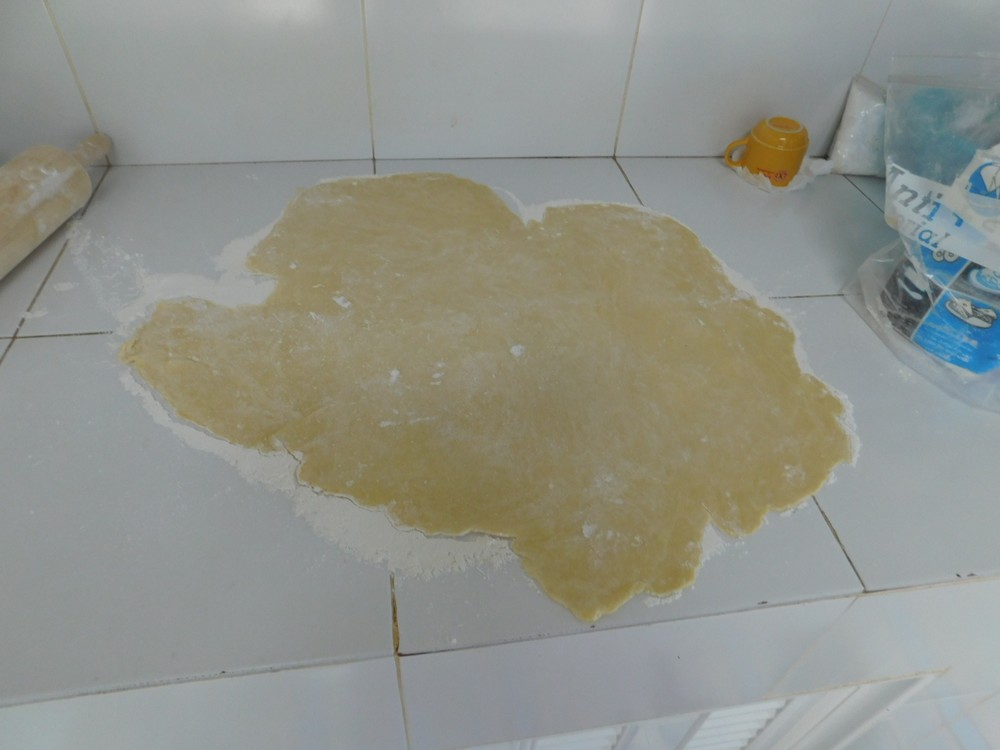
- Now we make the crust, make sure you have a large work surface to do the rolling on.
- Add the flour and salt to a mixing bowl and mix together, then add the shredded cold butter and cut into the flour with a large sturdy fork until it has the consistency of bread crumbs.
- Now add about 4 tablespoons of cold water and mix together with a large sturdy spoon, keep adding water 1 tablespoon at a time until the dough forms a nice ball, if too sticky, add flour as needed.
- Transfer the dough onto your floured work surface, rub your rolling pin with flour, sprinkle some flour on the dough and roll it out very large, about 1/8 inch thick, you want it larger than 9x13 due to the sides of the dish as well.

- Once rolled, roll it up on the pin and unroll it over the dish, gently pushing down and helping it in to cover the bottom and sides. If the side split and break off, no worries, just add them back to the sides and press together the seams. Trim off the excess dough from the edges. Place the dish in the fridge. (You can take the excess dough and roll it back out, cut into strips and sprinkle with sugar and cinnamon and bake those if you like.)

- Preheat your oven to 230 C (450 F). And take the baking dish out of the fridge and set on the counter, very important if you are using Pyrex so you do not do a major temp change.
- Now to make the filling. Take the cooled chunks of pumpkin and peel all the skin off using a pairing knife, very easy to do, toss each cleaned piece into a medium sized pot. When all are cleaned and in the pot, use a potato masher and mash the pumpkin.
- Add the rest of the Filling ingredients to the mashed pumpkin, mash a few more times then mix with a large spoon.
- Pour the filling into the baking dish and spread evenly, dish will be about 3/4 full. Place dish in the oven and bake for 10 minutes.
- Lower temp to 160 C (325 F) and continue to bake until set, use a toothpick to check, this takes 45 minutes to 1 hour.
- Once the filling is set, leave the pie in the oven and turn off the heat and let the pie set for 30-40 minutes (this gives a firm texture to the pie).
- Remove the pie to a rack on the counter and let completely cool. Then place in the fridge until chilled.
- Serve with whipped topping and enjoy.


Notes
Low cost.
Adapted from a combination of my pumpkin pie recipe and and internet recipe.
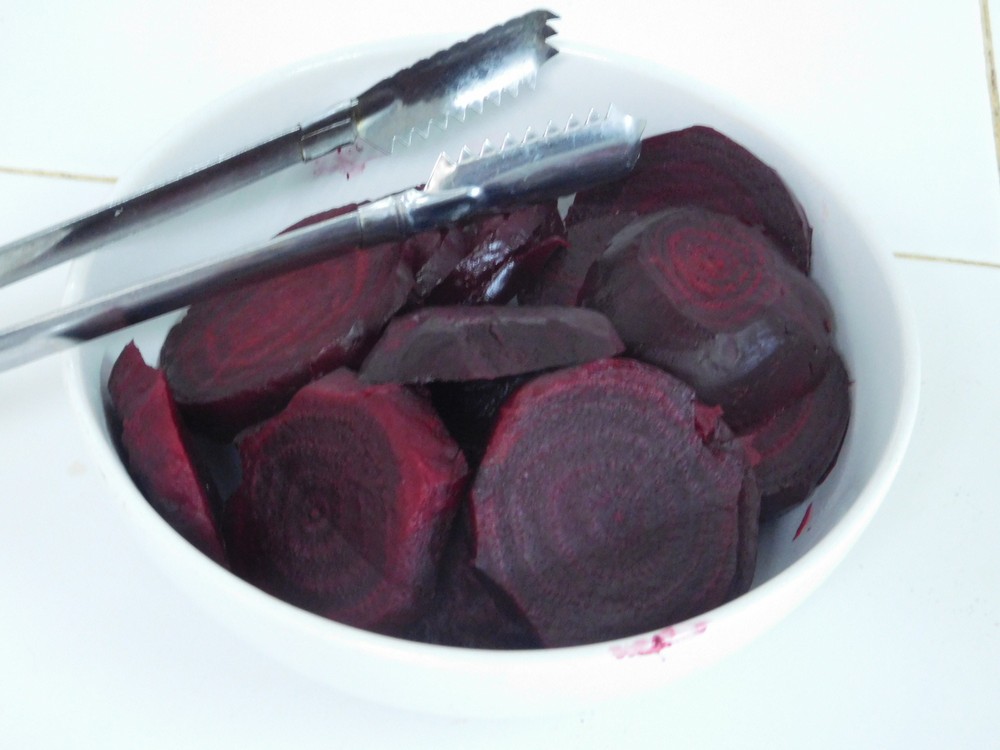
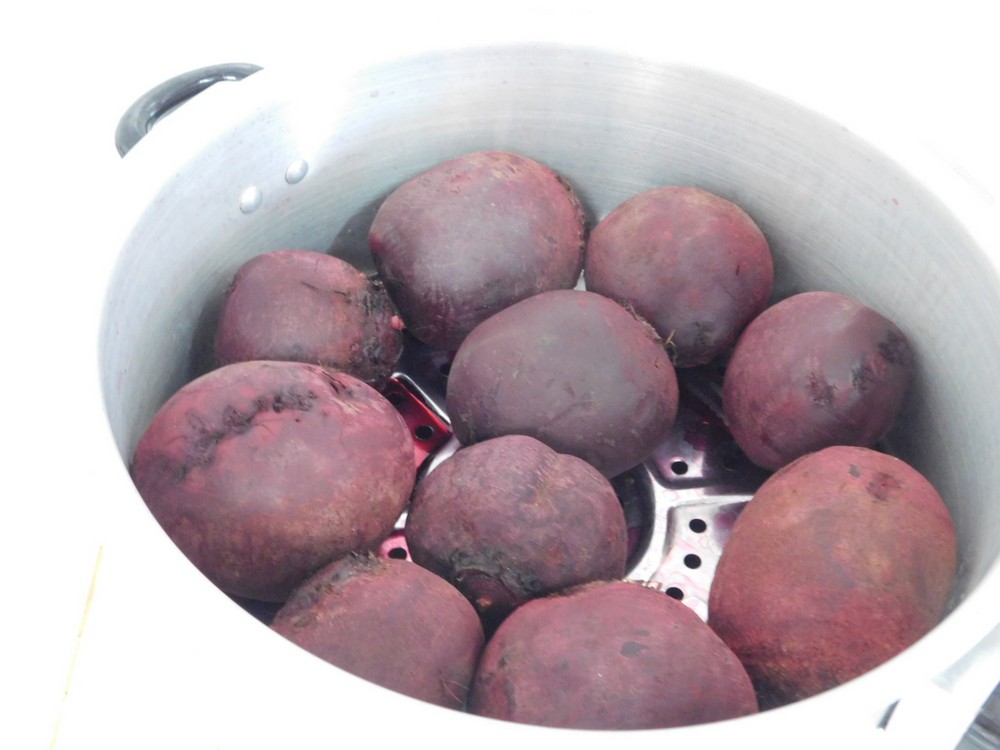
Fresh Beets (Pressure Cooker)
I really like beets but they can take some time just boiling on the stove top, so here is a way to reduce time, have more flavorful and nutritious beets, and reduce the amount of energy used, which for me is propane. I use a large 9 liter (9½ quart) stove top pressure cooker with a pressure of 80 kPa (12 psi) and a steamer tray as well. Follow all safety precautions for your pressure cooker.
Ingredients
- whole beets, 4-6, pot no more than ⅔ full
- 1½ cups water
Instructions
- The amount of water used is not increased with more beets, the main thing to keep in mind is do not fill the cooker more than ⅔ full.
- Wash the beets but do not peel them, if they have greens attached, cut them off about an inch from the beet. I buy beets at Tesco and have weighed them at 145 to 250 grams (5 to 9 ounces) each. These would be considered medium to large.
- Place the steamer tray in the cooker, add the water, and add the beets.
- Add the cover and lock in place, place weight on top. Bring up the pot on high heat until the jiggler (the weight) starts to move and vent pressure, then lower the temp to low or medium low to maintain the jiggler movement and pressure venting. Now start timing for 12 minutes. If using small beets, time for 8 minutes.
- When the time has passed, turn off the heat and move the pot to an unused burner and allow the pressure to release naturally.
- Open, remove beets (the beets should be able to be easily pierced with a fork).

- Allow to cool, then peel and slice or dice as desired for what ever dish you are adding them to or for a simple side dish.

Notes
Used in Recipes Listed on this Site:
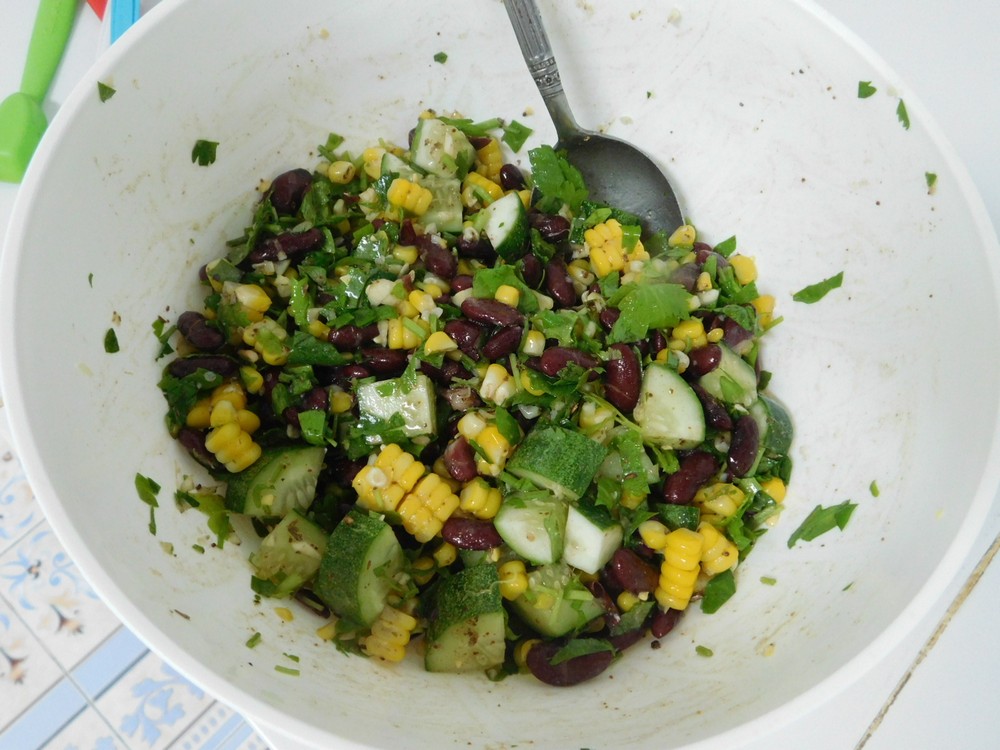
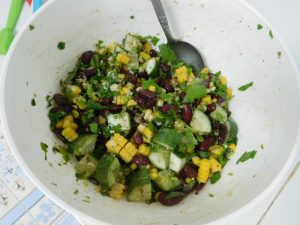
Kidney Bean Salad
Excellent salad if you like kidney beans, after I mixed I taste tested, perfect. When chilled, it is excellent. If one does not like that much cilantro, just cut back on that. To make this vegetarian/vegan simply leave out the cheese. Link to the Shortcut is listed in the Recipe Notes section.
Ingredients
For the Salad
- 1 can red Kidney beans, drained, rinsed, or 1½ cups you cooked, Shortcut.
- 1 can corn, drained, or 1½ cups fresh cooked or frozen
- ½ cucumber, diced, if small cucumber, use all of it
- 1 cup cilantro, chopped
- 2-3 spring onions, sliced, white and green
- ¾ cup Feta cheese, crumbled
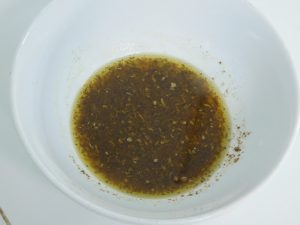
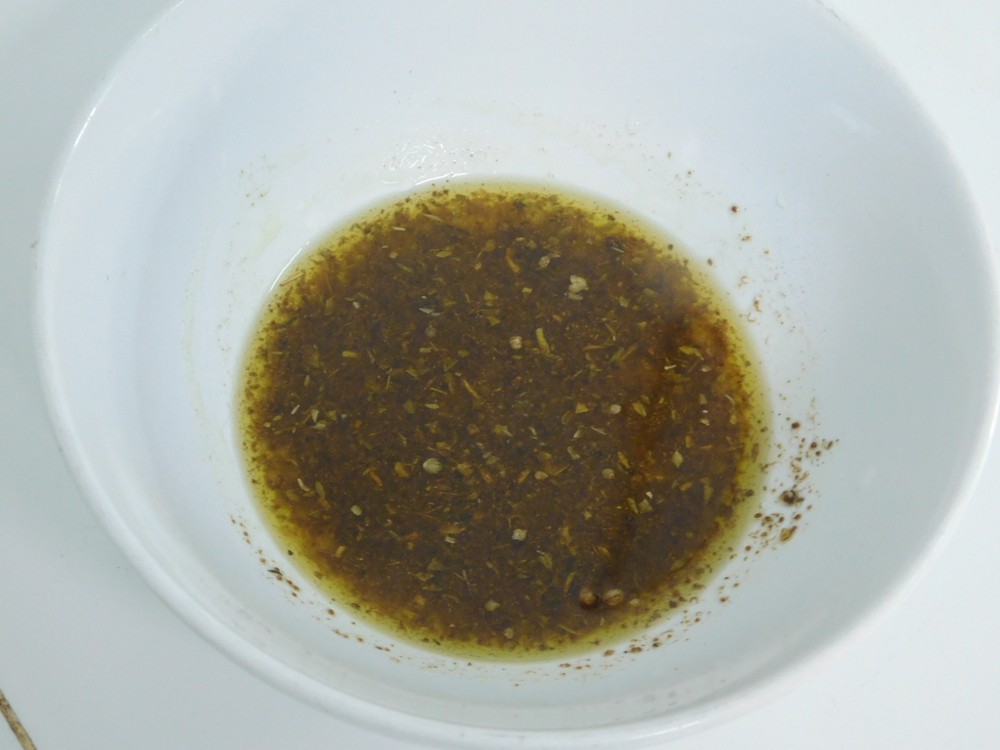
For the Dressing
- 1 tablespoon lime juice
- 2 tablespoons olive oil
- 1 clove garlic, minced
- 1-2 teaspoons ground cumin
- ½ teaspoon dried oregano
- salt and pepper, to taste
Instructions
- Add all the salad ingredients to a large mixing bowl and toss together.

- In a small bowl, add the dressing ingredients and whisk, taste and adjust as needed.
- Pour dressing over the salad and toss to coat. Place in the fridge for a few hours, serve as a side dish. This can be stored in the fridge for up to 5 days. (I chose to add the Feta cheese after this is chilled, that is why you do not see it in this.)

Notes
Shortcut: Kidney Beans (Pressure Cooker).
Variants: 1. Add halved cherry tomatoes. 2. Use black beans in place of red kidney beans. 3. For vegetarian or vegan, omit the cheese.