Archive for the ‘#1 Go-To Recipes’ Category
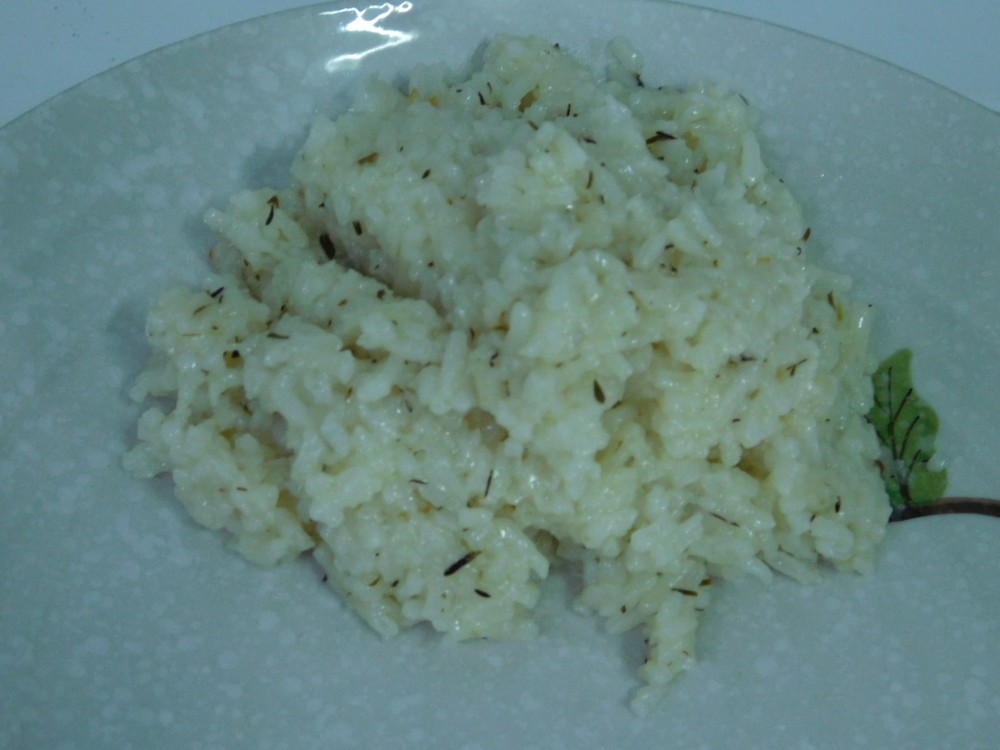
Lemon Thyme Rice (Rice Cooker)
Excellent seasoned rice! I use my basic 1 liter (1 quart) Cook and Warm rice cooker. Link to the Shortcut is listed in the Recipe Notes section.
Equipment
- Rice Cooker
Ingredients
- 1 tablespoon butter
- 1 cup dry Jasmine rice, rinsed and drained
- 1½ cups chicken broth, Shortcut
- 1 tablespoon lemon or lime juice
- 1 teaspoon dried thyme
- ⅛ teaspoon lemon pepper
Instructions
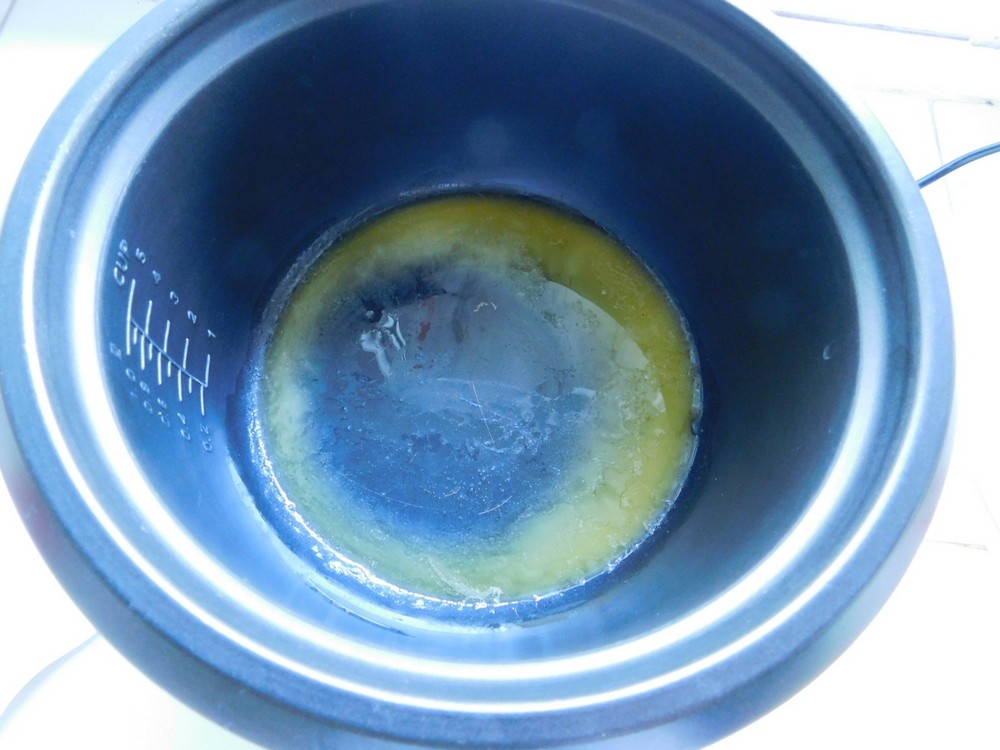
- Turn your rice cooker to the Cook setting and melt the butter.
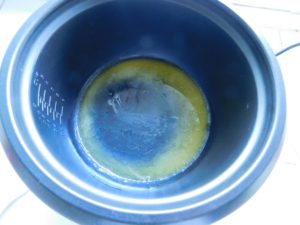
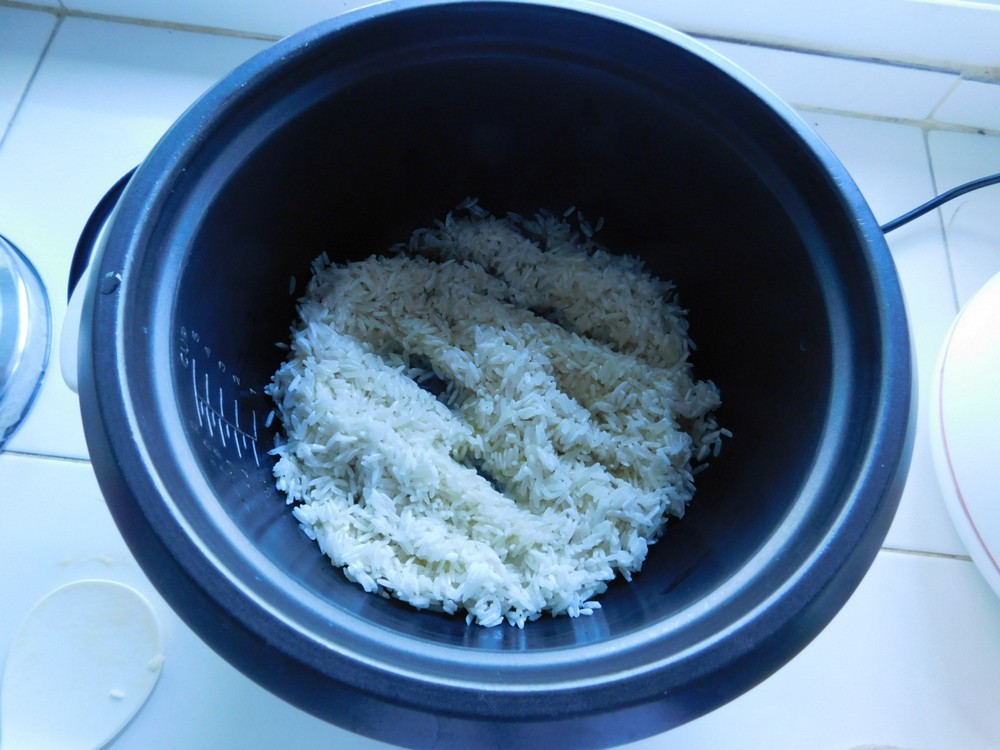
- When the butter is melted, stir in the rinsed and drained rice and coat with the butter, cook, stirring often, to lightly brown the rice, takes just a few minutes.

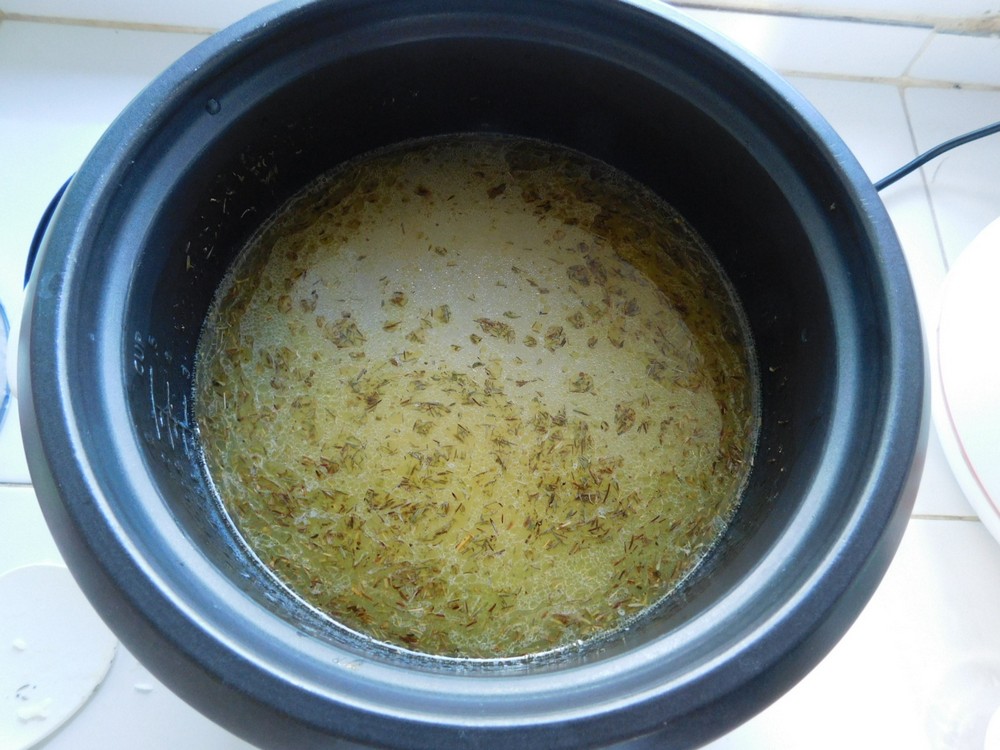
- Stir in the broth, lemon juice, thyme, and lemon pepper.

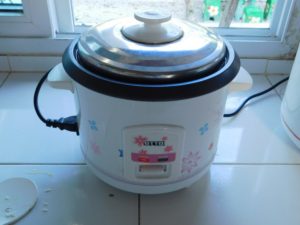
- Place the cover on the cooker and allow the Cook cycle to complete as indicated by it switching to the Warm setting.
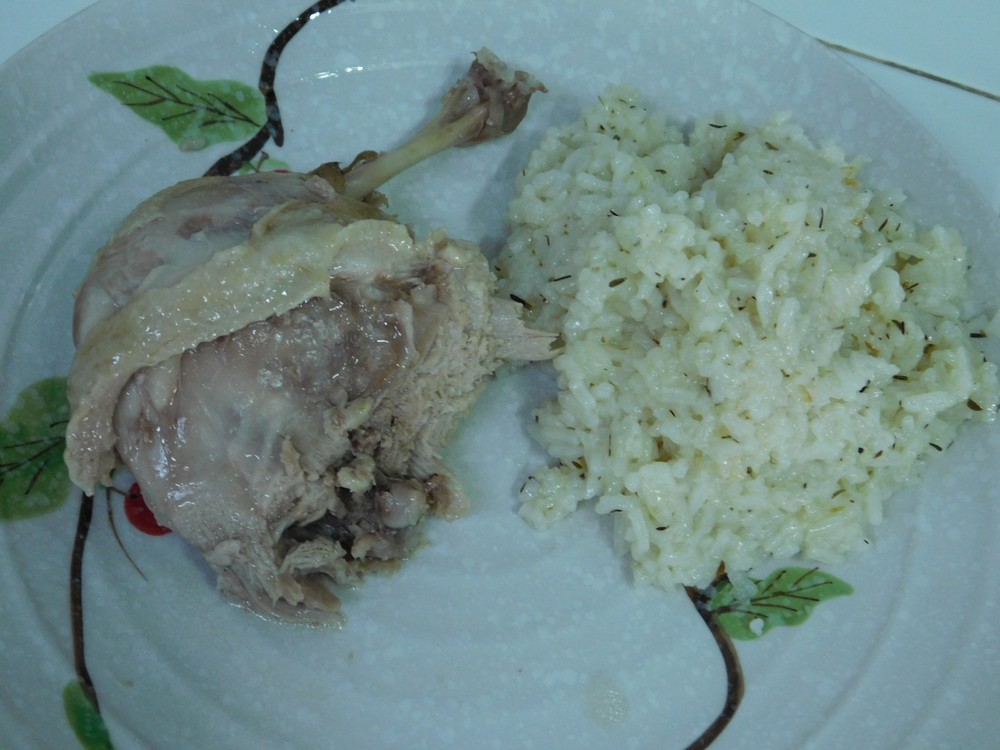
- Fluff with a rice paddle.
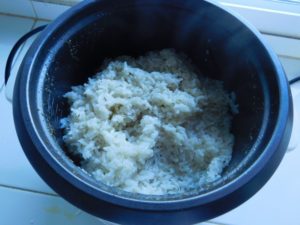
- Serve as a side with any dish. Enjoy.


Notes
Shortcut: Chicken Broth (Pressure Cooker).
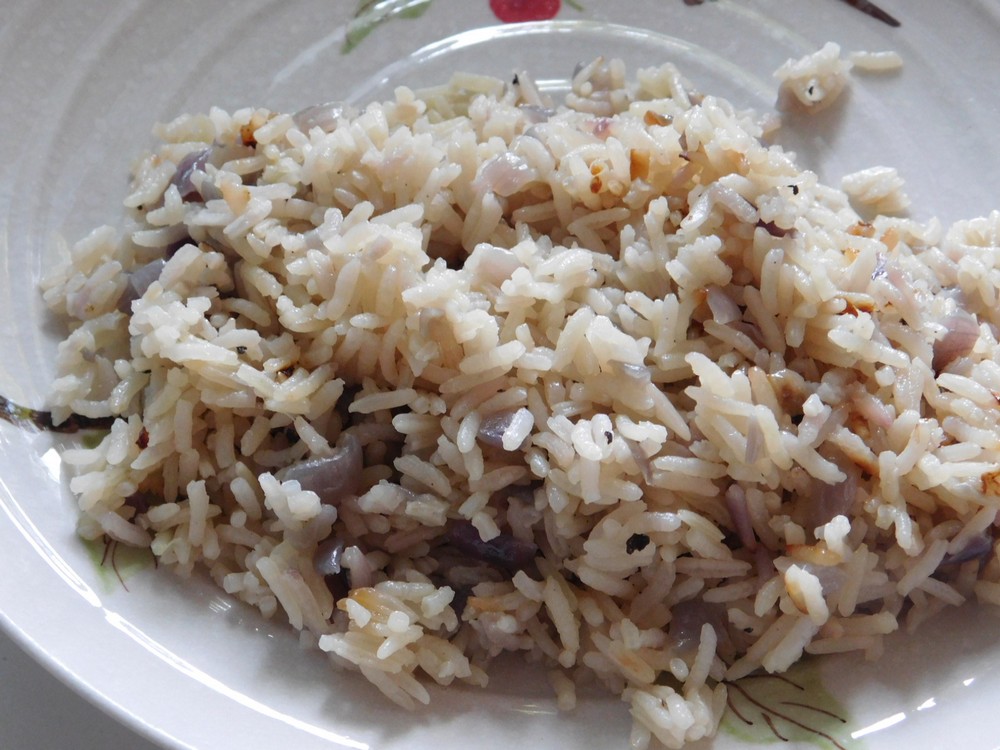
Onion Rice (Rice Cooker)
I made this on 27 Apr 2022, and it is so good, my wife and I enjoyed nearly the whole cooker! Easy and flavorful rice. I used my basic 1 liter (1 quart) Cook and Warm rice cooker. Link to the Shortcut is listed in the Recipe Notes section.
Equipment
- Rice Cooker
Ingredients
- 1 cup dry Jasmine rice
- 2 cups chicken broth, fresh or from powder, Shortcut
- 1 tablespoon olive oil, or vegetable oil
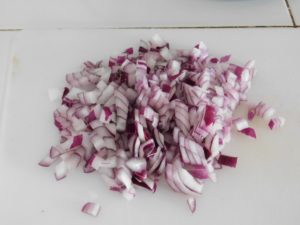
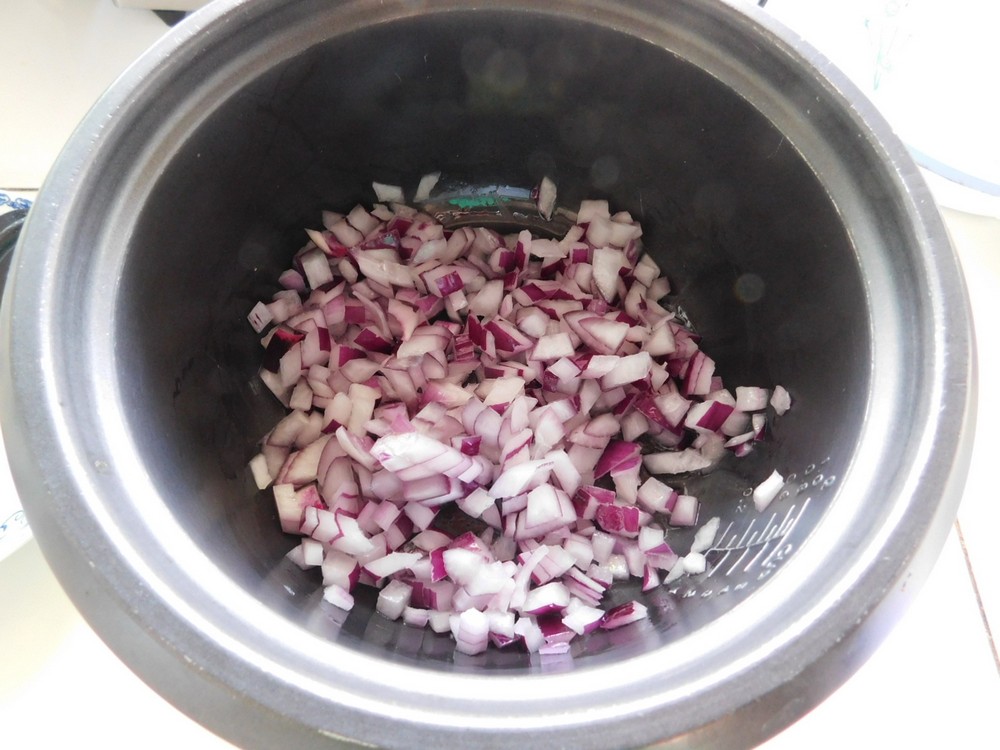
- 1 large red onion, diced, use two if they are small
- ¼ teaspoon black pepper
Instructions
- Onion is prepped. I used two small onions as well.
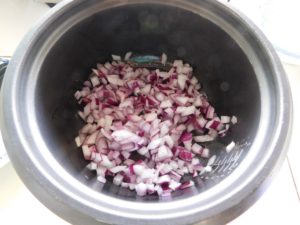
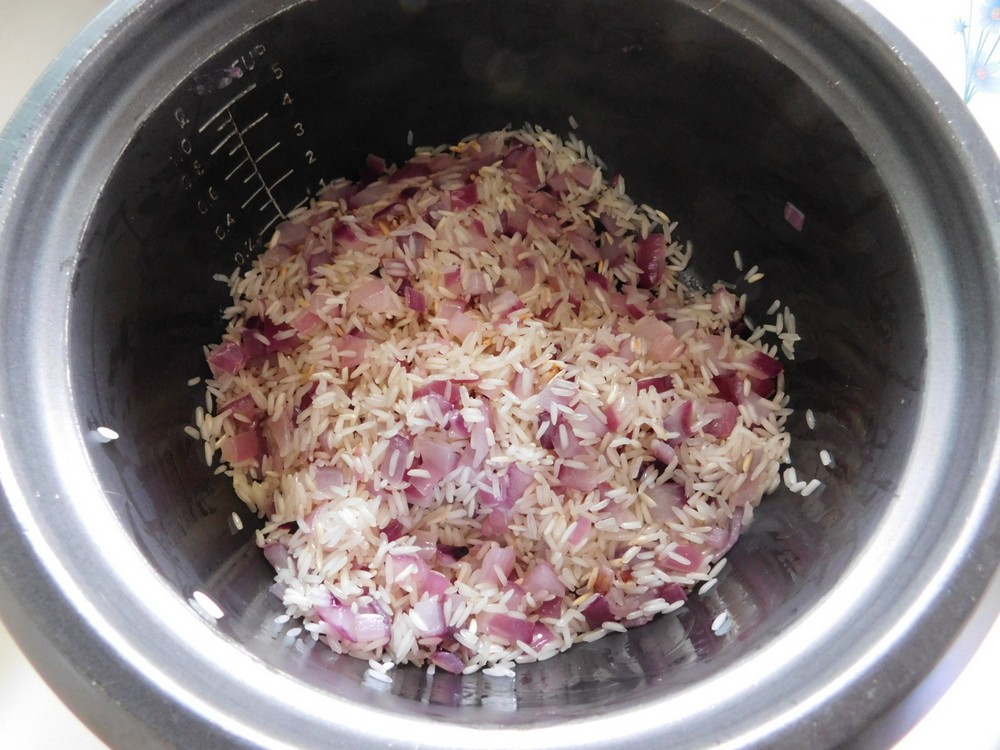
- Add the oil to your rice cooker and set to the Cook setting to heat the oil, when hot, add the onion and cook, stirring often, until almost softened.
- Add the rice and stir to coat the rice with oil. Cook, stirring often, until the onion is tender and the rice is just starting to lightly brown.
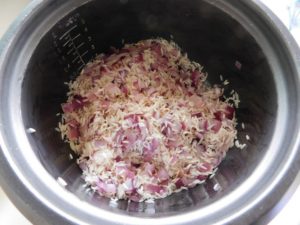
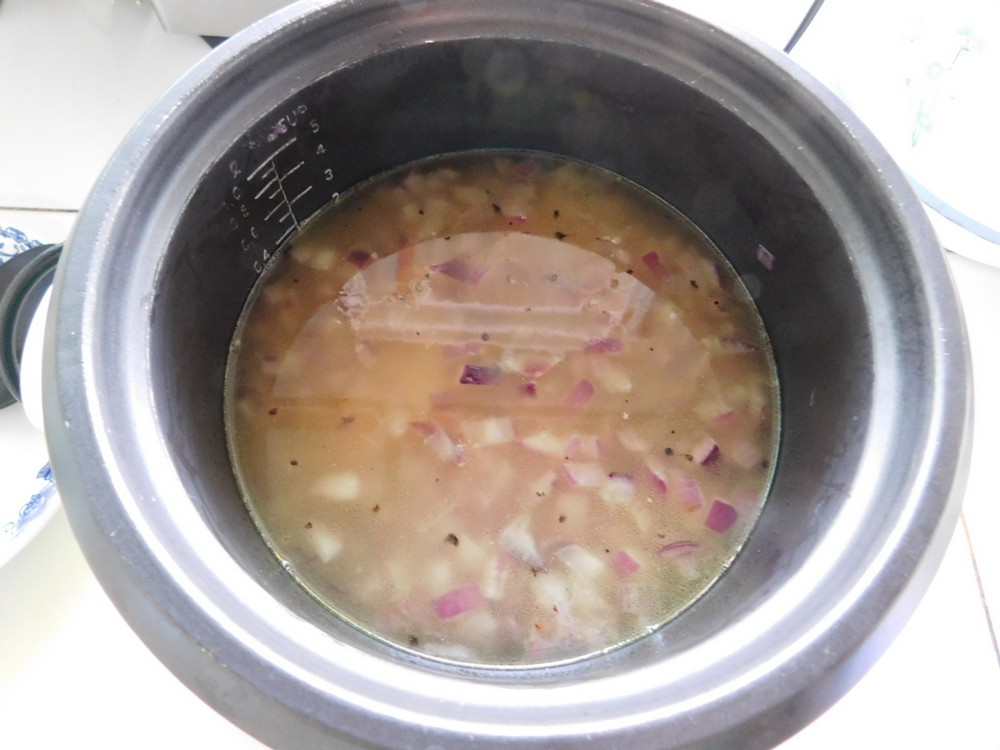
- Season with the pepper then stir in the chicken broth. Cover and let the Cook cycle complete, as indicated by the cooker switching to Warm setting.

- Remove the cover and fluff with a rice paddle.
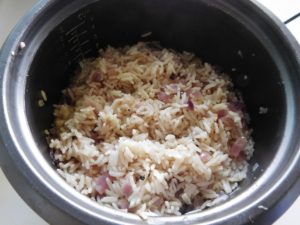
- Serve as a side with any main dish. Enjoy.


Notes
Shortcut: Chicken Broth (Pressure Cooker).
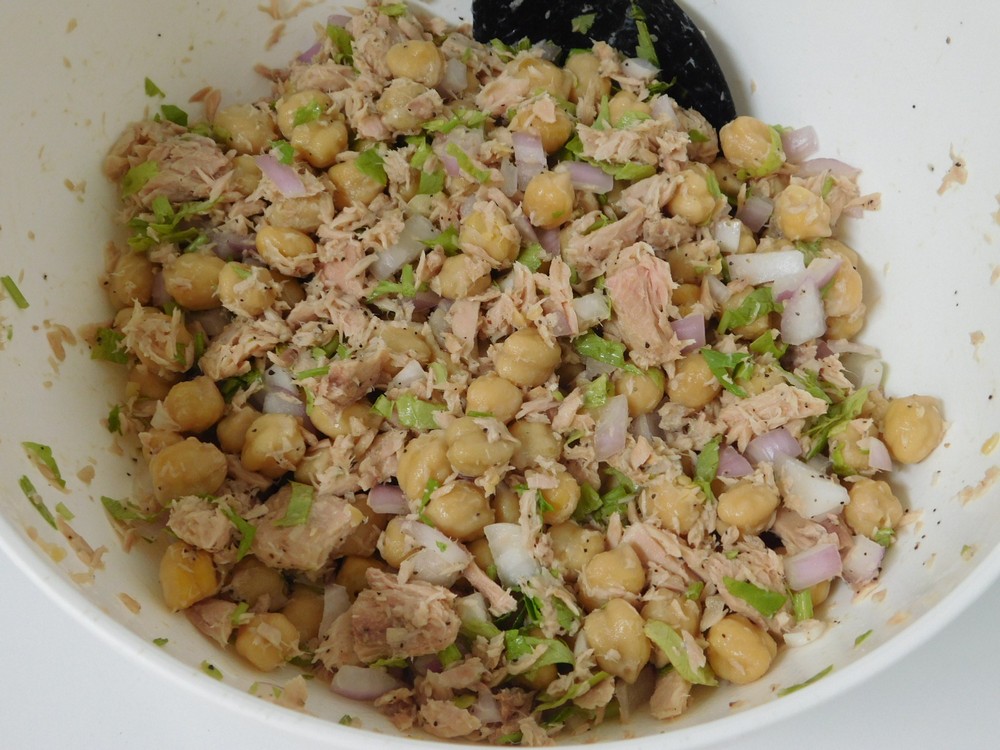
White Bean & Tuna Salad
This comes from a good friend and is delicious. Common ingredients and takes just minutes to put together. Links to the Shortcuts are listed in the Notes section.
Ingredients
- 1 cup red onion, diced
- 2 tablespoons lime juice, and as needed, plus the zest from 1-2 limes
- 2 cans tuna in olive oil, see Step 1, (Shortcut)
- 2 cans Great Northern Beans, 15 oz cans, or 4 cups fresh cooked, Shortcut
- ½ cup fresh parsley, chopped, loosely packed
- 1-2 dashes tabasco sauce, or a pinch of red pepper flakes, optional
- ½ teaspoon black pepper
- salt, as desired, to taste
- olive oil, as needed
Instructions
- For the tuna, if using canned in olive oil, 185 grams each can (5-6 oz each can) or 250 grams fresh cooked.
- Dice the onion and splash just a bit of the lime juice on them and toss together, this will cut back on some of the strong flavor of the onion. Set aside.
- Drain the cans of tuna, or drain fresh cooked if needed. Add the tuna to a large mixing bowl, add drained beans, and add remaining ingredients. (I used chickpeas this time that I cooked in a pressure cooker.)
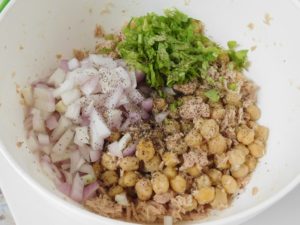
- Gently mix together.
- Taste, if dry, mix in some olive oil to get the desired consistency. Season with salt, Tabasco or red pepper flakes as desired.

- Cover tightly and place in the fridge to chill and to allow the flavors to blend.
- Serve as a light meal for lunch or dinner or as a side dish. Enjoy.
Notes
Low cost per serving.
Shortcuts: Great Northern Beans (Pressure Cooker), Fresh Tuna, Chickpeas (Pressure Cooker).
Variant: 1. Use chickpeas in place if Great Northern beans.
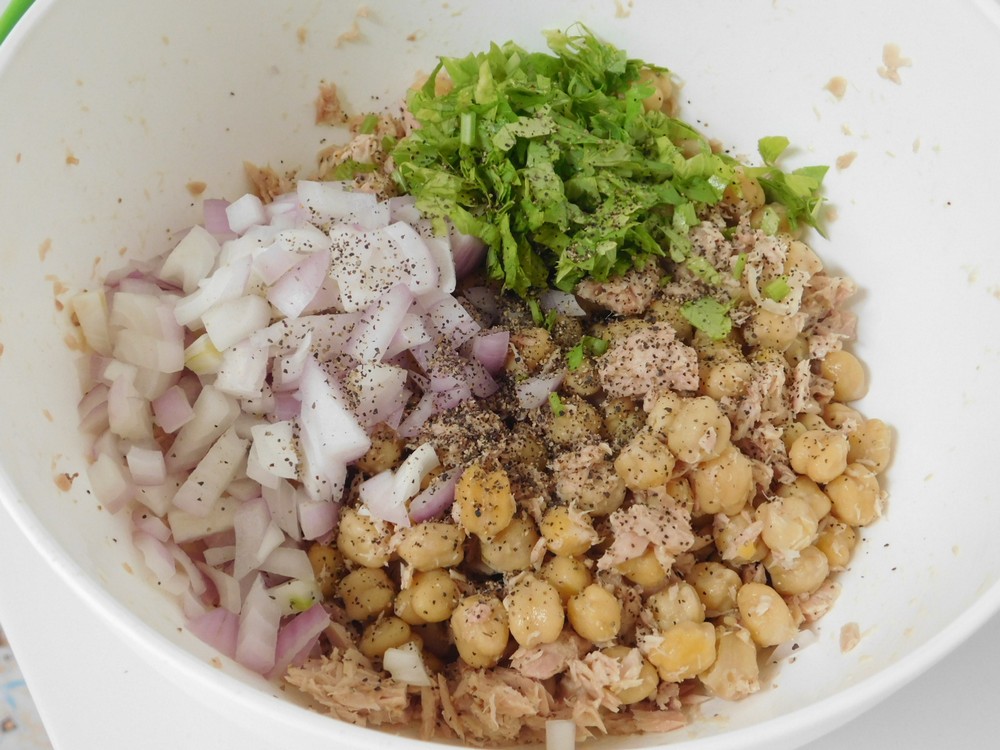
Black-eyed Peas (Pressure Cooker)
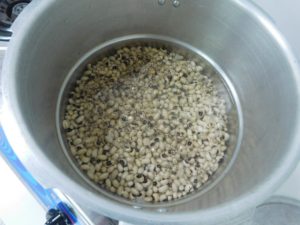
I made these on 16 Jan 2019 and I will say these are good beans! I used my 9 liter (9½ quart) stove top pressure cooker with 12 psi (80 kPa) pressure for these. Follow all safety precautions for your model of pressure cooker.
Equipment
- Pressure Cooker
Ingredients
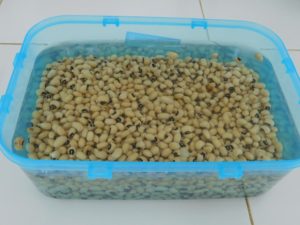
- 500 grams dry black-eyed peas, soaked at least 6 hours, (1 lb)
- 2 tablespoons cooking oil, very important
- 8 cups water
- salt and pepper, to taste
Instructions
- Rinse the beans and place in a large container, cover with 1-2 inches of water. Leave on the counter to soak for at least 6 hours. If soaking overnight, place in the fridge to prevent the beans from fermenting.
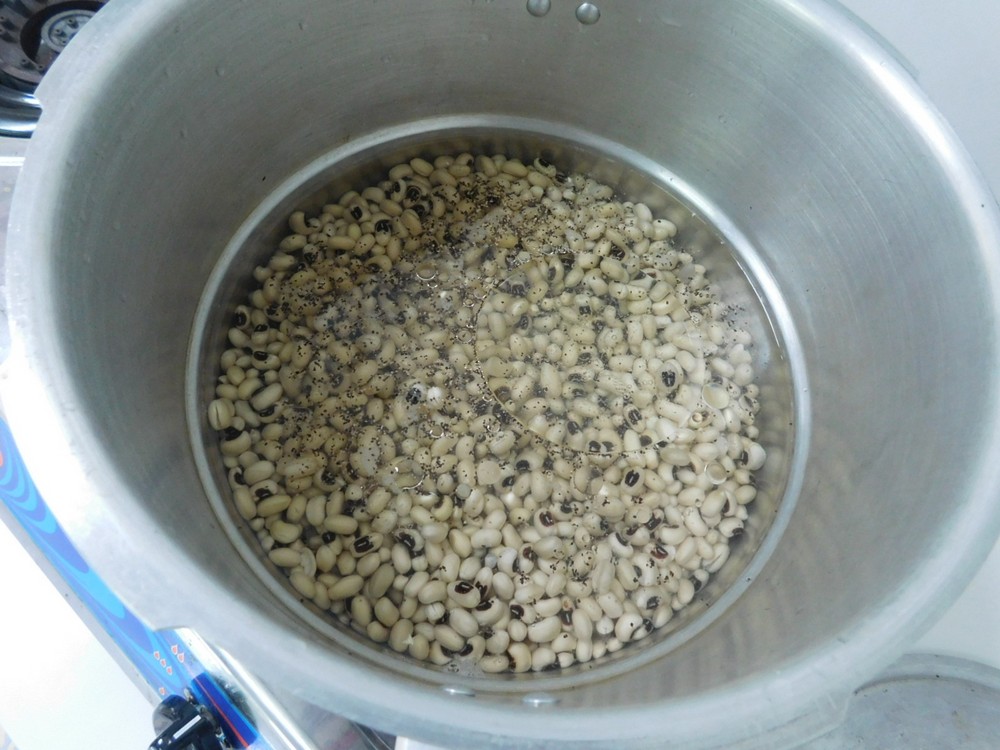
- When you are ready to start cooking, drain and rinse the soaked beans. Place the beans, water, cooking oil, and salt and pepper as desired to your pressure cooker.
- Place the lid on the pressure cooker, add the weight (jiggler). Turn the heat up to high. When the weight starts to move and release pressure, turn the heat to low or medium in order to maintain the jiggler moving and venting pressure (indicating you have full pressure.) Set your timer for 5 minutes.
- When 5 minutes have passed, turn off the heat, and carefully move the pressure cooker to an unused burner and allow a natural release of pressure, basically, just let the pot sit there until you have indication of zero pressure, 15-20 minutes.
- When the indication is zero pressure, pull off the weight (jiggler), then remove the lid. Drain the beans and use in any recipe calling for cooked beans. Or serve as is as a side dish. These beans are very tender. This bean broth is NOT recommended to save and use, I have tasted this broth, not what I would say is usable.


Notes
Used in Recipes Listed on this Site:
- Best-Ever Beans & Sausage, made it, GO-TO recipe.

Chicken Tikka Masala (Pressure Cooker)
This is an excellent pressure cooker chicken recipe! Very tasty! I made this on 22 Jan 2022 and the family loved this, this will be a regular now. I used my 9 liter (9½ quart) stove top pressure cooker with a pressure of 12 psi (80 kPa), so this will work as written with a electric pressure cooker. Links to the Shortcuts are listed in the Notes section.
Equipment
- Pressure Cooker
Ingredients
For the Marinade
- 1 kilo chicken breasts, boneless, skinless, (2 lb)
- 2 cups plain yogurt
- 1 tablespoon garam masala, Shortcut
- 1 tablespoon lemon or lime juice
- ½ teaspoon cayenne pepper
- ⅛ teaspoon ground ginger
For the Sauce
- 2 cups tomato sauce, Shortcut
- 4 cloves garlic, minced
- 1½ tablespoons garam masala, Shortcut
- 1 teaspoon paprika
- ½ teaspoon ground turmeric
- ½ teaspoon salt
- 1 cup whipping cream
Instructions
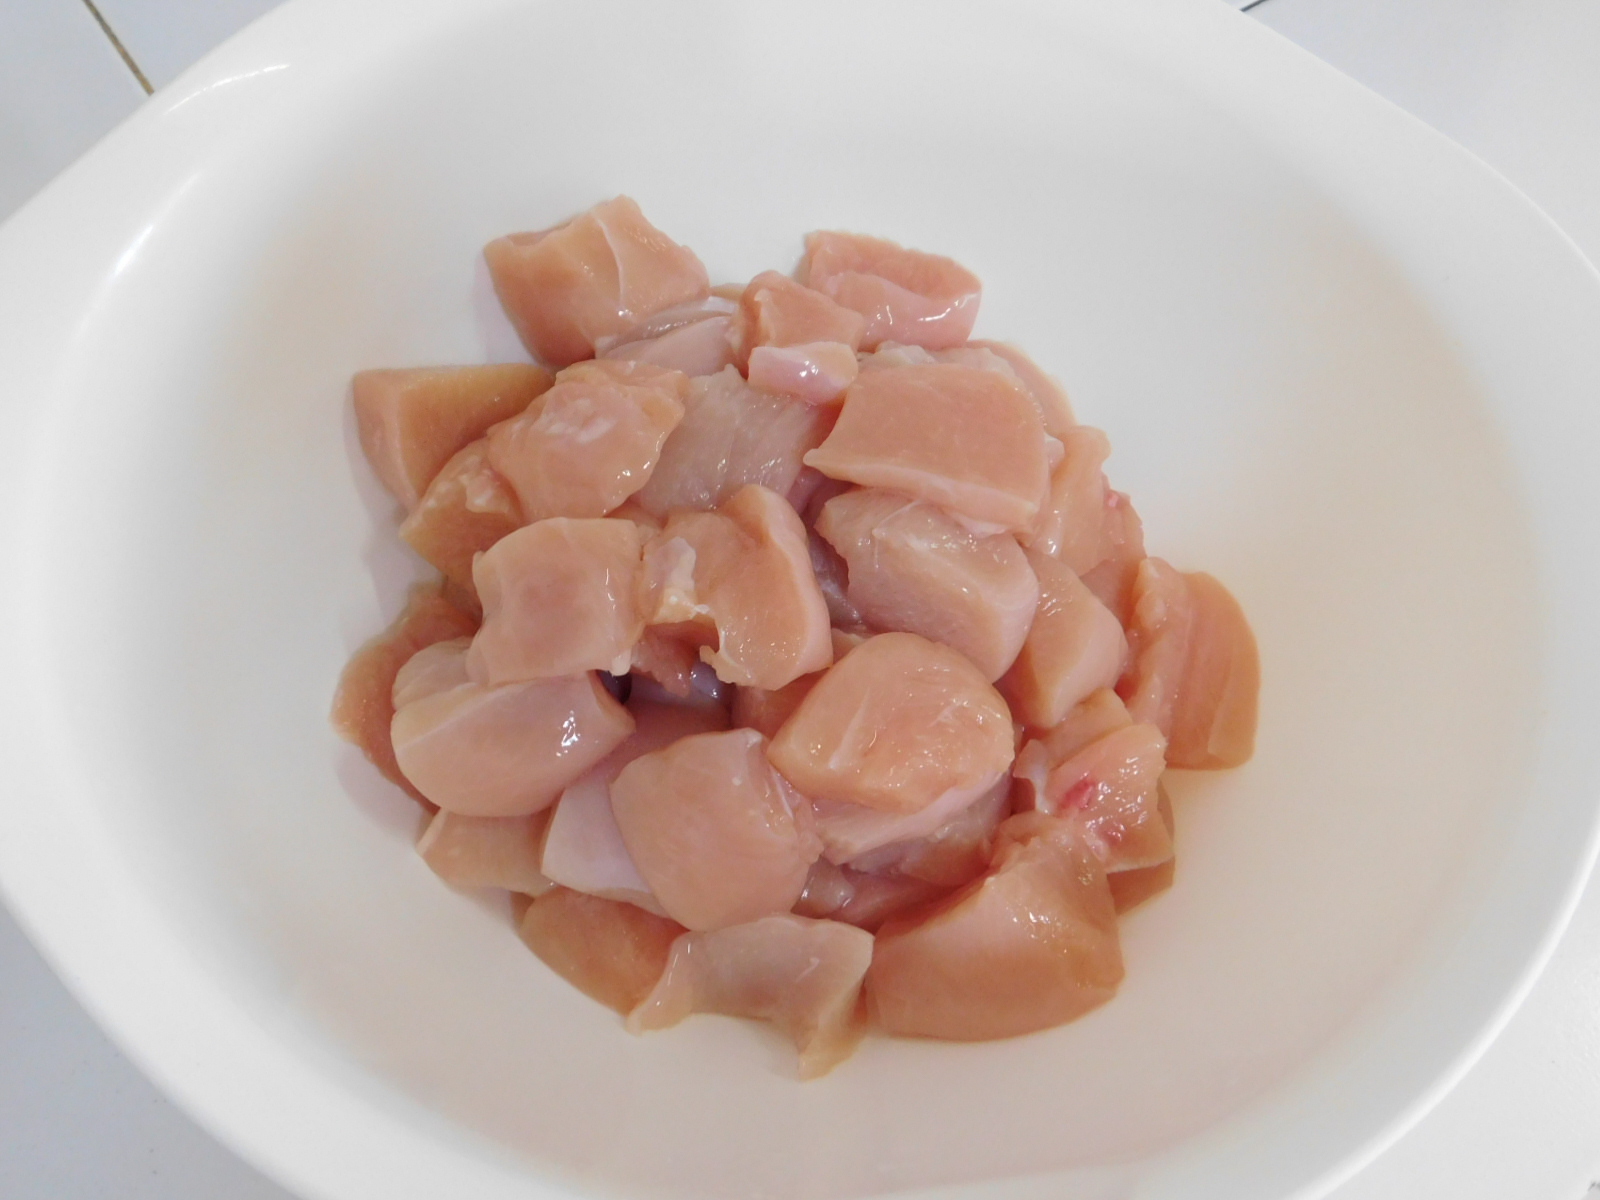
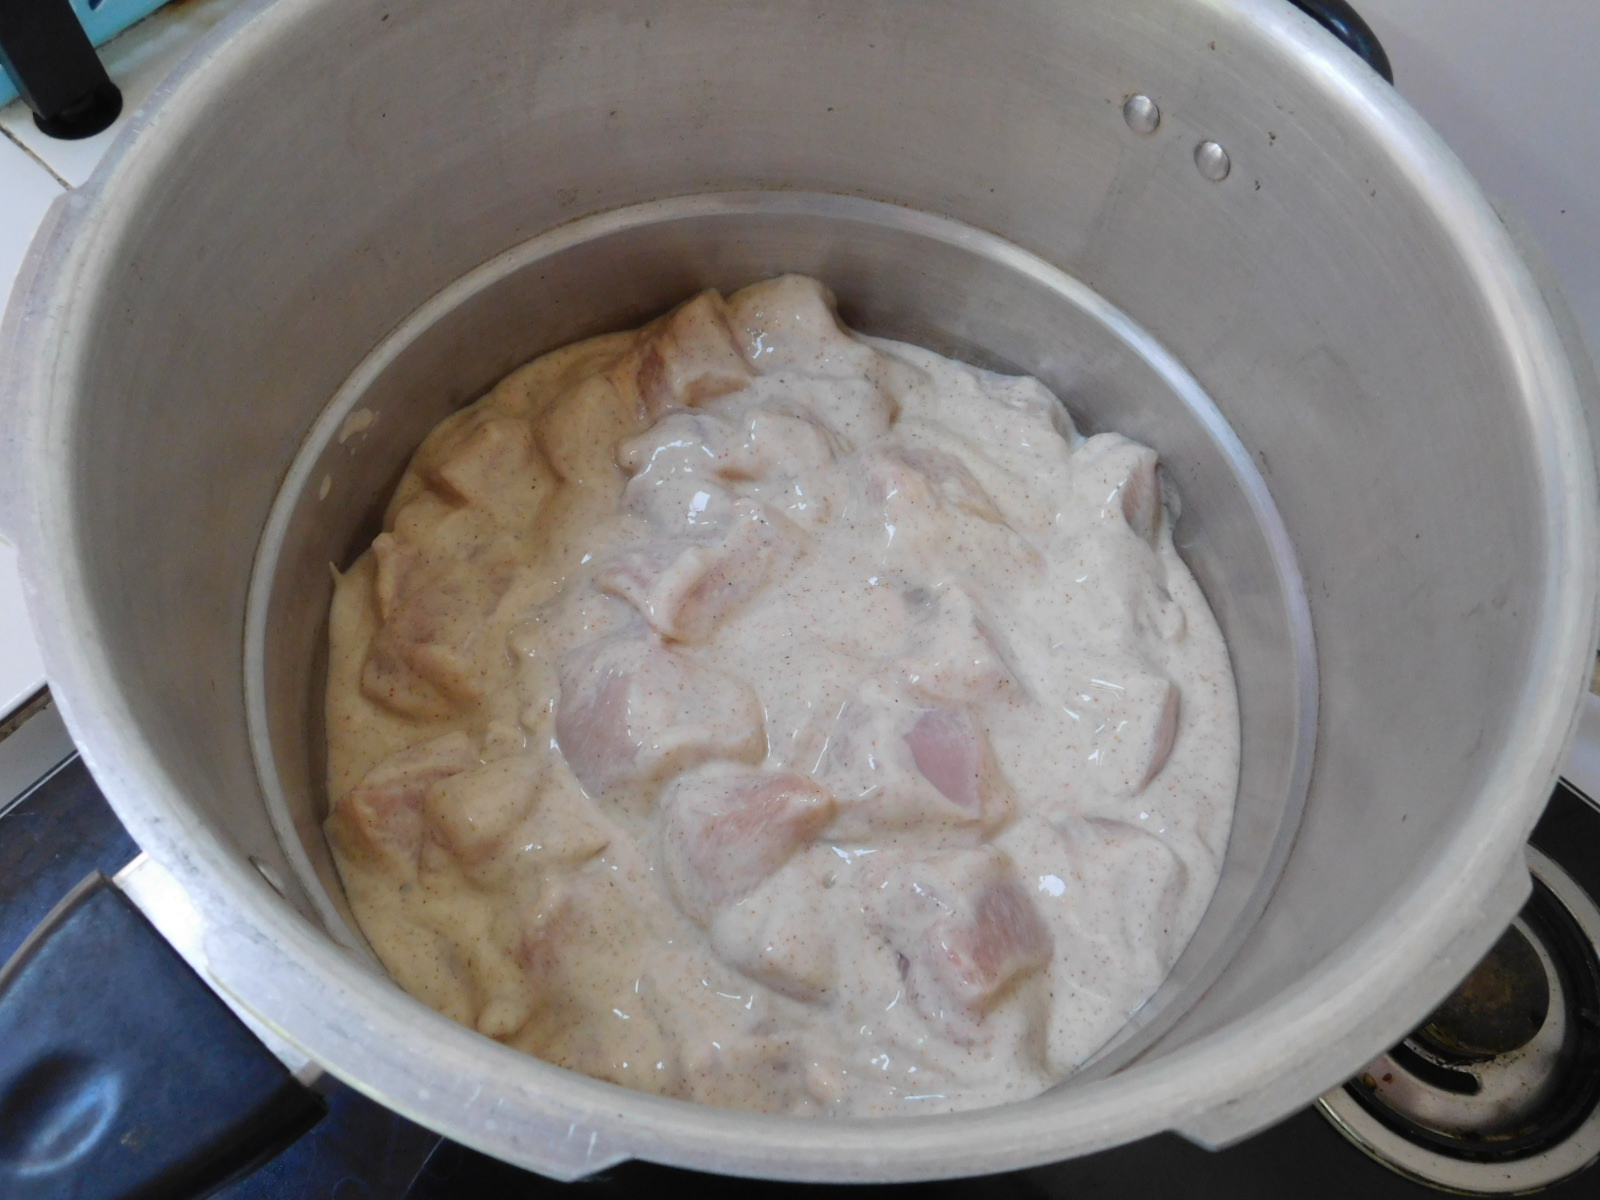
- Rinse the chicken and cut into 1½ to 2 inch pieces, place in a mixing bowl.

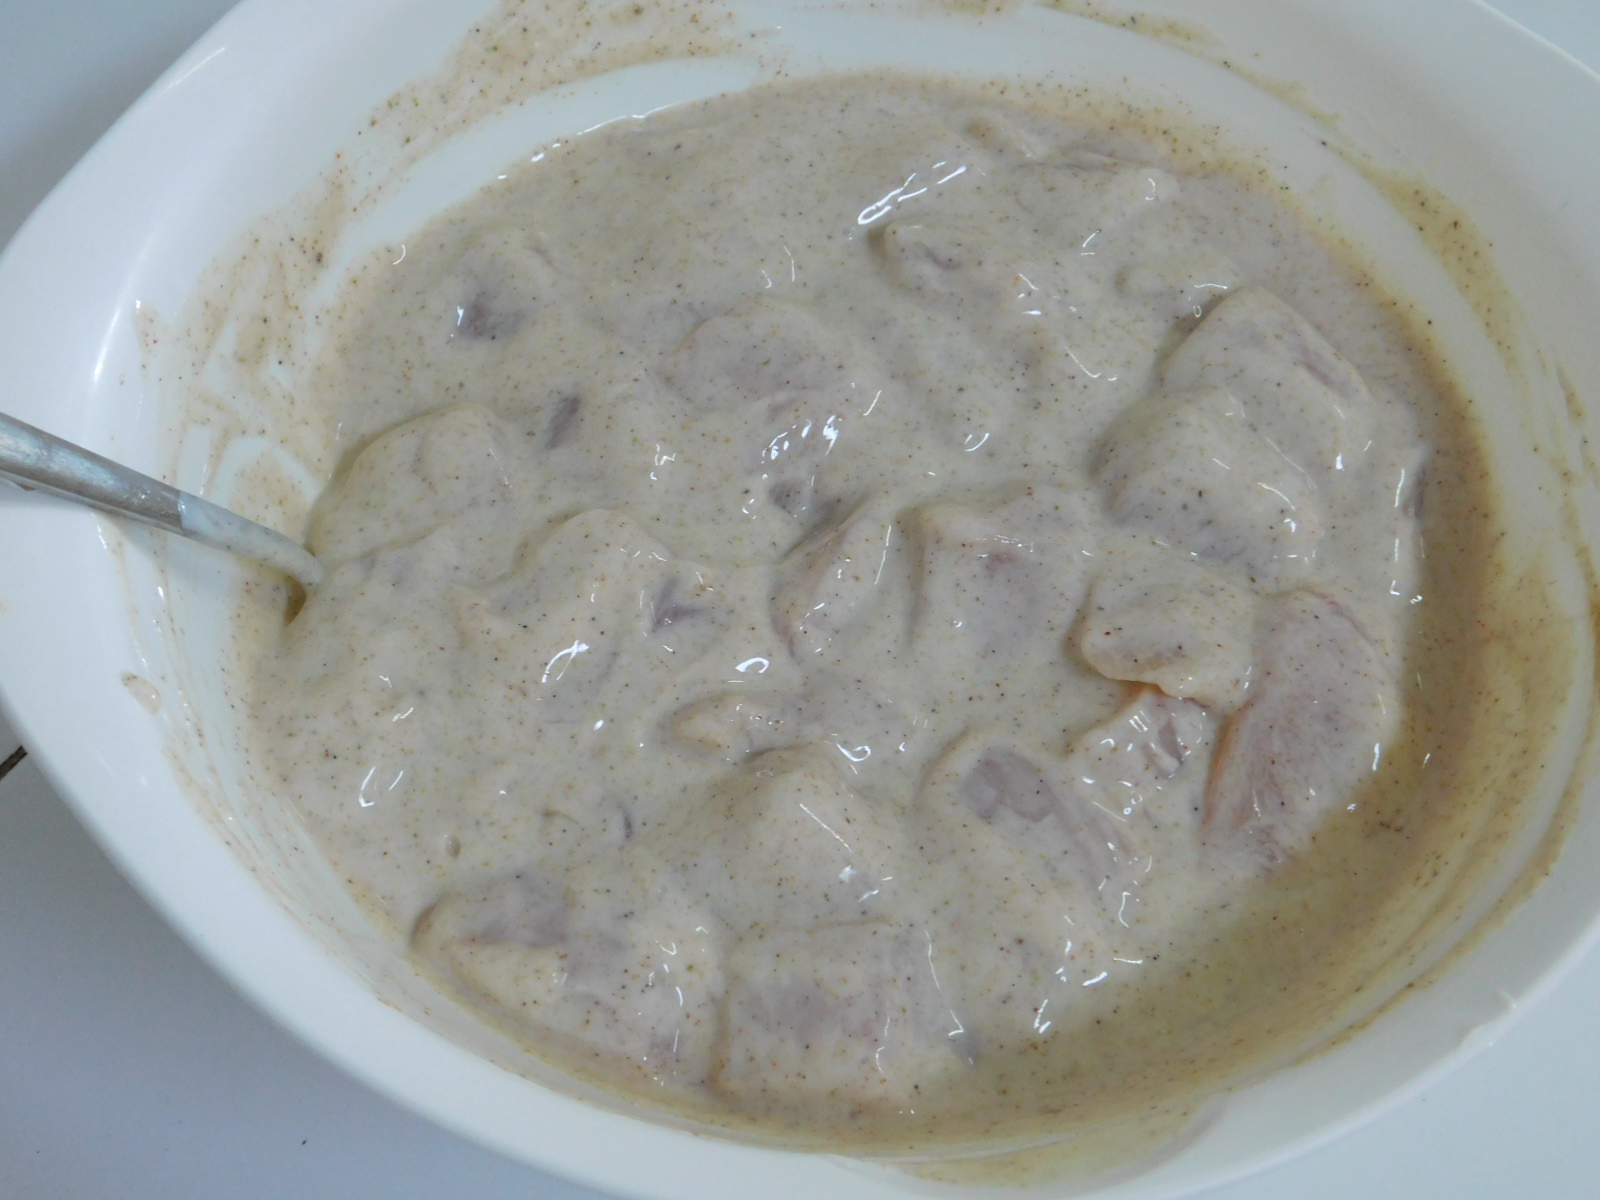
- To the mixing bowl, add the remaining Marinade ingredients.
- Mix into the chicken. Cover and place in the fridge to marinate for 2 hours.

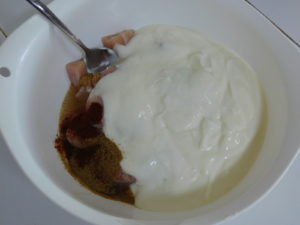
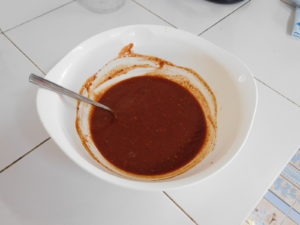
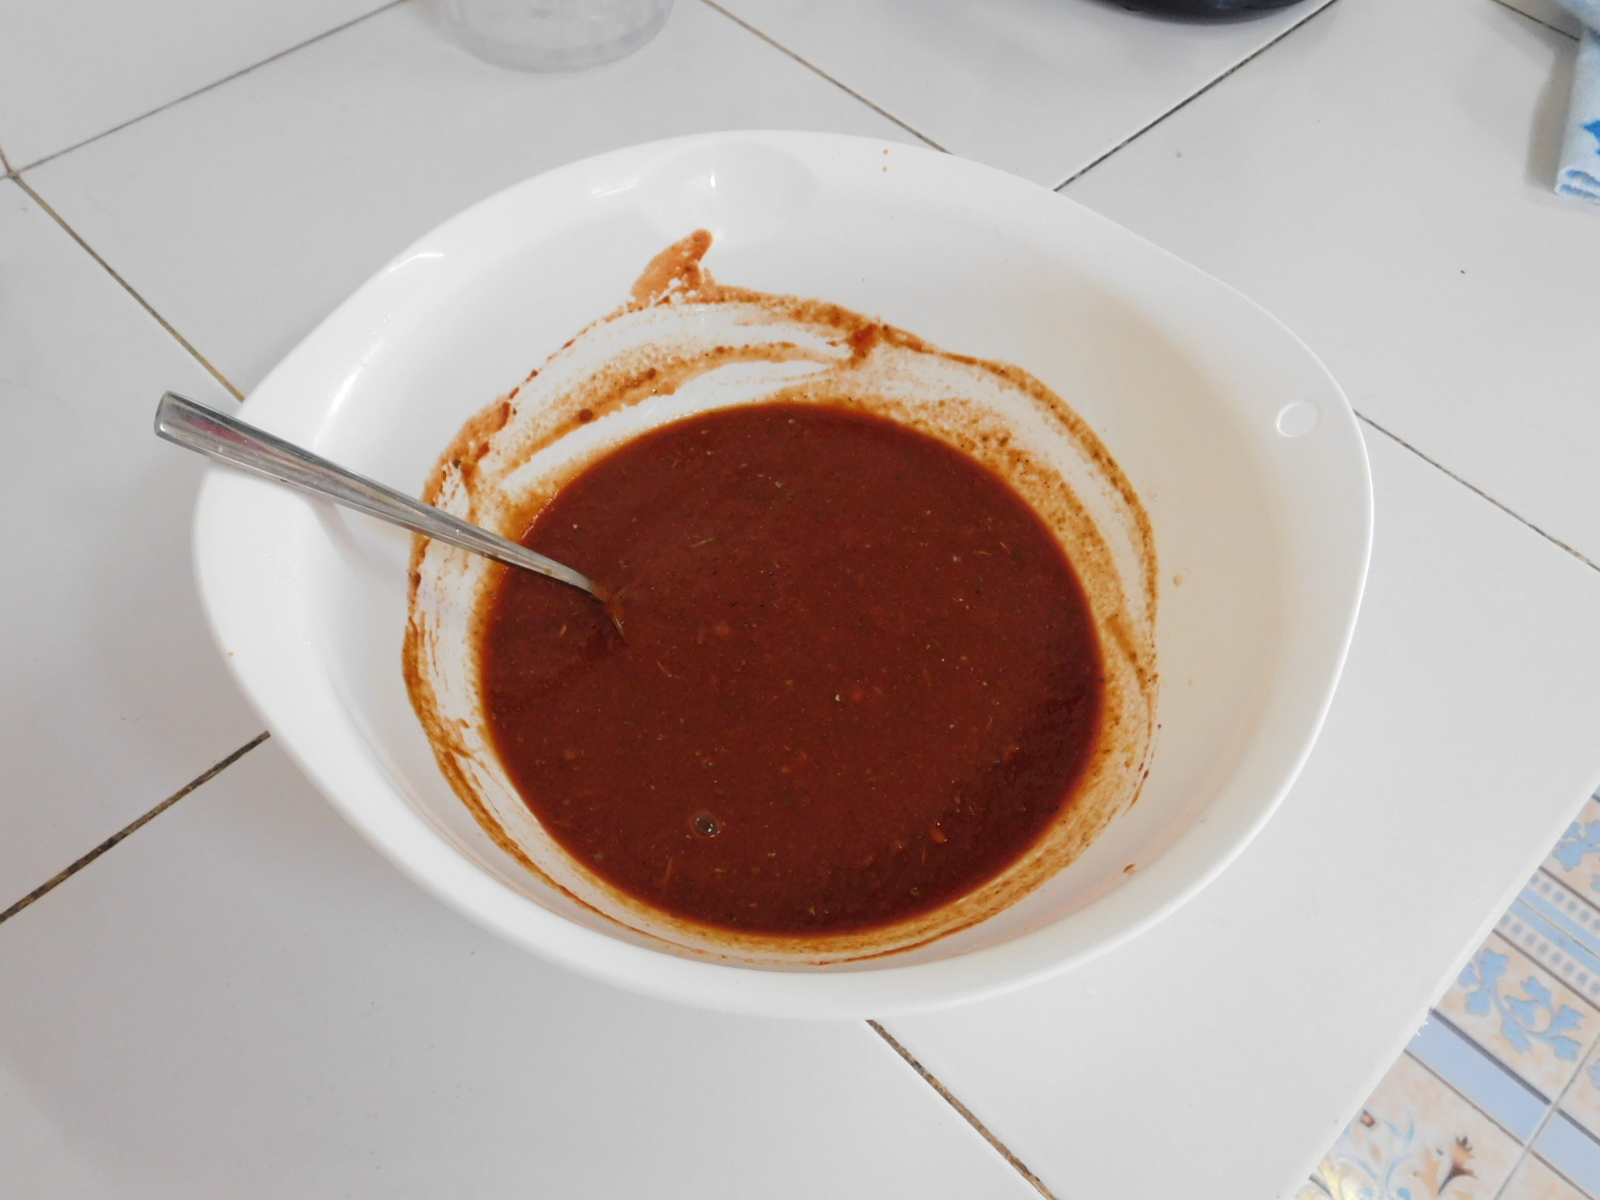
- In another mixing bowl, add all of the sauce ingredients, except the whipping cream, mix until well combined.
- When you are ready to cook, add the chicken and marinade to your stove top pressure cooker, NO LID at this point. Turn on the heat to medium or medium low and for about 5 minutes, stirring often.

- Add all the sauce mixture to the pressure cooker and stir to mix in. (And I missed taking this photo.)
- Once all mixed, place the lid on the pressure cooker and lock, turn heat to high and place the weight (jiggler) on the lid.
- When the jiggler starts to vent pressure, indicating full pressure, reduce heat to low or medium low in order to keep the jiggler just moving and venting pressure. Set your timer for 4 minutes.
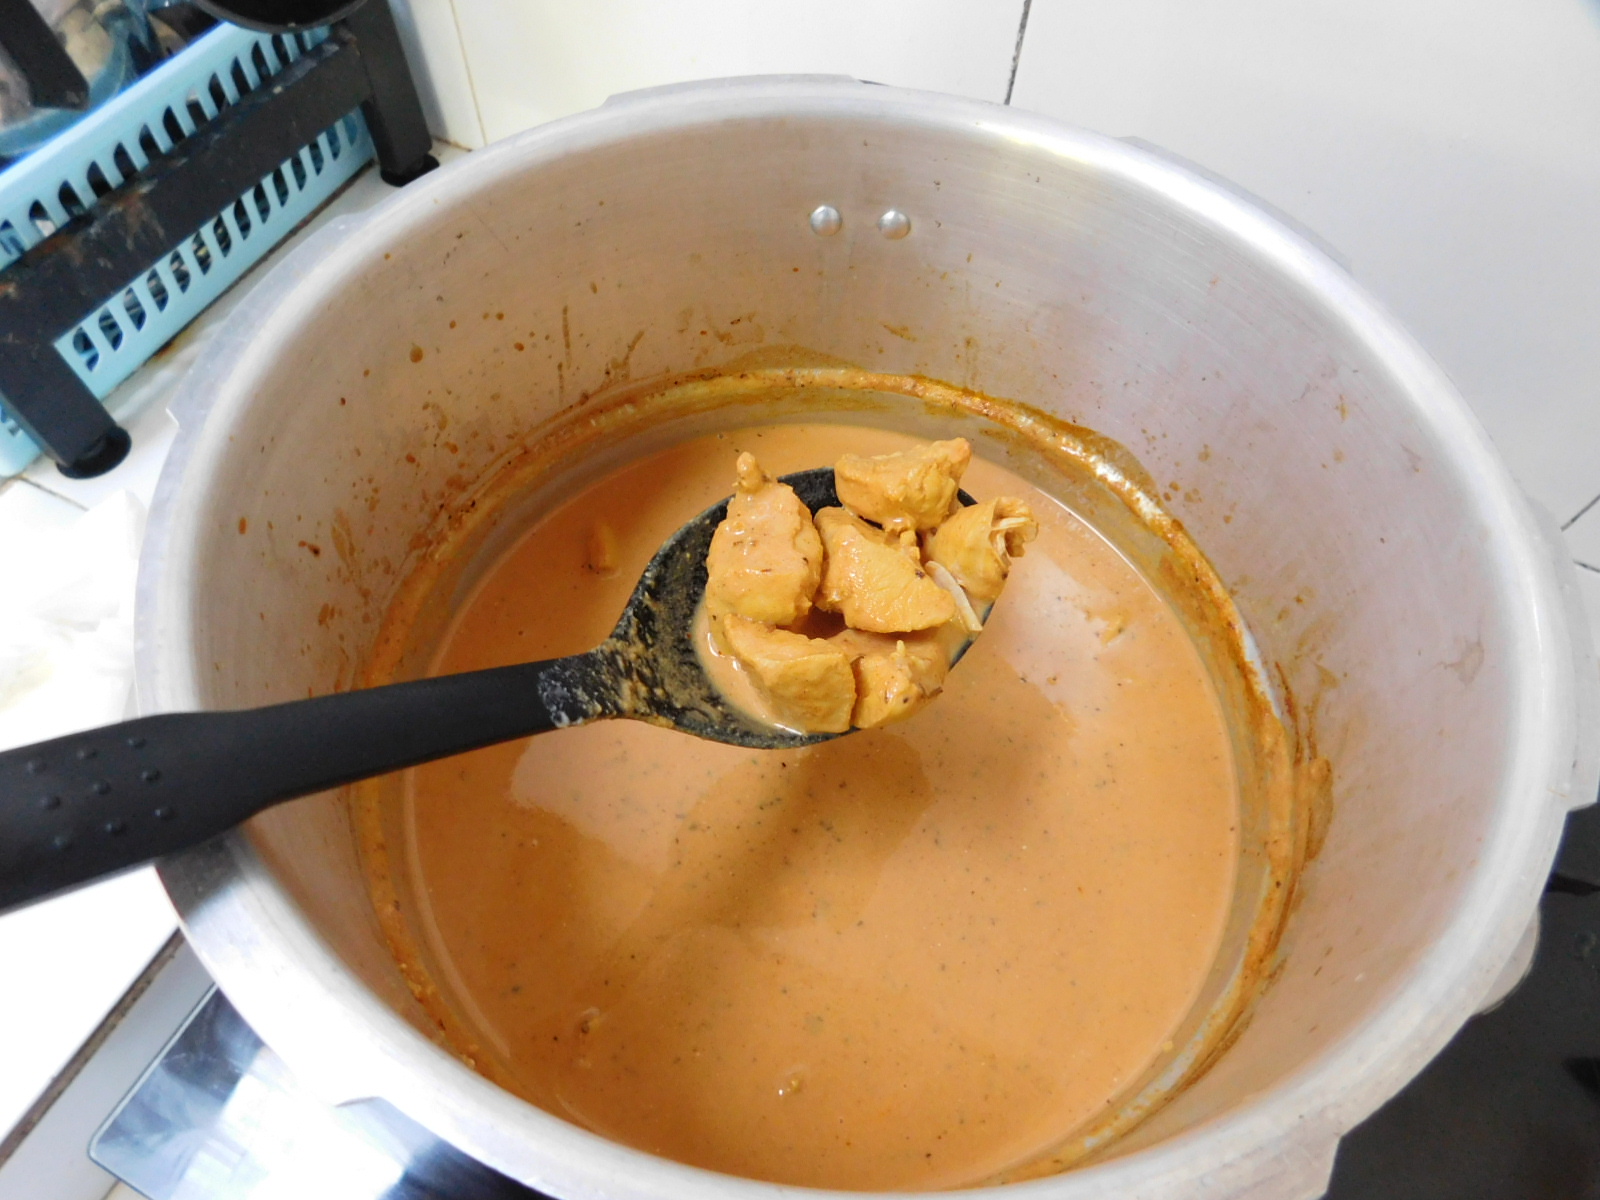
- When 4 minutes have passed, turn off the heat and move the cooker to an unused burner to release pressure naturally, meaning just let the cooker set with no interaction from you.
- When the cooker indicates zero pressure inside, remove the lid, and place the cooker back on low heat. Stir in the cream and allow to simmer until sauce is thickened, about 5 minutes. (This photo is just showing the chicken right after I removed the lid, before stirring in the cream.)

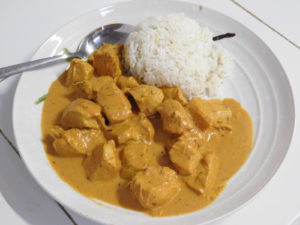
- Serve with rice, as there is plenty of sauce.

Notes
Homemade Chocolate Cake
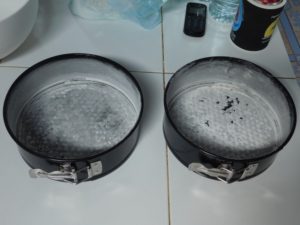
This uses the Homemade Chocolate Cake Mix here on this site. This will make two 8 inch round cakes, for a layered cake or one 9x13 flat cake. Link to the Shortcut is listed in the Recipe Notes section.
Ingredients
- 1 cake mix, (Shortcut)
- 1 cup milk, room temperature
- 2 eggs, room temperature
- 1/2 cup vegetable oil
- 1 cup water
- 2 teaspoons vanilla extract
Instructions
- Preheat your oven to 180 C (350 F). Grease and flour two 8 inch round cake pans. You really want the pans prepped and ready to go as well as the heated oven.
- Add the dry cake mix to a mixing bowl and whisk it well to ensure you have no lumps or use a sifter if you have one. Lump free dry mix is important for a nice cake.
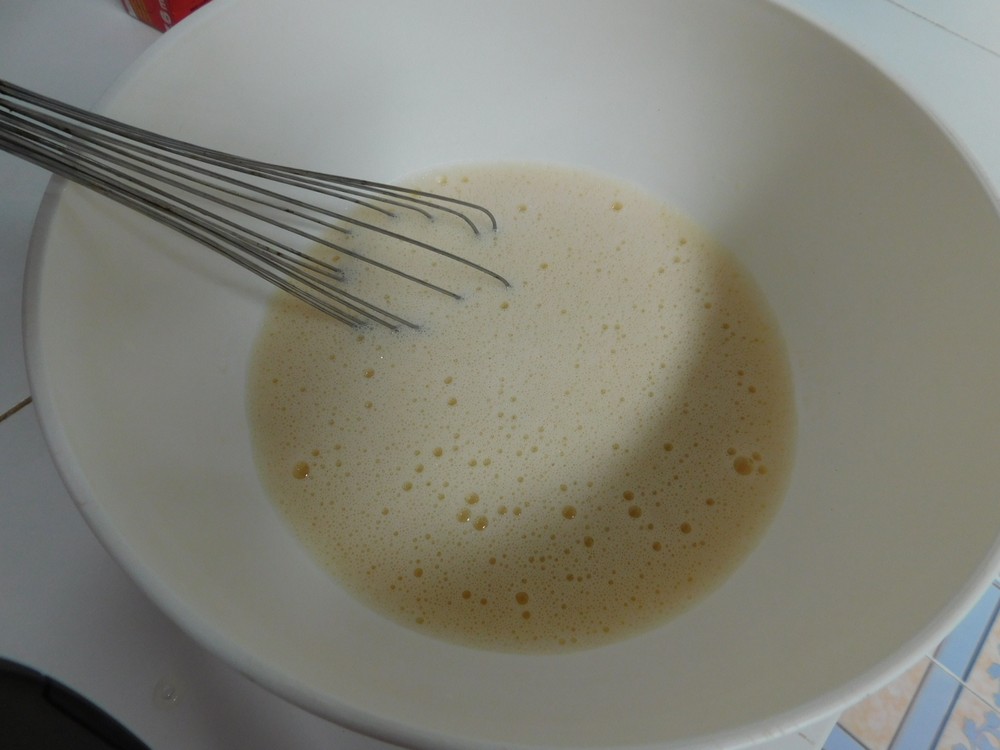
- In another large mixing bowl, add the milk, eggs, vegetable oil, water, and vanilla extract. Whisk together well and even slightly frothy is ok.
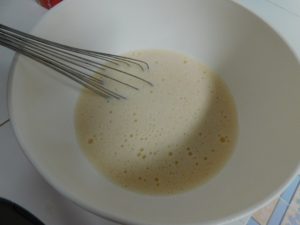
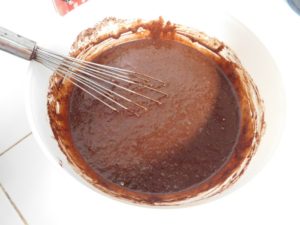
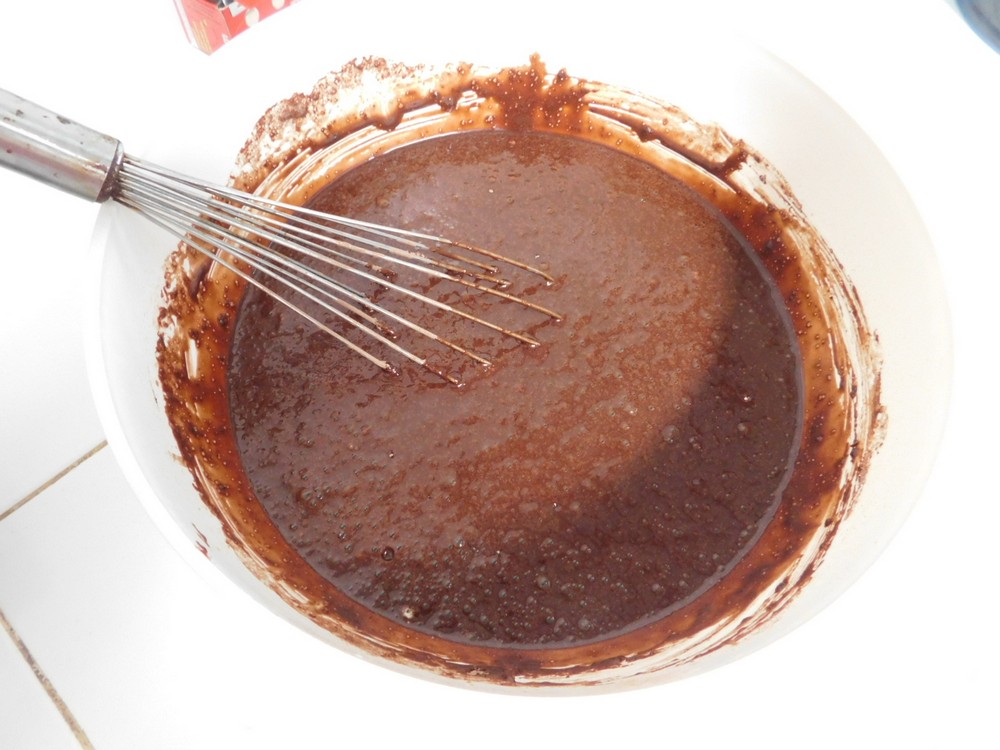
- Add the dry mix to the wet mix and whisk to just combined, do not over mix as that may result in less light and fluffy cake, and no one likes that.
- Divide the batter equally between the two prepared pans, place in the oven immediately.

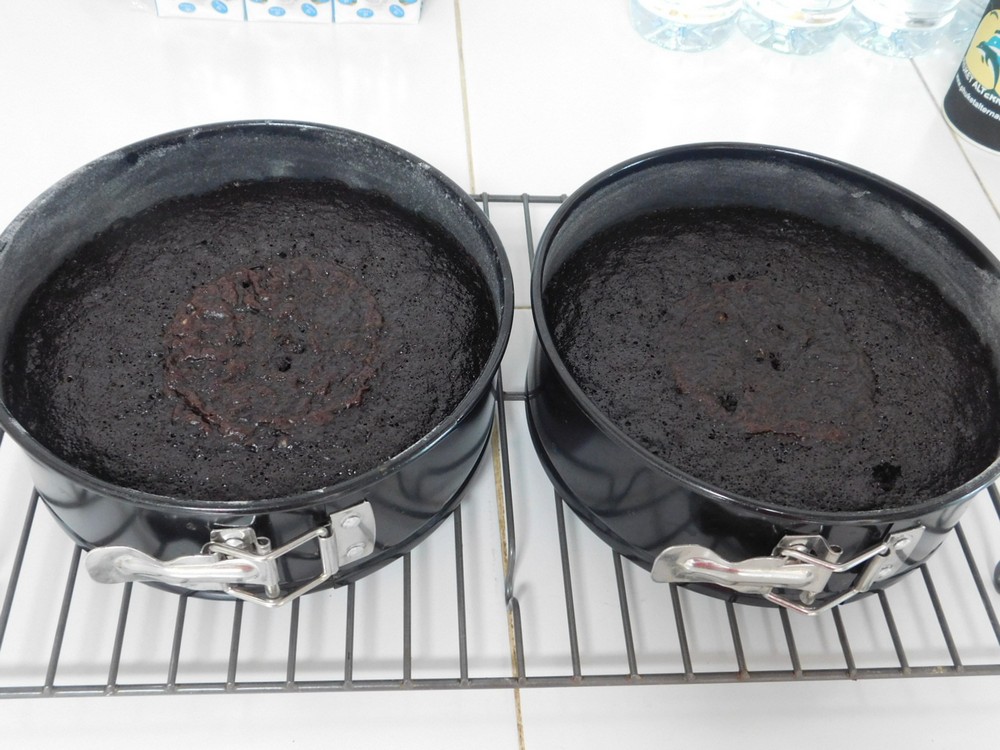
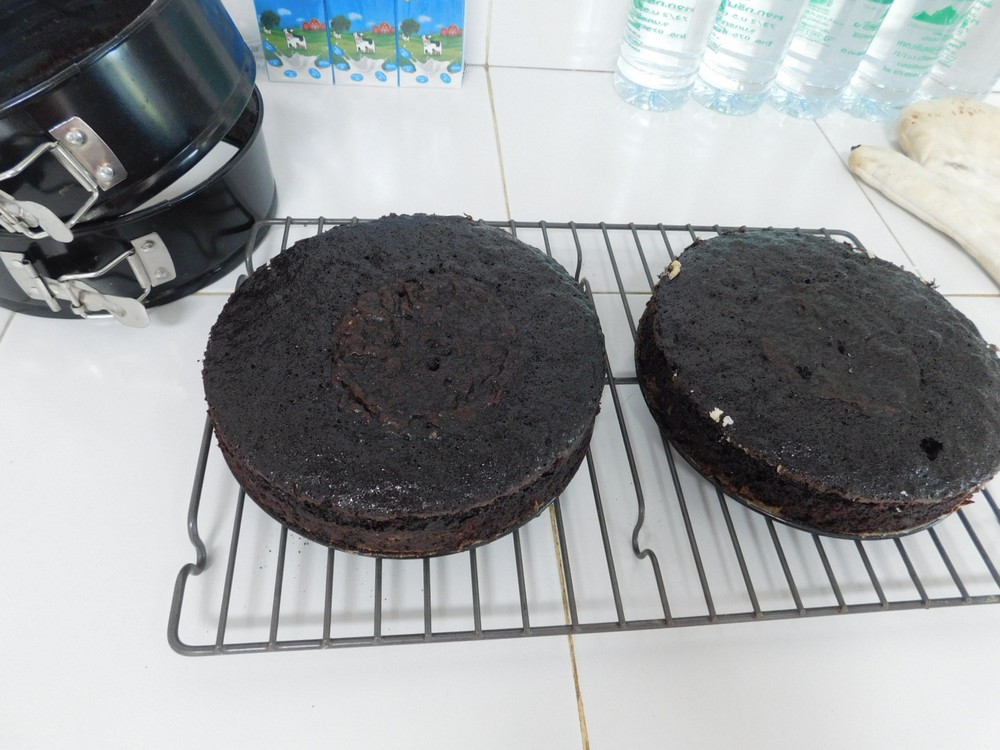
- Bake for 25 to 30 minutes, the cake should be puffed up a bit and a toothpick inserted in the center comes out clean. Remove from the oven and place the place the pans on a rack and let cool for 5 minutes.
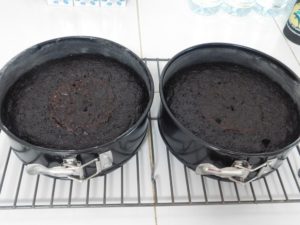
- After 5 minutes, turn out the cakes, right side up on a rack to cool completely.

- Once the cakes are completely cooled, decorate as you desire.


Notes
Low cost. In Thailand it pays to make a cake from scratch as box mixes are imports and carry a hefty price tag.
Shortcut: Homemade Chocolate Cake Mix.
Variant: 1. Replace the 1 cup of water with 1 cup of plain coffee.
Used in Recipes Listed on this Site:
- Earthquake Cake, made it, GO-TO recipe.
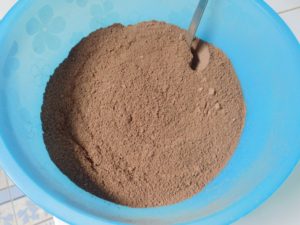
Homemade Chocolate Cake Mix
This is the homemade version of a boxed chocolate cake mix. This will make either two 8 inch round cakes or one 9x13 cake.
Ingredients
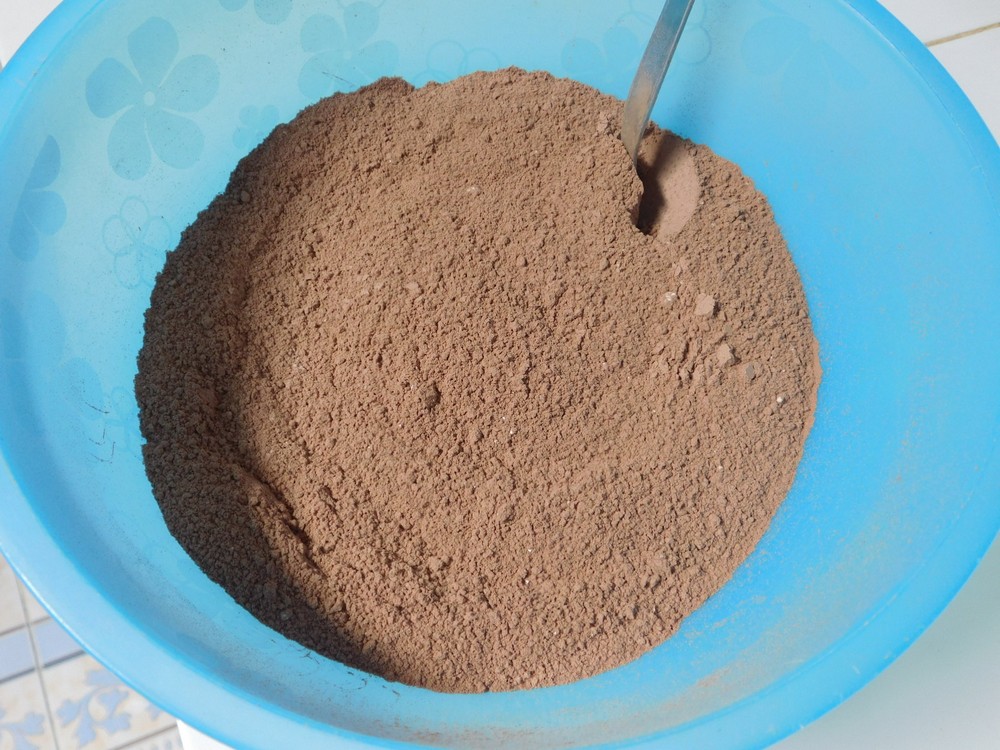
- 220 grams all purpose flour, 1 3/4 cups if no scale
- 2 cups sugar
- 90 grams cocoa powder, 3/4 cup if no scale
- 1 1/2 teaspoons baking powder
- 1 1/2 teaspoons baking soda
- 1 teaspoon salt
Instructions
- Whisk all ingredients together, store in an airtight container for up to 1 month.
- Use in any recipe calling for a box of chocolate cake mix.
Notes
Low cost.
Used in Recipes Listed on this Site:
- Homemade Chocolate Cake, made it, GO-TO recipe.
- Dream Cake, made it, GO-TO recipe.
- Earthquake Cake, made it, GO-TO recipe.
- Any Flavor Cake, made it, GO-TO recipe.
- Chocolate Peanut Butter Dump Cake, made it, GO-TO recipe.

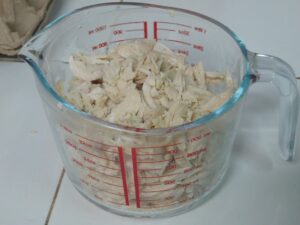
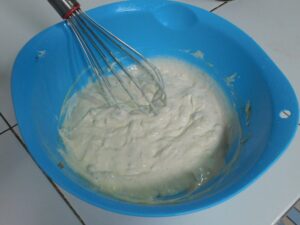
Chicken Ritz Casserole
This is an old time classic comfort food that stretched the dollars by using the crackers as a filler, and it is delicious and filling! Now for folks in Thailand and probably all of Southeast Asia, Ritz crackers are here but imported and come with a higher cost, so use made in Thailand products such as Magic or Rosi, which are just butter crackers and taste exactly like Ritz, and cost less. The prep time will vary depending on if you are cooking the chicken for this now or using leftover cooked chicken. This casserole is wide open to modifications. There is several shortcuts for cost savings as well. Links to the Shortcuts are listed in the Notes section.
Equipment
- Baking Pan (9x13 inch)
- Oven
Ingredients
- 4 cups cooked chicken breasts, shredded, Shortcut
- 1 can condensed cream of chicken soup, or creamy chicken mushroom soup, Shortcut
- 1 cup sour cream, Shortcut
- 2 sleeves Ritz crackers, about 70, crushed
- ½ cup butter, melted, (½ standard block / 1 stick)
Instructions
- Preheat your oven to 180° C (350° F), lightly grease a 9x13 baking dish with butter or oil spray. Melt the ½ cup butter in a small sauce pan or microwave, then set that aside.
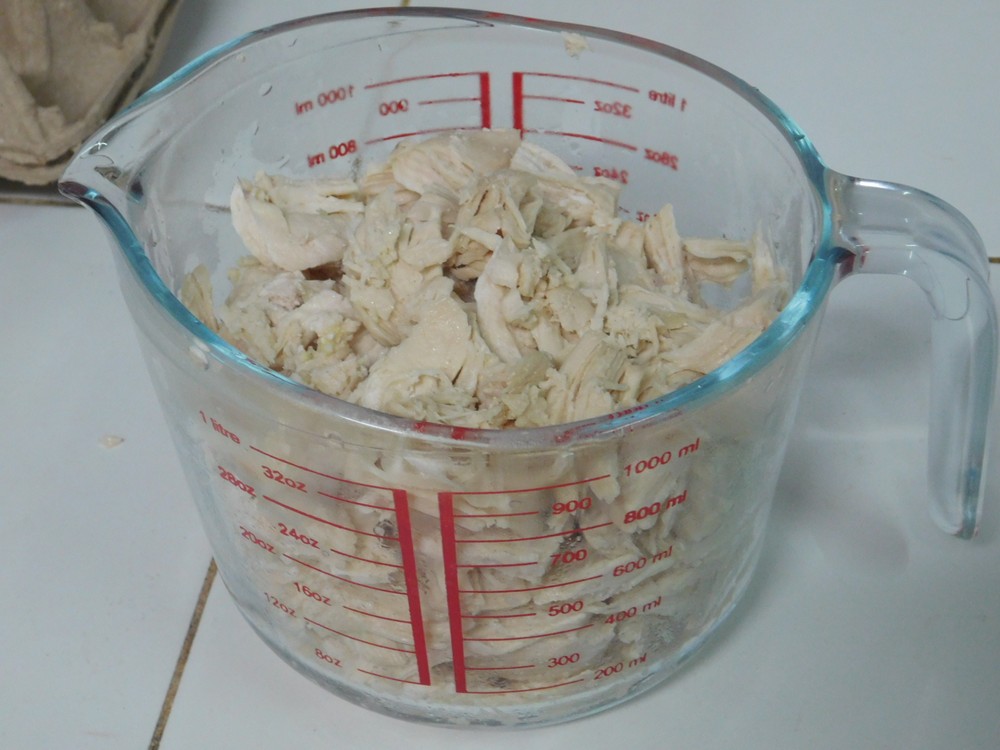
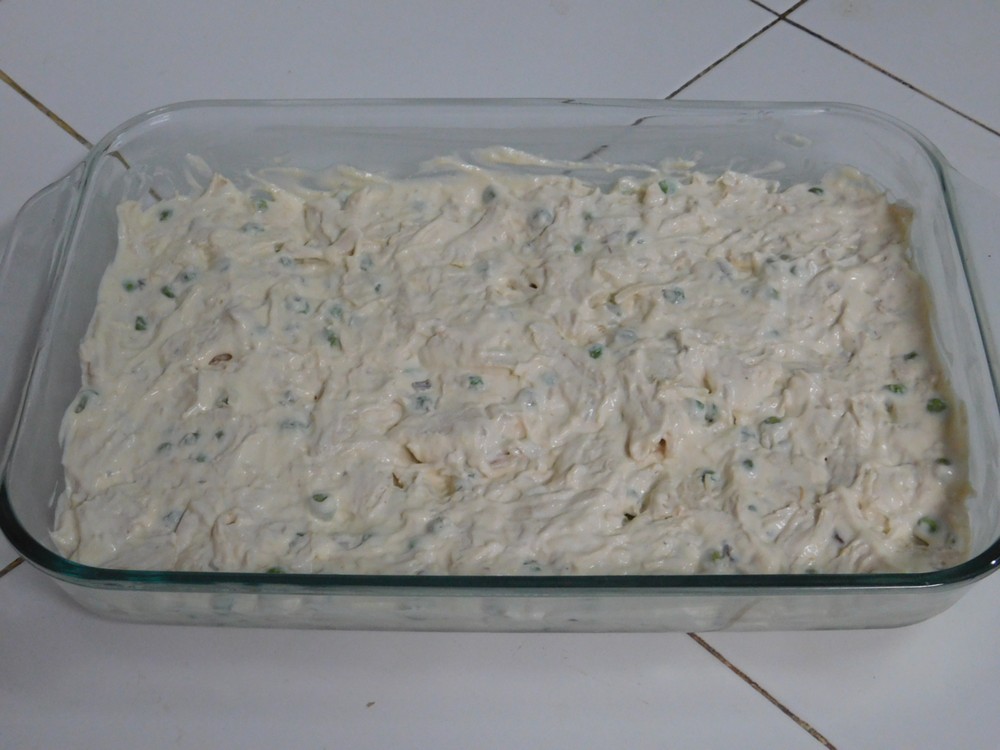
- For the chicken, you can use boiled, roasted, leftover chicken, or even rotisserie. Cook the chicken or use you preferred type. If using bone in, remove all the meat from the bones, discarding the bones and any skin and gristle. Shred and set aside. I used 3 chicken breasts that I pressure cooked, but feel free to use thighs, legs, or breasts or any combination.
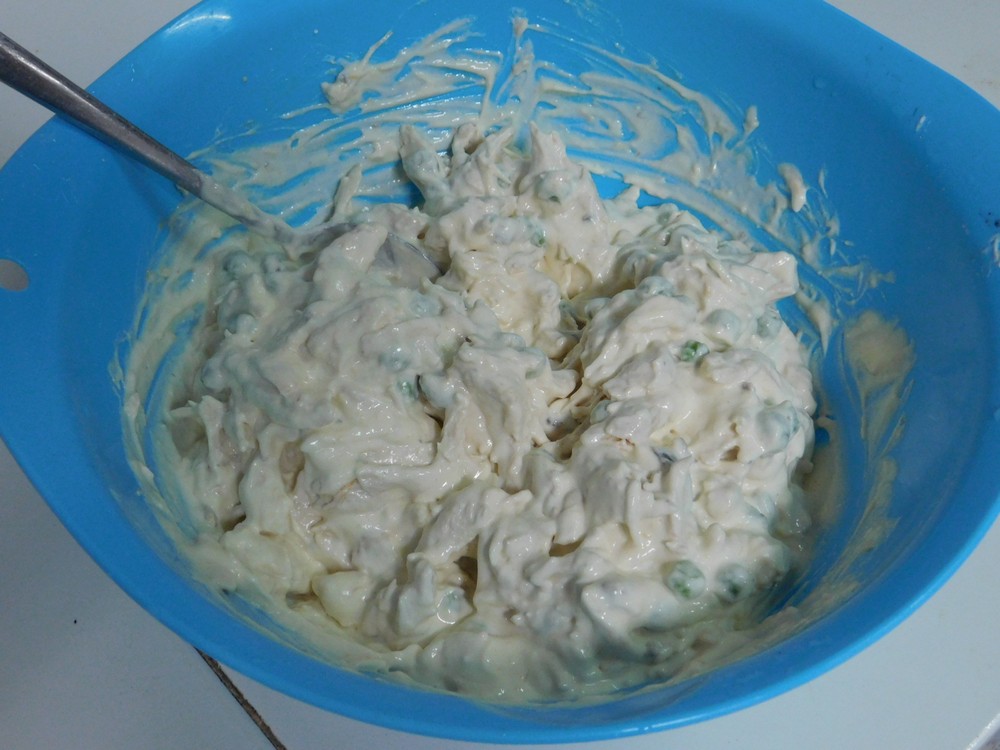
- In a large mixing bowl, whisk together the soup and sour cream.
- Mix in the cooked and shredded chicken, and any vegetables if you are using. I added frozen peas.
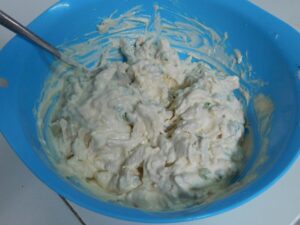
- Pour the chicken mixture into the baking dish and spread out evenly.
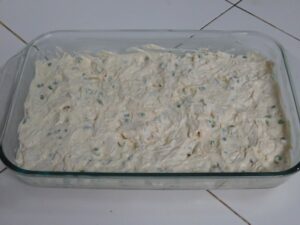
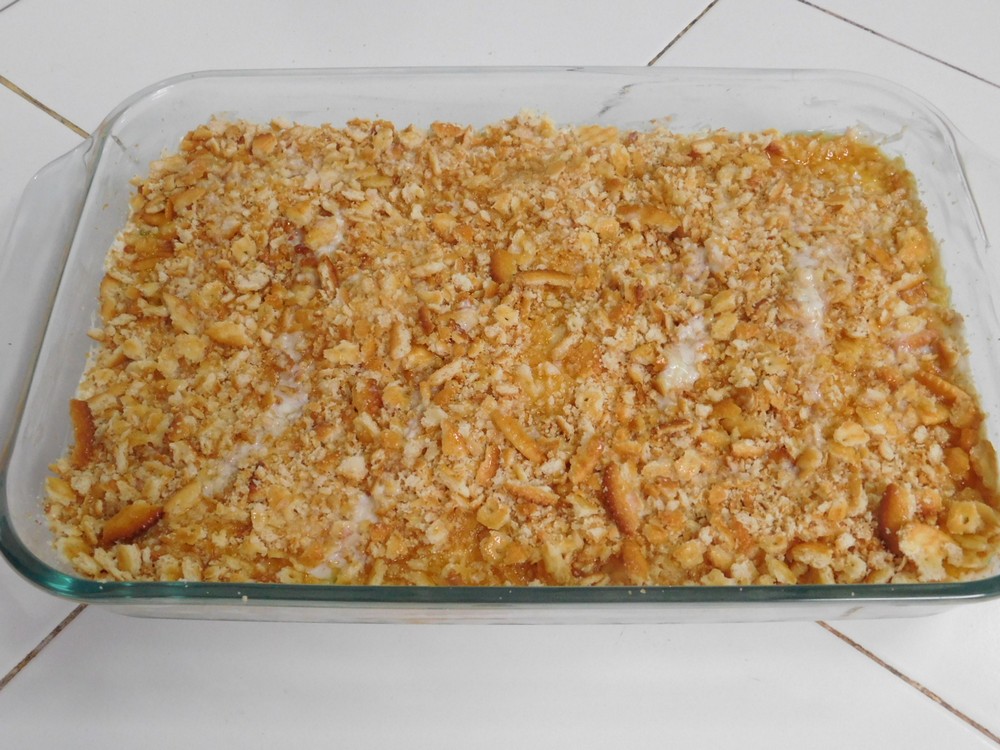
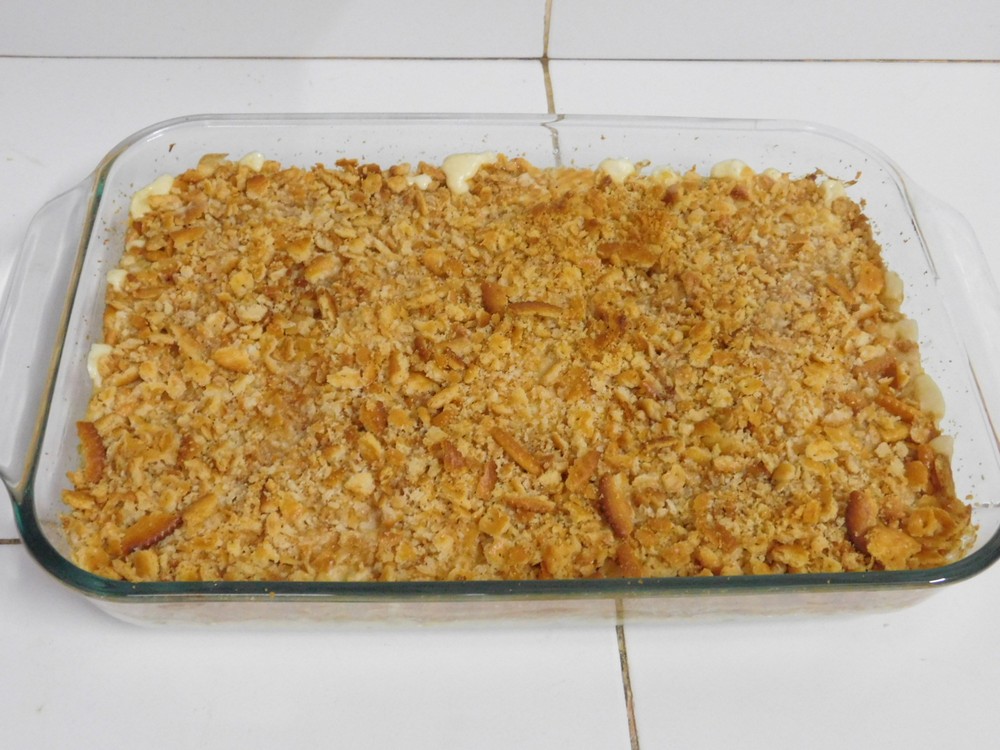
- Sprinkle the cracker crumbs over the casserole, then drizzle the crumbs with the melted butter.

- Bake for 25-30 minutes or until the crumbs are starting to turn golden brown and the casserole is hot and bubbly.
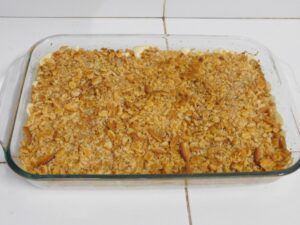
- Serve with a vegetable for a nice complete meal. Enjoy.


Notes
Low cost per serving using 3 chicken breasts.
Shortcuts: Chicken (Pressure Cooker) (this is a 2 for 1 recipe, you get cooked chicken for the recipe, and broth for use in another recipe, Condensed Cream of Chicken Soup, Sour Cream.
Variants: 1. Use a combination of breast and thigh meat. 2. Add some cooked egg noodles, say 250 grams (8 oz) but you will need to double the soup and sour cream. 3. Add 1 cup of peas or mixed vegetables to the meat mixture. 4. Add 1 cup sautéed mushrooms to the meat mixture.
Updated on 4 December 2023.
Cheater Mushroom Gravy
I call this 'cheater' because I use Lobo brand (Thai) gravy packets, there is western brand gravy packets here but those are about $2 each, the Thai brand I use, and it is good quality, is about 50 cents a packet. I like gravy and mashed potatoes, and I love a gravy with a lot of fresh mushrooms. This recipe is not rocket science or my creation, I am simply adding this for my own reference later.
Ingredients
- 2 packets beef gravy
- 225 grams fresh mushrooms, button, cremini, or Shiitake would be perfect, (8 oz)
- 1 tablespoon butter
- salt and pepper, as desired, to taste
Instructions
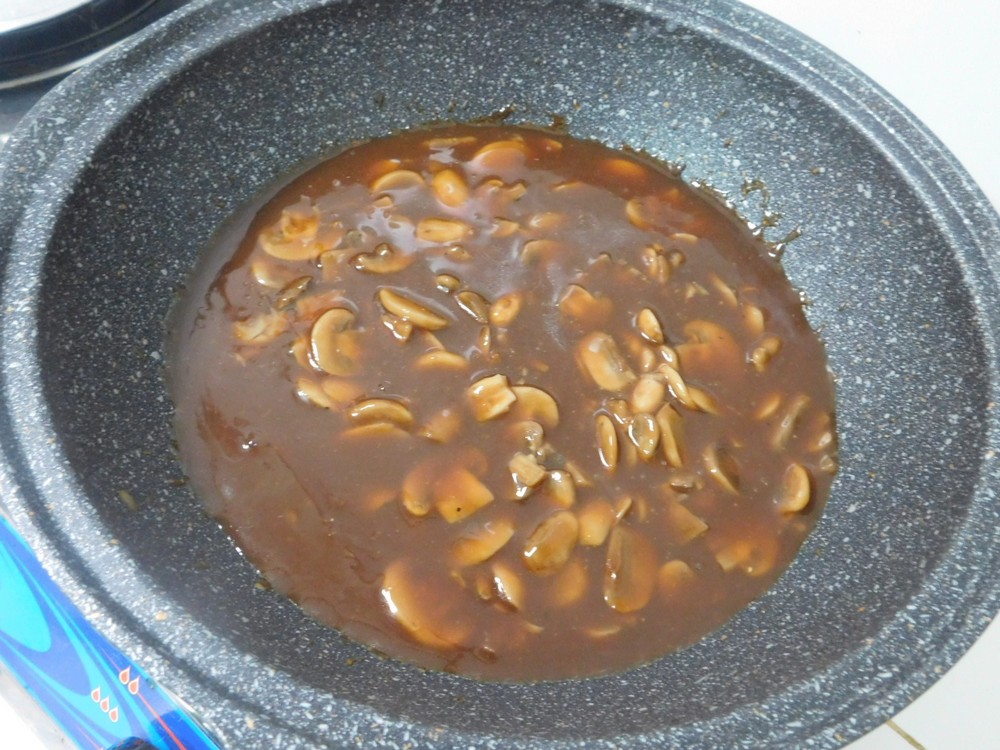
- Rinse the mushrooms (and for Shiitake also remove the stems) and slice them. Heat a non stick pan on medium heat with the butter, add the mushrooms and season as desired with salt and pepper. Saute, stirring and turn them often until all the water released from them has just evaporated. Remove the pan from heat and set aside.

- In a small sauce pan, prepare the gravy per the packet instructions, normally whisk in 1 cup of water for each packet and heat to boiling while whisking or stirring constantly until thickened.
- When the gravy has thickened, remove that from heat and put the pan with the mushrooms back on the heat. Pour in the gravy and stir to mix, Heat until nice and hot, season with salt and pepper as desired. Serve over mashed potatoes.


Notes
Low cost.
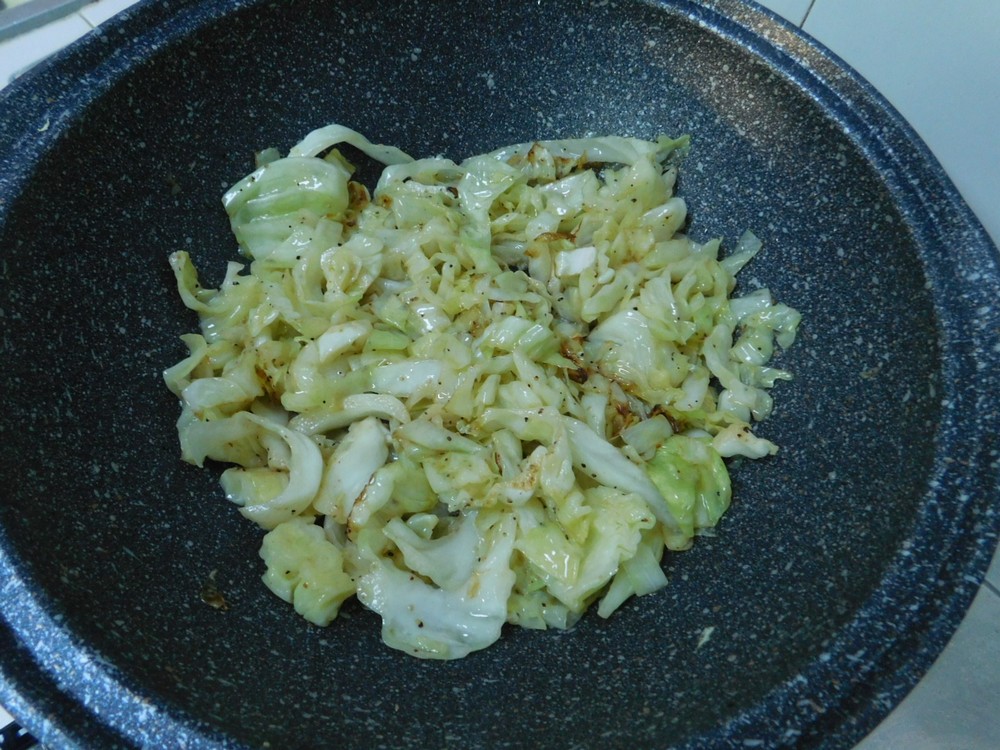
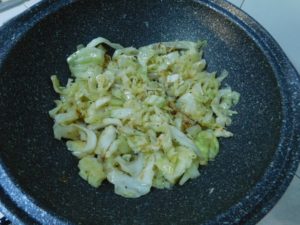
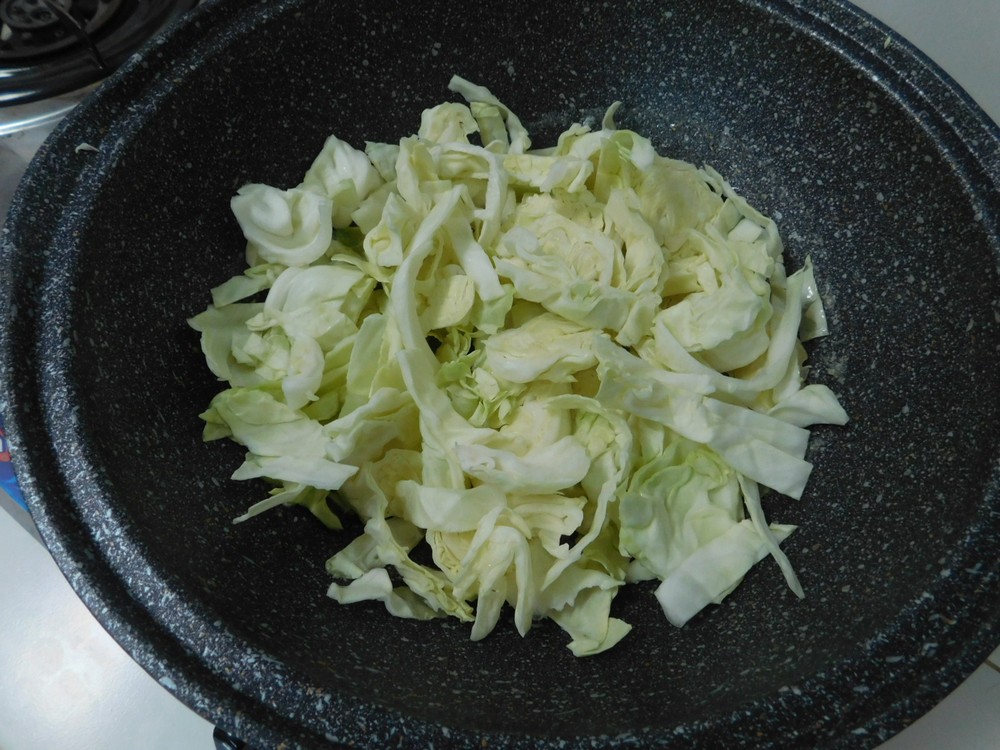
Basic Fried Cabbage
When it comes to side dishes, I like easy and quick to prepare, and this dish fits right in. Four ingredients and 15 minutes or so of your time. Cabbage is readily available here as it is a common side dish, uncooked with many Thai dishes. Frying it interested by brother in law. A common ingredient, prepared a different way.
Ingredients
- 1 head green cabbage
- black pepper, as desired
- 1 tablespoon butter
- 1 tablespoon bacon fat
Instructions
- Trim off the stem end just slightly, then quarter the head top down through the core, slice off each core piece, slice the 4 pieces into 1/2 inch slices.
- Heat a non stick pan on medium heat and add the butter and bacon fat, when hot, add the cabbage.

- Fry the cabbage, turning occasionally, until tender and just starting to brown. Done, perfect and simple side dish.
Notes
Low cost.
Just a stripped down version of fried cabbage without any extras.