
Archive for the ‘#1 Go-To Recipes’ Category
Brian's Frittata aka Egg Pizza
This recipe comes from my good friend, Brian, in northeastern Thailand. This was his creation that follows keto diet rules and is based on simple intuitive cooking, which is how many cooks come up with new dishes. Keto or not, this sounds absolutely delicious! The Egg Pizza part of the name comes from my wife. I made this on 3 Mar 2019 exactly as written and we absolutely loved it, this recipe is a keeper! Links to the Shortcuts are listed in the Notes section.
Equipment
- Pie Dish (9 inch)
- Oven
Ingredients
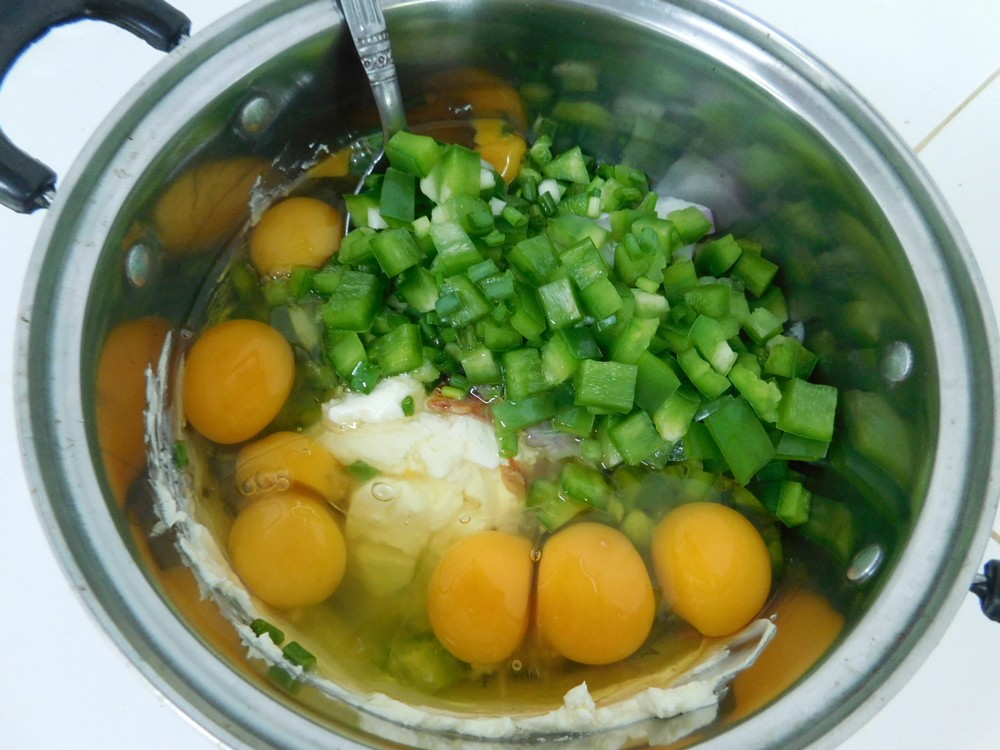
- 10 eggs
- 8 strips bacon, cooked crispy, crumbled
- 1 bell pepper, diced, your choice of color
- 1 onion, diced
- 3-4 spring onions, whites sliced, greens chopped
- 125 grams Cream cheese, softened, ½ block, (4 oz)
- marinara sauce, or pizza sauce, as desired, Shortcut
- Mozzarella Cheese, shredded, as desired
- Italian seasoning, as desired, Shortcut
Instructions
- Preheat your oven to 180° C (350° F). Lightly grease a 9 inch pie dish with butter.
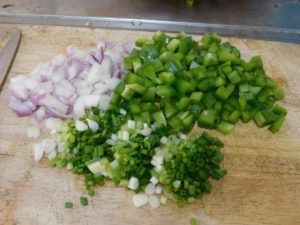
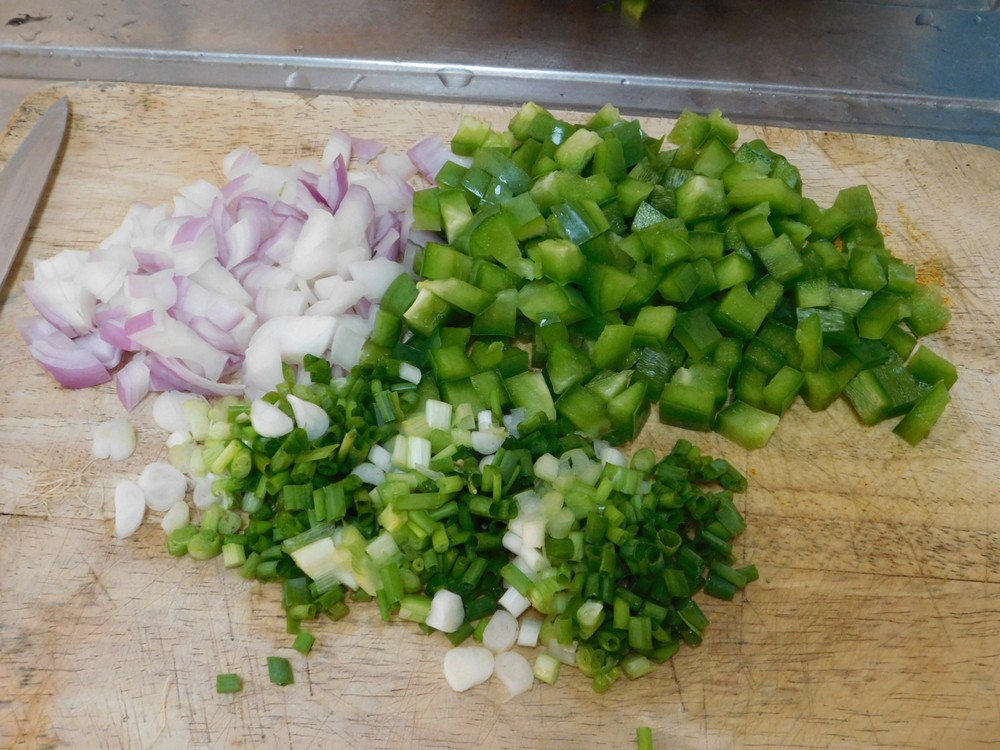
- Onion, bell pepper, and spring onions prepped while the bacon is frying.
- In a mixing bowl or pot, add all the ingredients except the marinara sauce, cheese, and Italian seasoning.
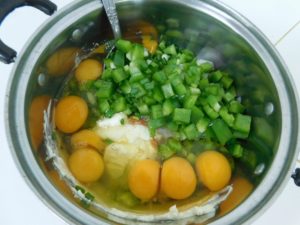
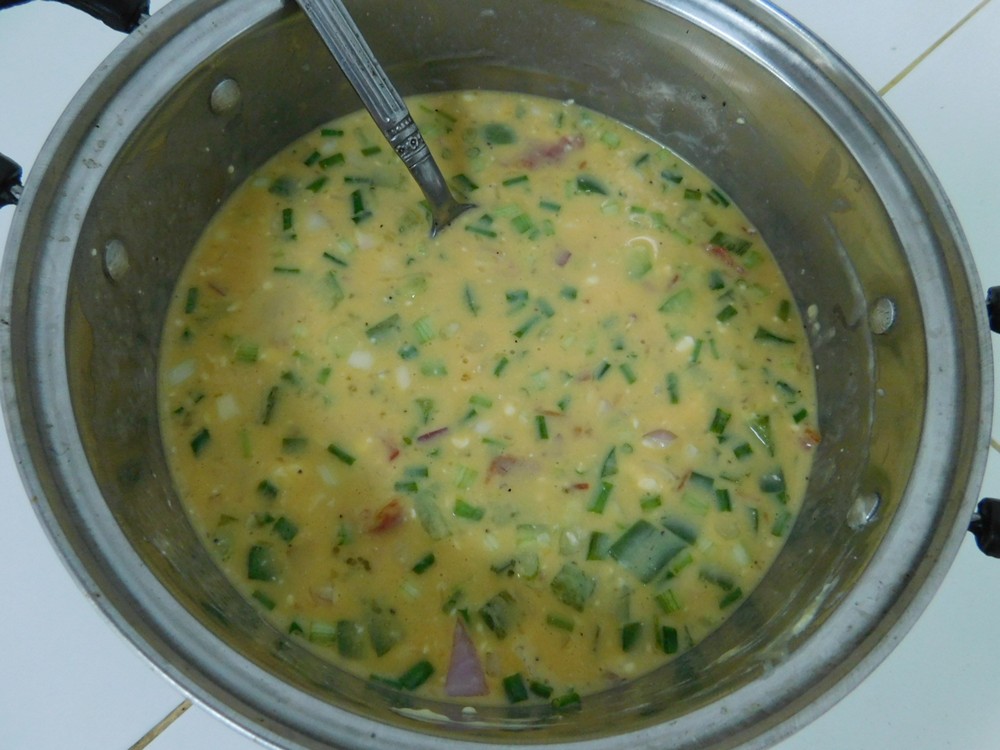
- Mix to combine, if there is a few lumps of cream cheese, no worries.

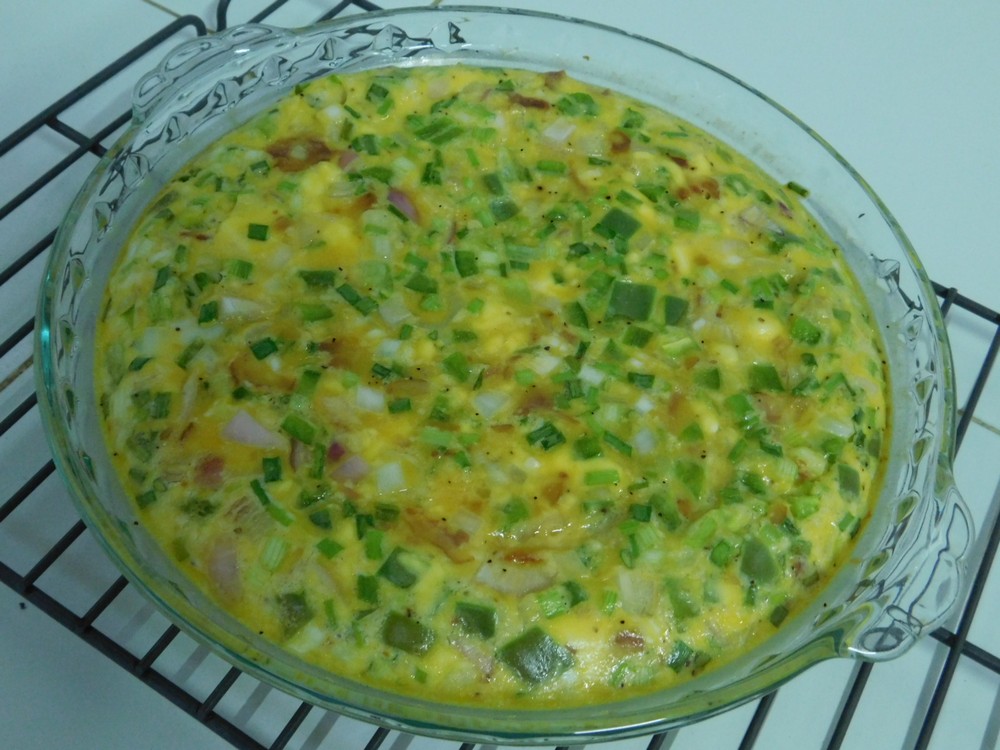
- Pour the mixture into the prepared baking dish and bake for 20-30 minutes or until the center is set (when a toothpick comes out clean), remove from the oven. Now at this point you have a great frittata, now we're going to take it up a notch.

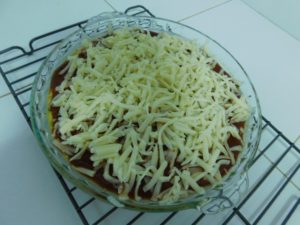
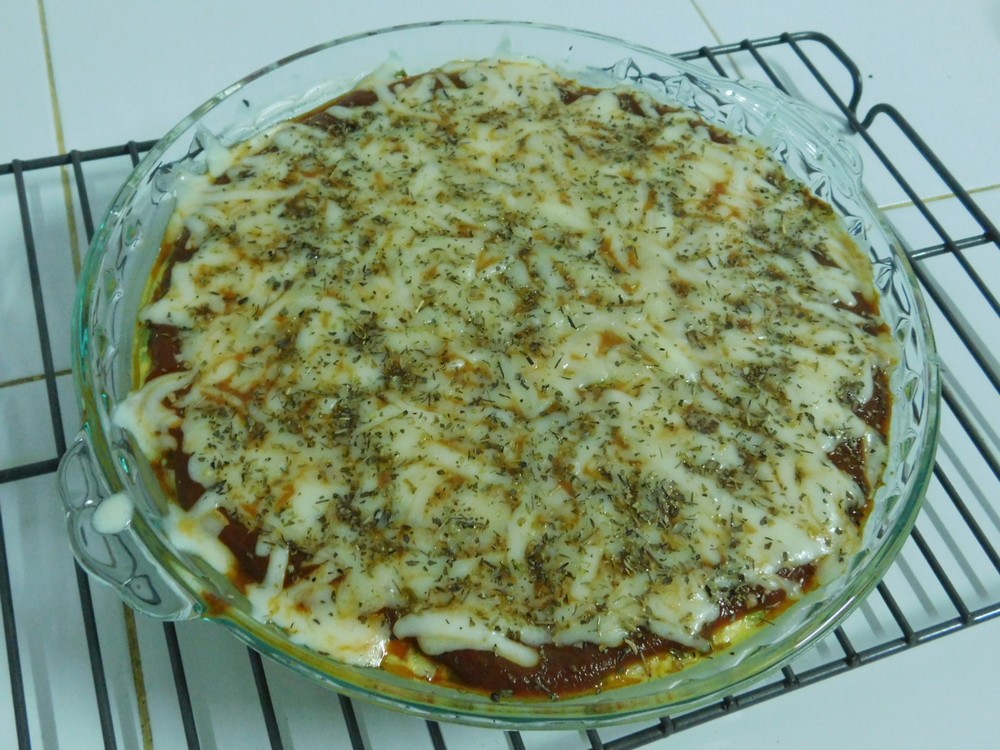
- Spread the top with marinara sauce as desired, top that with Mozzarella cheese as desired, and sprinkle on some Italian seasoning. I got snap happy with the camera and took the photo before adding the Italian seasoning.
- Place back in the oven until the cheese is melted.

- Slice, plate, add another light sprinkling of Italian seasoning as desired, and enjoy!


Notes
Low cost per serving.
Shortcuts: Pizza Sauce, Italian Seasoning.
Variants: 1. Replace the marinara sauce with salsa and replace the Mozzarella cheese with Cheddar cheese and sprinkle with oregano or even taco seasoning - there, you have a Mexican variant, like a Breakfast Burrito without the tortilla. 2. Use plain tomato sauce, oregano, and Cheddar cheese, highly recommended. 3. Add more bacon and use a 7x11 baking dish, highly recommended. 4. Serve with choice of toast, biscuits, or crescent rolls.

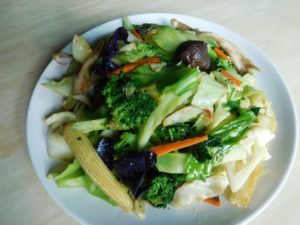
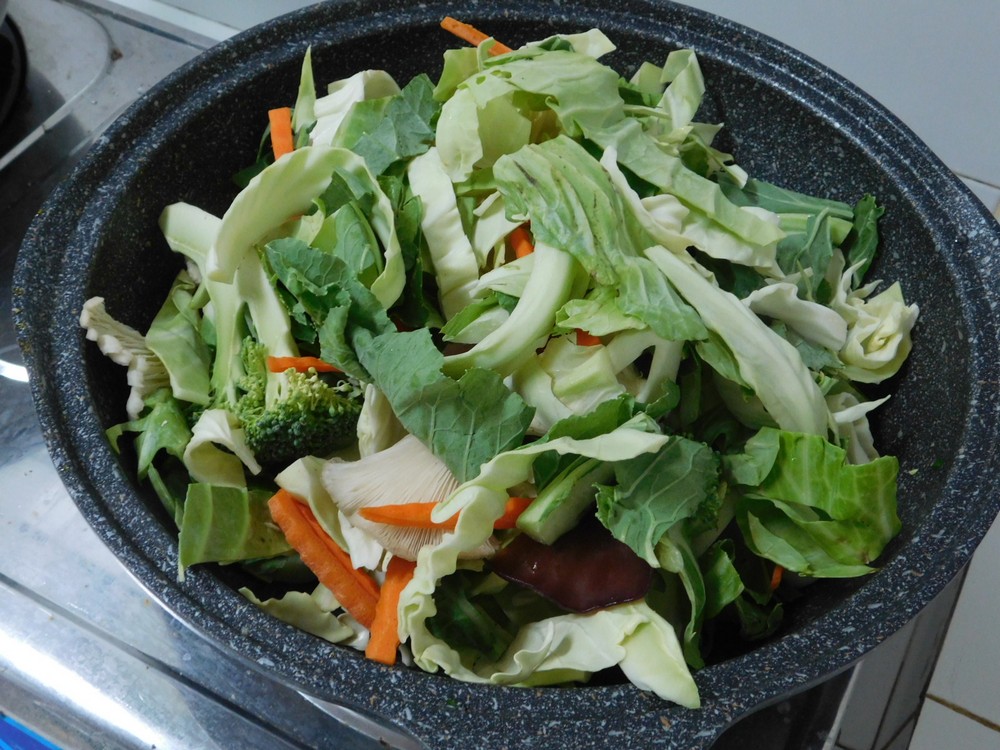
Stir Fry Fixings in a Bag
The advantages to buying these from the local markets is that the vegetables you need for a stir fry is already cut up, so instead of buying a whole cabbage and only needing part of it for a stir fry, the bag has the correct amount you need. Possibly less waste, and no room in the fridge needed as these are a buy on the day your are going to prepare. All you need is one bag, a few sauces, and a good arm. This can be a side dish or add some meat and you have a main dish. Each bag is only 25 Baht (78 cents) and you have 4 or 5 servings.
Ingredients
- 1 bag stir fry fixings
- oyster sauce, as desired
- mushroom sauce, as desired
- light soy sauce, as desired
- extra light olive oil, as needed
- water, as needed
Instructions
- A typical stir fry fixings in a bag will have chopped broccoli, cabbage, carrot, baby corn, and a few types of mushrooms, oyster and ear wood are common types used. Need a larger amount of stir fry when family is visiting? Use two bags and a larger pan or a wok would be preferred. Simply add the contents of the bag to a colander and give it a quick rinse.
- In a large non stick pan, or wok, heat 1-2 tablespoons of extra light olive oil, when hot, add the fixings (I used 2 bags), and stir fry...

- And stir fry, add a dash of each of the sauces, does not hurt to go heavy handed with the oyster sauce, and taste, if needed more salt, add another dash or so of light soy sauce.
- If the pan is drying out, add a bit of water, and keep stir frying, the water will help steam the veggies as well. When the carrot and broccoli are tender, and the liquid more or less evaporated, pour onto a serving tray and serve as a side with any meal.
To Add Meat
- Meat used is typically chicken or pork where I live, but beef can certainly be used. To prepare the meat, just slice into strips.
- Add the strips to the pan first and stir fry until just no longer pink, a bit of pink visible, no problem!
- Then just add the bag of fixings and continue as stated above.
Notes
Low cost per serving.
Commonly used throughout Thailand and Asia.
Photo of finished dish provided by my daughter, Samantha Thayer.
Thailand.
Photo of finished dish provided by my daughter, Samantha Thayer.
Thailand.

King Oyster Mushroom Spring Rolls
This original recipe is from my daughter, Samantha. We had some extra King Oyster mushrooms so Samantha suggested spring rolls, and here it is. A lot of time involved with making spring rolls is the prep work making the filling. These are excellent spring rolls.
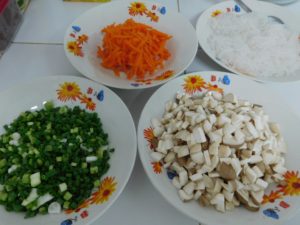
Ingredients
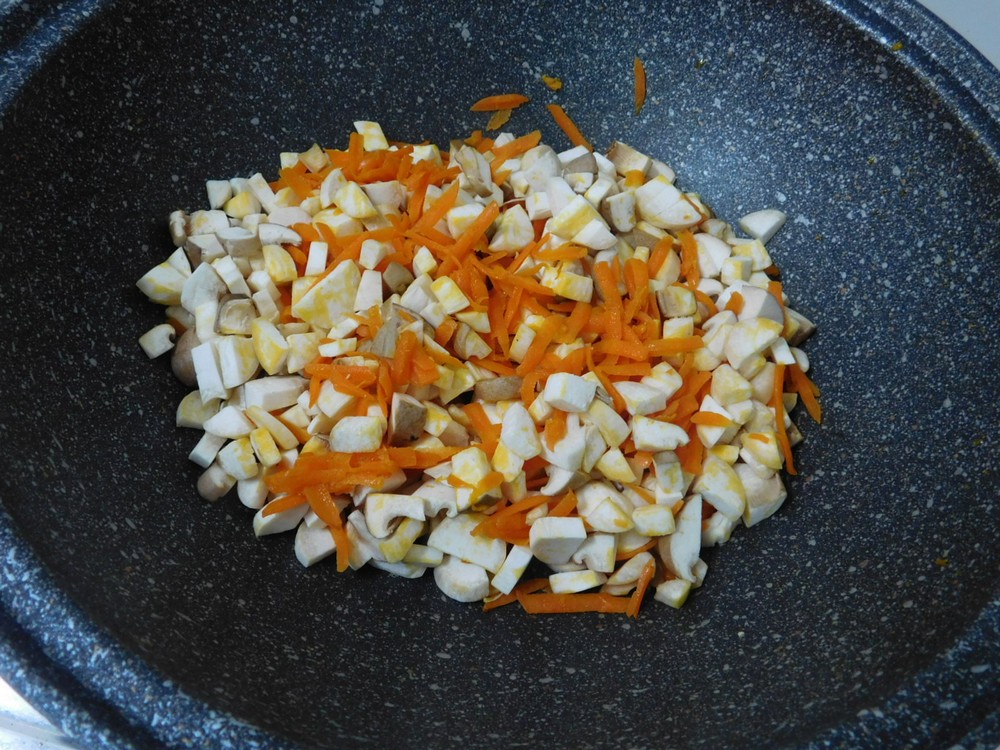
- 2 cups King Oyster mushrooms, diced
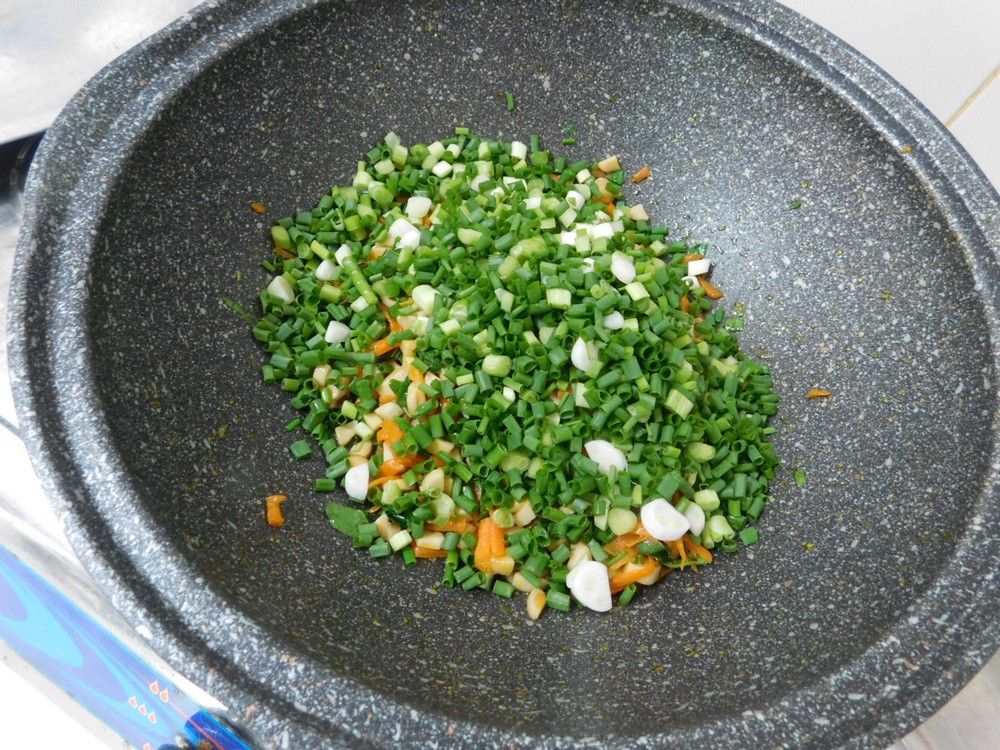
- 1 cup spring onions, sliced, white and green parts
- ⅔ cup carrot, shredded
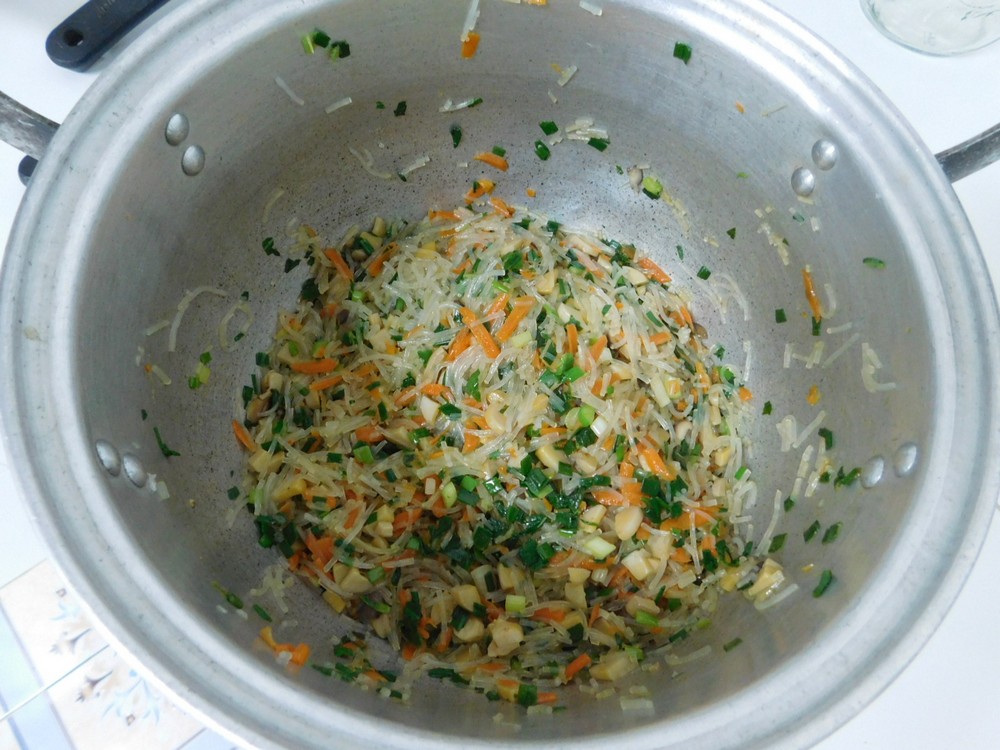
- 80 grams dry bean vermicelli, cooked, chopped, (2¾ oz)
- 1-2 dashes oyster sauce
- 1-2 dashes light soy sauce
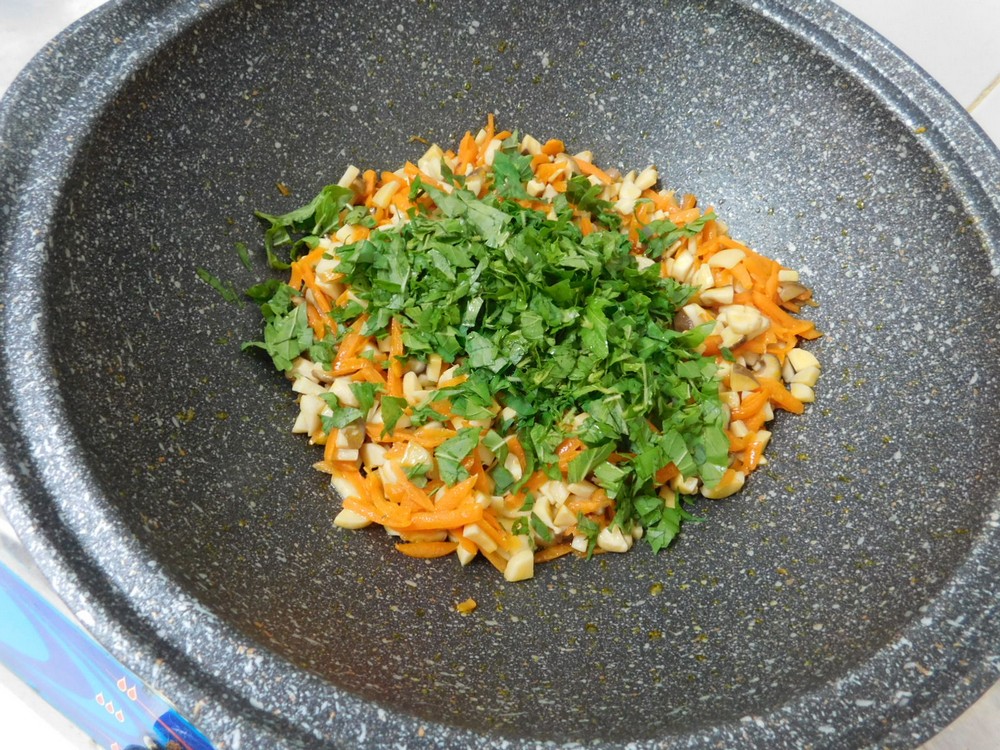
- handful fresh Thai Basil leaves, chopped
- salt, to taste
- extra light olive oil, as needed
- vegetable oil, as needed
- spring roll wrappers, as needed, about 20-22, thawed,
- 1 tablespoon cornstarch
- 1-2 tablespoons water
Instructions
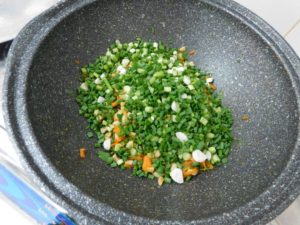
- Prep the mushrooms, spring onions, carrot, and heat a pot of water to boiling, add the noodles and cook until tender. Drain the noodles and chop. Here, everything is prepped. Now you can take your spring roll wrappers out of the freezer to thaw on the counter.
- Heat about a tablespoon of extra light olive oil in a non stick pan, when hot, add the carrot. Saute until soft, just a few minutes.

- Add the mushrooms to the pan and cook for a few minutes, stirring often. Goal is to soften the mushrooms, this type of mushroom does not release a lot of water so add a bit of extra light olive oil as needed. Saute for a few minutes to soften the mushrooms.

- Add the Thai basil and stir in, saute for a minute or two. The basil adds a depth of flavor and is not overpowering.

- When the basil is nicely wilted, add the spring onion and mix in. Add 1-2 dashes of soy sauce and oyster sauce and mix in, saute for just a minute or two. Remove from heat.
- Add the chopped vermicelli noodles to a large bowl or pot. Add mixture from the pan and mix together, taste and season with salt as desired. Set this aside to let it cool to room temp, about 1 hour.

- When you are ready to roll the spring rolls, open the package of spring roll wrappers, if working by yourself, you need to keep them covered with a damp cloth to prevent them from drying out. Ideally, two people would be perfect. One person to pull off each wrapper and one to fill. If the sheets dry out, they will tear when pulling them apart. There is two textures on a sheet, one side is smooth, the other side is a more rough texture.
- Mix together the cornstarch and water in a small bowl, this is your glue.
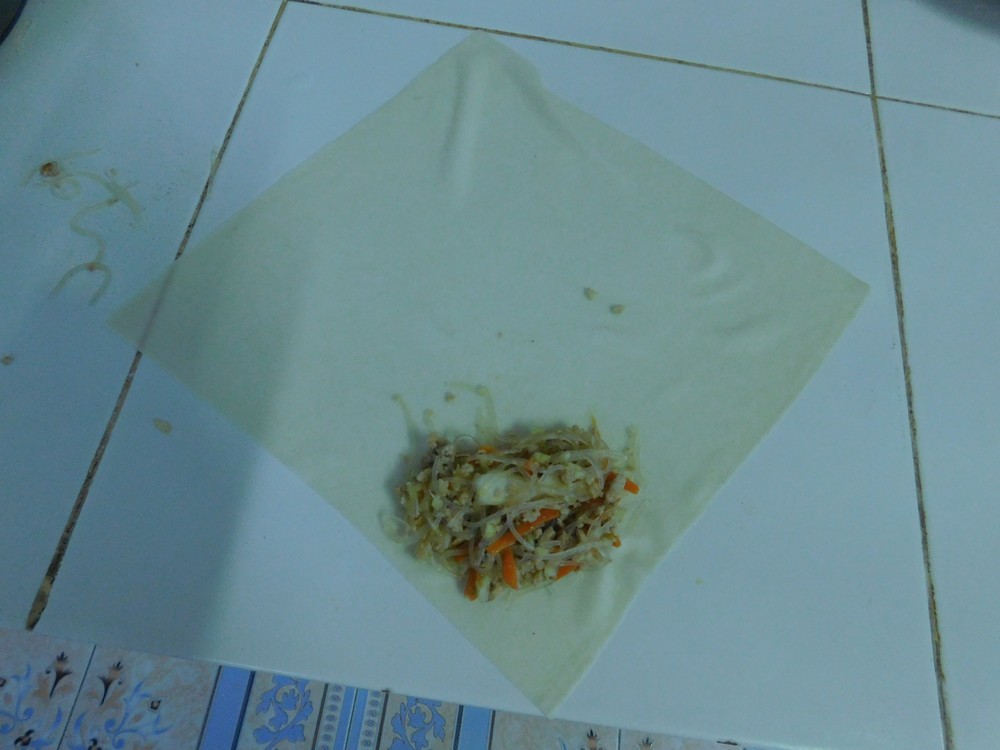
- Pull off one sheet and place smooth side down on a clean counter with one corner of the sheet facing you. Place a tablespoon or so of filling near the corner closest to you.

- Fold the bottom (the corner closest to you) up over the filling.

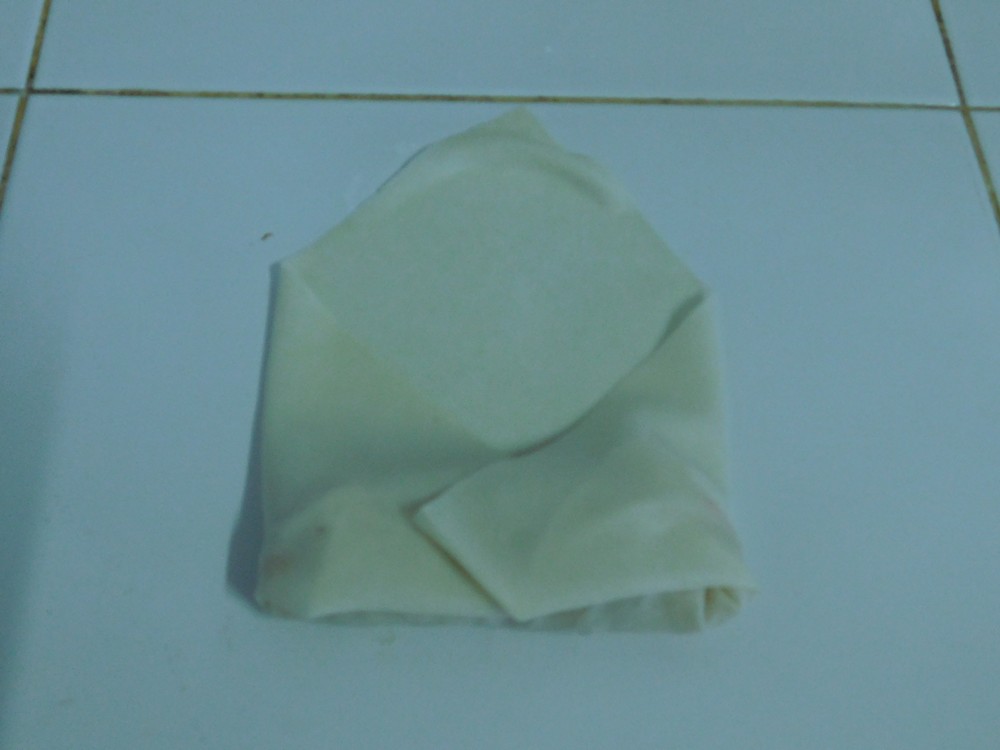
- Tightly roll away from you, the filling will spread some, that is fine. When the roll is just before the widest part of the pastry (left and right corners will be on the sides of the roll). Use your fingers and apply some glue to the two sides that are away from you, then fold the left and right sides towards the center. The roll should be about 5 inches long, and should look like an envelope.

- Continue to roll away from you and just pat the seam down with your fingers. There, you just made a spring roll. Repeat this process until all the filling is used.

- To fry these, heat about ½ inch of vegetable oil in a pan. When hot, add 5-6 spring rolls at a time and fry, turn often, until golden brown, These cook fast so keep an eye on them. Remove to paper towels to drain and fry the remaining rolls. Perfect color.

- Let cool for a few minutes then serve hot with a dipping sauce of your choice.


Notes
Low cost per serving.
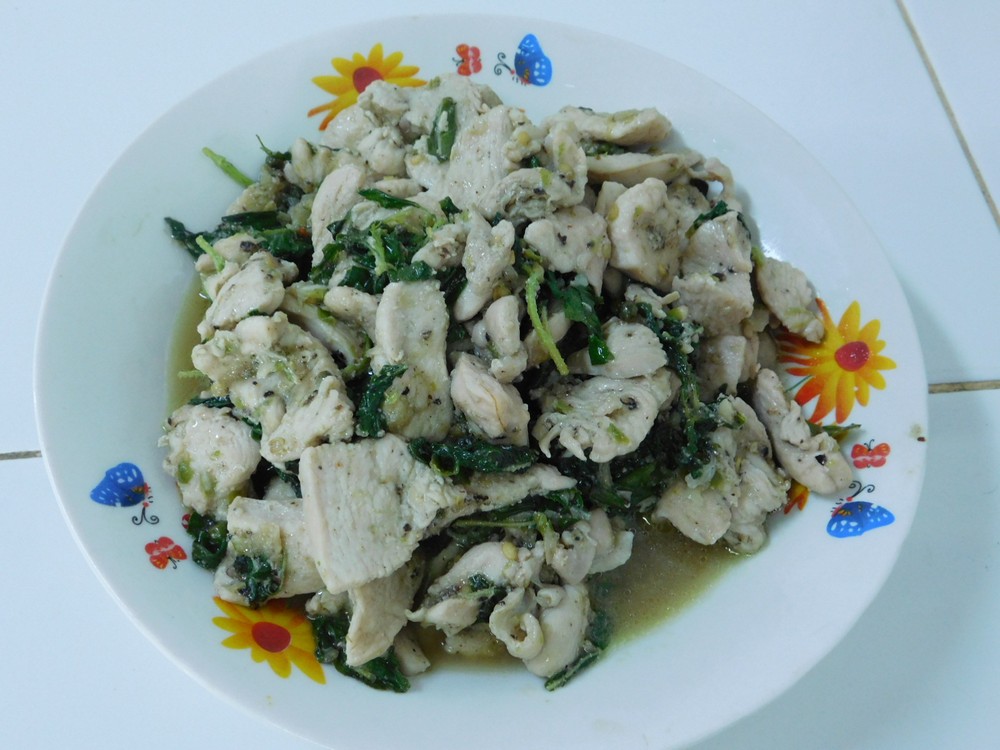
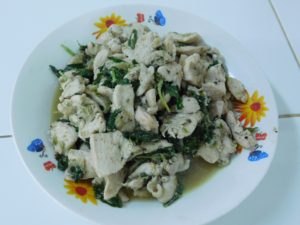
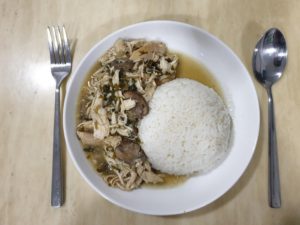
Chicken & Thai Basil
This is an easy Thai dish that goes together quickly and is delicious, spiciness comes from green Bird's Eye Chilies and Thai Basil, and is delicious!
Ingredients
- 2 chicken breasts, boneless, skinless
- 20 green Bird's Eye chilies
- 4-5 cloves garlic, peeled
- soy sauce, as desired
- 1 handful fresh Thai Basil leaves
- cooking oil, as needed
- cooked rice, for serving
Instructions
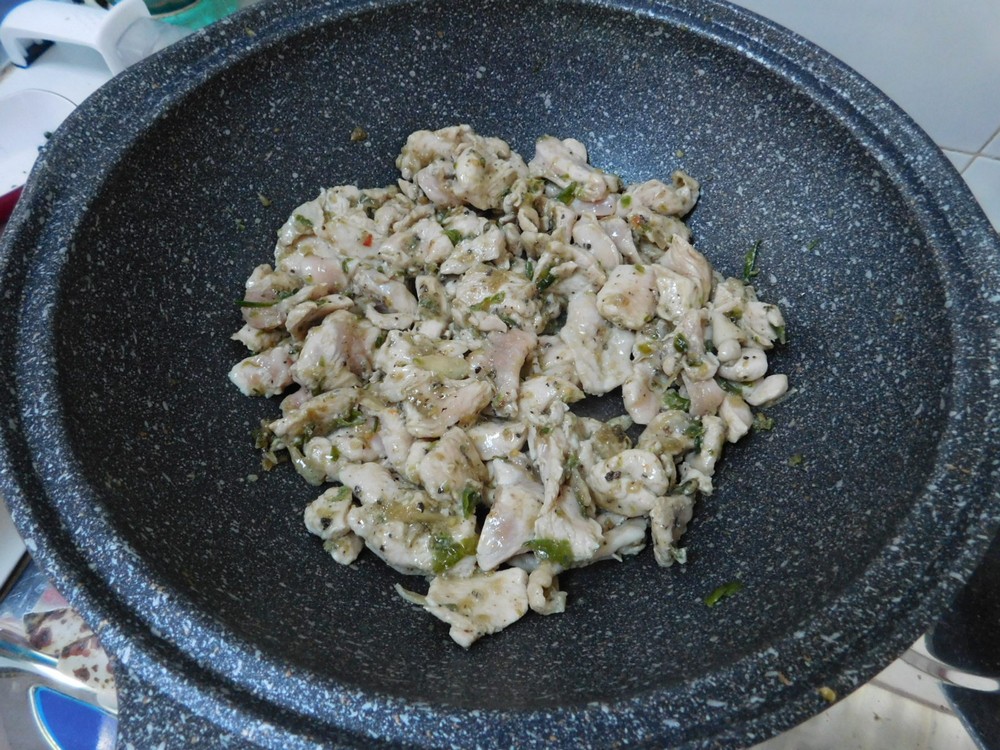
- Slice the chicken breasts into small pieces, set aside. Add the chilies and garlic to a mortar and mash with a pestle.
- In a large non stick pan (we use a marble wok pan) on medium to medium high heat, a tablespoon or so of cooking oil, when hot, add the chicken and chili garlic mixture. Saute until the chicken has mostly turned white, a little bit of pink here and there is no problem. Season with a splash of soy sauce as desired.

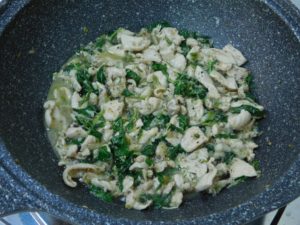
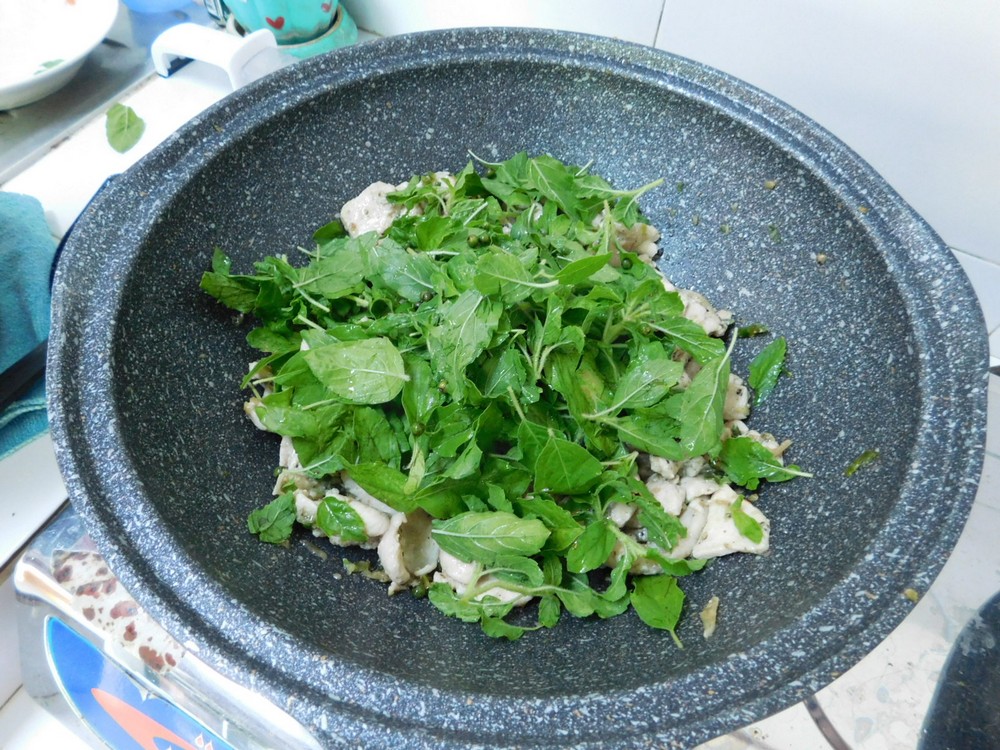
- Add the Thai basil and stir into the chicken.

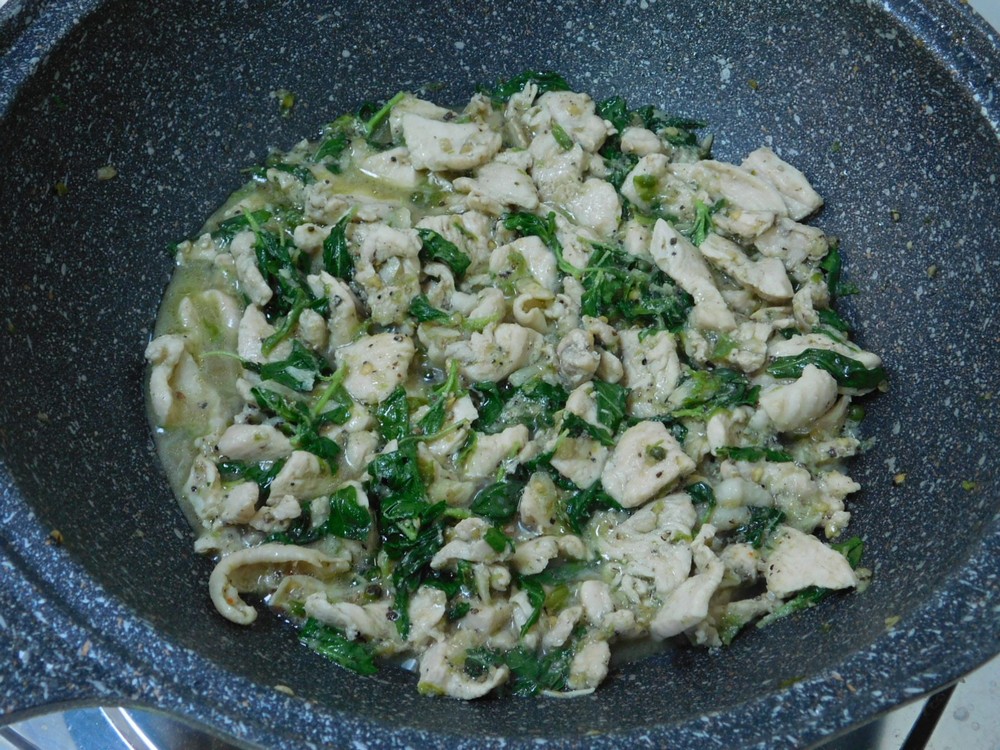
- When the basil is wilted, cover the pan and turn off the heat. Now you can get the bowls and rice ready to serve.
- Remove the lid from the pan, give the chicken a stir and pour the chicken into a serving bowl. Serve family style in the center of the table and people can just take and enjoy what they want.
Notes
Low cost per serving. Depending on the sides, this is 2-3 servings.
Recipe provided and cooked by my wife, Rrayada Thayer.
Thailand.
Thailand.

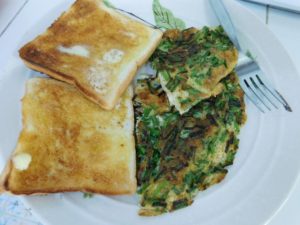
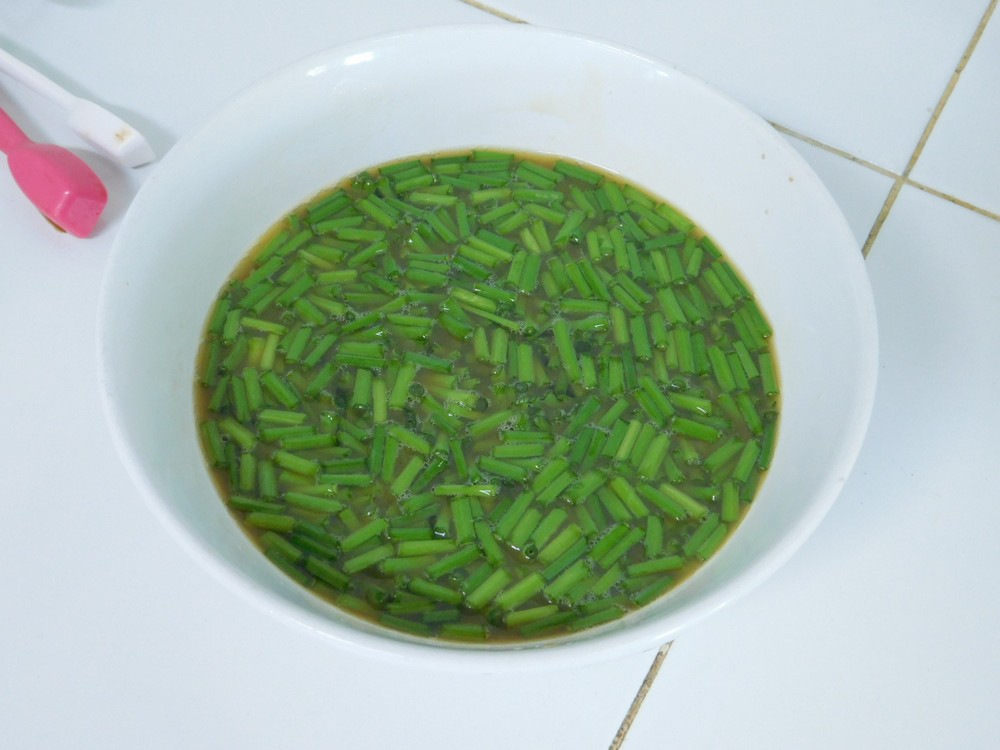
Chives Omelet (韭菜煎蛋)
This is a Chinese dish, and the method / seasonings is shared throughout Thailand and many Asian countries.
Ingredients
- 85 grams Chinese chives, or chives, or spring onion greens, (3 oz)
- 4 chicken eggs
- 1 1/2 tablespoons cooking oil
- 1/8 teaspoon sesame oil
- 1/2 teaspoon fish sauce
- 1/2 teaspoon oyster sauce
- pinch salt
Instructions
- Slice the chives into about 1/4 inch pieces. In a non stick pan or wok, heat the oil on high heat but not smoking.
- While the pan is heating, crack the eggs into a bowl and beat until frothy. Mix in the sesame oil, fish sauce, oyster sauce, salt, then mix in the chives.

- Pour the eggs into the hot pan.

- As the edges set, check the bottom.

- When golden brown, flip the omelet over and cook until the bottom is golden brown.

- Flip again and remove to a plate.
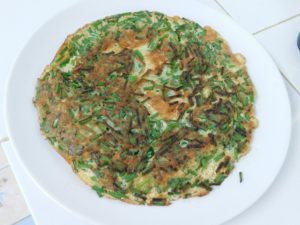
- Serve family style with rice or toast for sides. Enjoy.


Notes
Low cost per serving.
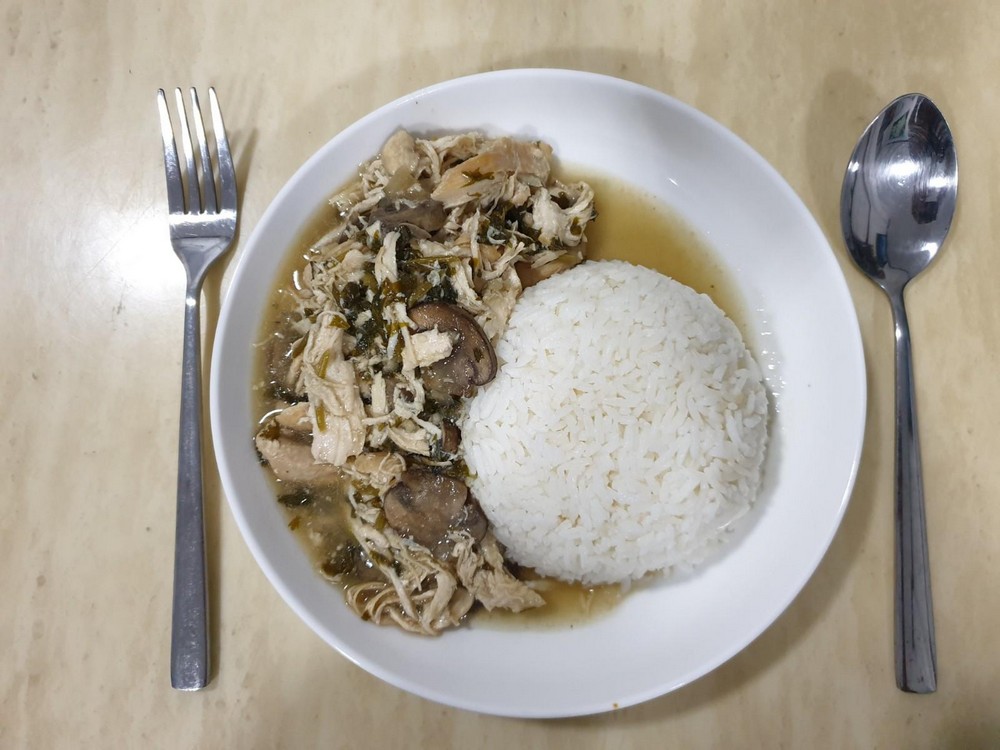
Chicken & Mushrooms (Slow Cooker)
This is a delicious meal and comes from a good friend, I served with plain rice, but feel free to serve over rice or mashed potatoes. Common ingredients is a bonus. Link to the Shortcut is listed in the Recipe Notes section.
Equipment
- Slow Cooker (3½+ quart)
Ingredients
- 750 grams chicken breasts, boneless, skinless, (1½ lb)
- 2 tablespoons extra light olive oil
- 500 grams button mushrooms, sliced, (1 lb)
- 1 onion, diced
- 2 cloves garlic, smashed and minced
- fresh parsley, chopped, good handful or two
- 1½ cups chicken broth, fresh or from powdered, Shortcut
- 2 tablespoons corn starch, or tapioca starch
- salt and pepper, as desired
Instructions
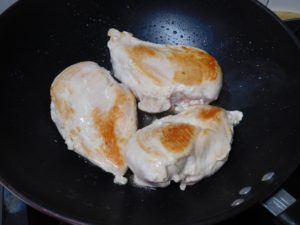
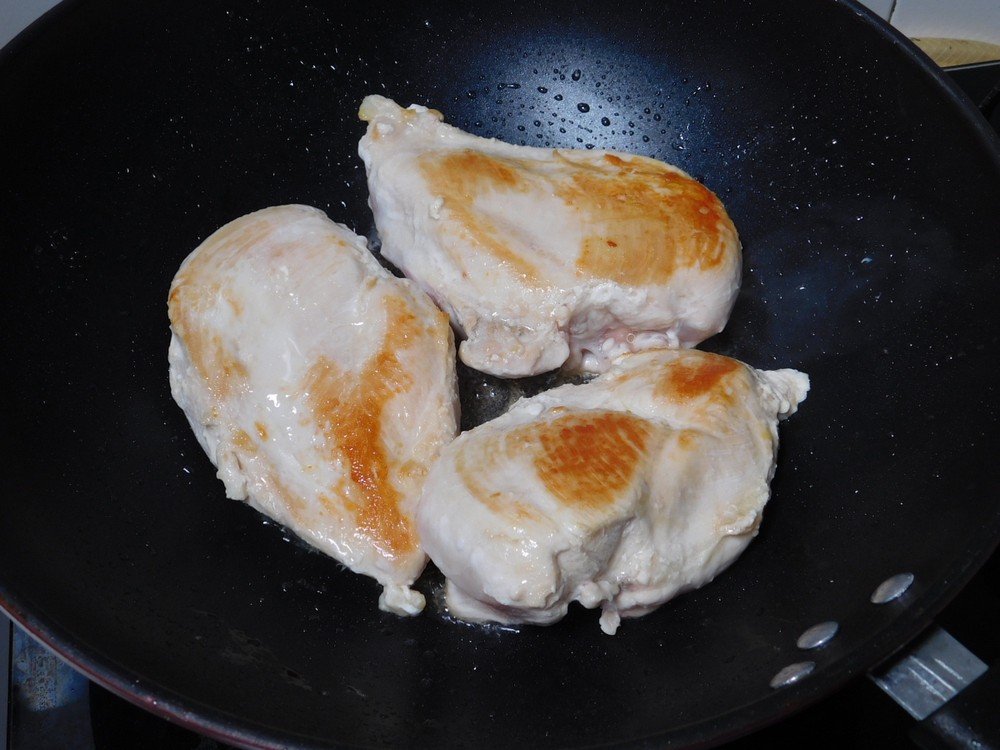
- Heat a non stick pan with with the oil, when hot, add the chicken, working in batches if needed, and brown each side. When browned, place in your slow cooker. (These 3 chicken breasts were about 800 grams.)
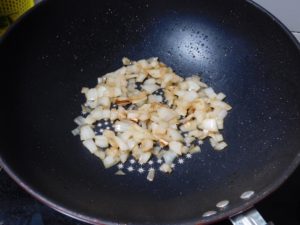
- Once all the chicken is done, using the same pan, add the onion, cook, stirring often until tender. Remove from heat and add the onion on top of the chicken in the slow cooker.
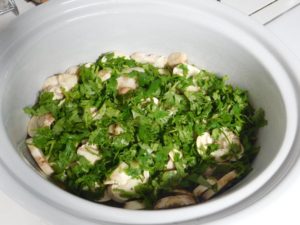
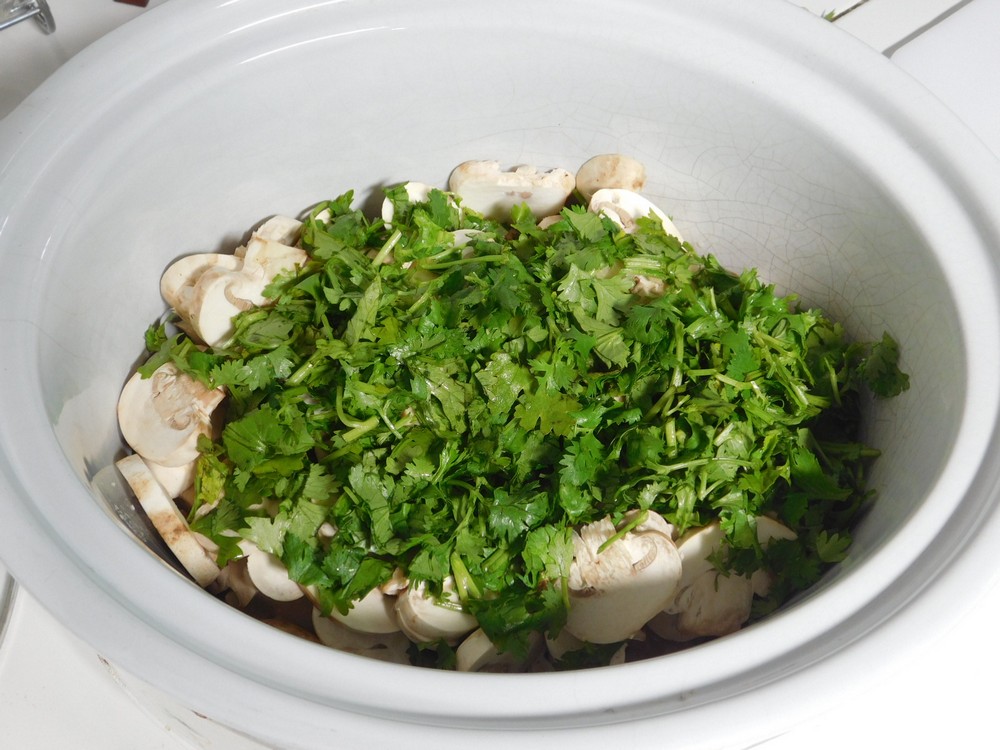
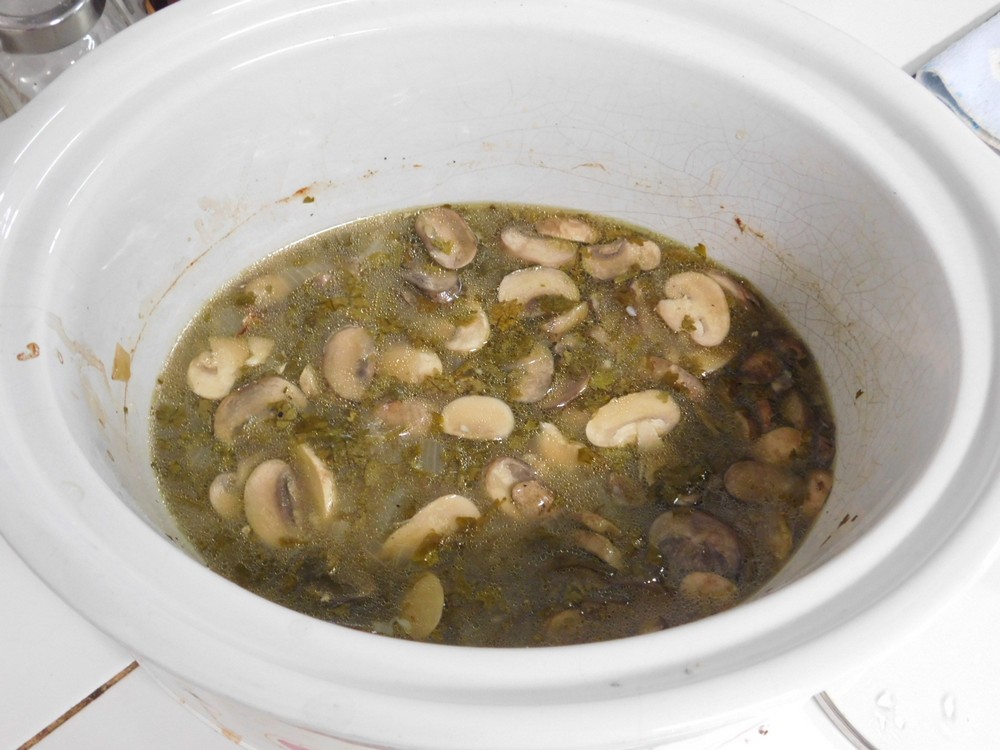
- Now add the mushrooms, garlic, and parsley to the slow cooker. (I used cilantro in place of the parsley, worked perfectly, and I did use my 3½ quart slow cooker for this.)

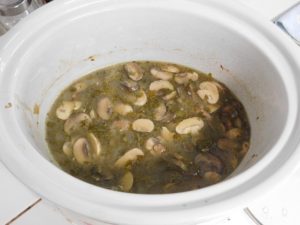
- Pour in the chicken broth, season with salt and pepper as desired, tamp everything down level, no need to make sure in broth as it will make liquid shortly. Cover and set the cooker to Low setting for 4 hours.
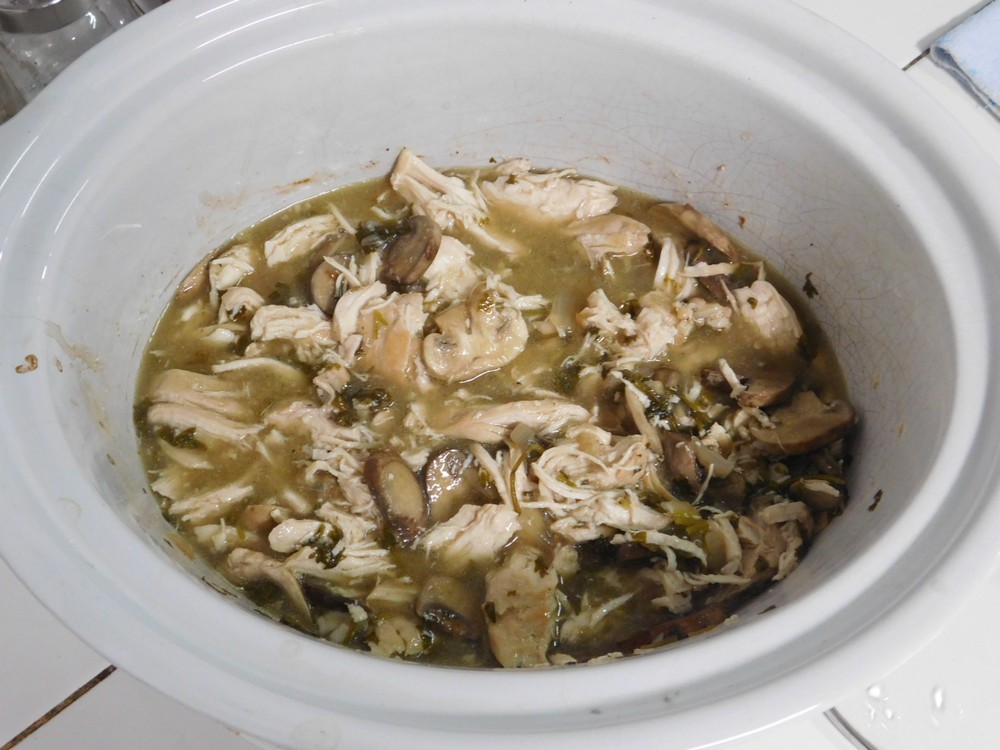
- When 4 hours have passed, leave the slow cooker on Low setting and remove the chicken from the cooker with a slotted spoon, leaving as much liquid as you can and the mushrooms in the cooker.

- Whisk in the cornstarch into the cooker until smooth.
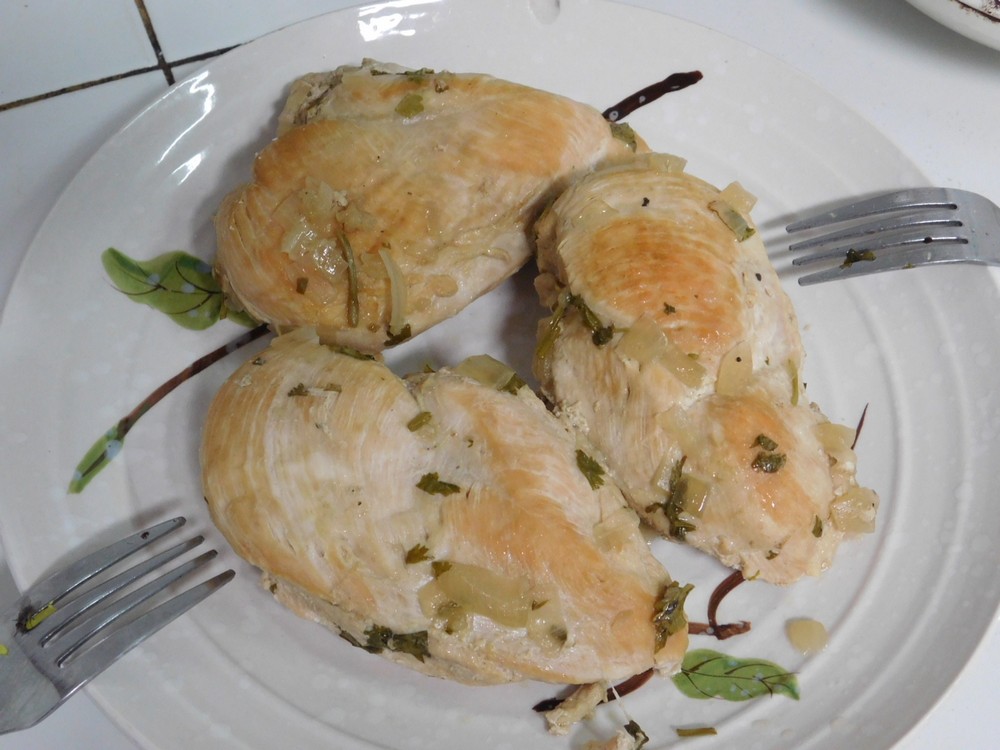
- Return the chicken to the cooker and cook until the sauce has thickened, about 20-30 minutes.

- Server over pasta, rice, or mashed potatoes, and the gravy is excellent. Enjoy.


Notes
Low cost per serving.
Shortcut: Chicken Broth (Pressure Cooker).
Variant: 1. Use fresh cilantro in place of parsley.
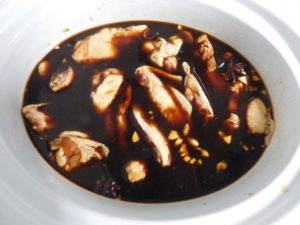
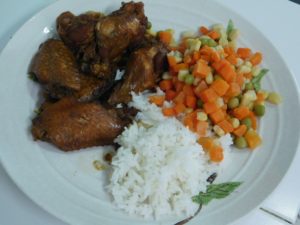
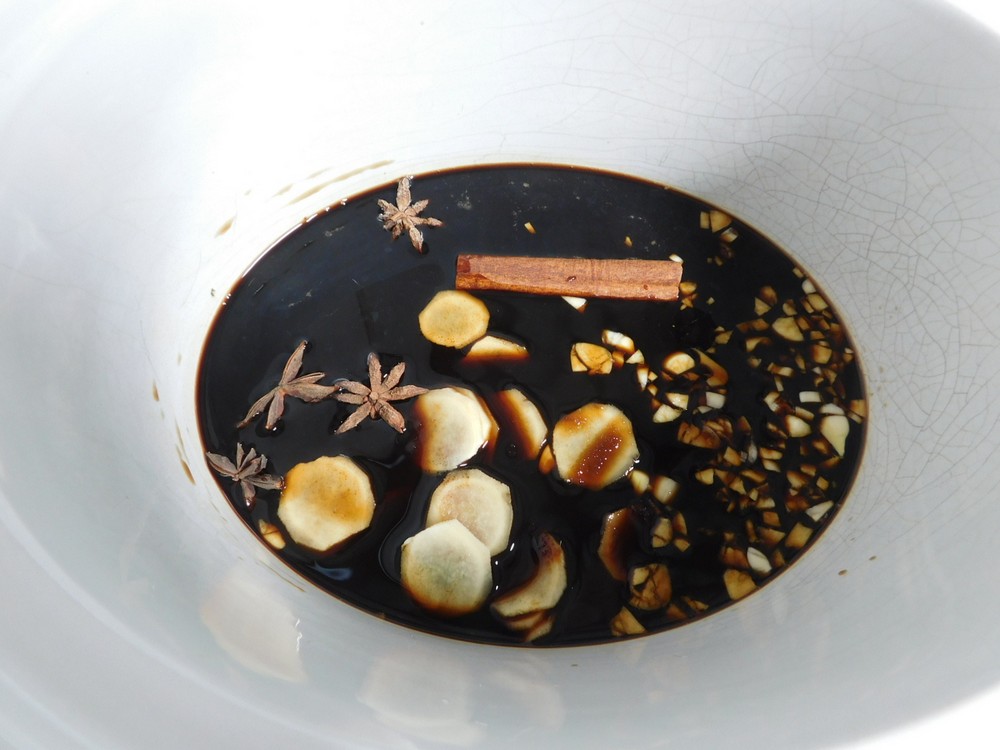
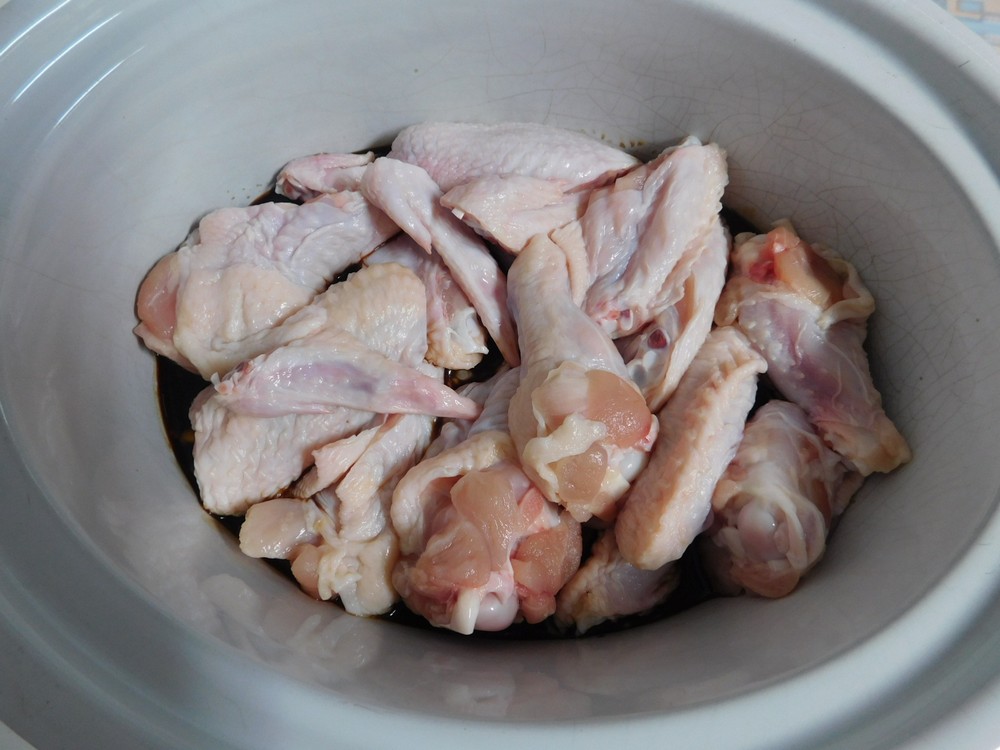
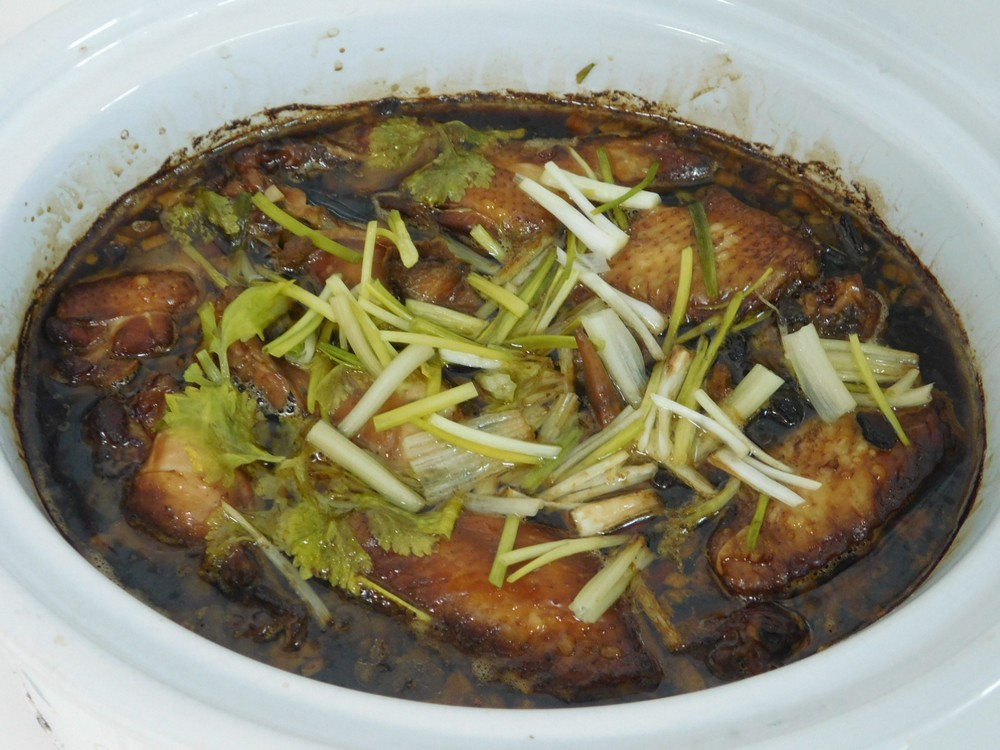
Soy Sauce Chicken Wings (Slow Cooker)
This is the Cantonese version of Taiwanese 3 Cup Chicken, and is tasty. This is normally made with whole plump chickens and once they have cooled completely, they are simply chopped. This recipe will use wings, drummettes (called wing sticks in Thailand) and middle wing sections (called middle wing sticks in Thailand) cooked in a slow cooker.
Equipment
- Slow Cooker
Ingredients
- 3/4 cup light soy sauce
- 1/4 cup dark soy sauce
- water, as needed
- 1 - 1 ¼ kilos chicken wings, (1 - 1 ½ lbs)
- 2 inches fresh ginger, peeled and sliced
- 3 cloves garlic, smashed
- 3 tablespoons sugar
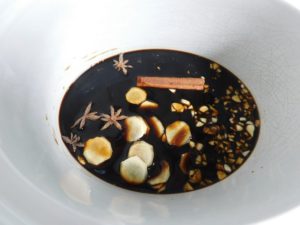
- 1 stick cinnamon
- 2 pieces whole star anise
- 2-3 spring onions, chopped
- fresh cilantro, for garnish
Instructions
- Prep the chicken by rinsing it, then cut the tip off, then separate the drummette (wing stick) from the middle wing (middle wing stick). You can use the tips if you like or discard.
- Add the ginger, star anise, cinnamon, garlic, sugar, and both soy sauces to your slow cooker. Give the mixture a stir.
- Place the wings in your slow cooker.

- Add water as you stir the wings around to get them settled into the liquid, add just enough water to cover the wings.
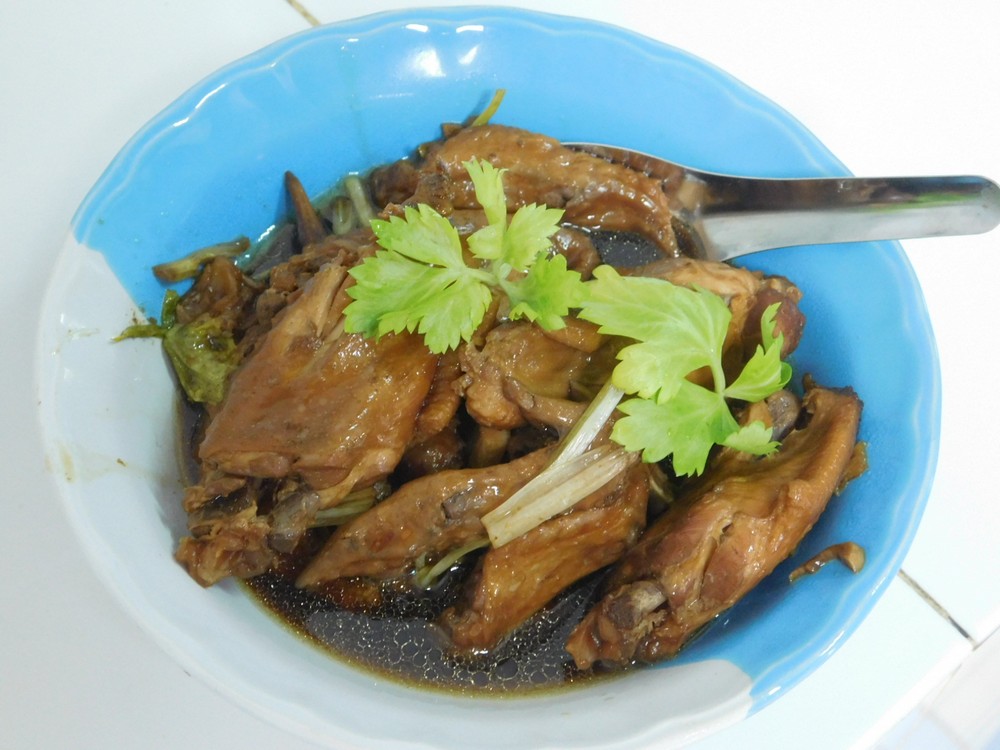
- Place the slow cooker on High setting 1 hour. Give the wings a quick stir then turn the cooker to Low setting and let cook for 2 hours. Sprinkle the chicken with the spring onion about 10 minutes before serving.

- Use a spoon to remove the chicken to a serving platter or bowl and spoon the sauce over the wings.

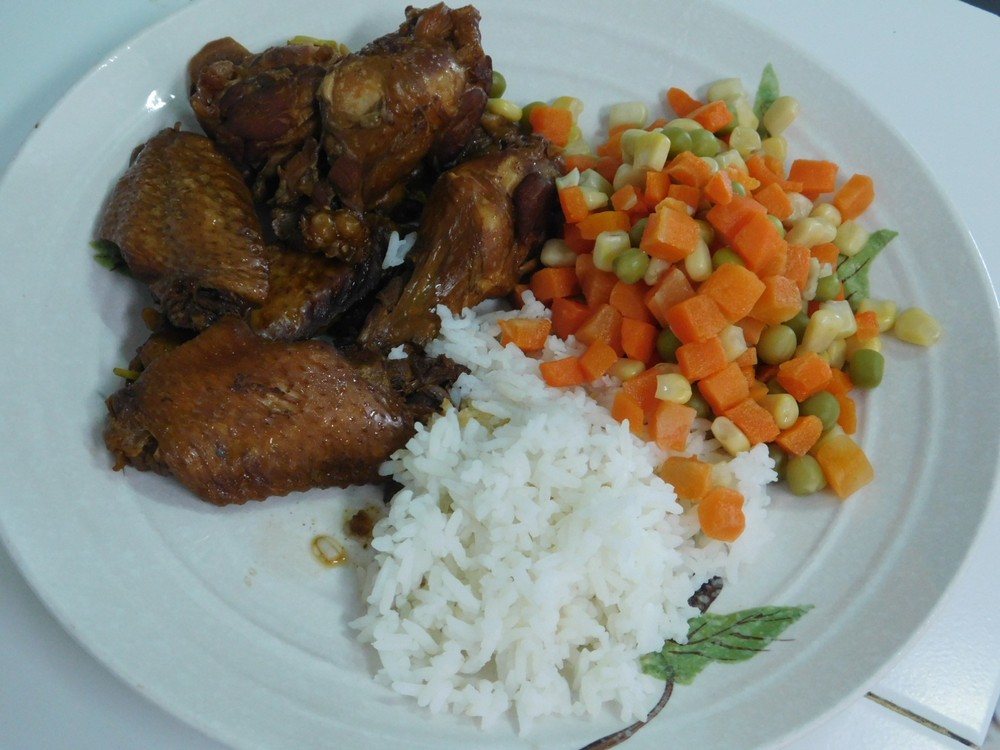
- Serve with rice or noodles, spoon sauce over the rice or noodles as desired. Enjoy.

Notes
Low cost per serving.

Salami Cream Cheese Sandwich
This recipe comes form a good friend, and it is delicious! I made this on 9 Feb 2019, the same day I came across this. Highly recommended.
Ingredients
- 250 grams Cream cheese, room temp, (8 oz)
- 1/4 cup spring onion, finely chopped
- 1/4 cup fresh dill, finely chopped
- 1 clove garlic, pressed
- 8 slices sandwich bread
- 280 grams salami, thin sliced, (10 oz)
- 8 lettuce leaves, or as desired
Instructions
- For the salami, I used Haus (German style), produced here in Thailand, which is beef and pork. Imported Genoa salami, one would need to take out a small loan to get that. This Haus salami is excellent. I used one pack, 70 grams (2 1/2 oz) for each sandwich.

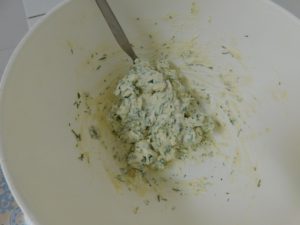
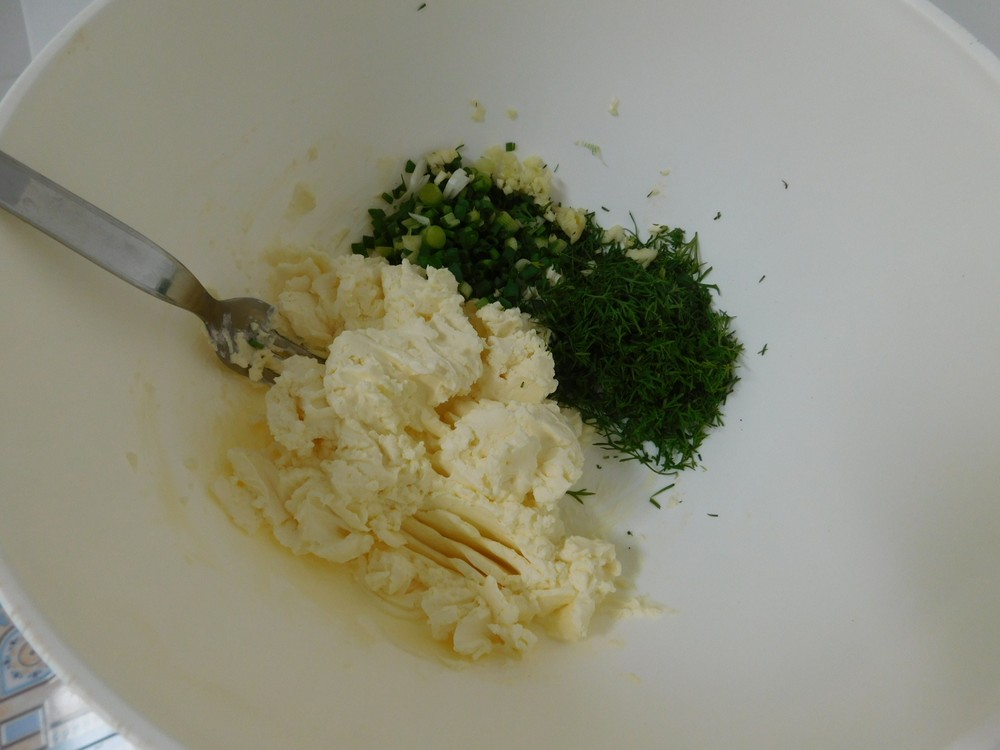
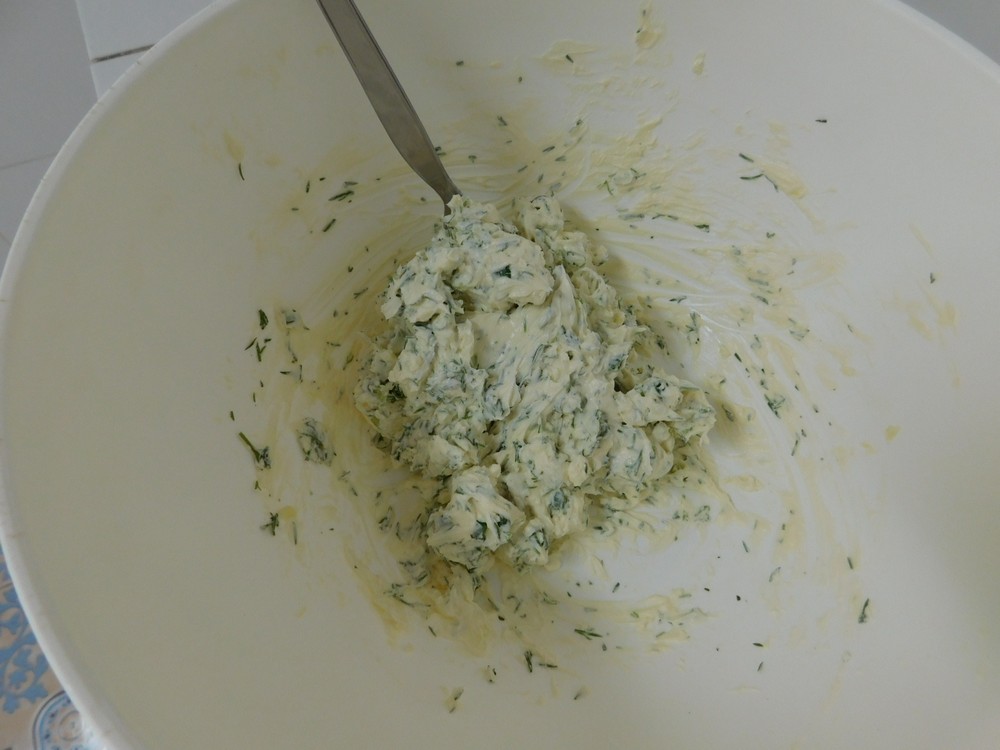
- Add the cream cheese, spring onion, dill, and garlic to a mixing bowl.

- Mash together with a fork to completely mix.
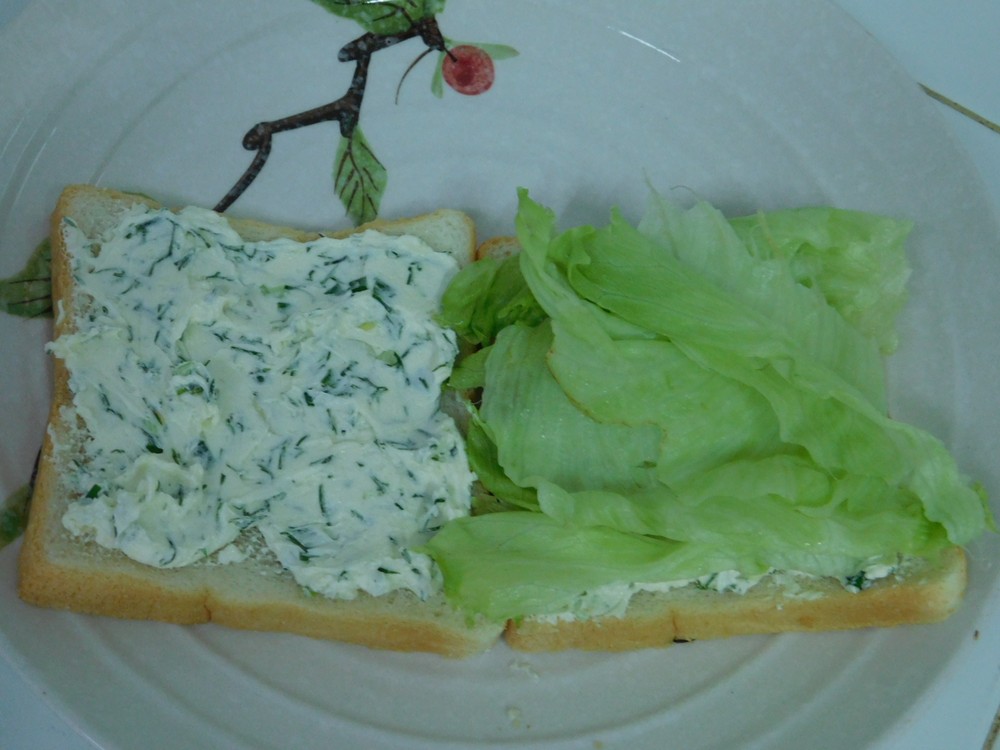
- To make a sandwich, spread some cream cheese mix onto two slices of bread, top one slice of bread with the lettuce leaves.

- Top the lettuce with the salami slices from the whole 70 gram package or 2 1/2 ounces if the salami you are using is larger diameter.

- Top the sandwich with the other slice of bread. Slice in half, and enjoy. Repeat for remaining sandwiches. The cream cheese mix will keep refrigerated for 3 to 5 days.


Notes
The salami I used is 88 Baht/70 gram package (2 1/2 oz), that is 352 Baht. The cream cheese is 120 Baht/250 gram package. For 4 sandwiches, this is about $3.70 per sandwich. High cost but oh so good for a once in a while treat.
This recipe for Salami Cream Cheese Sandwich is from Natasha's Kitchen.

Crab Pasta Salad
I like pasta salads as they are easy to make and can be dressed up any way you like. This is something I just threw together and it was well liked.
Ingredients
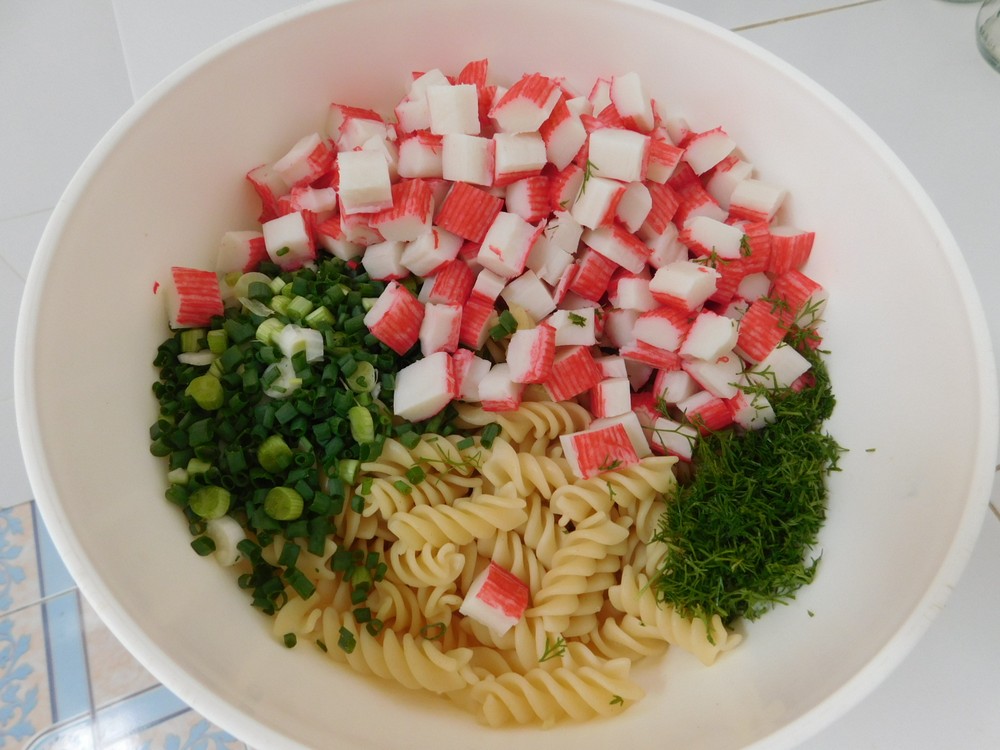
- 250 grams dry spiral pasta, or any bite size pasta you like, (8 oz)
- 500 grams imitation crab, cut into bite size pieces, (1 lb)
- 4-5 spring onions, chopped
- 1 handful fresh dill, chopped
- mayo, as needed
- black pepper, as desired, to taste
Instructions
- Bring a pot of salted water to a boil and then add the pasta. Cook until tender. Drain and run under cold water, drain and let set in the colander for a few minutes to drain very well. Place in a large mixing bowl.
- Add the crab, spring onion, and dill.

- Ad 2 big spoonfuls of mayo and gently mix into the salad to coat everything in mayo, add more as needed to get the consistency you desire. Goal is well coated, not dripping, in mayo. Season with black pepper as desired. Cover and place in the fridge to chill for several hours, serve with any main dish or as is for a light meal.

Notes
The imitation crab will cost 52 Baht/250 grams, 104 for 500 grams. The pasta I used was Fusilli (spiral) from Italy for 35 Baht/250 grams. For 6 servings, this is about 72 cents per serving.
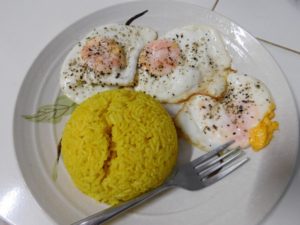
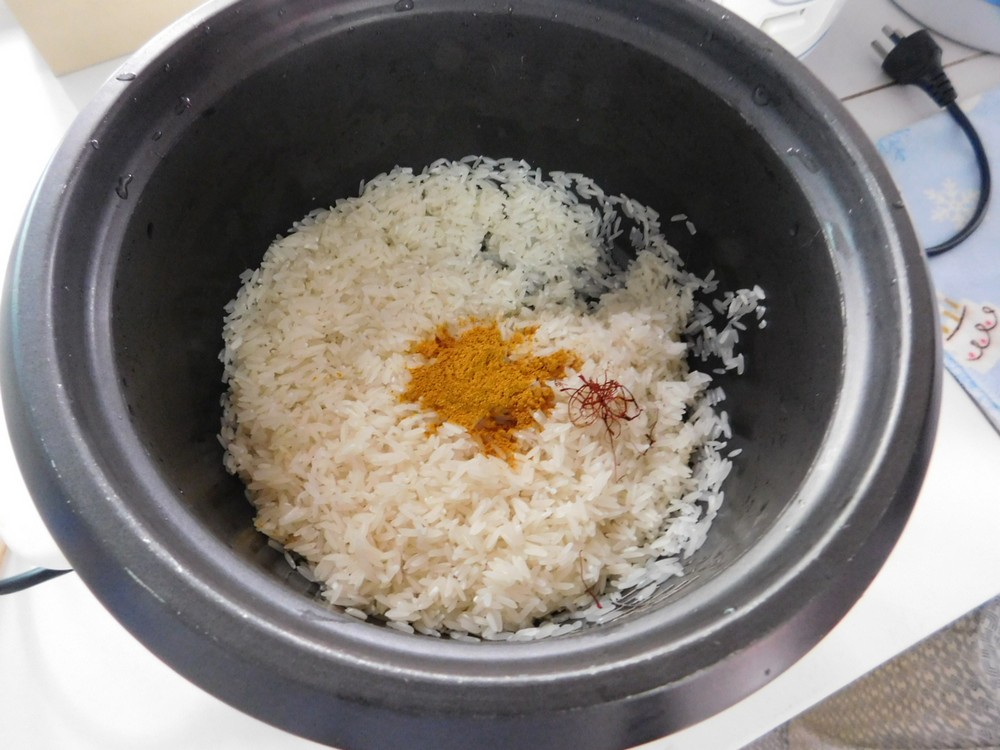
Saffron Curry Rice
This recipe comes from a good friend who has made curry rice and saffron rice on many occasions, he decided to combine the two. His results is great curry rice with a subtle flavor and body from the saffron. Here is his original recipe. Two methods are listed for this, Stovetop and Rice Cooker. Link to the Shortcut is listed in the Recipe Notes section.
Equipment
- Rice Cooker
Ingredients
- 1½ cups dry Jasmine rice, rinsed and drained
- 2 cups chicken broth, fresh or from powder, Shortcut
- 1 pinch saffron threads, (6-8 threads)
- 1 tablespoon madras curry paste, or 1½ teaspoons of yellow curry powder
Instructions
Stovetop Method
- In a saucepan, add all the ingredients and stir together.
- Heat the saucepan to boiling, stirring occasionally. Reduce heat to low and cover for 10 minutes.
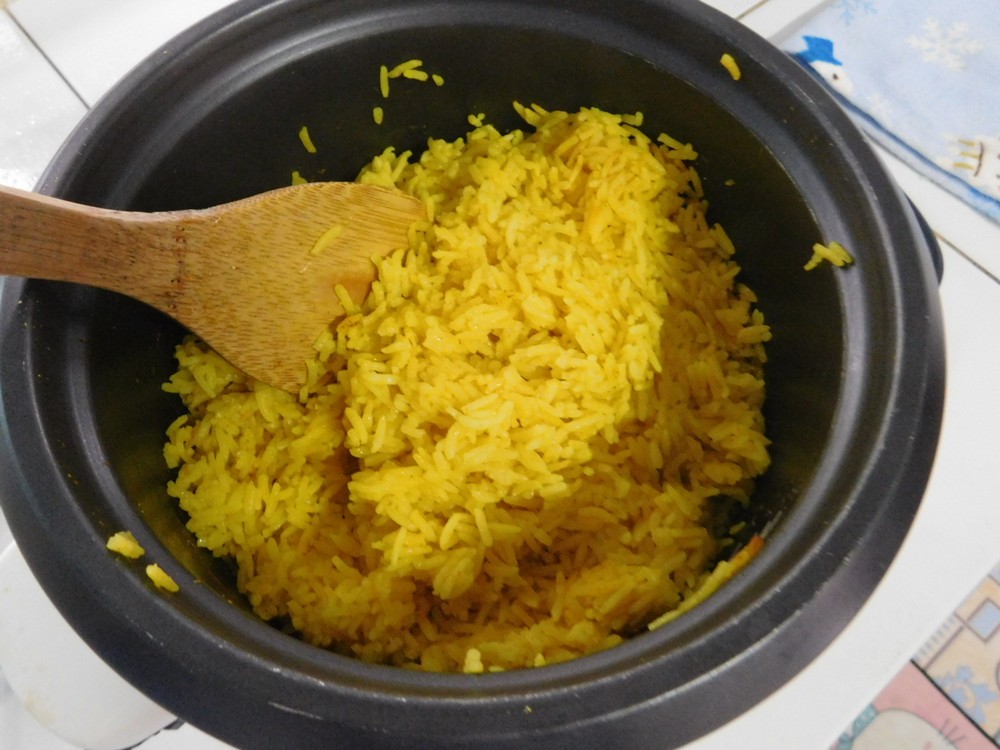
- Remove from heat, fluff rice, serve as a side dish with any Asian dish.
Rice Cooker Method
- Add the rinsed rice, curry powder, and saffron to your rice cooker.

- Add the broth and stir together.

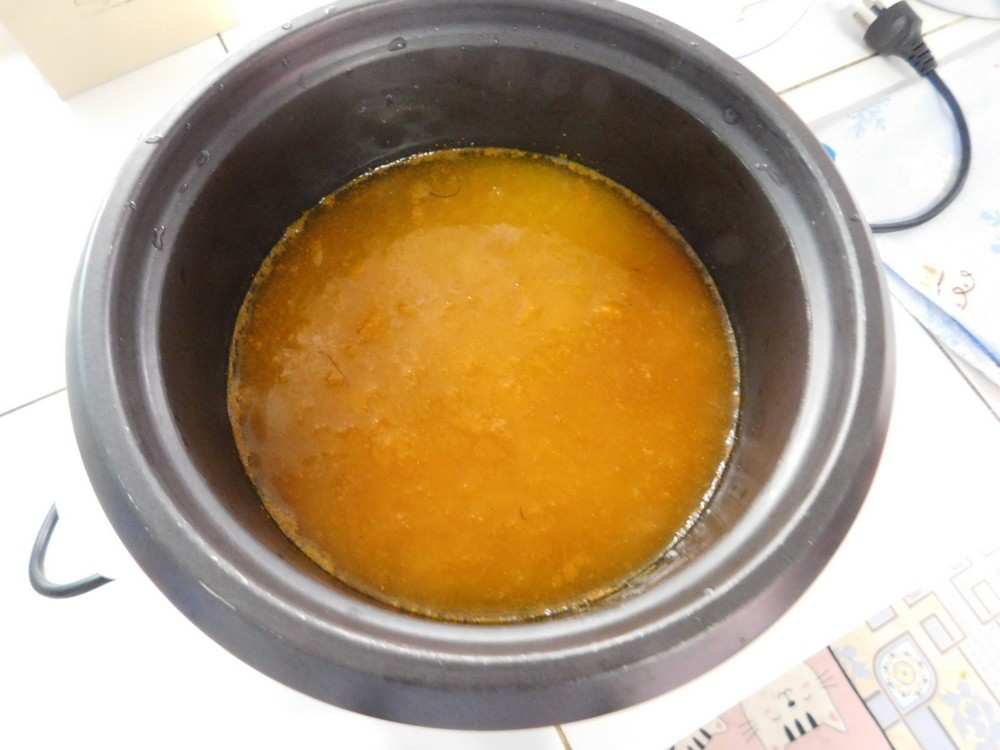
- Cover and set the cooker to Cook setting and let it complete the cook cycle and automatically switch to Warm setting.

- Unplug the cooker and fluff rice with a rice paddle. Serve as a side dish.

- Serve as a side dish, enjoy.


Notes
Shortcut: Chicken Broth (Pressure Cooker).
Variant: 1. Use yellow curry powder in place of the madras paste, excellent curry flavor with a bit less heat.