
Archive for the ‘#1 Go-To Recipes’ Category
Pork Chops (Pressure Cooker)
This is a base recipe for tender pork chops using your pressure cooker. The time stated for at pressure is based on a stove top pressure cooker with 80 kPa (12 psi) pressure, so this will work as stated for electric pressure cooker. I used my 9 liter (9½ quart) stove top pressure cooker. Follow you pressure cooker safety instructions at all times.
Equipment
- Pressure Cooker
Ingredients
- 4 thick cut pork chops, ¾ inch thick, bone in
- 2-3 tablespoons butter
- salt and black pepper, as desired
- 1 cup vegetable stock, or pork or chicken stock
Optional - To Make Gravy
- 1 tablespoon cornstarch
- 2 tablespoons water
Instructions
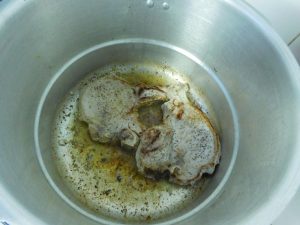
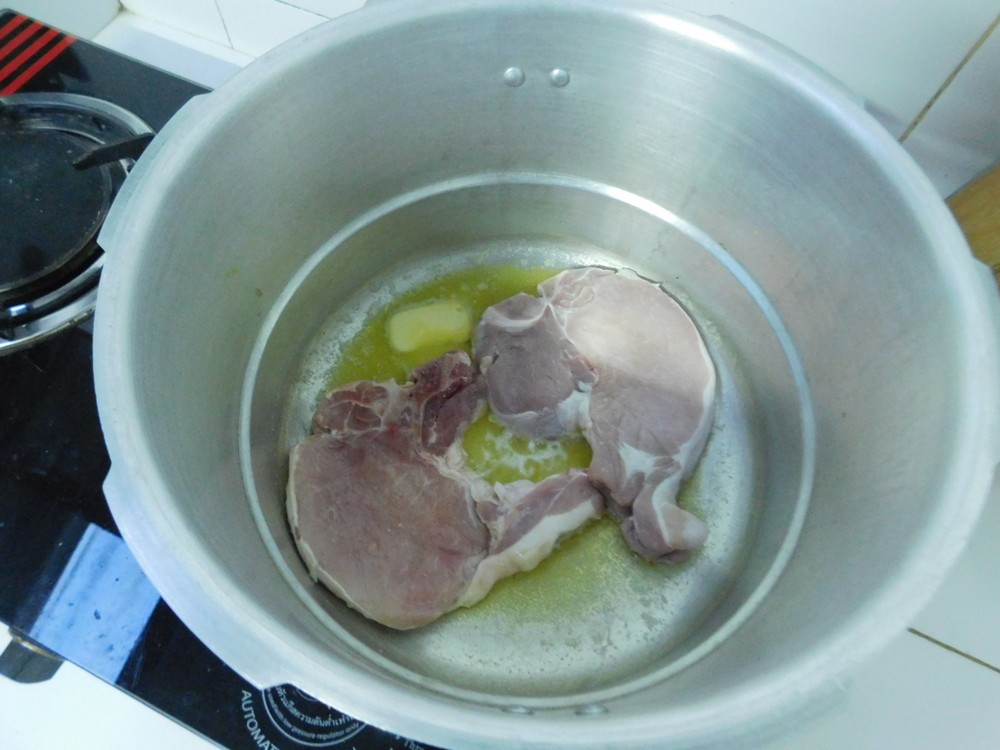
- Add the butter to your pressure cooker, keeping lid off for this part, and heat. when melted, add two pork chops to the cooker and season with salt and pepper as desired and brown the chops for about 2 minutes. (I was snap happy with the camera and took the photo before the salt and pepper.)

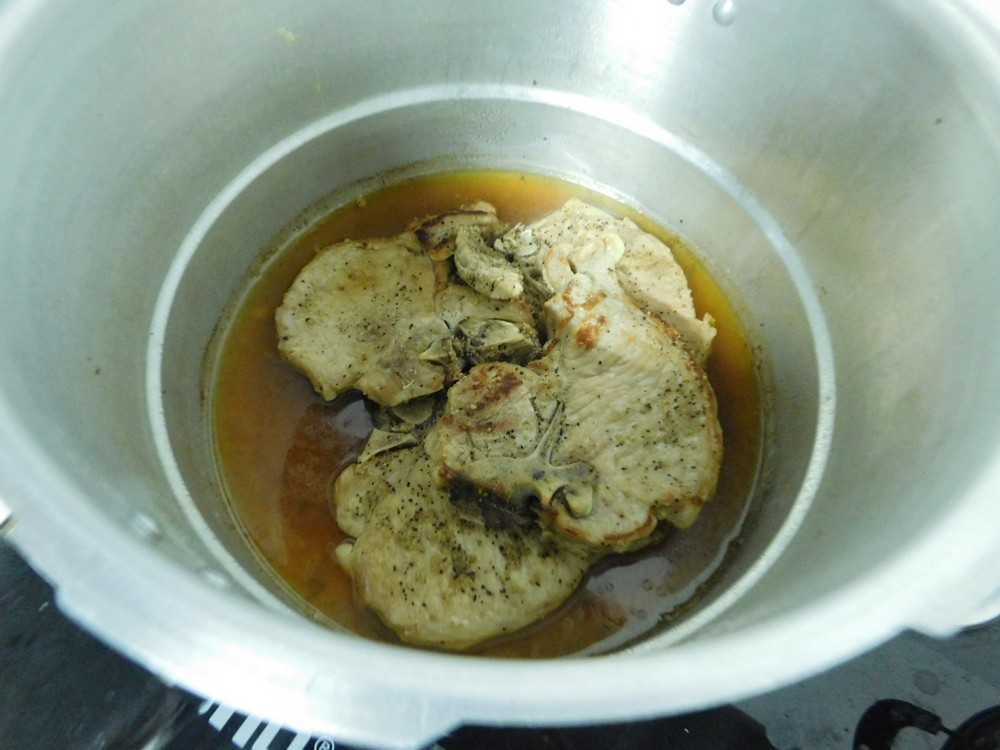
- Turn the chops over and brown the other side, season with salt and pepper as desired. Remove to a bowl and add more butter if needed. repeat with the two remaining chops.
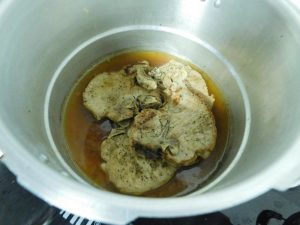
- Add the vegetable stock and the first two chops to the cooker, place the lid on, add the weight (the jiggler) and turn heat to high. When the jiggler starts to vent pressure and starts moving, set your timer for 10 minutes and reduce heat to low or medium to keep the jiggler moving and venting pressure.
- When 10 minutes have passed, turn off heat and move the cooker to an unused burner and allow the cooker to release pressure naturally.
- When you have indication that the pressure cooker had no pressure inside, open the pressure cooker.
- Optional, but worth it. Remove the chops from the pressure cooker, leaving the liquid in the pot. Mix together the cornstarch and 2 tablespoons of water in a cup. Place the pot back on low heat, no lid this time, and when hot, whisk in the cornstarch slurry and whisk until thickened, there, you just made pork gravy.
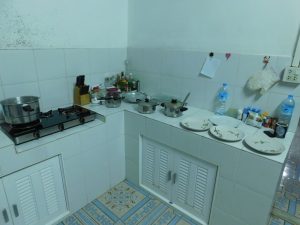
- Ready to plate. While the pressure cooking is working, or cooling down, make your side dishes. The 3 pots on the counter, left to right, gravy, daikon, and mashed potatoes, which I cooked the potatoes in the pressure cooker right before making the chops, and mashed while the cooker was working on the chops.
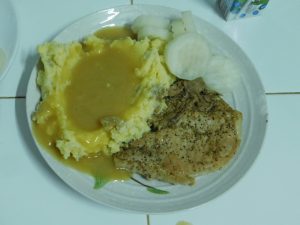
- Served.


Notes
And like an idiot, I forget to get the price on the pork chops at Tesco, will update this once I go back up to the city.

Dill Thai Omelet
Thai omelets are generally airy and fluffy cooked eggs, not folded over. This is quick and easy, served with rice on the side, a simple and filling meal for 4-6 people. The eggs are mixed into the fresh dill before going into the pan, and is a brilliant flavor. I seen my wife make this a few weeks ago, and she learned this from her sister.
Ingredients
- 4-5 eggs, chicken or duck
- handful fresh dill, chopped
- salt, as desired
- cooking oil, as needed
- fresh dill, for serving
- cooked rice, for serving
Instructions
- Put a wok or non stick pan on high heat and add about 1/2 cup of cooking oil. For a non stick with the rounded sides, a 10 inch pan is perfect and you want about 1/4 inch of oil on the bottom of the pan.
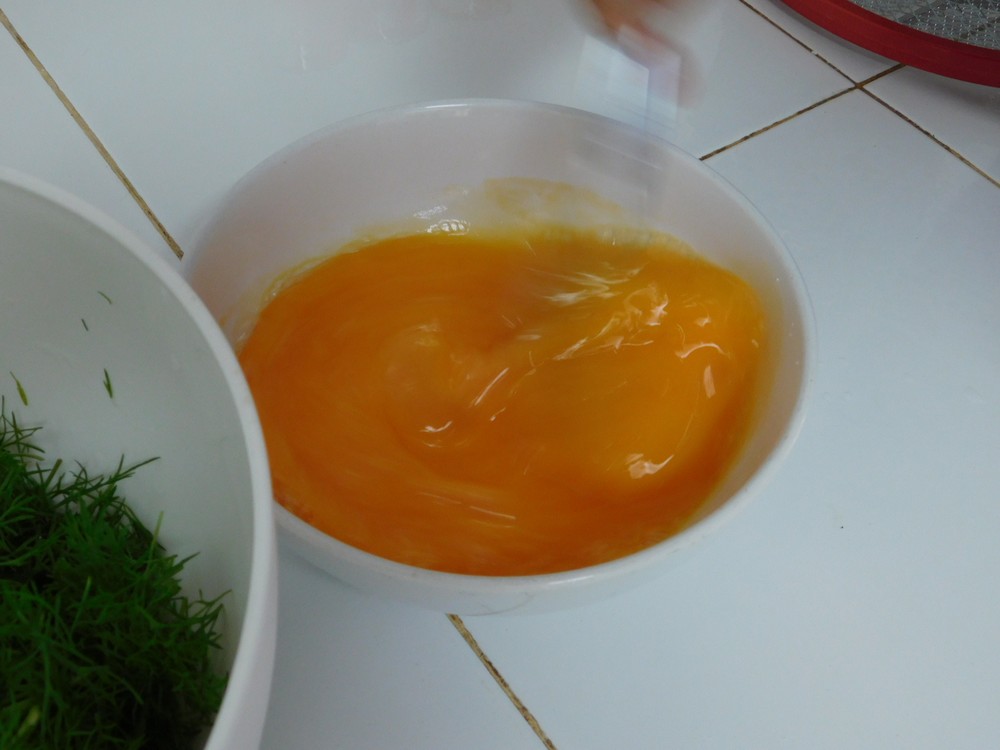
- The chopped dill in the bowl is for the omelet, the sprigs of dill are for serving. The eggs, farm fresh.
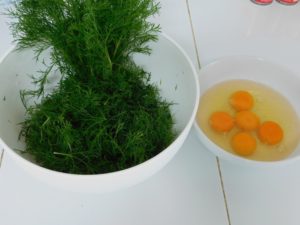
- While the pan is heating, break eggs into a bowl. Add the salt and beat with a fork until frothy. My wife is beating the eggs at light speed here.

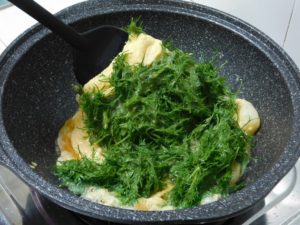
- Pour the eggs into the bowl with the dill and mix together.

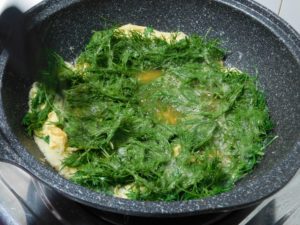
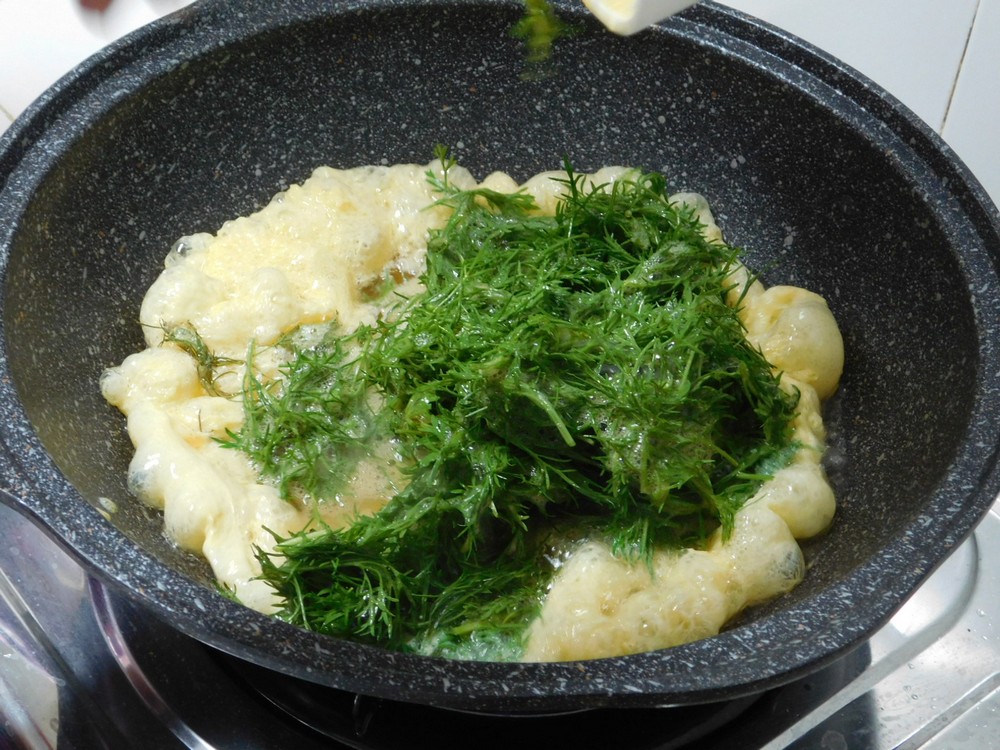
- When the oil just starts to smoke, turn the heat to low and quickly pour in the beaten eggs, it will fluff before your eyes. The dill will end up on the top, no worries.

- Using a spatula, spread the dill out if it is clumped in the center, then lift the edges to get the liquid part of the eggs onto the pan, do this several times from all sides.
- The bottom is evened out, the dill is spread out, just cooking to set the egg.
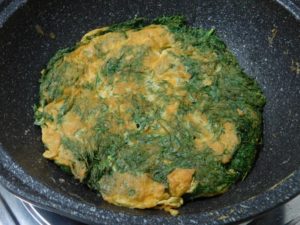
- Keep checking the bottom and when getting nice and browned and set well (remember, from pouring into the pan to flipping takes only 45 seconds to a minute) flip the omelet over, 20-30 seconds later, the bottom should be browning nicely.

- When the bottom is browned, flip again to put the dill on the top.
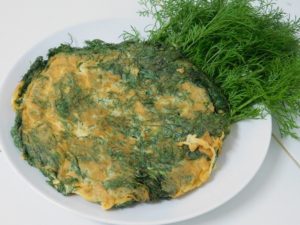
- Remove from the pan to a plate and serve with rice on the side. Here, this is garnished with fresh dill on the side as well.


Notes
Low cost.
Variants: 1. Add a few drops of lime juice or vinegar for a even more fluffier omelette.
Recipe provided by my wife's sister.
Thailand.
Thailand.

Spicy Shredded Chicken Salad
This is a Chinese dish, and sounds very tasty, as I do love a good chicken salad. Common ingredients are used which is a bonus. On my to cook list.
Ingredients
- 500 grams chicken breasts, boneless, skinless
- 1/2 cup garlic, smashed and minced
- 1/2 cup fresh cilantro, chopped
- 2 tablespoons vegetable oil
- 1 tablespoon red pepper flakes, or less, to taste
- 1/4 teaspoon salt
- 1 1/2 teaspoon soy sauce
- 1 1/2 teaspoons oyster sauce
- 1/4 teaspoon ground cumin
Instructions
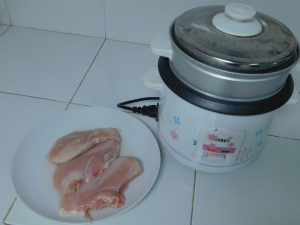
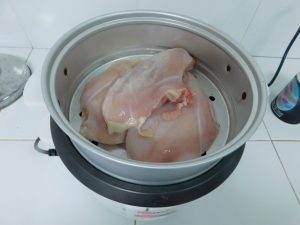
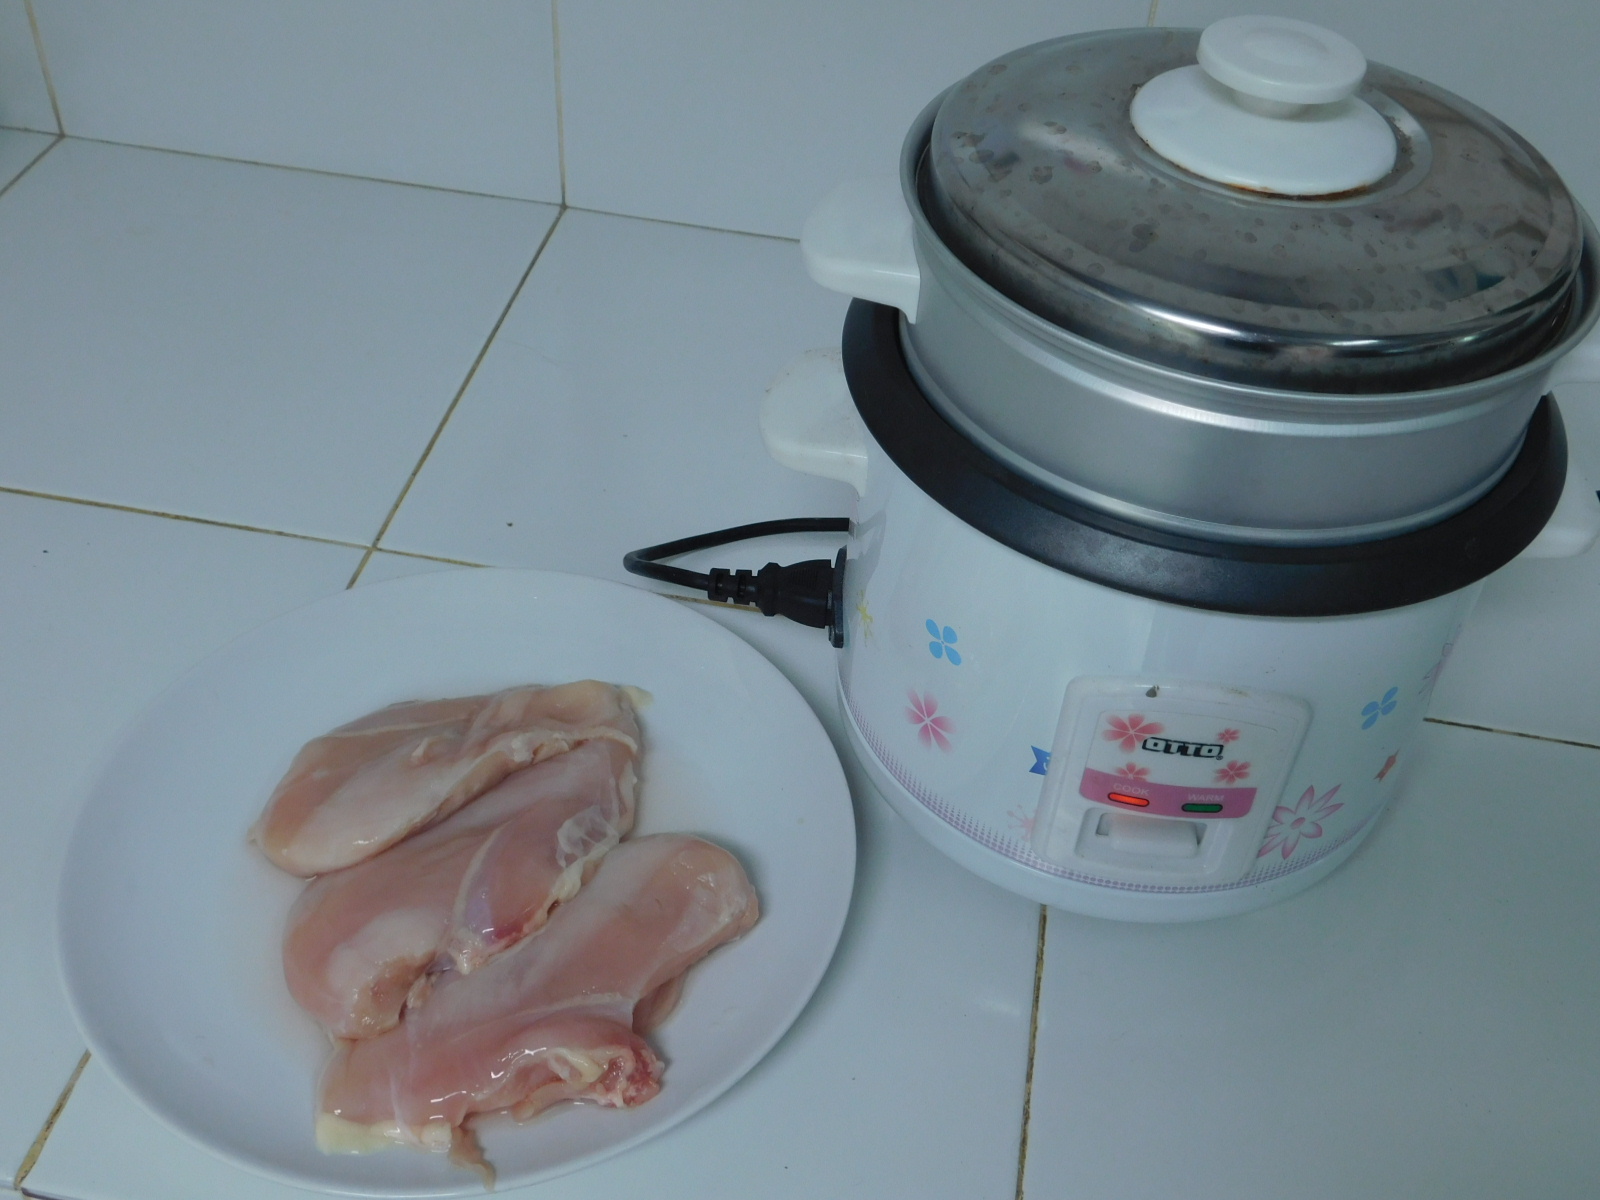
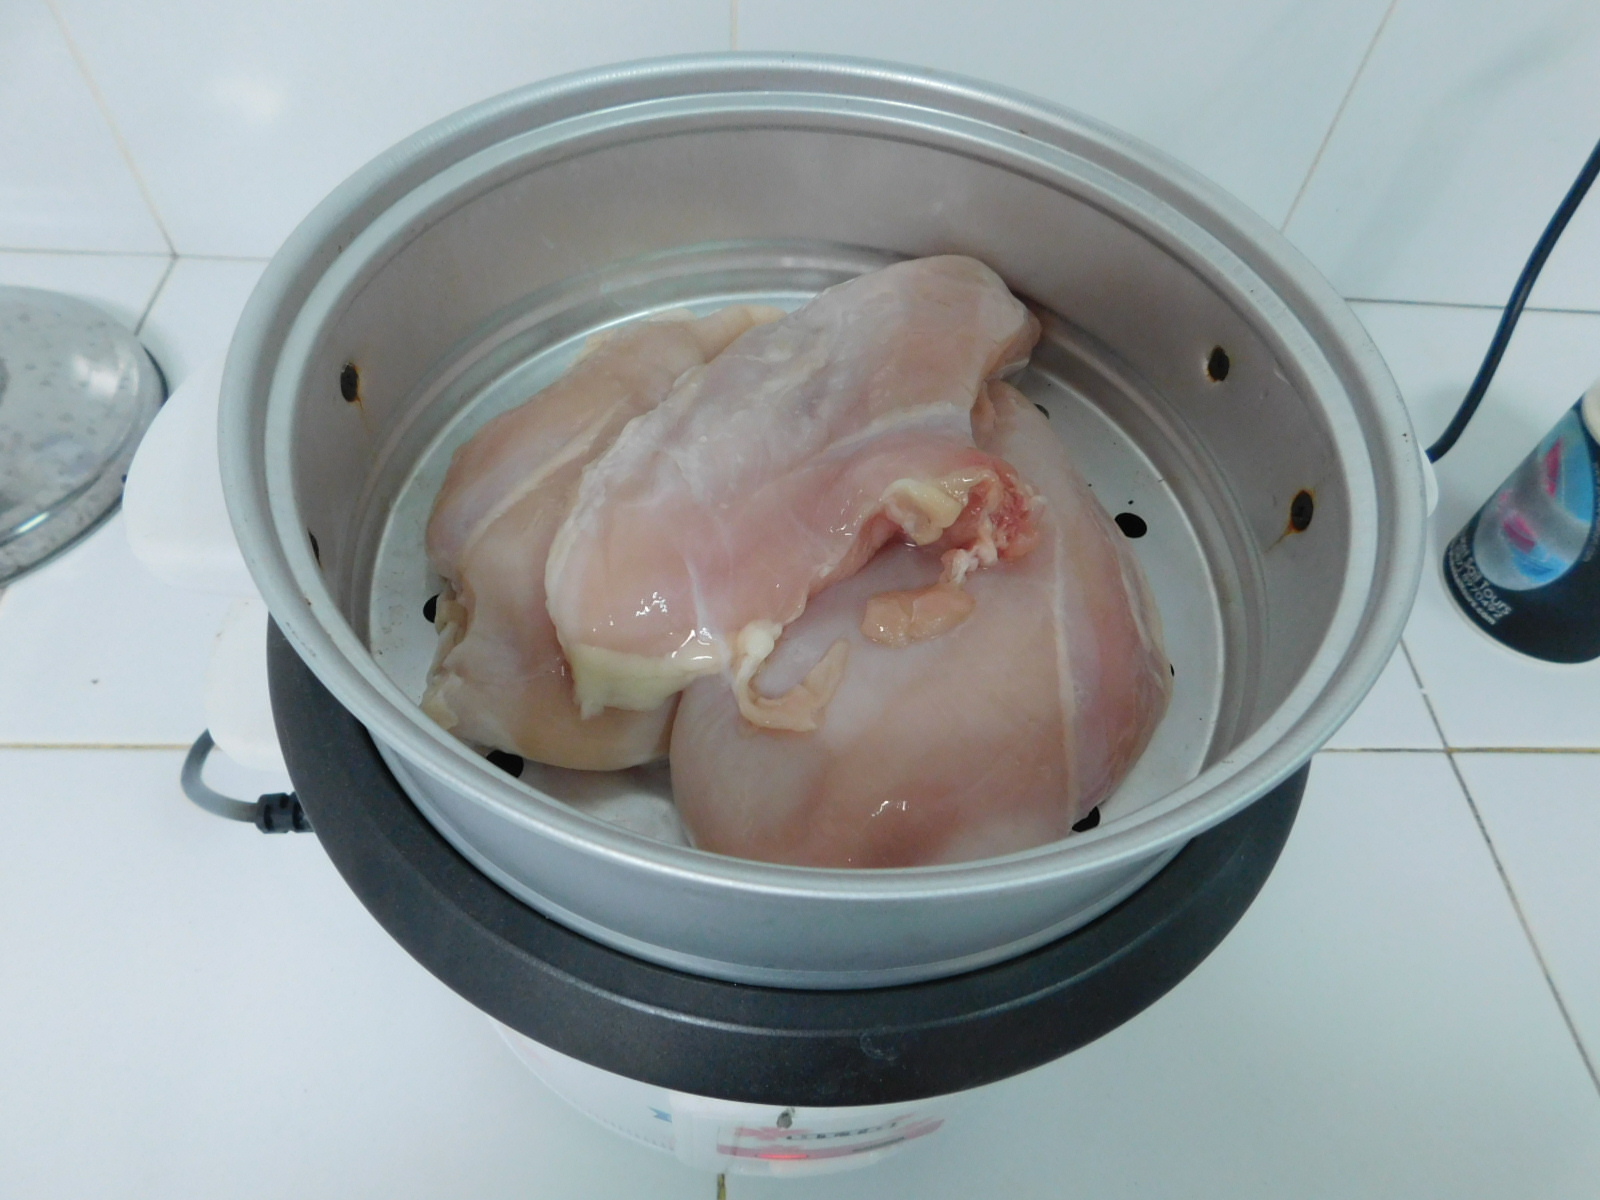
- I use my little rice cooker to do steaming, it came with a steamer basket and works perfect for items like this. Three chicken breasts was just a bit over 500 grams, perfect, no one will complain.
- Steam the chicken breasts for 20-25 minutes or until cooked through, cut one in half to check doneness.
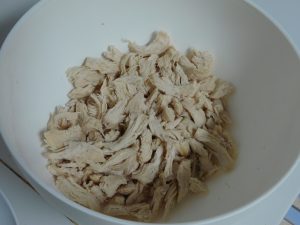
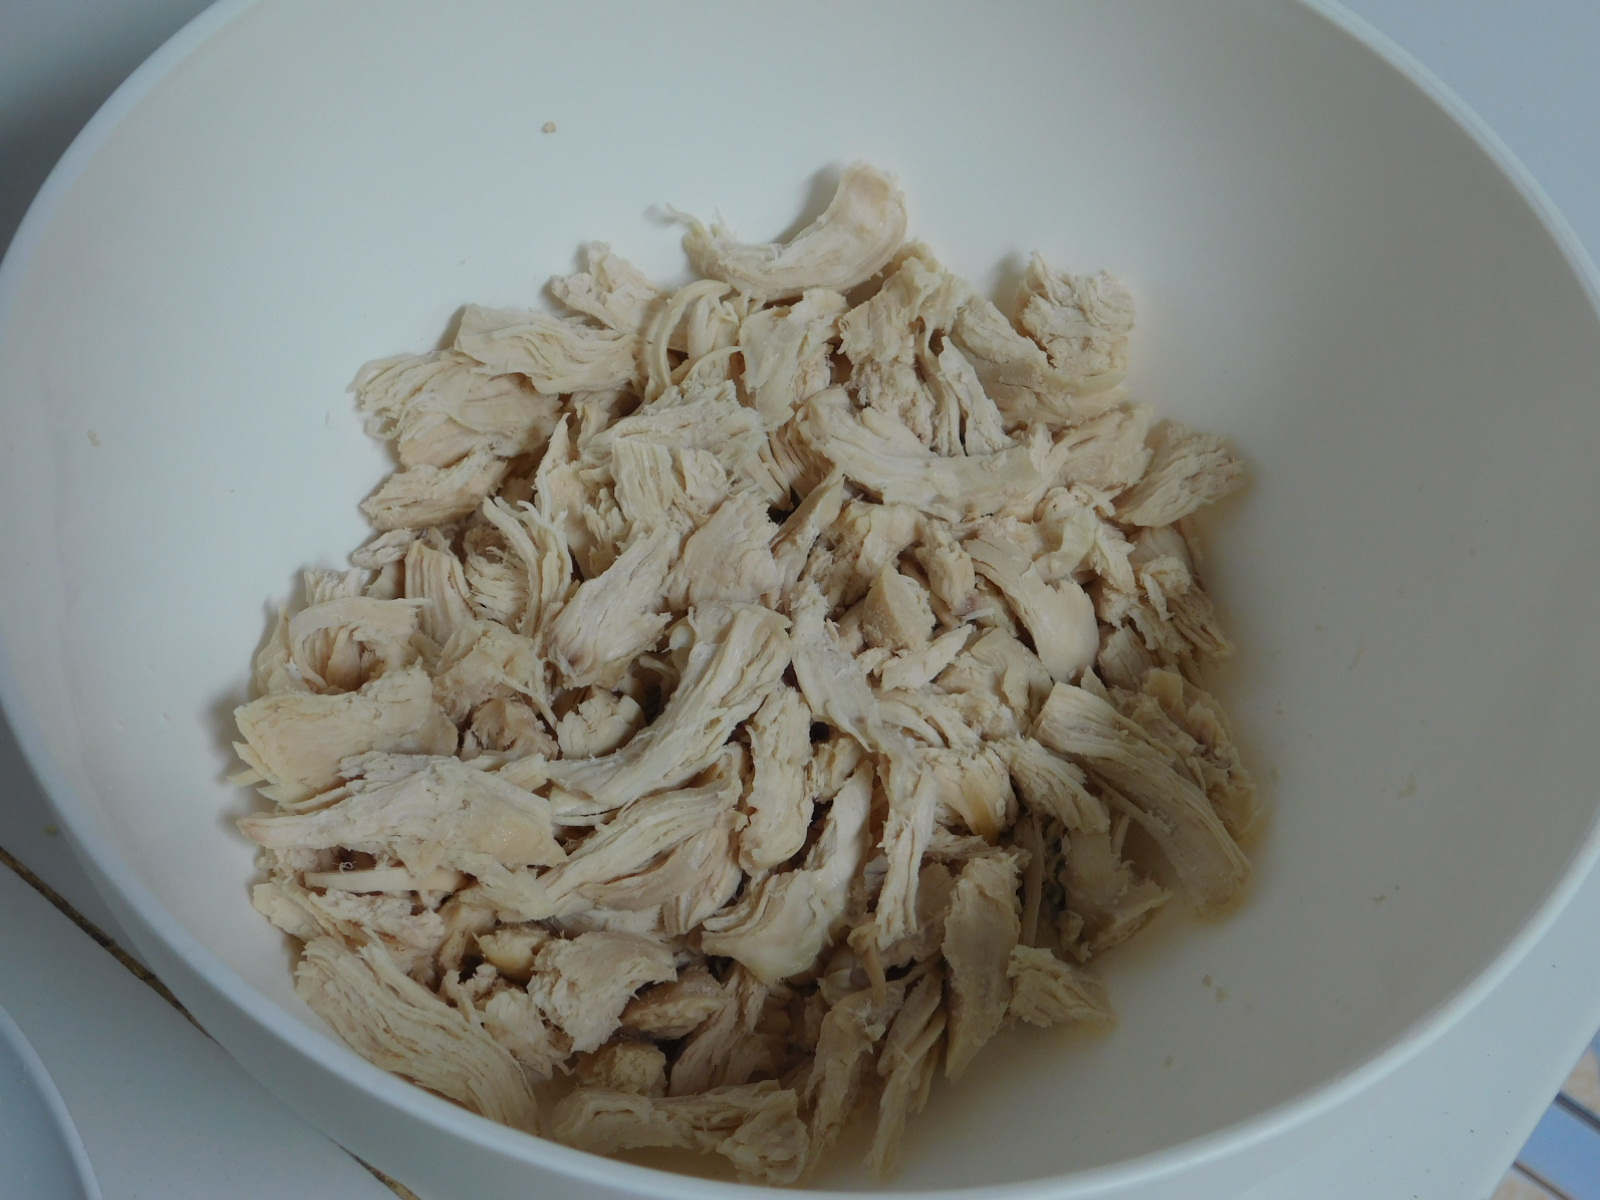
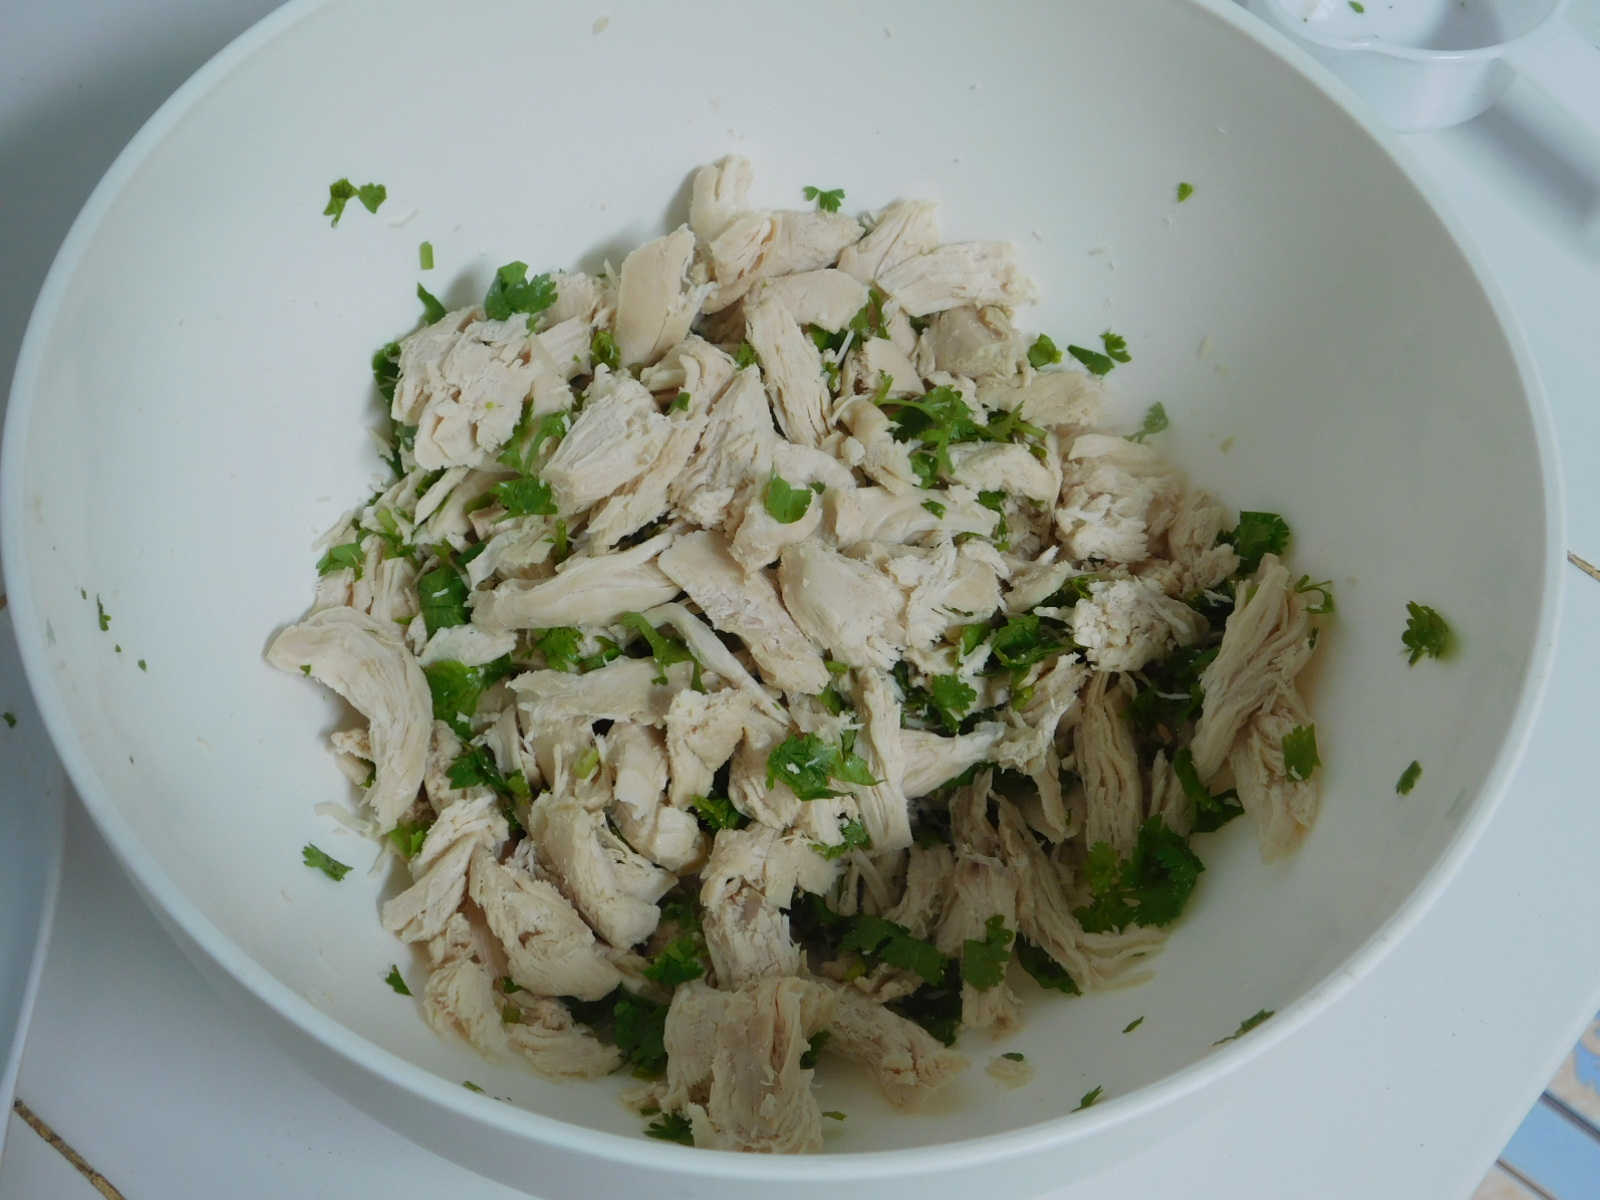
- When cooked, remove from the steamer and allow to cool, then shred and place in a large mixing bowl.
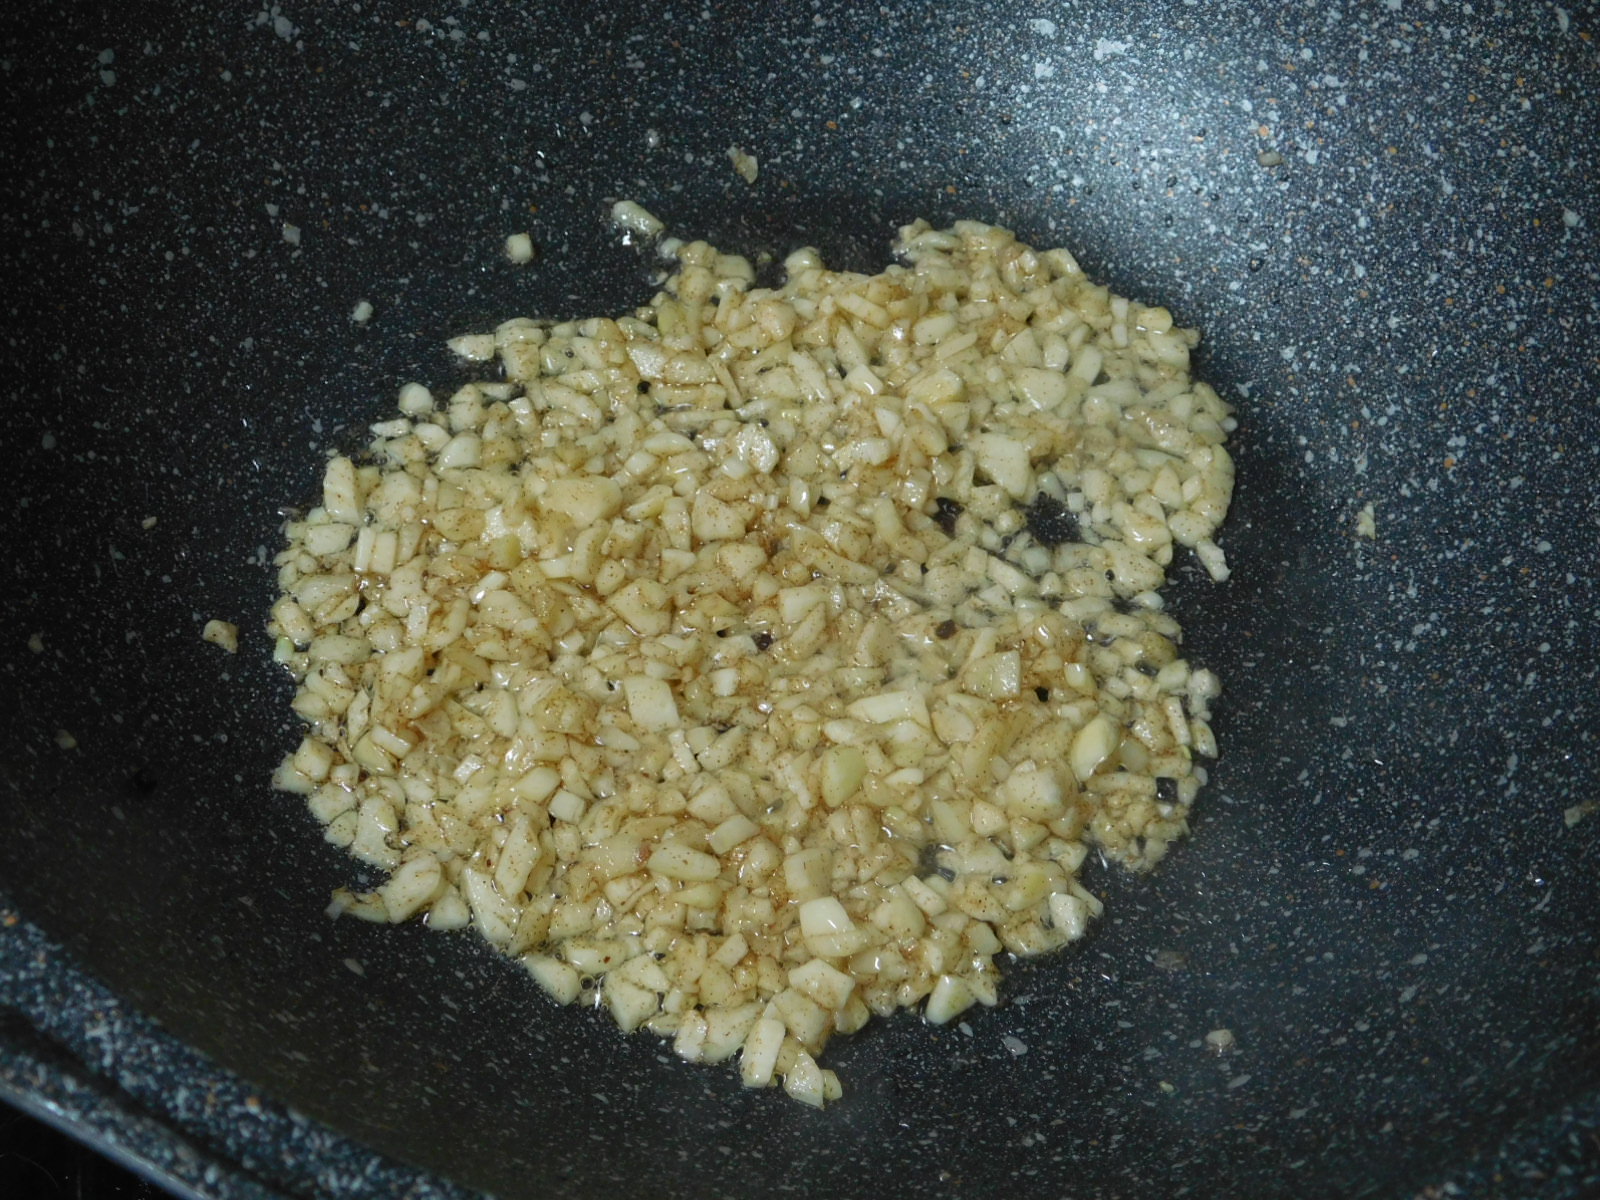
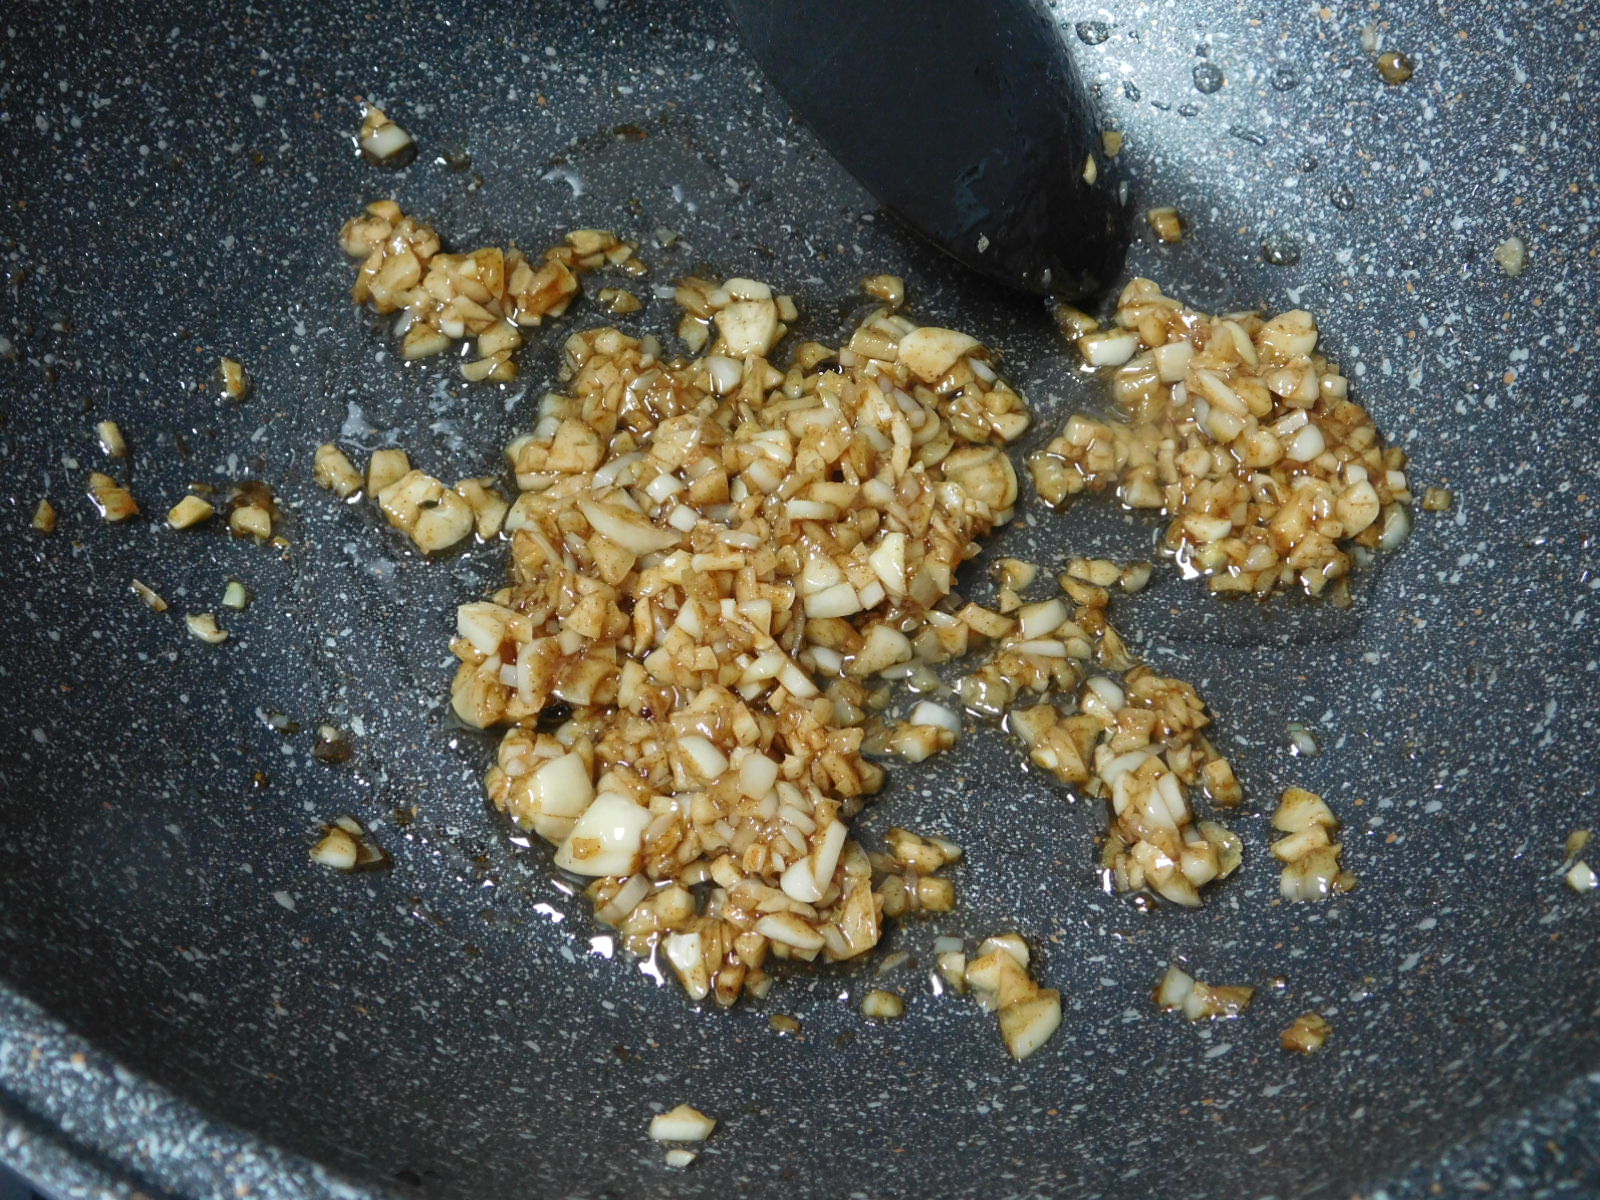
- Heat the oil in a non stick pan on medium heat, when hot, add the garlic and red pepper flakes. Stir fry until fragrant, about 1-2 minutes. Remove from heat.

- To the pan, stir in the salt, oyster sauce, soy sauce, and cumin.

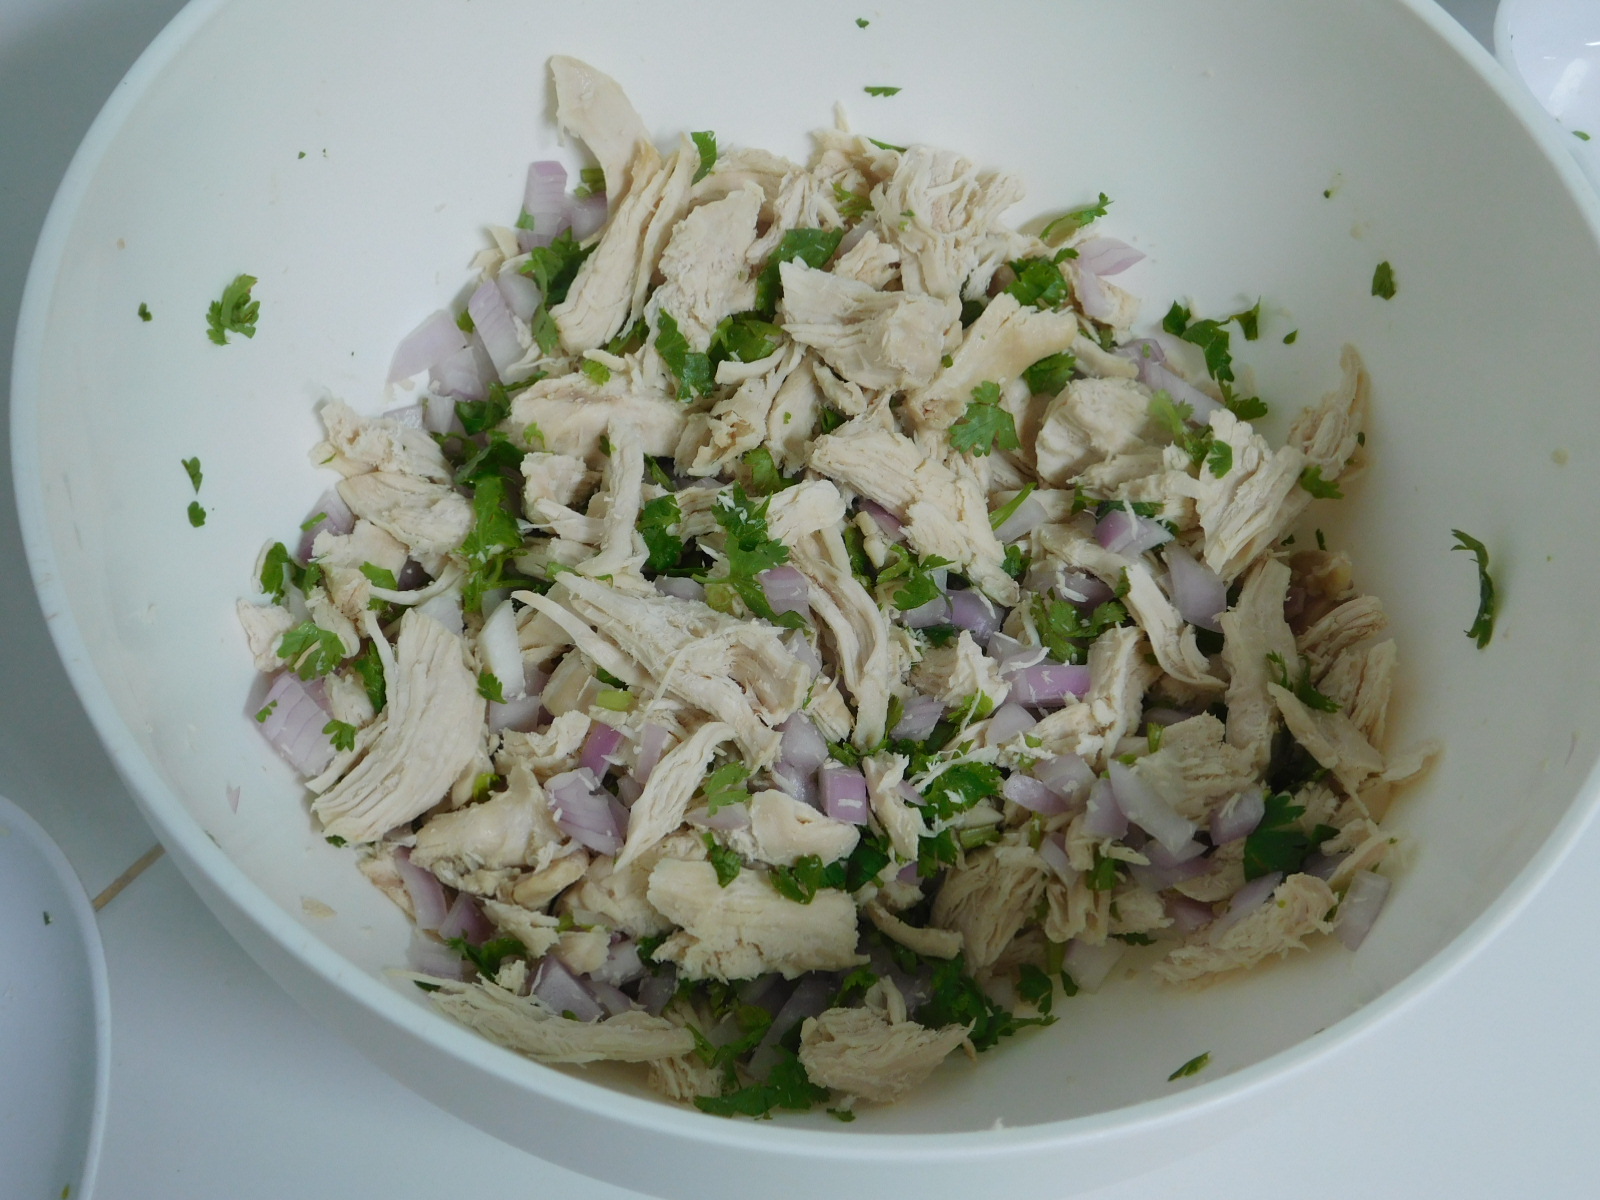
- Add the cilantro, reserving a small amount for garnish) to the chicken in the mixing bowl and toss to mix that in.

- I did use a variant and added some diced pickled red onion.

- Add the garlic mixture from the pan and toss to mix well.
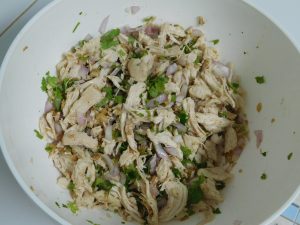
- Serve and garnish with cilantro or chill and serve with cilantro garnish.
Notes
The chicken breasts will cost about 30 Baht/500 grams. For 2 servings, this is about 47 cents per serving.
Shortcut: Pickled Red Onion.
Variants: 1. Add diced red onion. 2. Add diced celery. 3. Add diced pickled red onion, excellent!
Inspired by the recipe Spicy Shredded Chicken Salad from Spice the Plate.
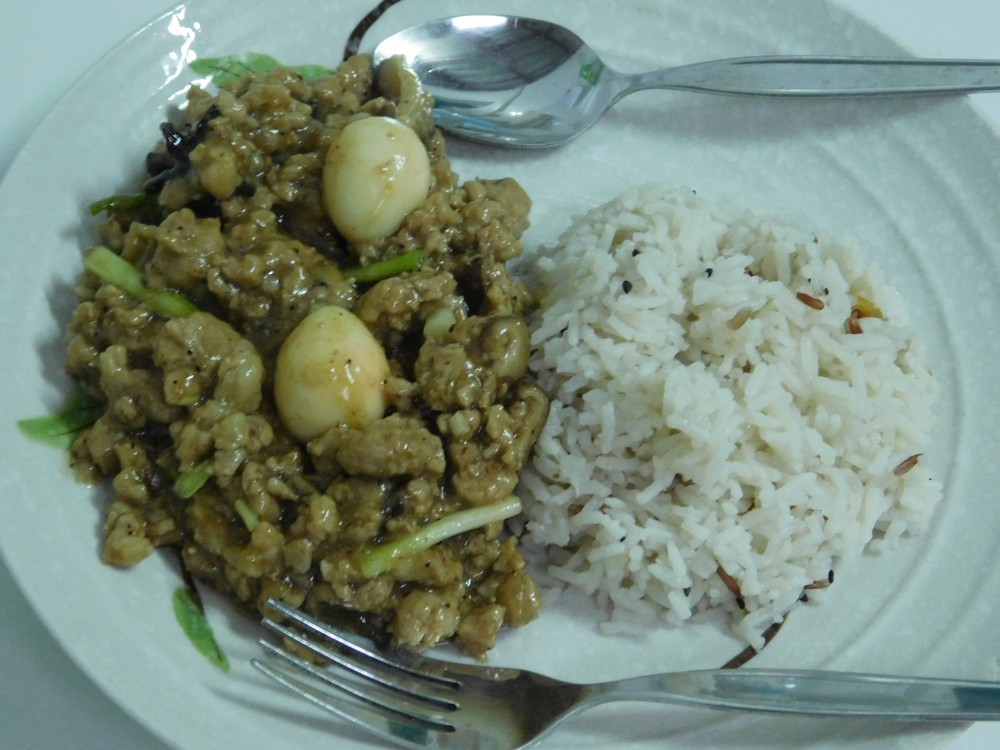
Asadong Pork Giniling with Quail Eggs & Mushrooms
This is a Filipino dish and struck my interest as a main dish with the use of ground pork. This is delicious, I made this on 17 July 2018 exactly as written, very well liked by the family. Link to the Shortcut is listed in the Notes section.
Ingredients
- 500 grams ground pork, (1 lb)
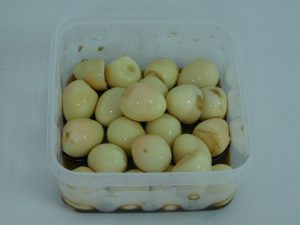
- 15-20 hard boiled quail eggs, peeled, or canned, Shortcut
- 8 fresh Shiitake mushrooms, stems removed and sliced
- ¼ cup oyster sauce
- ¼ cup soy sauce
- 2 pieces whole star anise
- 1 tablespoon sugar
- 1 cup chicken stock
- 2 tablespoons cornstarch, mix with ¼ cup water to make a slurry
- 3 spring onions, chopped, 1 inch pieces, white and green parts
- 4 cloves garlic, minced
- 1 small onion, minced
- salt and pepper, to taste
- cooking oil, as needed
Instructions
- If using fresh quail eggs, hard boil, peel, and place in a dish and set aside. If using canned eggs, just drain and rinse then place in a bowl and set aside.
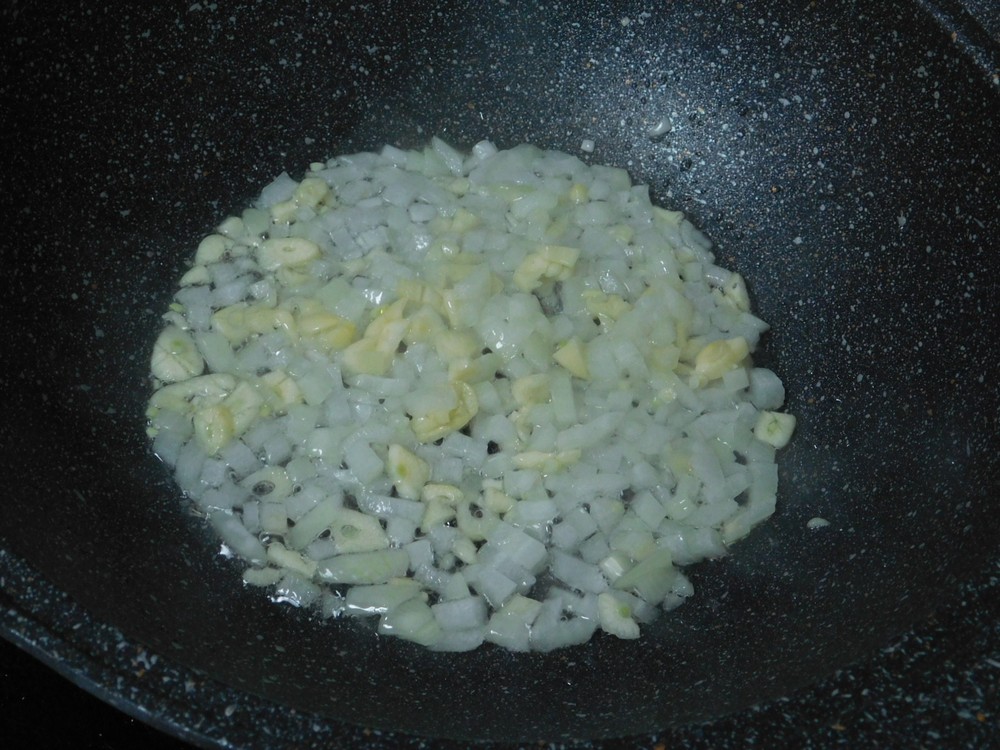
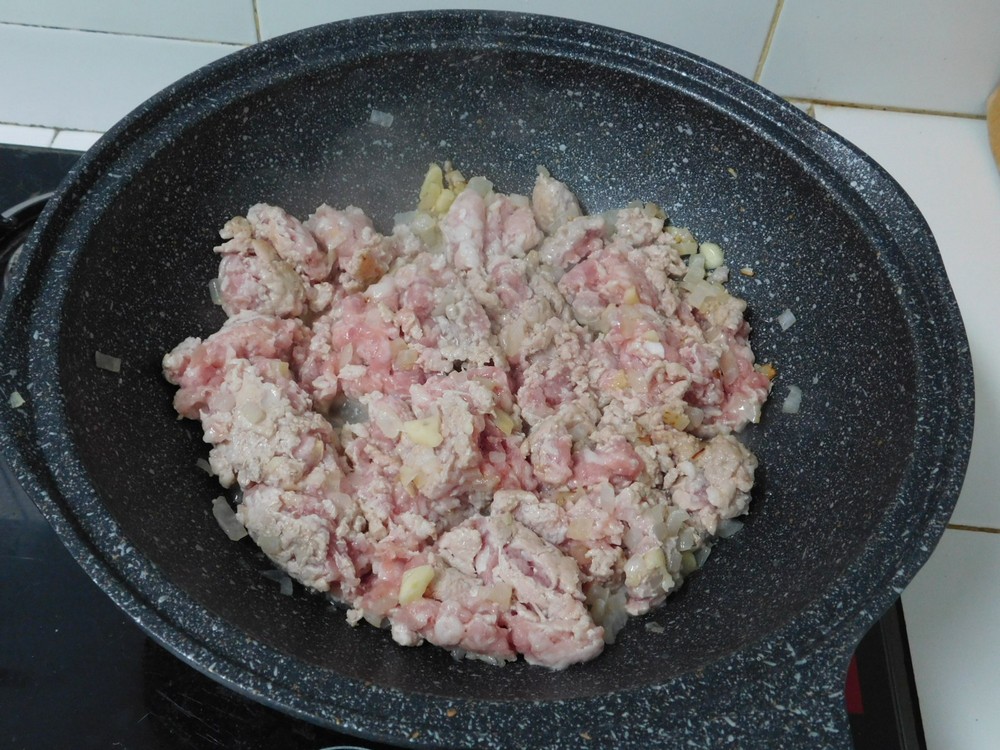
- In a wok or large non stick pan, heat a splash of oil, when hot, add the garlic and onion. Saute until the onion is soft.

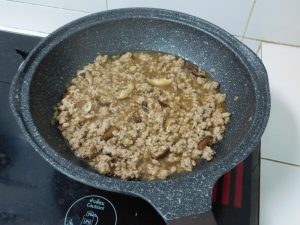
- Add the pork, chopping up and turn with your spatula and cook until no longer pink and browned a bit, it gets cooked more later.

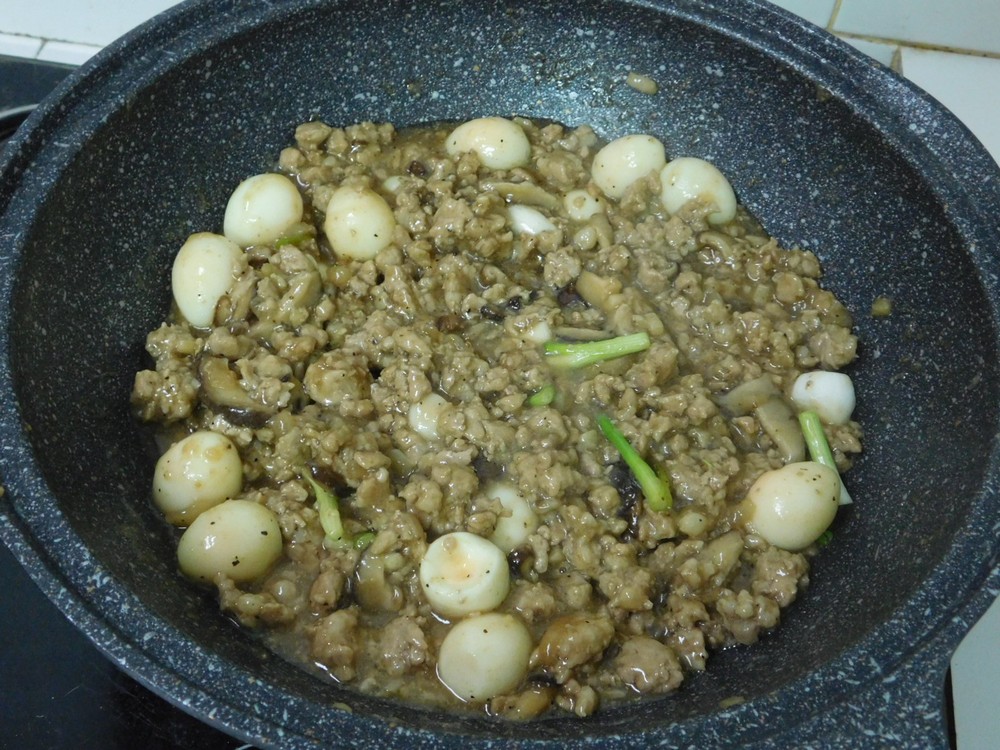
- Add the mushrooms, sauces, star anise, stock, and sugar, mix and bring to a boil, then reduce to a simmer. Add cover and simmer for 15 minutes.
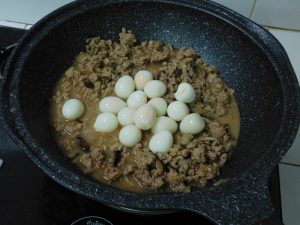
- Stir in the cornstarch slurry and the eggs, simmer until the sauce thickens as you desire. Season with salt and pepper as desired.
- When the sauce has thickened, taste and season as desired with salt and pepper as you desire, stir in the spring onion.

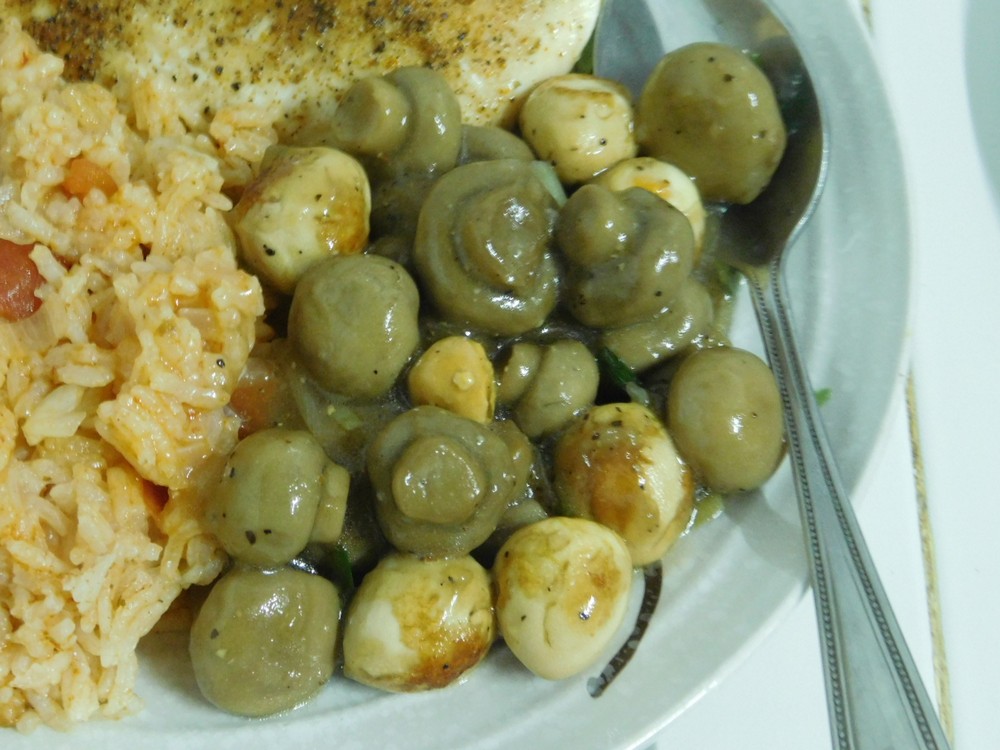
- Serve with a side of fresh cooked rice.


Notes
Ground pork at Tesco will cost about 50 Baht/500 grams, if you want to control the fat, grind your own but that will affect the price. For 3 servings (not including the eggs as there is a large shift from the price from local vendor to Tesco, for 3 servings, this is about 52 cents per serving, slightly more with the eggs, but well under $1, always go with a local vendor.
Shortcut: Perfect Hard Boiled Quail Eggs.
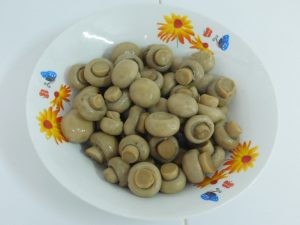
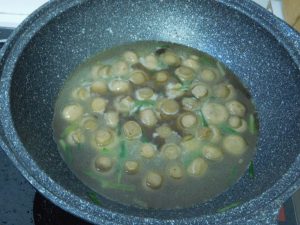
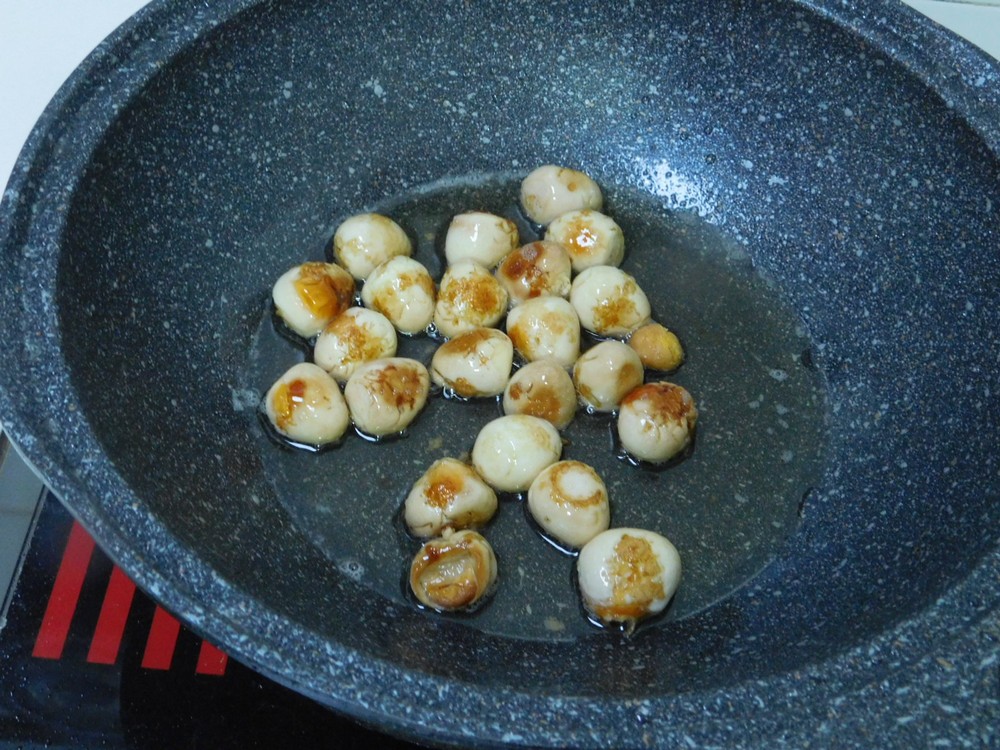
Braised Quail Eggs & Mushrooms
Quail eggs and mushrooms, sounds good to me. This is Chinese in origin. Served as a side dish or a light main dish when served with steamed broccoli or cauliflower. I made this on 24 June 2018 and is perfect as written. Link to the shortcut is listed in the Notes section.
Ingredients
- 24 hard boiled quail eggs, peeled, or canned, Shortcut
- 1 tablespoon soy sauce
- 1 spring onion, cut into 1 inch pieces, green and white
- 2 cups fresh baby button mushrooms, or canned
- cooking oil, for frying and sauteing
For the Sauce
- 1½ tablespoons soy sauce
- 1 cup chicken stock, fresh or from powder
- ½ teaspoon sugar
- black pepper, as desired
For the Thickener
- 1 tablespoon cornstarch
- 1 tablespoon water
Instructions
- If using fresh hard boiled quail eggs, peel those and place in a shallow bowl. If using canned canned eggs, drain, rinse, and place in a bowl. Add the 1 tablespoon of soy sauce and mix together. Set aside and marinate for 15 minutes.
- If using canned mushrooms, drain and rinse those, and set them aside. If using fresh mushrooms, steam those to precook them, then set those aside.
- In a bowl, mix together the sauce ingredients, and in a measuring cup, mix together the thickening ingredients.
- Heat a wok or large pan with about ½ inch of cooking oil, while the oil is heating, take a toothpick and poke each egg a few times through the white into the yolk. The reason for this is you are going to fry the eggs in hot oil, the pricks from the toothpick should reduce the chances of an egg bursting. When the oil is hot, add the eggs and fry for a few minutes, stirring them as well until starting to brown up. Remove the eggs and drain.

- Pour out the oil from the wok or pan, and return 2 tablespoons of oil back to the pan, heat and when hot, saute the spring onion until fragrant.
- Add the mushrooms and the sauce to the pan and stir fry for 2-3 minutes.
- Stir in the thickener then the eggs. Stir to mix together and cook until the sauce thickens. Remove from heat.
- Serve as is as a side dish or serve with steamed vegetables for the light main dish.


Notes
Low cost as a light main dish.
Shortcut: Perfect Hard Boiled Quail Eggs.

Quail Egg Wontons
This is a common street food in Bangkok sold as a snack. This is going to be written as 5 eggs per skewer, and one to two skewers would be an appetizer or snack. If you do not have fresh quail eggs, in the states you can buy these canned in most Asian markets. I made these on 3 Jun 2018, nothing hard about this but it does time if making a lot, I used about 42 eggs for this. Links to the shortcuts are listed in the Notes section.
Ingredients
For Each Skewer
- 5 hard boiled quail eggs, peeled, or canned - drained, Shortcut
- 5 wonton wrappers
- 1 wooden skewer
To Fry
- lard, or cooking oil, as needed, Shortcut
Instructions
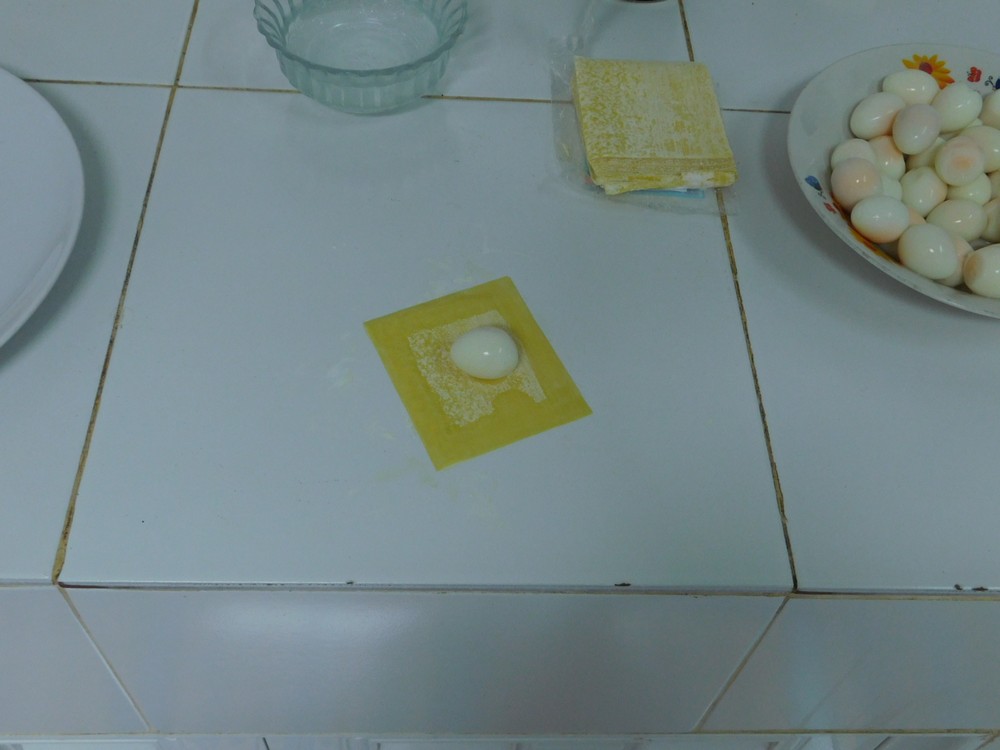
- Place a wonton wrapper on your work surface with a corner pointed towards you. Dip your finger in a small bowl of water and all 4 edges of the wrapper, place a quail egg on the wrapper.

- Fold the corner closest to you over the egg away from you, then roll the egg away from until you see the corners overlapped.
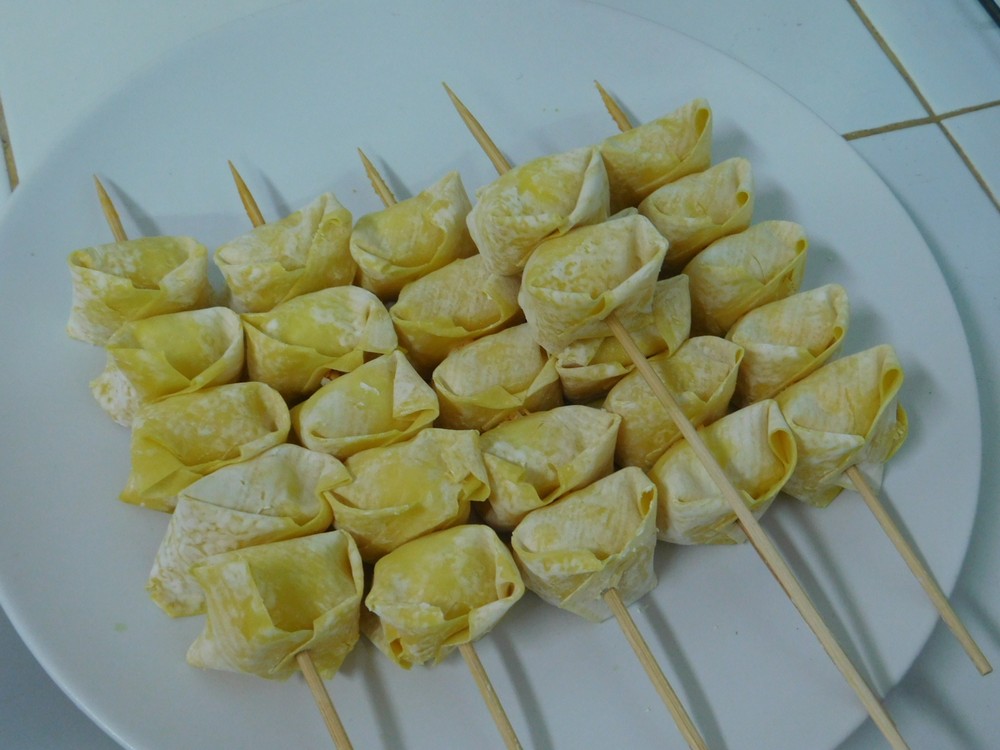
- Take the left and right corners and fold them one at a time over the egg as well, so they overlap. Place on a skewer, running the skewer through the corners overlapped, as seen in this photo. I folded the left corner first, then right corner, gives a nice uniform appearance.

- Repeat with the remaining eggs and wrappers. Using as many skewers, eggs, and wrappers as desired.
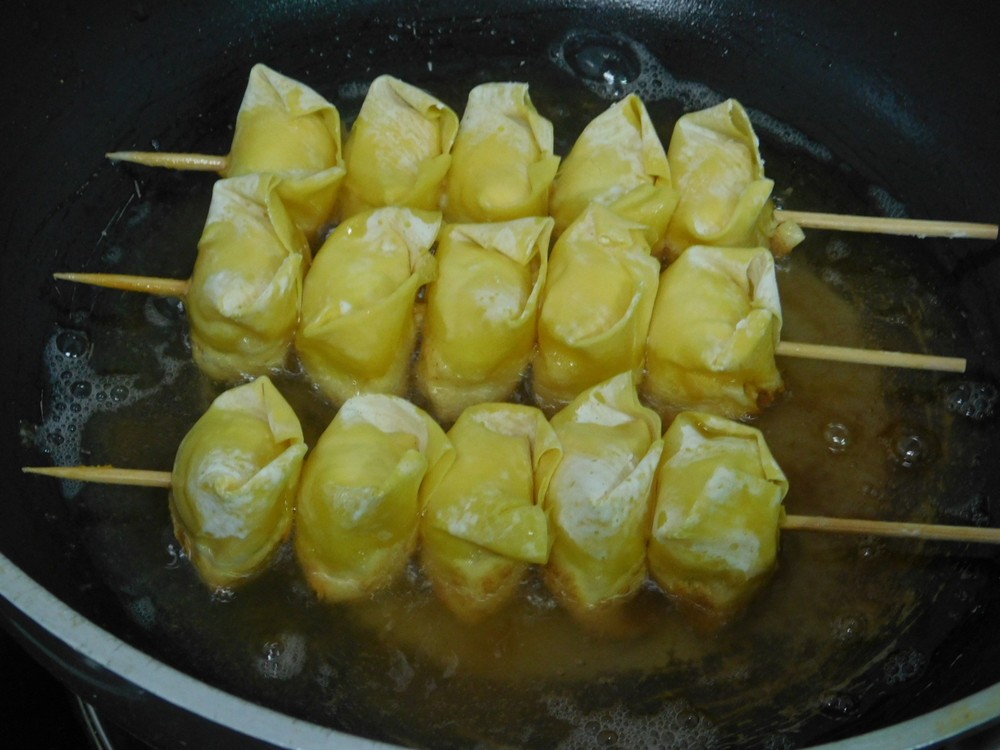
- Heat a pan with about ½ inch of lard, or oil, (I used homemade lard for this), when hot, add a few skewers at a time, fry to golden brown.

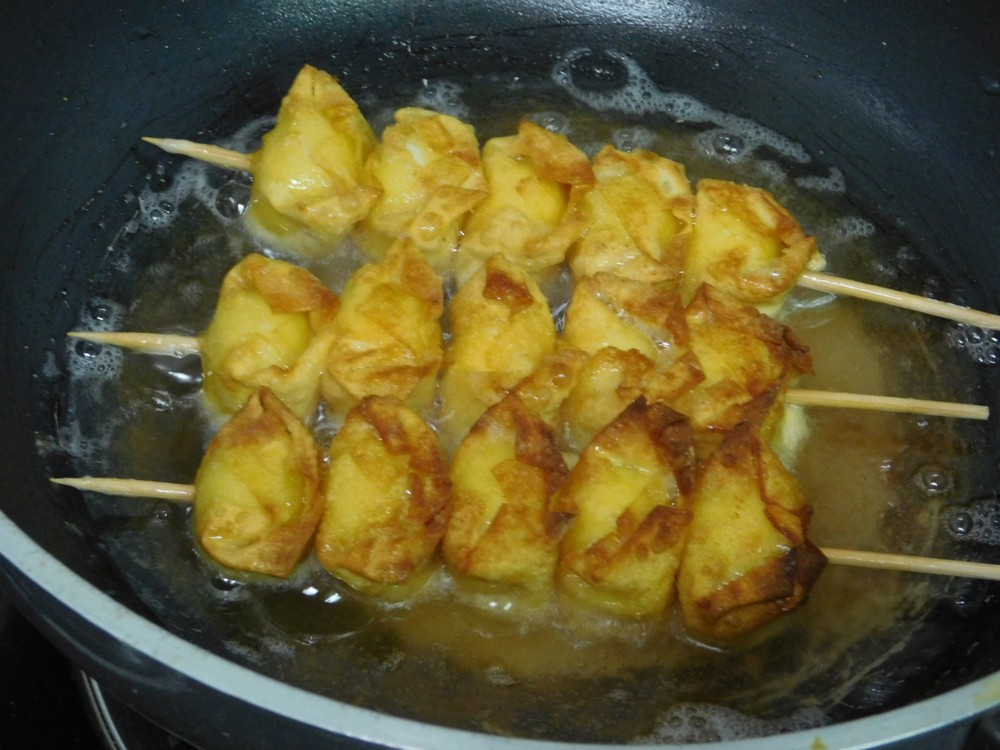
- Turn and fry the other side to golden brown. Frying both sides, called a shallow deep fry, takes just 10-20 seconds per side.

- Serve with a dipping sauce of your choice.


Notes
Shortcuts: Perfect Hard Boiled Quail Eggs. Rendering Lard.
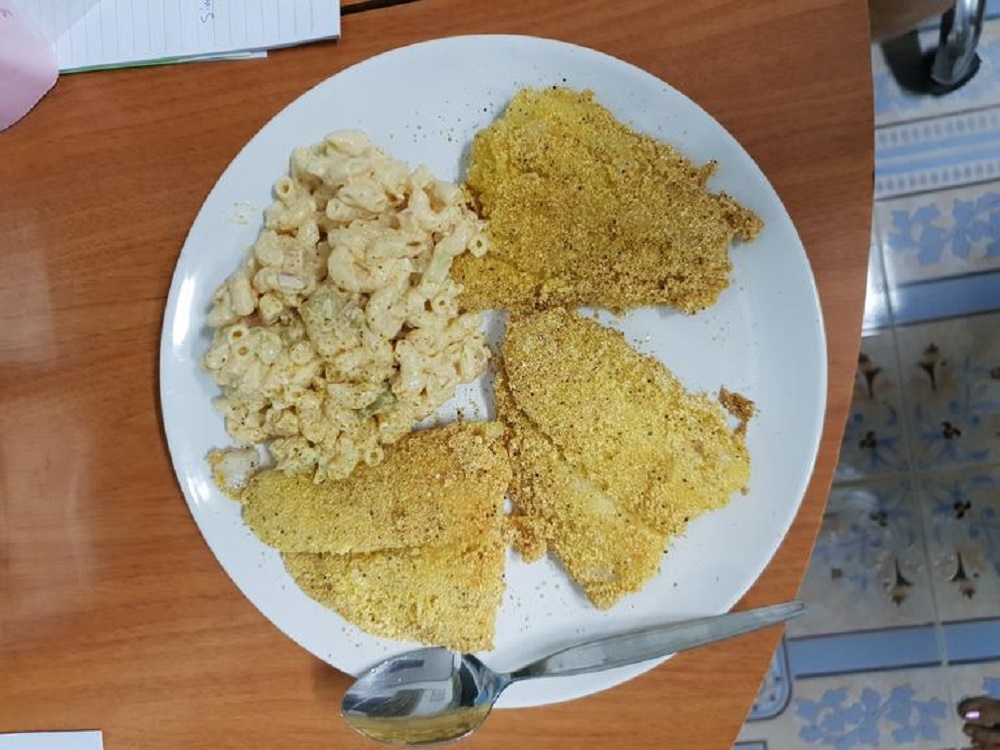
Cornmeal Whitefish II (Simplicity)
This a change from Cornmeal Fish I, basically as the result of me taking a nap, and we'll just say that was an extended nap, so I was running late to prepare dinner and this is a delicious result of that error. My wife, and I, actually enjoyed this over the Cornmeal Fish I recipe. When cooking fish, minimum ingredients are need in order not to over power the flavor of the fish. No serving size, times, or quantities are given, this is totally what amount you want to make. And if you want a great fried fish, use lard to fry it in. Link to the shortcut is listed in the Recipe Notes section.
Ingredients
- whitefish fillets, figure 1-2 fillets per peron
- cornmeal, as needed
- lemon pepper, as desired
- lard, Shortcut
Instructions
- Cut your whitefish fillets in half if you like, easier to manage that way.
- Place some cornmeal in a shallow dish, season the cornmeal with lemon pepper as desired.
- Heat a large non stick pan with 2-3 tablespoons of lard. When the oil is hot, dredge each fillet in cornmeal, coating it well. place fillets in the hot lard. cook until golden brown on the bottom then turn fillets over with tongs and cook until golden brown, remove to paper towels.
- When all the fillets are cooked, serve with a vegetable or a salad for a nice meal.

Notes
For the fish, go with about 130 Baht/1 kilo of Pangasius fillets. For 4 servings, this is about 96 cents per serving.
Shortcut: Rendering Lard.
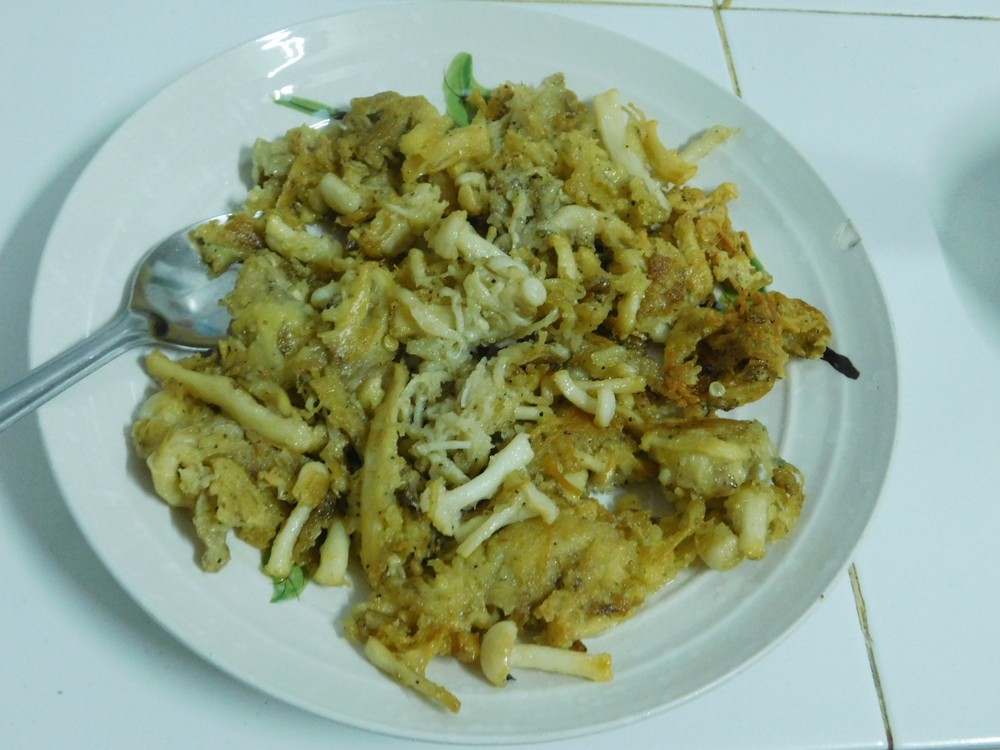
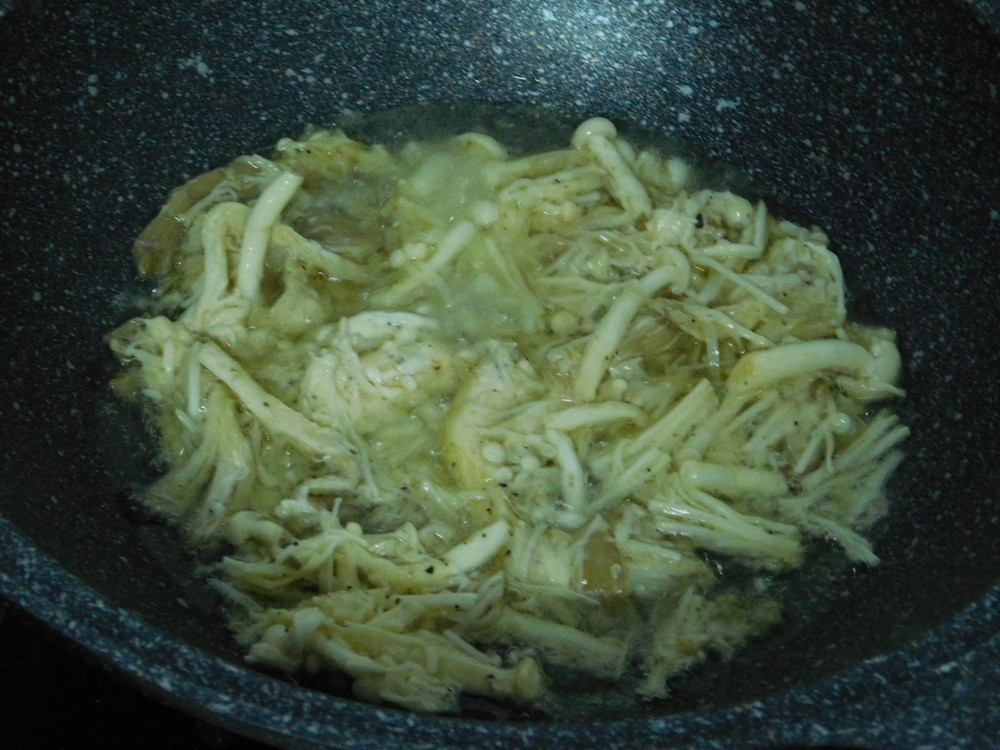
Fried Oyster Mushrooms
This comes from a good friend, and this recipe is Chinese in origin, and my friend is Chinese as well, so I will take her word on this, and it not only sounds very good, it is delicious! Using Oyster mushrooms as the base and adding to this, this is wide open to adapt to your liking. Lot of photos here as I used 3 types and want to show how to prep these if you have not used these before. Link to the shortcut is listed in the Recipe Notes section.
Ingredients
- 400 grams fresh oyster mushrooms, (14 oz)
- 1 egg, lightly beaten
- 1 cup corn starch
- salt and pepper, as desired
- 1-2 cups lard, or cooking oil, for frying, OR make from a shortcut
Instructions
- Remove the root end of the mushrooms, rinse the mushrooms and squeeze dry. Using your hands, pull apart the mushrooms into 2 or 3 pieces and place in a mixing bowl.
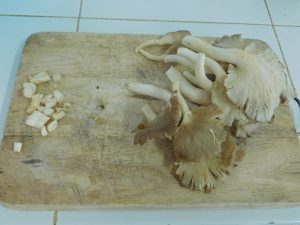
- I misjudged the amount of Oyster mushrooms I had so I used two more types of mushrooms, first I used a package of white Shimeji mushrooms, 150 grams (5-6 oz). These are in clumps in the package. This photo is I just took them out of the package.
- To prep these, cut off about 1 inch of the root ends of the clumps as shown, rinse, squeeze dry, add to the bowl with the Oyster mushrooms.
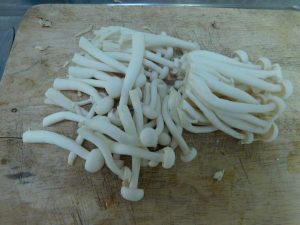
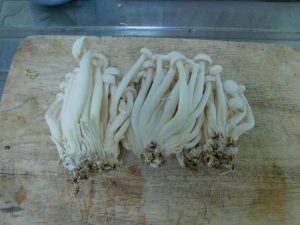
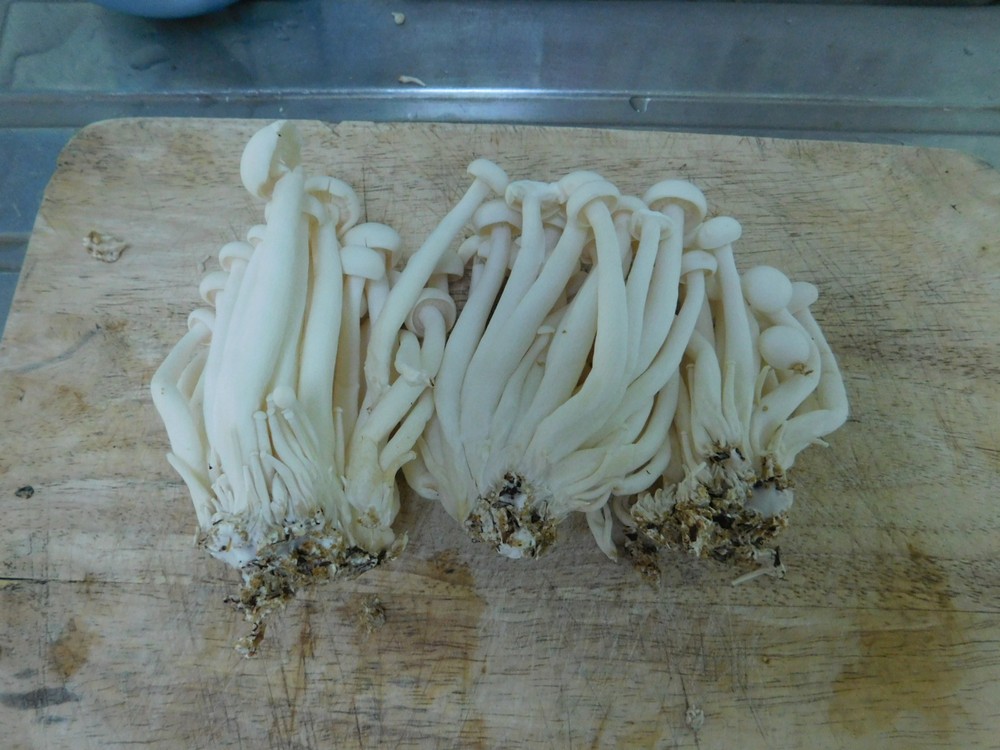
- Next mushroom used was a package of Enoki mushrooms, 200 grams (7 oz), in the states, these are also known as Golden mushrooms, and can be found canned as well in the Asian markets there. This photo is the mushrooms taken out of the package, these grow in a large clump and are long slender stems.

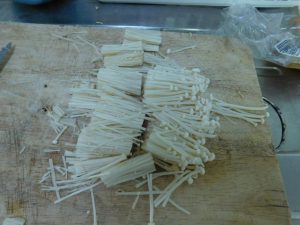
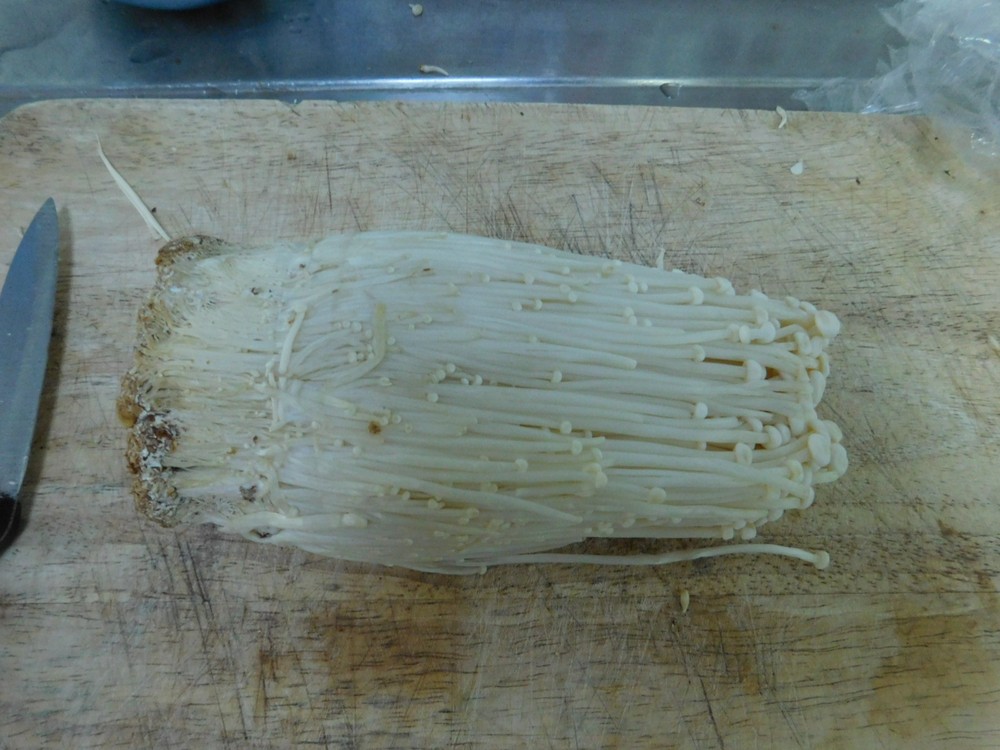
- To prep these, cut off about 1 1/2 to two inches from the root end, and cut the mushrooms in half as shown, rinse, squeeze dry and to the bowl with the other mushrooms.
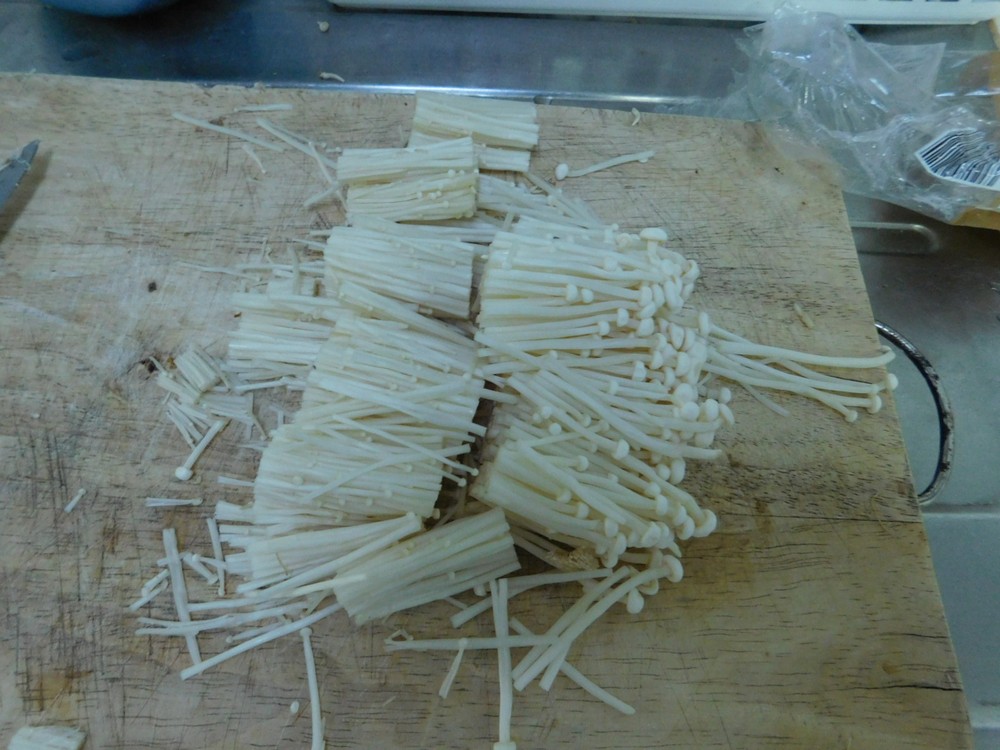
- Use your hands and toss the mushrooms together. This photo really shows how slender the Enoki mushrooms are.

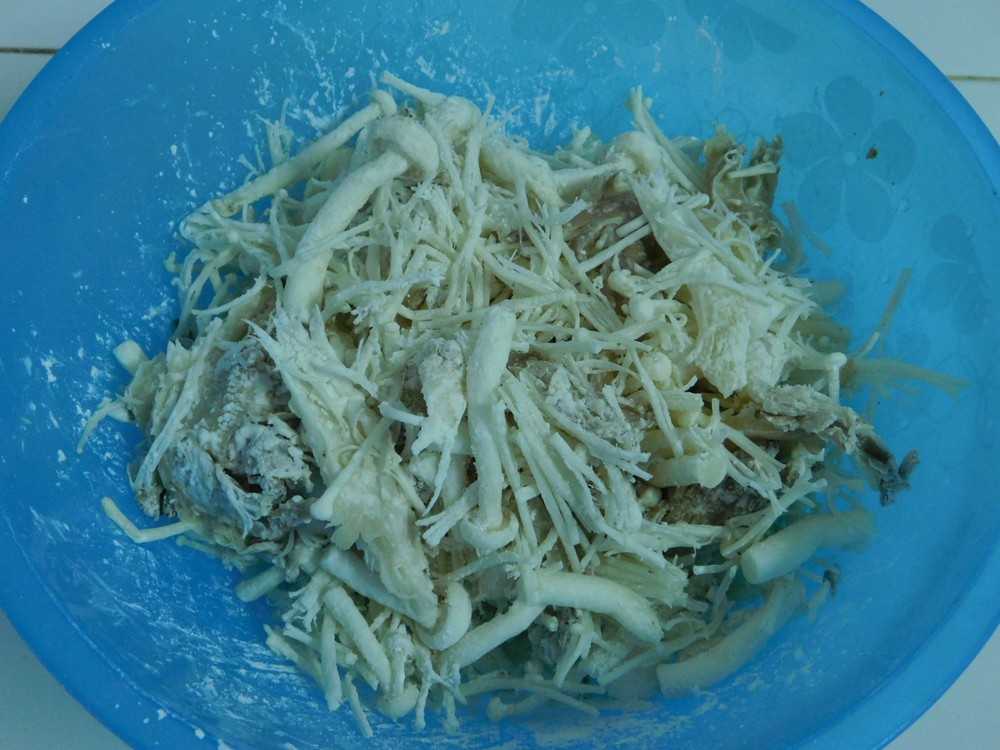
- Sprinkle the corn starch onto the mushrooms and gently mix together to coat the mushrooms.
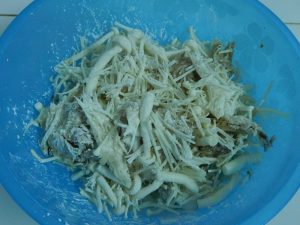
- Then add the egg, salt and pepper to taste, heavy handed with the pepper works well, and mix together to coat the mushrooms fully.
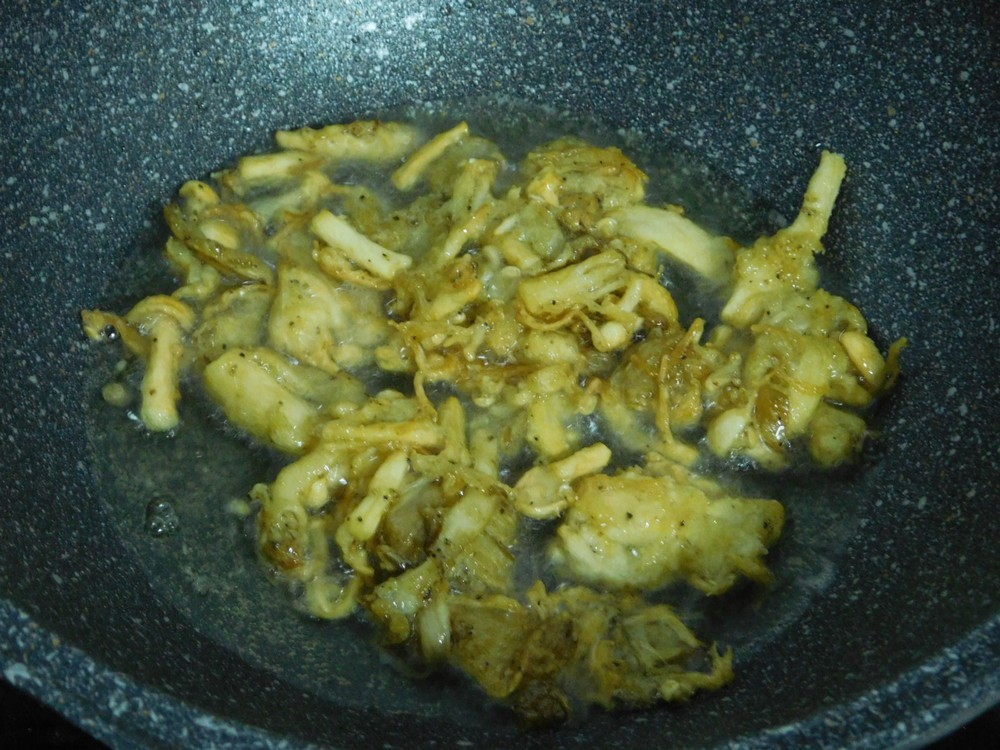
- Heat the lard or oil in a large non stick pan, when hot but not smoking, carefully slide or place (using tongs) the mushroom in the oil.
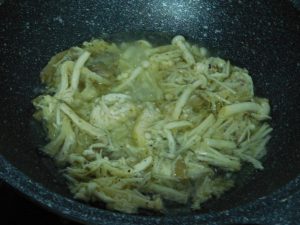
- Fry until golden brown, turning them often as you fry them.

- Remove from the pan and drain on paper towels.
- Place on a serving tray or large plate, serve with additional salt and pepper as desired.


Notes
Low cost.
Shortcut: Rendering Lard.
Variant: 1. Reduce the amount of Oyster mushrooms and add in other types of mushrooms.
This recipe for Fried Oyster Mushrooms is from China Sichuan Food.

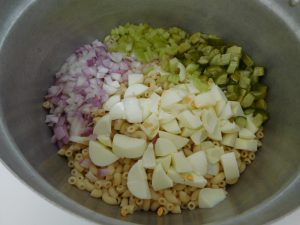
Deviled Egg Pasta Salad
I love deviled eggs and pasta salads, and this recipe interested me. I made this on 22 May 2018, and the taste is excellent. Links to the shortcuts are listed in the Recipe Notes section.
Ingredients
- 8 hard boiled eggs, peeled and cooled
- 400 grams dry pasta, elbow macaroni, spirals, bite size, (14 oz)
- 1/4 teaspoon salt
- 1/4 teaspoon pepper
- 2 tablespoons Dijon mustard
- 1 1/4 cup mayo
- 1 cup dill pickles, chopped, as desired, OR make from a shortcut
- 1/2 red onion, diced
- 2 stalks celery, diced
- 1/2 cup pitted black olives, chopped
- 1 teaspoon paprika, smoked paprika would be best
Instructions
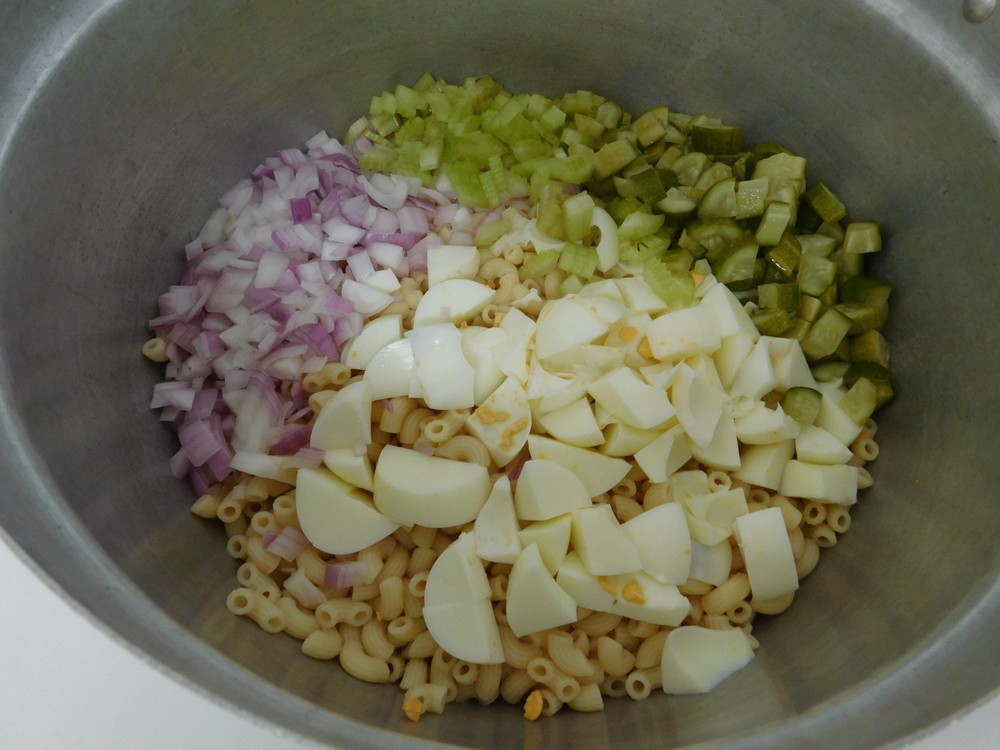
- Cook the pasta in a pot of salted water until tender, drain and run under water to cool it down. Add to a large mixing bowl after it is well drained.
- Cut the eggs in half, remove yolks and place in a separate bowl. Mash the egg yolks with a fork and set aside. chop the egg whites and add to the pasta.
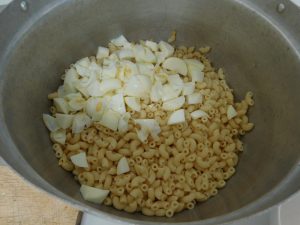
- Add the pickles (I used 6 spears from a pint jar), onion, celery, and olives.
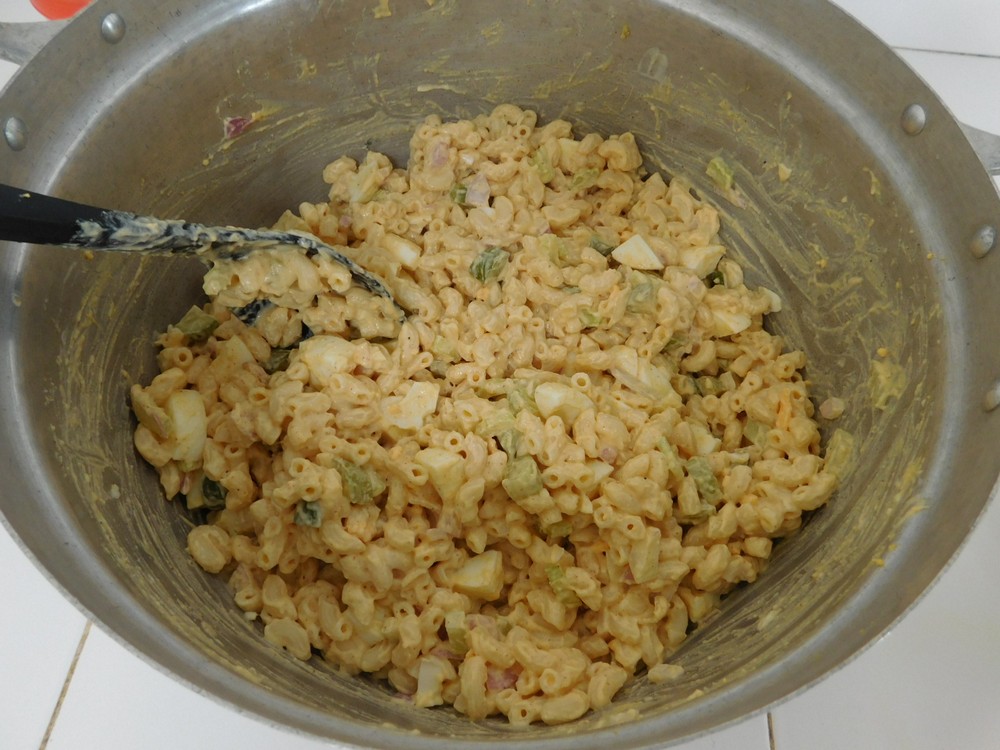
- Add the salt, pepper, mustard, mayo, paprika, and the mashed yolks.
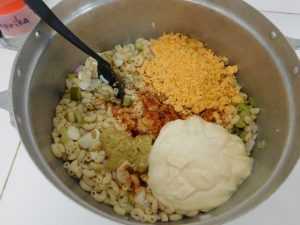
- Mix together until well coated. I use a large pot to mix everything, then transfer to a smaller mixing bowl to chill.

- Refrigerate for at least 2-3 hours before serving.
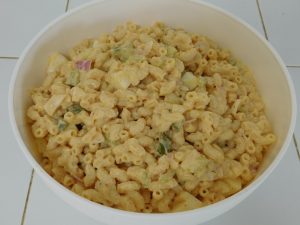
- Garnish with a light sprinkling of paprika if desired. Serve and enjoy.


Notes
Low cost.
Shortcuts: Fridge Dill Pickles, Perfect Hard Boiled Eggs.
Variant: 1. Top with sliced hard boiled eggs before serving.
Adapted from an internet recipe.
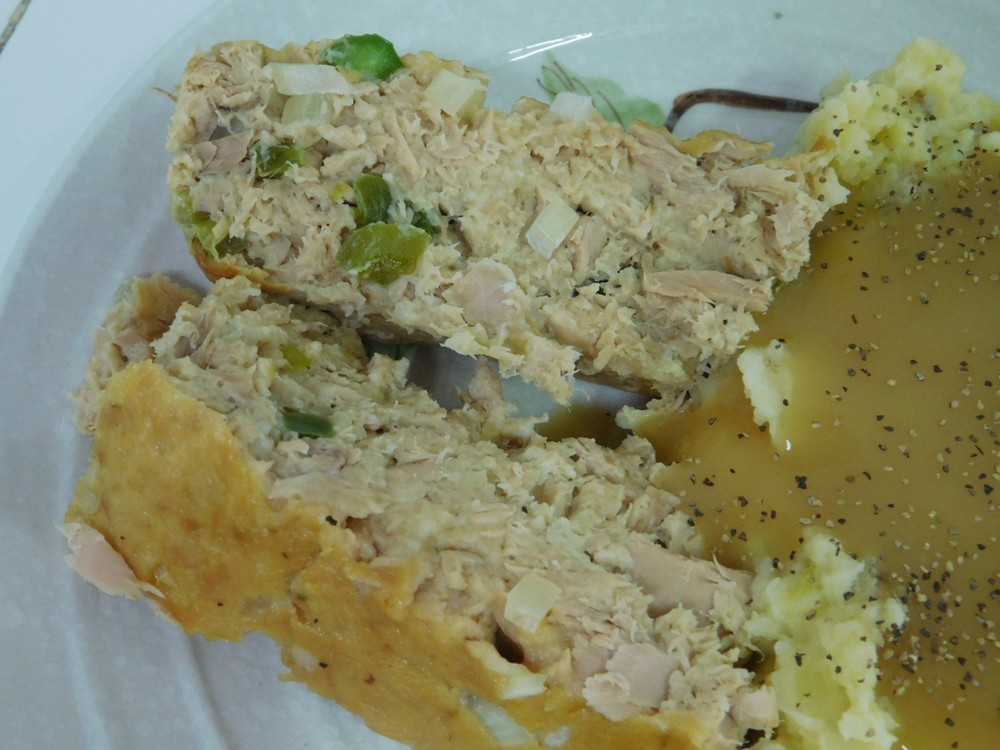
Tuna Loaf
It has been many many years since I have had tuna loaf, and I am enjoying this one, excellent flavor, and easy to put together. Use fresh cooked tuna or canned in brine, either one is perfectly acceptable. This recipes screams of variants that you can use to make it different each time it is prepared. Links to the Shortcuts are listed in the Recipe Notes section.
Equipment
- Loaf Pan (5x9 inch)
- Oven
Ingredients
- 425 grams tuna, fresh cooked or canned in brine, (15 oz), Shortcut
- ½ cup bread crumbs, Shortcut
- 2 eggs
- ½ cup green bell pepper, diced
- ½ cup onion, diced
- ¼ cup milk
- ½ teaspoon Worcestershire sauce
- salt and pepper, as desired
- dash tabasco sauce, optional
Instructions
- For the tuna, I used 3 cans of tuna in brine, drained well. Weight listed on each can was 185 grams net, 140 grams drained. For fresh cooked, go with 425 grams (15 oz).
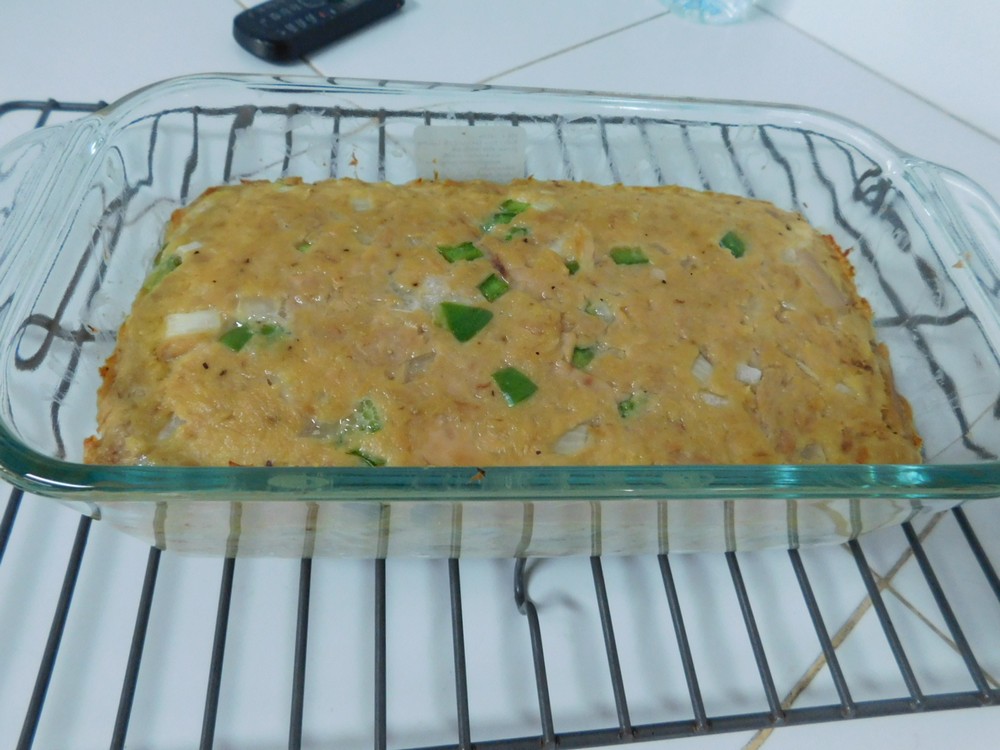
- Preheat your oven to 180° C (350° F). Get out a loaf pan and grease with butter.
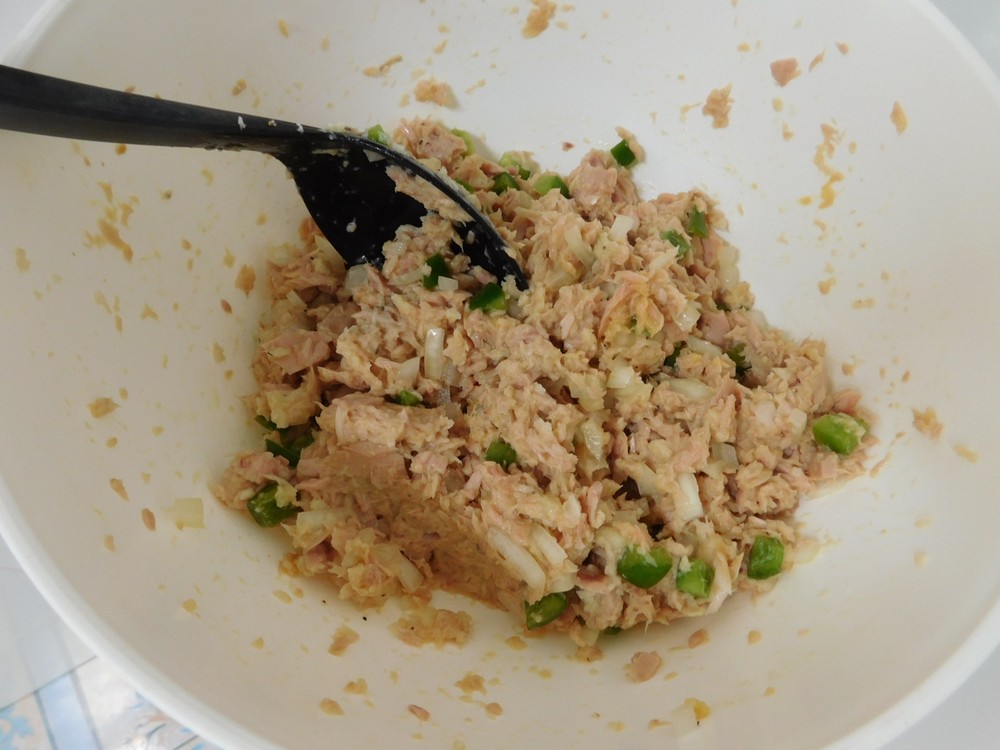
- In a large mixing bowl, add all the ingredients, seasoning with salt and pepper as desired, as well as Tabasco sauce if desired.
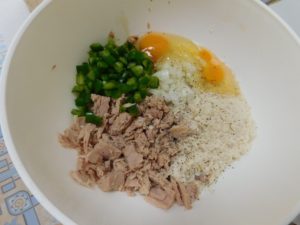
- Use a large spoon and mix together.

- Pack mixture into the prepared loaf pan.
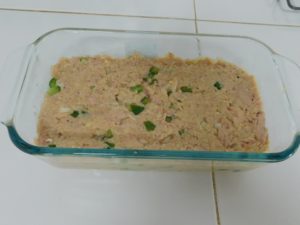
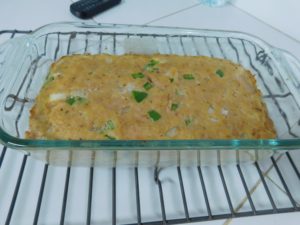
- Place in the oven and bake for about 45 to 50 minutes or until the top is golden brown. Cool for 10 minutes before slicing.
- Serve with sides of your choice and enjoy.


Notes
Low cost, even more so if using fresh cooked tuna.
Shortcuts: Fresh Tuna, Bread Crumbs.
Variants: 1. Use red bell pepper in place of green. 2. Saute the bell pepper and onion prior to mixing in with the tuna. 3. Add chopped hard boiled eggs. 4. Add sliced green olives. 5. Add chopped fresh parsley or cilantro. 6. Add another can of tuna.