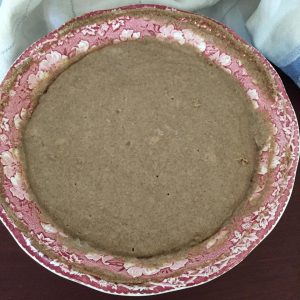
Sourdough Bread

Sourdough Bread

Adapted from an internet recipe.
You will need a sourdough starter for this recipe. There is no added yeast, you are going to use naturally occurring yeast. This sounds good and I am looking forward to making it. This does take time however.
Prep Time 1 day
Cook Time 45 minutes
Total Time 1 day
Course Side
Cuisine European
Servings 2 loaves

Equipment

  • Oven
  • Bread Pans (two 4x8 inch)

Ingredients
  

  • 1 cup sourdough starter, room temperature, read Step 1
  • cups luke warm water
  • tablespoons salt
  • ¼ cup sugar
  • ½ cup vegetable oil
  • 6 cups all purpose flour

Instructions
 

  • Remove the starter from the fridge and let it sit on the counter overnight to ensure an even room temp. Remember, after you take out the 1 cup of starter, replenish the starter with 1 cup of water and 1 cup of flour, and a pinch of sugar, mix and let sit on the counter for a few hours, then return to the fridge.
  • In a large glass bowl, mix the sugar, oil, salt, water, and starter, mix in the flour until the last cup, add that a little at a time, you may need a bit more, or a bit less to get the right consistency. Should form a nice ball of dough. Turn the dough out onto a work surface, put a small amount of oil in the bowl and rub it around to coat the bottom and sides, return the dough to the bowl and flip that around to lightly oil that as well, cover with a towel and let rise overnight.
  • The next day, grease 2 bread pans lightly with butter, then punch down the dough, divide in half, shape a little to fit the pans and put each half in each bread pan. Allow the dough to double in size. This can take hours so have some patience, and start on this step in the early morning.
  • Once the loaves have doubled, bake in a 180° C (350° F) oven for 40-45 or until the bread is golden brown and taps hollow. Remove from the oven and turn out on a wire rack to cool.

Notes

Sourdough Starter

Sourdough Starter

Adapted from an internet recipe.
Sourdough starter is a very old technique to keep ready to use dough, breads and pancakes come to mind. The starter improves with age, the longer you keep it, the better the flavor will improve. I remember my Mom had starter in the fridge for years, and I remember the bread she made from it, delicious! Think of starter as a pet you keep in the fridge as this does require care, there is a few rules to follow as well. Now for folks in the far north, this will be straight forward to make in the cooler months you have up there, for everyone else, you may need to use an air conditioned room to get the starter going, meaning to ferment. The basic rule I have seen is you need a place that is lower than 31 C (88 F), anything over that temp and the starter may fail to ferment. Yeast is used to kick start this initially, naturally occurring yeast will do the rest, it just needs to have flour and water on a regular basis.
Prep Time 5 minutes
Total Time 5 minutes
Cuisine American
Servings 1 starter

Ingredients
  

  • 2 cups all purpose flour
  • 2 cups luke warm water
  • 1 packet active dry yeast, OR use 1 teaspoon of instant yeast

Instructions
 

  • In a large glass or plastic bowl, mix together the yeast, flour, and water, cover with a towel and leave at room temperature to ferment for 4 to 8 days. Each day, you are going to FEED it, add a 1/4 cup of flour and a 1/4 cup of water, mix that in. If your bowl is not that large, set it on a cookie sheet in case the dough over flows the bowl.
  • Once it is bubbly and has a pleasant sour smell, it is ready to use, or to refrigerate for use later. Once your starter is made, it will live primarily in the fridge but needs some feeding, you can do this once a week. Feeding is just that, first you remove 1/4 cup of starter and discard or use, THEN you are going to add just a little bit to the mixture to keep the fermentation active. For feeding, if you removed 1/4 cup, then add 1/4 cup of flour and 1/4 cup of water to the mix, stir that in and let it sit at room temp for a few hours, then you can return it to the fridge. A liquid will appear, it is alcohol, just stir that back into the mix. Only need to feed it once a week.
  • When you use starter to bake, always replace with equal amounts of a flour and water mixture. So, if you remove 1 cup starter, replace with 1 cup water and 1 cup flour. Mix well and leave out on the counter at room temp until bubbly again, then refrigerate. Most recipes will state if the starter has to be room temp or from the fridge, if room temp, then take out the starter the night before and just let it set on your counter over night.
  • IMPORTANT: when you make the starter initially, or anytime after that, if the mixture discolors to pink or orange, or any odd color, discard the mixture.

Notes

Used in Recipes Listed on this Site:
Crock Pot Cream Cheese Chicken

Crock Pot Cream Cheese Chicken

Anything with Cream cheese sounds great to me, this is a must try for sure. Only 4 ingredients and 2 can be made with shortcuts, win win! Links to the shortcuts are listed in the Recipe Notes section.
Prep Time 5 minutes
Cook Time 3 hours
Total Time 3 hours 5 minutes
Course Main Dish
Cuisine American
Servings 4 servings

Ingredients
  

  • 250 grams Cream cheese, this is 1 standard block, softened
  • 1 packet dry Italian salad dressing mix, OR make from a shortcut
  • 4-6 chicken breasts, boneless and skinless
  • 1 can condensed cream of chicken soup, OR make from a shortcut

Instructions
 

  • Spray your slow cooker with non stick spray or mist with olive oil, place the chicken in, place the Cream cheese in, pour in the can of soup and sprinkle the packet of Italian seasoning over the top. Cook on Low setting for 6-8 hours. Give it a gentle stir at about the 3 hour mark. At 6 hours, check the tenderness of the chicken, it is done when it falls apart.
  • Serve over rice or pasta.

Notes

Chicken breasts run about 60 Baht/kilo, that should be 4 to 6 pieces. Cream cheese will run 120 Baht. For 4 servings, this is about $1.33 per serving. Use the shortcuts for savings as well.
Shortcuts: Dry Italian Dressing Mix, Condensed Cream of Chicken Soup, Cooking Spray.
Adapted from an internet recipe.
Bacon & Cheese Smothered Garlic Chicken

Bacon & Cheese Smothered Garlic Chicken

Sounds really good! Not a cheap meal based on the cheese alone. Link to the shortcut is listed in the Recipe Notes section.
Prep Time 5 minutes
Cook Time 20 minutes
Total Time 25 minutes
Course Main Dish
Cuisine American
Servings 4 servings

Ingredients
  

  • 4-5 chicken breasts, amount depends on what you can fit in your pan, think cast iron as well, boneless and skinless
  • 6 slices bacon, thick cut preferred
  • Mozzarella Cheese, thin slices to cover the chicken
  • 1 cup heavy cream
  • 1/2 teaspoon black pepper
  • salt, to taste
  • 1/2 cup chicken stock, fresh or make from powder
  • 1 teaspoon garlic powder
  • 1 teaspoon fresh parsley, chopped
  • 3/4 cup Parmesan cheese, grated
  • 1 cup spinach, fresh or frozen, chopped
  • 1/2 cup sun dried tomatoes, or go with 1/2 cup fresh, chopped
  • olive oil, as needed

Instructions
 

  • Cook the bacon in a large non stick pan until crispy, then remove the bacon and drain out the fat to a bowl to reserve. Chop the bacon and set aside. Using the same pan, add 1 tablespoon of bacon fat and a splash of olive oil, 2-3 tablespoons, and heat to medium.
  • Add the chicken and cook for about 4-5 minutes on each side or until browned on each side and cooked through. Remove the chicken and set aside. Same pan, add the heavy cream, chicken stock, garlic powder, parsley, salt and pepper, and Parmesan cheese. Whisk over medium heat until this begins to thicken then add in the spinach and tomatoes and turn heat to a low simmer.
  • Now add in the chicken one piece at a time and make sure it is coated with the sauce. then place Mozzarella slices on each piece and sprinkle some crumbled bacon over each one. Cover for a minute or two to melt the cheese. Server over pasta of your choice.

Notes

Boneless breasts run about 60 Baht/kilo (skin is on, takes seconds to remove the skin and trim away any fat), 4-5 breast might be 60-70 Baht. I will go with 70 Baht. For the Mozzarella cheese, sliced thin, this would be maybe 1/2 package so about 70 Baht for this. For the Parmesan cheese, figure about 140 Baht. For 4 servings, this is about $2.06 per serving. High cost but would be a good meal for visiting friends and family.
Shortcut: Heavy Cream.
Adapted from an internet recipe.
Cilantro Lime Chicken I

Cilantro Lime Chicken I

Lime and cilantro with chicken sounds very good! This I will be trying soon.
Prep Time 2 hours
Cook Time 30 minutes
Total Time 2 hours 30 minutes
Course Main Dish
Cuisine American
Servings 4 servings

Ingredients
  

  • 4 chicken thighs, bone in and skin on
  • 1/4 cup cilantro, chopped
  • 2 limes, juice from 2 limes
  • pinch red pepper flakes
  • 2 cloves garlic, smashed and minced
  • 1/2 teaspoon cumin
  • olive oil, as needed
  • cooked rice, for serving
  • chicken stock, as needed

Instructions
 

  • Make the marinade by whisking together 2 tablespoons olive oil, cilantro, lime juice, red pepper flakes, garlic, and cumin. Add chicken and toss to evenly coat with the marinade. Cover with plastic wrap and refrigerate for at least 30 minutes and up to 2 hours.
  • Pour olive oil into a large skillet, cast iron would be perfect, to just cover the bottom of the pan. Heat over medium high heat. Season each side of marinated chicken with salt and pepper. Add chicken skin side down and pour in the marinade. Sear until the skin becomes golden and crispy, about 6 minutes. Flip the chicken over, reduce heat to a low simmer and cover the pan. Cook for another 20 minutes or so, moving the chicken around once in a while to prevent sticking, add chicken stock as needed, until cooked through and juices run clear.
  • Serve over rice along with the drippings from the pan.

Notes

Chicken thighs run about 75 Baht/kilo, quarters run about 71 Baht/kilo. Quarters will give you the largest thighs and it takes just seconds to separate the thigh from the leg. I will go with just 75 Baht (on the high side for 4 thighs), everything else is minimal. For 4 servings, this would be about 55 cents per meal.
Adapted from an internet recipe.
Viennese Beef Goulash

Viennese Beef Goulash

This, sounds really good! Austrian Goulash is different than Hungarian style but still shares the paprika ingredient and is served over pasta or potatoes. This recipe screams of using a slow cooker for the simmering, which is what I will do when I make this so I will modify this recipe slighly. One ingredient may only be available in the larger cities, cornichons.
Prep Time 15 minutes
Cook Time 3 hours
Total Time 3 hours 15 minutes
Course Main Dish
Cuisine European
Servings 6 servings

Ingredients
  

  • 10 tablespoons olive oil
  • 5 1/2 cups onion, diced
  • 1/2 cup garlic, smashed and minced, about 1/2 head of garlic
  • 1 kilo beef stew meat, cut into 1 to 1 1/2 inch pieces
  • 1/2 cup cornichons, finely chopped
  • 1/2 lemon, zest only
  • 1 teaspoon caraway seeds
  • 4 tablespoons paprika
  • 2 tablespoons tomato paste
  • 2 tablespoons red wine vinegar, OR equal 2 tablespoons of balsamic vinegar, OR 1 1/2 tablespoons of apple cider vinegar
  • 2 1/2 cups beef stock, fresh or make from powder
  • 2 bay leaves
  • salt and pepper, to taste

Instructions
 

  • Heat 5 tablespoons of olive oil in a medium pot and cook onion and garlic on medium heat until golden brown, stirring occasionally to ensure garlic does not burn. After it is cooked, place in your slow cooker.
  • Add the remaining olive oil to the same pot and brown the beef well in batches, as it browns, add to the slow cooker. Once all the beef is added to the slow cooker, add the rest of the ingredients to the slow cooker. Mix well and cook on High setting for 3 hours. Check for tenderness of the beef at the 3 hour mark, continue cooking if not tender. If mixture is too thick, add a bit of beef stock and stir that in.
  • Season with additional salt and pepper to suit your taste. Remove the bay leaves before serving. Serve over pasta or mashed potatoes.

Notes

For the beef, I will go with 200 Baht/kilo. For 6 servings this is about 98 cents per serving.
Adapted from an internet recipe.
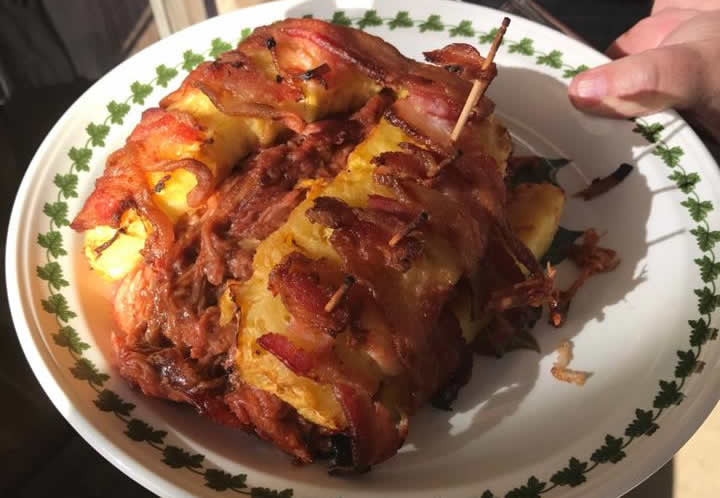
French Baguettes

French Baguettes

This is a basic recipe that you may need to experiment with to get the right consistency with the flour you have available. And I am really winging this with the type of flour. This takes a lot of time to make. Metric and Imperial measurements are given, the metric is more accurate if you have that measuring capability. This recipe ranks right up there are expert level!
Prep Time 2 days 2 hours
Cook Time 25 minutes
Total Time 2 days 2 hours 25 minutes
Course Side
Cuisine European
Servings 2 baguettes

Ingredients
  

  • 2.83 cups bread flour, 360 grams
  • 1 cup luke warm water, 240 ml
  • 1/8 teaspoon instant yeast, .65 g
  • 1 1/2 teaspoon salt, 7 g
  • 1/2 teaspoon sugar, 2 g

Instructions
 

  • Mix the water, yeast, salt and sugar together until dissolved. Add the flour to a large mixing bowl and make a well in the center and pour in the water mixture. Mix to form a smooth dough. The dough should be kneaded until it does not stick to the bowl any longer (alternatively have a mixer or kitchen machine do it. First slow then a bit faster.) Once you have a smooth dough, you are going to let this rest for 1 hour but you will fold it over on itself every 20 minutes.
  • Now take the take the dough and transfer to the fridge to rest for 48 hours, put the dough in a bowl that is covered. After it has rested, take it out of the fridge and divide it into 2 or 3 pieces. On a lightly floured surface, fold each piece over on itself 2-3 times, to make a cylinder, place each roll seam side up on a towel and cover with the towel for 15 minutes.
  • Now take each roll and on a lightly floured surface, roll with your hands to make the roll longer, about 3 times longer than what it started out as, place each long roll on a towel. Cover these with the towel and let rest for 30 minutes.
  • Place a oven proof small pot filled with water in the bottom center of your oven. Now preheat your oven to 250 C. Once it is heated, place the long rolls on a baking sheet seam side up and put into the oven (you can also use a razor and make 2 or 3 light cuts along the top of each roll at an angle), then reduce the temp to 230 C. They will be done in about 25 minutes and should be golden brown.

Notes

Bread flour is available in Tops, Tesco, etc. Some shops will have better quality flours. Once you make this and it comes out good for you, stick with that type of flour when making again. Easliy low cost.
Recipe and photos provided courtesy of good friend, Daniela Dalaa Payerl.
Thailand.
Pan Fried Whitefish I

Pan Fried Whitefish I

This is a basic recipe that you can use to expand on to suite your taste. There is no quantities here as this is a make with what you want recipe, either way, this is a low cost meal, whether feeding 10 people (think a fish fry) or feeding just 2 people. Link to the shortcut is listed in the Recipe Notes section.
Prep Time 5 minutes
Cook Time 6 minutes
Total Time 11 minutes
Course Lunch, Main Dish
Cuisine American
Servings 0

Ingredients
  

  • whitefish fillets, skin on or skin off is up to you
  • all purpose flour, you need about 1/2 cup per 4 fillets
  • salt and pepper, to taste
  • cooking oil, as needed
  • tartar sauce, as needed, for serving, OR make from a shortcut

Instructions
 

  • Season the flour with salt and pepper and you like, coat the fish fillets in flour, shake off the excess flour.
  • Using a non stick pan, heat a splash of cooking oil and heat to hot but not smoking, place the fillets in the pan skin side down and cook for 3-4 until browned on the bottom and edges, then flip and cook for another 3 minutes or so, just until the flesh is cooked through and not translucent, and flakes with a fork. The thickness of the fillets will determine how long you cook these.
  • Serve. Fries on the side would be great, a green vegetable like asparagus or broccoli would be nice as well. If cooking for a fish fry, some potato salad would be a good choice. If tartar sauce is desired, there is a shortcut on the site for that.

Notes

Overall, this is a low cost meal, whether for 2 people or 10. This is not what would be called Fish and Chips, you need batter cooked fillets for that.
Shortcut: Tartar Sauce.
I have been cooking fish like this for many years, Lee Thayer.
Thailand.
Grilled Salmon

Grilled Salmon

Adapted from an internet recipe.
I have not had salmon in many years, I can get that in the city, it is costly so not a cheap meal, but this does sound good.
Prep Time 2 hours
Cook Time 15 minutes
Total Time 2 hours 15 minutes
Course Main Dish
Cuisine American
Servings 6 servings

Equipment

  • Grill, Charcoal or Gas

Ingredients
  

  • 750 grams salmon fillets, (I think the 140-160 gram / 5-6 oz fillets would be perfect)
  • cup soy sauce
  • cup brown sugar
  • cup water
  • ¼ cup olive oil
  • garlic powder, to taste
  • salt and black pepper, to taste
  • lemon zest, to taste

Instructions
 

  • Season salmon fillets with pepper, salt, lemon zest, and garlic powder to your liking. In a bowl, mix together the soy sauce, brown sugar, water, and olive oil until the sugar is dissolved. Place the seasoned fillets in a large resealable bag with the soy mixture, seal, and turn to coat, refrigerate for 2 hours, turning every 30 minutes.
  • Heat your grill to medium heat. Oil the grill and place the salmon on the grill flesh side down and discard the marinade. Cook salmon for about 6-8 minutes per side or until the flesh flakes easily with a fork. Serve.

Notes

For 6 servings, this comes out to about 1.60 per serving, as I make this and get more accurate pricing I will update this.
NY No Knead Bread

NY No Knead Bread

This comes highly recommended by a good friend in Phuket. This is a no knead bread but this does take some time. You will need a pot with a lid that can go in your oven, a cast iron dutch oven would be perfect.
Prep Time 16 hours
Total Time 16 hours
Course Side
Cuisine American
Servings 1 loaf

Ingredients
  

  • 325 grams wheat flour, 3 1/4 cups
  • 125 grams rye flower, 1 1/4 cups, if no rye flour is available, then use 5 cups of wheat flour
  • 1 1/3 cup luke warm water, 320 ml for metric measuring cup
  • 1/4 teaspoon instant yeast
  • 1/4 teaspoon sugar
  • 1 1/2 teaspoon salt

Instructions
 

  • This is the wheat flour used, this is an import from Australia.
  • This is the rye flour used, this is also an import from Australia.
  • Put the water in a large mixing bowl, add yeast, salt, and sugar and let it dissolve. Then add the flour and stir until no dry flour is left. Cover the bowl with clear kitchen wrap and let it rest for 16-22 hours (now the yeast does its job).
  • Now you either can gently stir the dough one more time or plop it onto a smooth, well floured surface ( what I did) fold top to the middle, bottom to the middle then left to the middle and right to the middle cover it up with a clean kitchen towel for about an hour. (Even if you stir it one more time, still cover the bowl to let it rest.)
  • While the dough is resting, preheat your oven to 250 C and also preheat the pot and lid in the oven at the same time.
  • When the dough has rested, take out the hot pot from the oven, then take your dough and gently rub flour or wheat bran onto it and plop it into the pot, cover, and bake for 30 minutes. Then remove the lid and reduce the temp to 220-230 and bake for another 30-40 minutes. Remove from oven, done, enjoy. This is the wheat/rye bread.
  • This is the wheat only flour.

Notes

The flour is available at Tops Central in Phuket for sure for about about 40 Baht/ for 450 to 500 grams, each package shown. There is also a bakery supply place in Rawai, Phuket (Schmidt Bakery Supply) as well in several cities across Thailand. The cost is a bit more at the bakery supply shop. Over, this is an economical loaf of bread that you made yourself and you know exactly what is in it.
Recipe and photos provided courtesy of good friend, Daniela Dalaa Payerl.
Thailand.