Crème Fraîche

Crème Fraîche

Brian Colligan, Thailand.
This is from a good friend of mine in north-eastern Thailand. Sour cream in Thailand is costly, so this is a great alternative.
Prep Time 5 minutes
Passive Time 3 days
Total Time 3 days 5 minutes
Servings 1 liter (1 quart)

Ingredients
  

  • 1 liter heavy cream, or whipping cream, (1 quart)
  • 3 tablespoons plain yogurt, NOT low fat yogurt
  • 1 quart mason jar, optional but helpful

Instructions
 

  • Wash and sterilize a 1 quart mason or a plastic container. Container has to be non-reactive, so no aluminum or copper containers.
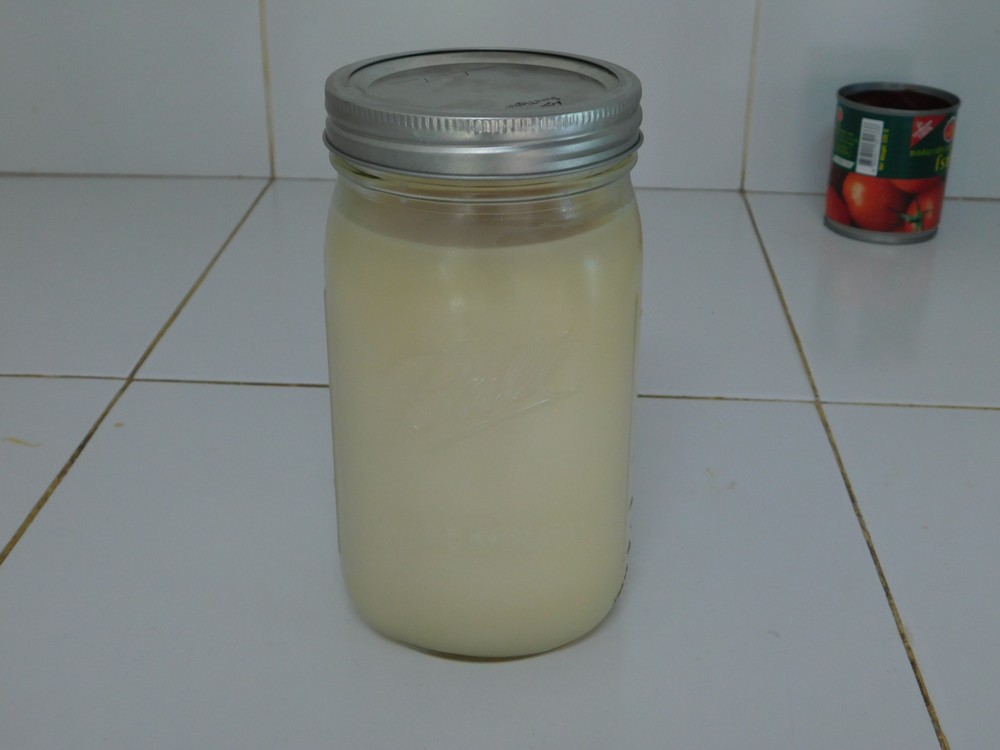
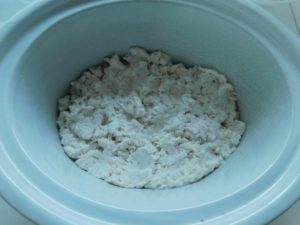
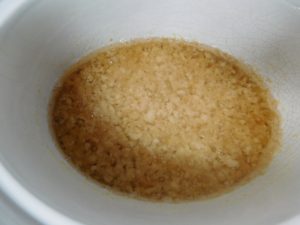
  • Add the cream to the jar, leaving about 1½ inches of space on the top. Add the yogurt and stir together.
  • Cover with a coffee filter, cheesecloth, tea towel, etc, and secure with a rubber band. Leave the container on the counter for 1-2 days.
  • Check each day to see if it has thickened. Should thicken in no more than 2 days, but normally in 1 day.
  • Once thickened, remove the coffee filter, cheesecloth, etc. and cover with the regular container lid and refrigerate for 1 day, then it is ready to use. Enjoy as you would use sour cream.

Notes

Used in Recipes Listed on this Site:
Basic Shrimp Stock

Basic Shrimp Stock

Taking only a few minutes on the stove, this is a great stock to use in recipes calling for clam juice or to add more depth of flavor to seafood soups and stews. The amount of stock is based on how many shrimp heads, shells, and tail you have on hand.
Prep Time 1 minute
Cook Time 15 minutes
Total Time 16 minutes
Cuisine American
Servings 0

Ingredients
  

  • shrimp heads, plus shells and tails
  • 1-2 teaspoons black peppercorns
  • 1 bay leaf
  • 1-2 fresh parsley tops
  • water, as needed

Instructions
 

  • Place everything in a pot and add water to just cover the shrimp parts.
  • Simmer for about 15 minutes, you are looking for a light orange color.
  • Pour the stock through a fine mesh strainer and it is ready to use, or you can freeze for later use.

Notes

Low cost.
Variants: 1. Toast the shells in the oven prior to putting in the pot of water. 2. Lobster and crab shells also make a nice stock, with or without the shrimp shells.
Adapted from an internet recipe.
How to Roast Green Chilies

How to Roast Green Chilies

I have a friend in New Mexico, and lives and breaths green chilies, in particular, the Hatch variety. Now here in Thailand, we don't have the hatch varieties, but we can take advantage of the green chilies and peppers that are plentiful here. I actually had to look up how to roast chilies (you can tell I am not from Texas or New Mexico). This is a roast and freeze recipe for use in recipes that call for these, just thaw them out and ready to use.
Prep Time 5 minutes
Cook Time 6 minutes
Total Time 11 minutes
Cuisine American
Servings 0

Ingredients
  

  • green chilies, and or green pepper

Instructions
 

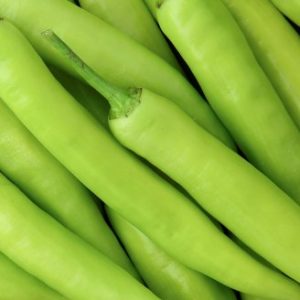
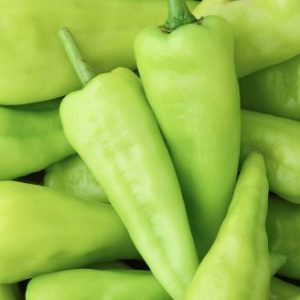
  • In Tesco-Lotus, these are named simply "Green Peppers" and they are delicious as well, but they have a skin that needs to be removed, and the roasting makes that easy and gives a great flavor the the peppers/chilies.
  • In Tesco-Lotus, these are named simply "Long Green Peppers" and they are also delicious. These are the two types I am going prepare by roasting. There is also a red version of this aptly named "Large Red Pepper."
  • Preheat your broiler to 200 C (400 F), for those with counter top ovens, use the top coil only. Position the rack 4 to 6 inches from the heating coil/burner. Line a baking sheet with foil.
  • Wash the chilies and dry with paper towels. Place the chilies on the baking sheet in a single layer.
  • Place the baking sheet in the broiler or oven and cook for 3 to 5 minutes, you are looking for about 75% charred and blistered skins on the chilies.
  • Using tongs, turn each chili over and cook again for 3-5 minutes, also looking for 75% charred and blistered skins.
  • Remove the baking sheet from the oven, and quickly place the chilies in a food safe zip lock bag, then seal the bag and let them sit for 15 minutes. This steams the chilies which will help in peeling them.
  • Trim of the stem end of the chilies and pull the skin off. Slice in half lengthwise and scrape out the seeds and inner membranes with a spoon.
  • Slice in piece in half lengthwise, then chop or dice.
  • Allow to cool to room temperature, then place in small freezer bags or in small freezer containers, or in an average size ice cube tray, and when they are frozen, transfer the 'cubes' to a freezer bag.

Notes

Low cost.
Variant: 1. You can roast the chilies over an open flame on your stove, using tongs to hold the chilies.
Adapted from an internet recipe. Photos courtesy of Tesco-Lotus Thailand.
Peanut Butter

Peanut Butter

Peanuts, four other ingredients, and a blender is all you need to make peanut butter at home, and you control the amount of sugar you want to use.
Prep Time 5 minutes
Cook Time 20 minutes
Total Time 25 minutes
Cuisine American
Servings 2 cups of peanut butter

Ingredients
  

  • 300 grams raw peanuts, skinless, (2 cups or 11 oz)
  • 5 tablespoons cooking oil
  • 1 tablespoon butter
  • 1/2 teaspoon salt
  • 3 tablespoons sugar, use less as desired

Instructions
 

  • Preheat your oven 180 C (350 F). When hot, place the peanuts in a single layer on a baking sheet and bake for about 20 minutes, tossing them a few times and spreading back out to a single layer. Bake until they are golden brown. Set aside to cool.
  • When the peanuts are cooled, add to a blender along with the cooking oil, butter, salt, and sugar that is dependent on your taste.
  • Blend on high speed for about 3 minutes, pause several times to scrape the sides back in the mixer.
  • When smooth, remove from the blender and place in a jar or air tight container and place in the fridge. This will stay fresh for 1-2 months in the fridge.

Notes

Low cost.
Adapted from an internet recipe.
Easy Spring Roll Wrappers

Easy Spring Roll Wrappers

China Sichuan Food, Elaine, China.
This comes from a good friend in China to make an easy spring roll wrapper without kneading and fast. This is a non traditional way but seems to work perfect, and is vegan as well, bonus for my vegan friends. Just three ingredients, and read the steps fully as you need to have some patience here and follow the steps.
Prep Time 10 minutes
Cook Time 15 minutes
Total Time 25 minutes
Cuisine Chinese
Servings 25 spring roll wrappers

Ingredients
  

  • 200 grams all purpose flour, (1⅓ cups)
  • cups water, more as needed, a teaspoon at a time
  • ½ teaspoon salt

Instructions
 

  • In a bowl, mix together the flour and salt, then stir in the water, stir until well mixed.
  • Place a strainer on another bowl, pour the mixture through the strainer to remove any lumps. Now your mixture is perfect.
  • Now you need a non stick pan with a flat bottom, and a brush. Heat the pan on low heat, then quickly brush the flour mixture into the pan to make a round skin. Increase the heat and the skin will turn white and will lift from the pan. Cooking takes about 10 seconds.
  • Flip the skin over and cook for another few seconds and it will lift from the pan. Turn heat to low.
  • Place skin on a plate to cool before stacking them to prevent the skins from sticking to each other.
  • Wipe out any crumbs in the pan, and repeat the steps until all the batter is used, about 20 wrappers.
Jalapenos en Escabeche (Pickled Jalapenos)

Jalapenos en Escabeche (Pickled Jalapenos)

Adopted from a internet recipe.
Spanish for pickled jalapenos. Heavy on the garlic, these sound really good. This is a fridge version, no need for canning these. On my to make list for sure.
Prep Time 30 minutes
Cook Time 20 minutes
Total Time 50 minutes
Cuisine Mexican
Servings 2 quarts

Ingredients
  

  • cups fresh jalapenos, sliced
  • 2 cups water
  • 2 cups white vinegar, or apple cider vinegar
  • 6 tablespoons sugar
  • 2 tablespoons sea salt
  • 1 tablespoon black peppercorns
  • 2 bay leaves
  • ¼ cup garlic, chopped
  • ½ cup onion, diced
  • 1 cup carrots, sliced
  • 2 tablespoons olive oil

Instructions
 

  • Sterilize two quart jars, you won't be canning these but you need them clean.
  • Slice off the stem and pointy ends of the peppers, slice peppers into rings and place in a large mixing bowl.
  • In a sauce pan, add the water, sugar, salt, peppercorns, bay leaves, and vinegar and bring brine to a boil.
  • While the brine is heating, toss the carrot, garlic, onion, and olive oil with the jalapenos, then place mixture into 2 quart jars.
  • Once the brine is boiling, remove the bay leaves and place one into each jar. Pour the hot brine into the quart jars.
  • Leave jars on the counter, with no lids to cool to room temperature, then add the lids and place in the fridge for at least 1 week, 2 weeks is better to allow the flavors to really blend.

Notes

Low cost.
Variants: 1. Leave the peppers whole after cutting off the stem and pointy end, can make two rows in a quart jar. 2. Leave whole with stem and pointy end intact but cut two slits on opposite sides to prevent bursting.
Used in Recipes Listed on this Site:
Steamed Eggs (Rice Cooker)

Steamed Eggs (Rice Cooker)

Simply Recipes, Elise Bauer, United States.
I found this recipe on a friend's web site and decided to give this a try. I use a small rice cooker (1 liter) with a steamer tray, a steamer basket in a pot works equally as well. The size of the steamer basket, size of the eggs, if eggs are layered, and even elevation will play a role in the time to get perfect hard cooked eggs.
5 from 2 votes
Prep Time 1 minute
Cook Time 12 minutes
Total Time 13 minutes
Cuisine American
Servings 8 eggs

Equipment

  • Rice Cooker

Ingredients
  

  • 8-10 eggs, chicken, room temperature
  • water, as needed
  • ice, as needed

Instructions
 

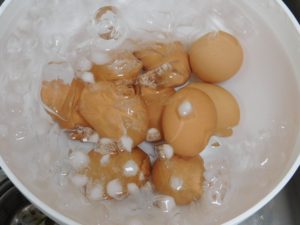
  • Add about 1 to 1½ inches of water to your rice cooker insert and add the steamer tray and cover, if using a pot with a steamer basket, add the basket then add water to where it just touches the bottom of the steamer basket then cover. Turn the rice cooker to Cook setting and for a pot, turn to medium to high heat. Get the water boiling and making steam.
  • Remove the steamer tray and cover the pot, add the eggs to the steamer tray, place tray on the cooker, for a pot, remove from heat, add the eggs then put back on the heat. For a pot, adjust the heat needed to maintain a gentle boil.
  • Set your timer for 6 minutes for soft cooked and 10 minutes for hard cooked with a slightly soft yolk center, or 12-15 minutes for fully cooked through yolks. (I used 15 minutes and the eggs were perfect). If you are using two layers of eggs, increase the time by 1 to 2 minutes. (My little rice cooker doing its thing.)
  • Place a large bowl in the sink and fill will ice, then fill with water, when the time is up on the eggs, transfer the eggs with a slotted spoon into the ice water, as the ice melts, turn on the tap to keep the water running into the bowl for 5 to 10 minutes to cool the eggs.
  • When the eggs are cooled, take each egg and crack all over and return to the water. Once all eggs are cracked, start peeling them under running water, rinse off any shell fragments, place in another bowl, cover, and refrigerate until used.
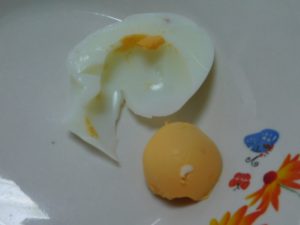
  • I hard cooked 10, previous photo shows 9, here is number 10. I took the ugly egg, the white was broke, and sliced in half, and as you can see, absolutely no green from over cooking. The whites were perfect in taste, not rubbery at all. Yolk was perfect.

Notes

Low cost.
These can be used in any recipe calling for hard or soft boiled eggs.
Rendering Lard

Rendering Lard

Adapted from an internet recipe.
Rendering pig fat produces lard, which a natural fat and is actually healthier than many vegetable oils. It has a high smoke point which makes it ideal for deep frying and is ideal for pastry making. I used to render bear fat when I was growing up and that, makes the best pastry, hands down. This process uses a slow cooker, perfect for the low heat and minimal chance of burning the lard. If you have ever made lard in a pot on the stove top, and burned it, you will understand why the slow cooker is the best option. The rule of thumb is 1 quart of lard is rendered from 1 kilo (2 lbs) of pig fat. I have two methods to prepare the fat listed, if you have an electric meat grinder, that option will save some time in the slow cooker.
5 from 1 vote
Prep Time 10 minutes
Cook Time 12 hours
Total Time 22 minutes
Servings 1 quart of lard

Equipment

  • Slow Cooker
  • Meat Grinder optional

Ingredients
  

  • 1 kilo pork fat, (2 lb)
  • ¼ cup water

Instructions
 

Cubed Fat

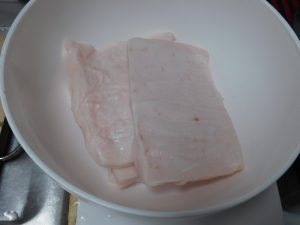
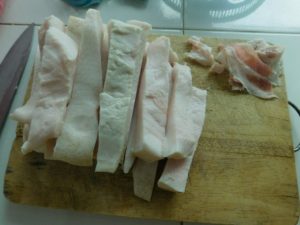
  • Trim any large pieces of meat from the fat, does not have to be perfect, just remove the large bits. If you buy the fat at Tesco, it will be back fat and all be trimmed and in large pieces. In the US try and get leaf fat from a reputable farmer that has pasture raised pigs I bought 5 slabs at Tesco, about ¾ inch thick that came out to 1 kilo in weight.
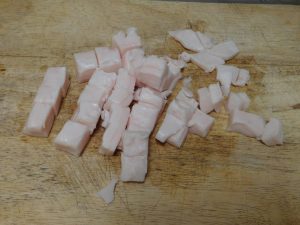
  • Dice the fat into ½ to ¾ inch pieces, smaller is better for this.
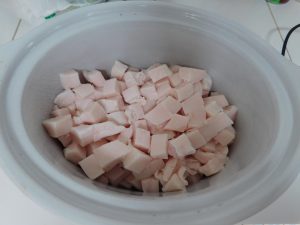
  • Add the fat to your slow cooker and add a ¼ cup of water (the water evaporates off). Place the lid on the cooker and set the cooker to Low setting.
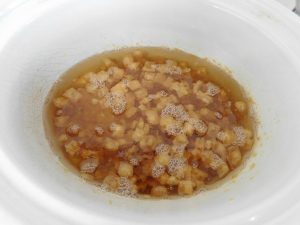
  • After 1 hour, give the pot a stir and you will see some liquid in the pot, that is the fat being rendered.
  • Continue to stir every hour until the fat is fully melted or is brown bits on the bottom of the pot that start to float again. At this point, the lard is ready. Mine was ready in 15 hours.
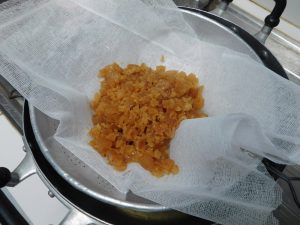
  • Pour the lard through cheese cloth placed in a strainer, over a pot, Let the brown bits (crackling) drain for about 20 minutes or so. Remove the strainer and set aside with the cracklings.
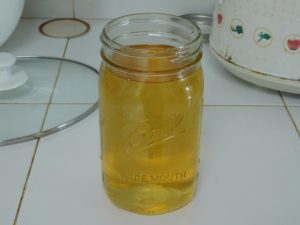
  • Pour the lard into a quart jar and allow to cool on the counter uncovered. Once cooled, cover and store in the fridge until use.
  • Cooled and solidified, perfect!
  • Bonus item! Heat a non stick pan and when hot, dump the cracklings, the left over bits in the cheese cloth, into the pan, season with salt and herbs of your choice, fry until crispy, enjoy!

Coarse Ground Fat

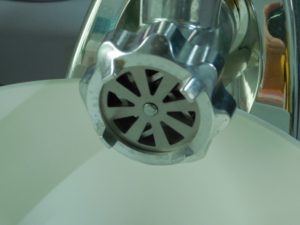
  • If you have an electric meat grinder, and a coarse plate, the coarse plate I have is called the wagon wheel. Assemble your grinder with clean sterile parts. Do not add the hopper tray, the try that fits on top of the feed tube, first, it is not needed, two, less to wash later.
  • To prepare the fat, you want is very cold, not frozen. Place the fat skin side up on a cutting board, cut into strips that are about ⅜ inch wide, once all the strips are cut, check each one for any meat tissue and trim that off. Be careful doing this as pieces will be very slippery. Here you can see the strips and the meat tissue I removed on the right.
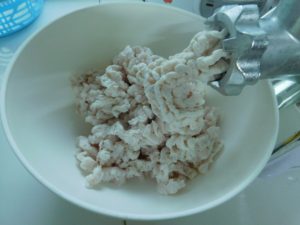
  • Place a bowl to catch the fat. For this method, you are not going to load up the hopper with a bunch fat, you are going to do this one strip at a strip at a time, as the grinder is grinding the skin as well, so we do not want to overwhelm the grinder or slow the motor. Turn the grinder on and drop in a fat strip, when that is coming out, drop in another. This actually goes quite fast.
  • Place the fat in your slow cooker. And proceed with adding the 1/4 cup of water and setting the cooker to Low.
  • Stir every hour, the fat and skin will turn golden brown and the bits will sink to the bottom, when they start to float, the lard is ready. Mine was ready after 9 hours.
  • Pour the lard through cheese cloth placed in a strainer, over a pot, Let the brown bits drain for about 20 minutes or so. Remove the strainer and discard the bits, they are so small, don't worry about using them.
  • Pour the lard into a quart jar and allow to cool on the counter uncovered. Once cooled, cover and store in the fridge until use.

Notes

Low cost. I paid 70 Baht for 1 kilo of fat resulting in 1 quart (4 cups) of rendered, good quality lard, to use in frying and baking.
Used in Recipes Listed on this Site:
Beef Stock

Beef Stock

This is from a good American friend, Brian, who lives in northeastern Thailand. When I order beef next time in the village I will have to order some cut leg bones to try this out, sounds like excellent stock.
Prep Time 45 minutes
Cook Time 4 hours
Total Time 4 hours 45 minutes
Cuisine American
Servings 4 quarts

Ingredients
  

  • 1 tablespoon vegetable oil
  • 1 large onion, cut into chunks
  • 2 large carrots, cut into 1 inch pieces
  • 2 stalks imported celery, cut into 1 inch pieces
  • 2 kilos beef marrow bones, cut into 2 to 3 inch pieces, (4 lbs)
  • 2 teaspoons tomato paste
  • 8 whole black peppercorns
  • 1 bay leaf
  • 5 quarts cold water

Instructions
 

  • Preheat your oven to 230 C (450 F). Oil a roasting pan and add the marrow bones, onions, carrots, and celery. Roast for 20-30 minutes or until the vegetables are browned, turn the veggies occasionally.
  • When the veggies are roasted, transfer the bones and veggies to a large stock pot add the water. All the contents should be covered with water.
  • Now with the roasting pan, pour out any fat and discard that. Add 1/2 cup hot water to the pan and scrape up any bits stuck to the pan, then pour that water into the stock pot.
  • To the stock pot, now add the tomato paste, peppercorns, and bay leaf. Bring the pot to a simmer and maintain a simmer for 4 to 6 hours. Check the pot once in a while and skim off any foam and fat. Add water as needed to keep the contents covered.
  • Once simmered, turn off the heat and allow the pot to cool. Remove the bones and discard or for a treat for your dog. Strain the stock and discard what you strained out.
  • Can be used immediately or stored in the fridge for several days, or even frozen.

Notes

Low cost.
Recipe provide by good friend, Brian Colligan, Pleasures & Pastimes (which is a great resource for gardening seeds and other items).
Thailand.
Vanilla Buttercream Frosting

Vanilla Buttercream Frosting

This is a basic buttercream frosting mix from none other than Betty Crocker, this recipe has been used by millions of people over many many years. Frosts 13x9-inch cake generously, or fills and frosts an 8 or 9-inch two-layer cake, or about 12 cupcakes.
Prep Time 10 minutes
Total Time 10 minutes
Cuisine American
Servings 0

Ingredients
  

  • 3 cups powdered sugar
  • 1/3 cup butter, room temperature
  • 1 1/2 teaspoons vanilla extract, see Variants listed below
  • 1-2 tablespoons milk

Instructions
 

  • In a mixing bowl, mix together the butter and sugar, use a heavy spoon or an electric mixer on low speed.
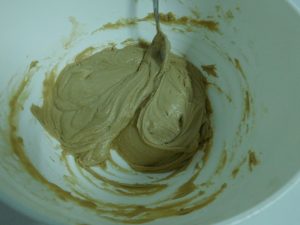
  • Add the vanilla and just 1 tablespoon of milk. Beat well, and just add additional milk, a few drops at a time, to make a nice and smooth, and spreadable frosting. If frosting is too thick, add milk a few drops at a time, if too thin, add powdered sugar a teaspoon at a time. (This photo is the chocolate variant.)
  • Frosts 13x9-inch cake generously, or fills and frosts an 8 or 9-inch two-layer cake, or about 12 cupcakes.

Notes

Low cost.
Variants: 1. Use chocolate flavoring instead of vanilla. 2. Use coconut flavoring instead of vanilla.
Used in Recipe Listed on this Site:
Red Velvet Cake, Made it, GO-TO recipe.
Adapted from an internet recipe.