Archive for the ‘#1 Go-To Recipes’ Category
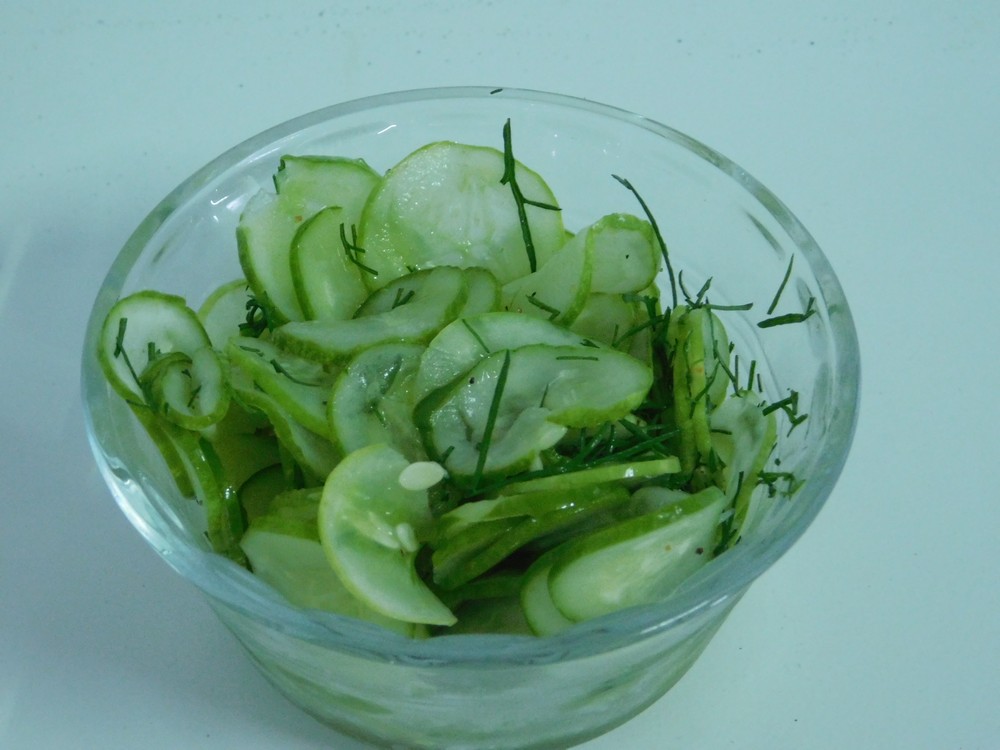
Cucumber Salad II
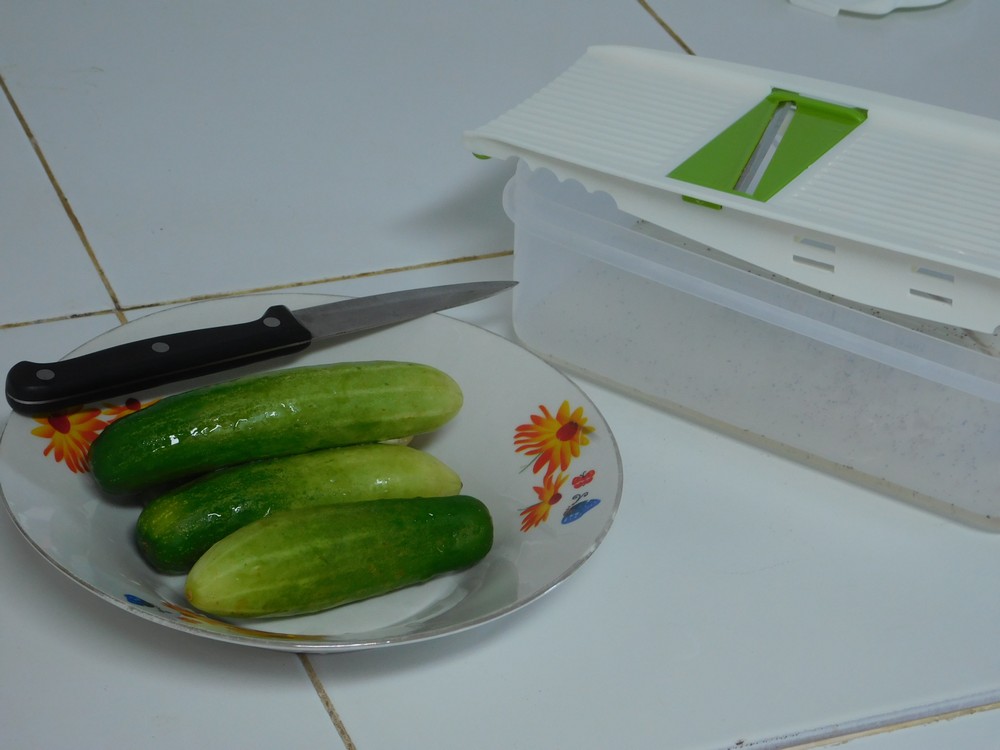
This is another version of a cucumber salad, and it really good. Use of a mandolin is recommended to give you very thin slices. Made this on 28 Oct 2017, wonderful salad!
Ingredients
- 2 medium cucumbers, thinly sliced
- 1/3 cup white vinegar, or cider vinegar
- 1/3 cup water
- 2 tablespoons sugar
- 1/2 teaspoon salt
- 1/8 teaspoon black pepper
- fresh dill, chopped, for serving
Instructions
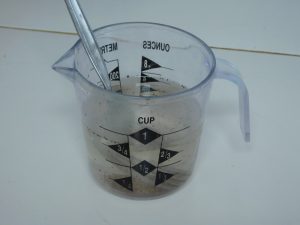
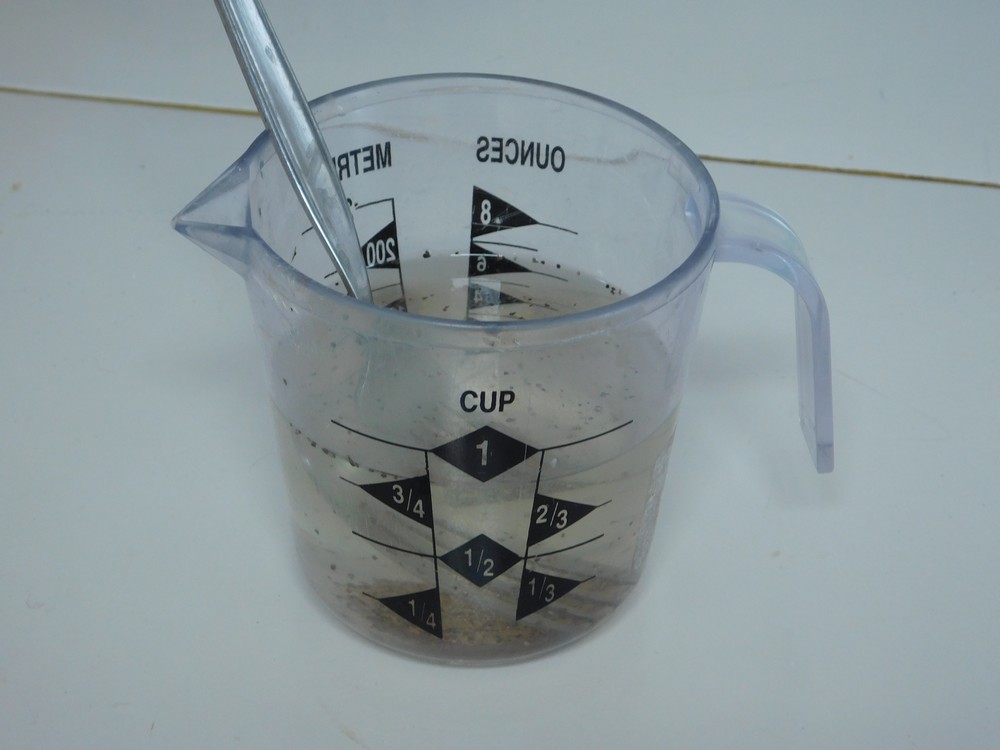
- In a measuring cup, add the vinegar, water, sugar, salt, and pepper, and mix together (see, instead of using another bowl to mix everything, you just saved yourself from washing another item). Pour the mixture into a small container. I used a plastic box.
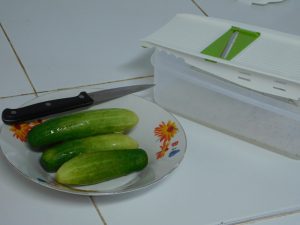
- I used my mandolin placed right on the box with the liquid. I used 4 small cucumbers as shown. Or you can just slice with a knife and add the cucumber slices to the liquid and mix.
- Cover and place in the fridge for at least 3 hours to chill and blend the flavors.

- When ready to serve, drain the cucumbers, sprinkle on some chopped dill and mix in, serve as a side dish.


Notes
Low cost.
Provided courtesy of good friend, Stephen Connell.
United States.
United States.

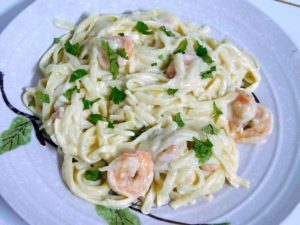
Creamy Shrimp Pasta
This comes from a good friend, and her recipes have never failed me. I love pasta and shrimp, and this is best pasta I have made.
Ingredients
- 350 grams dry Fettuccine pasta
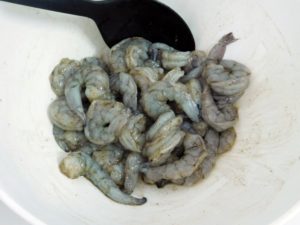
- 500 grams fresh shrimp, peeled, deveined, tails removed
- 1 tablespoon olive oil
- 1/2 onion, finely diced
- 2 tablespoons butter
- 1 clove garlic, smashed and minced
- 1/3 cup white wine
- 2 cups whipping cream
- 1/3 cup Parmesan cheese, grated. plus more for serving
- salt and pepper, to taste
- paprika, to taste
- fresh parsley, chopped, for garnish
Instructions
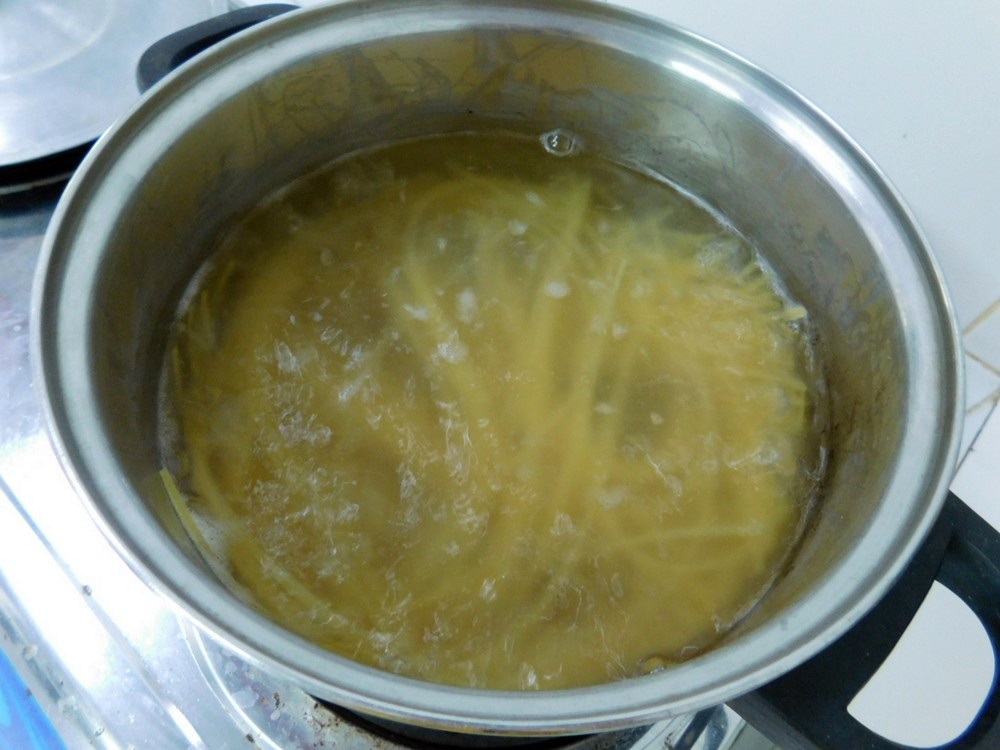
- Cook the pasta in a pot of salted water until just tender, drain, and set aside.

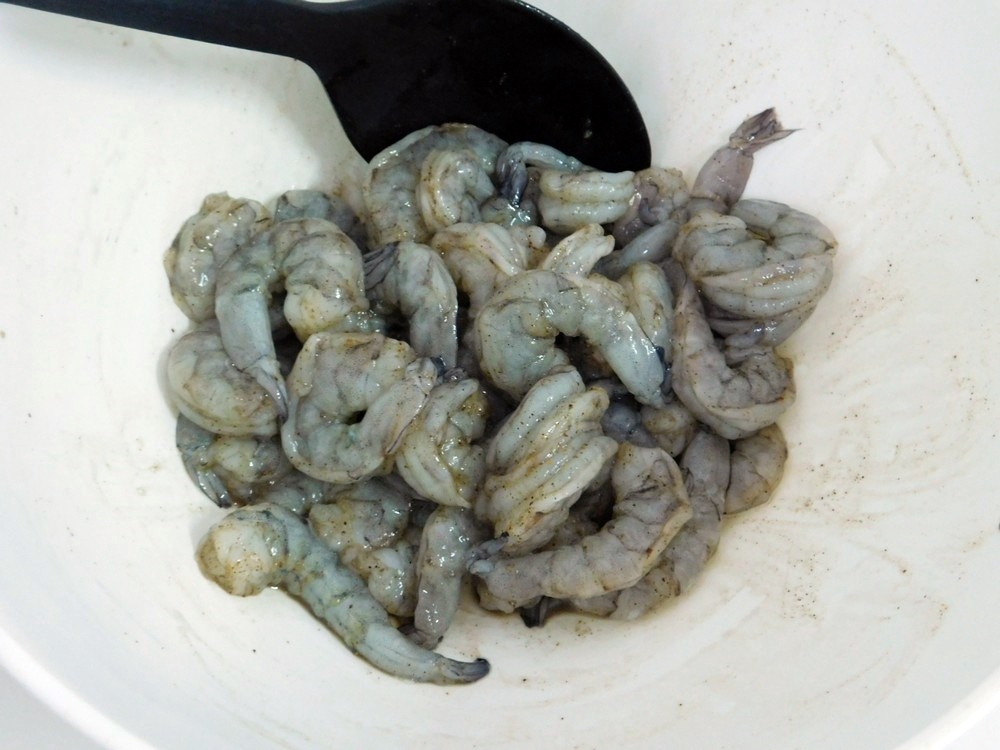
- In a large bowl, add the shrimp and season with 1/2 teaspoon of salt, 1/4 teaspoon pepper, and 1/4 teaspoon of paprika or according to your taste. Toss the shrimp to make sure they are all seasoned.
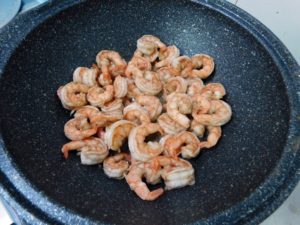
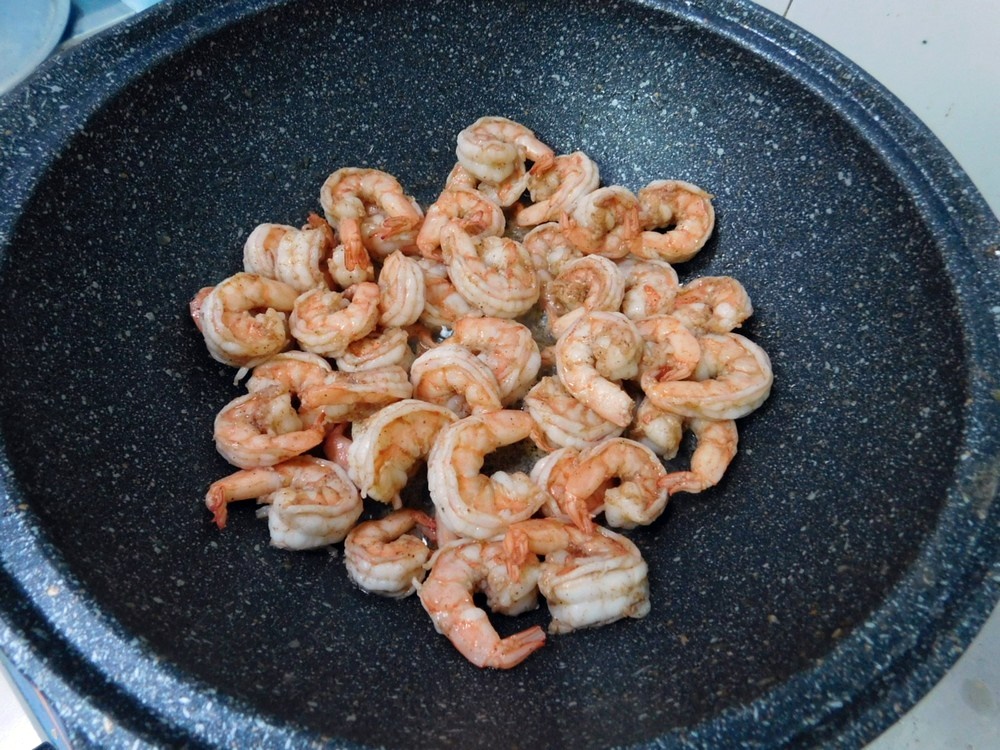
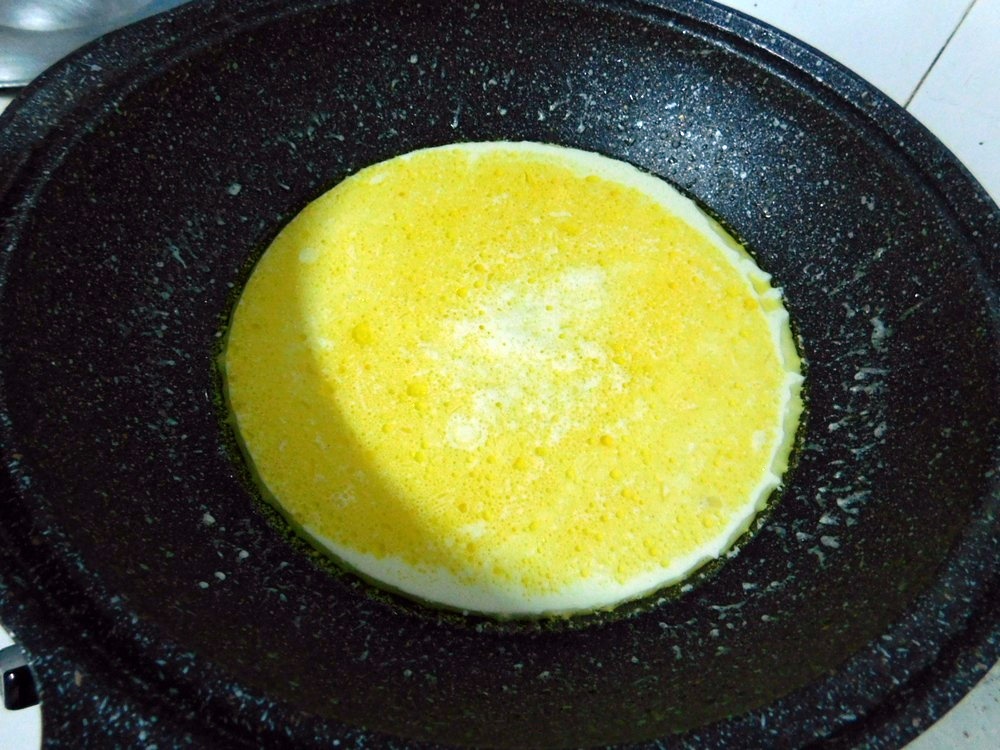
- Heat a large non stick pan on medium heat and add the oil, when hot, add the shrimp and stir often to cook until pink on all sides, takes just a few minutes then quickly remove them from the pan to a plate.
- Same pan, add the butter and onion and cook, stirring often until golden brown, then add the garlic and cook until fragrant, 30 seconds to a minute. Now stir in the white wine and cook this to reduce to 25% of the liquid remaining in the pan.

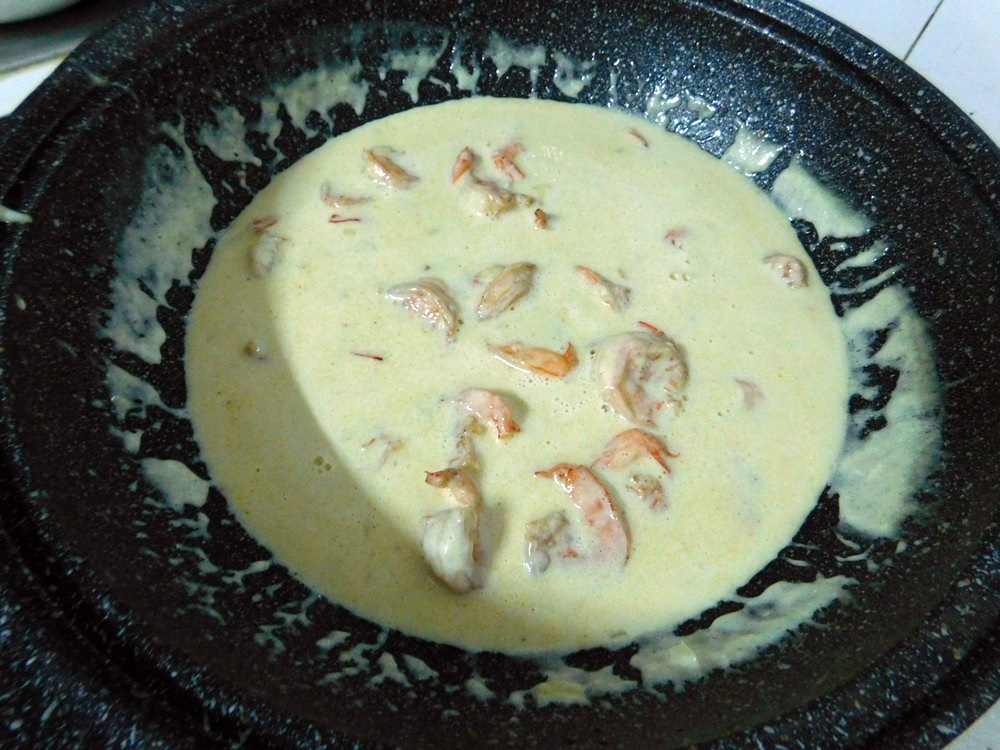
- When the wine is reduced, stir in the cream and bring to a low boil then reduce heat to a simmer for 2 minutes. Now sprinkle on the Parmesan and stir only until smooth and creamy, simmer for a minute or two then turn off the heat, do not let it get to a boil. Season to taste with additional salt, pepper, and paprika as desired.

- Stir in the shrimp.

- Then add the pasta and toss to coat.
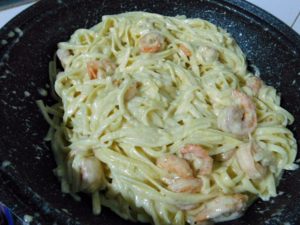
- Serve with a sprinkle of Parmesan and parsley.


Notes
Figure about 150 Baht/500 grams of large shrimp. For 4 servings, this is about $1.10 per serving.
This recipe for Creamy Shrimp Pasta is from Natasha's Kitchen.

Fresh Pumpkin Pie
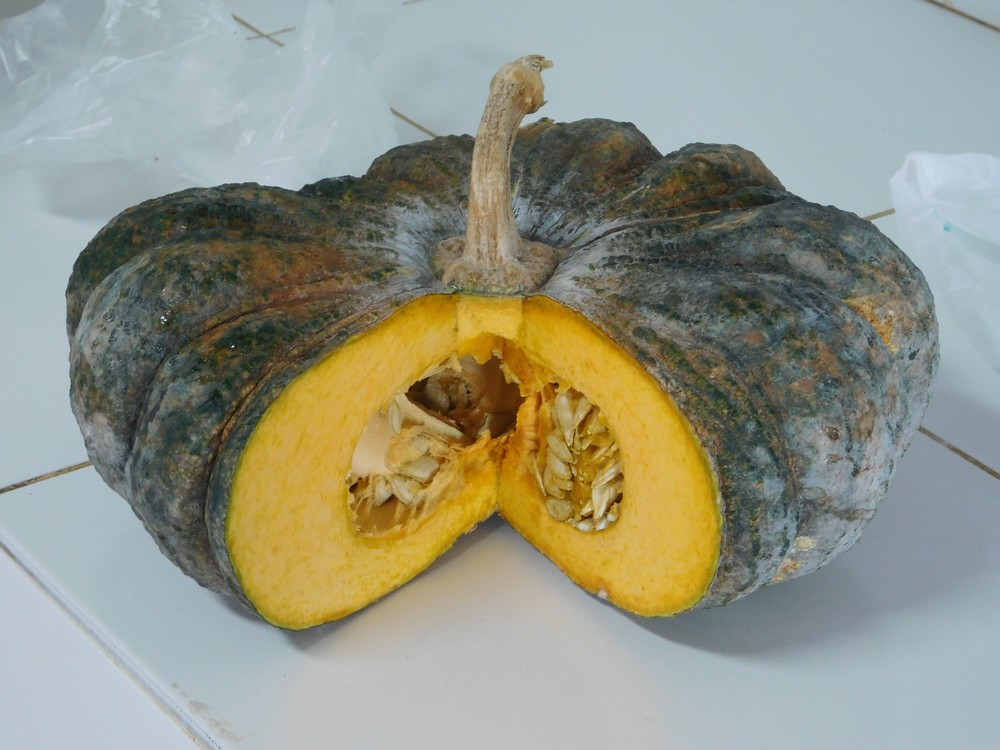
This is a from scratch pie, no canned pumpkin, for where I live, plenty of winter squash, which is a pumpkin, but depending on your location, feel free to use orange pumpkin, acorn squash, butternut, or Hubbard squash. I am really surprised I have not made this before as winter squash, called pumpkins here, is grown here locally and available everywhere. I made this on 16 Oct 2017 and it came out beyond all expectations, this was just perfect, very liked by the family, so much so, I was asked to make this again on 17 Oct. Most of the steps and photos is just to prepare the pumpkin, keep in mind, you are going to go from a whole pumpkin to making the mix, crust, and baking, this actually moves along quickly however.
Equipment
- Pie Dish (9 inch)
- Oven
Ingredients
- 750-800 grams fresh pumpkin, I used a large section from a large pumpkin, 26-28 oz)
For the Filling, after pumpkin is cooked
- 2 cups pumpkin, cooked, peeled, and mashed
- 1 can evaporated milk, (368 ml Thailand, 12 fl oz US)
- 2 eggs, beaten
- ¾ cup brown sugar, packed
- ¾ teaspoon ground cinnamon
- ¾ teaspoon ground ginger
- ¾ teaspoon ground nutmeg
- ½ teaspoon salt
For the Pie Crust
- 1⅓ cups all purpose flour
- ½ teaspoon salt
- ½ cup shortening, lard, or frozen butter that is shredded
- 3½ tablespoons cold water
Instructions
To Cook the Pumpkin
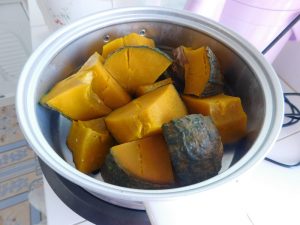
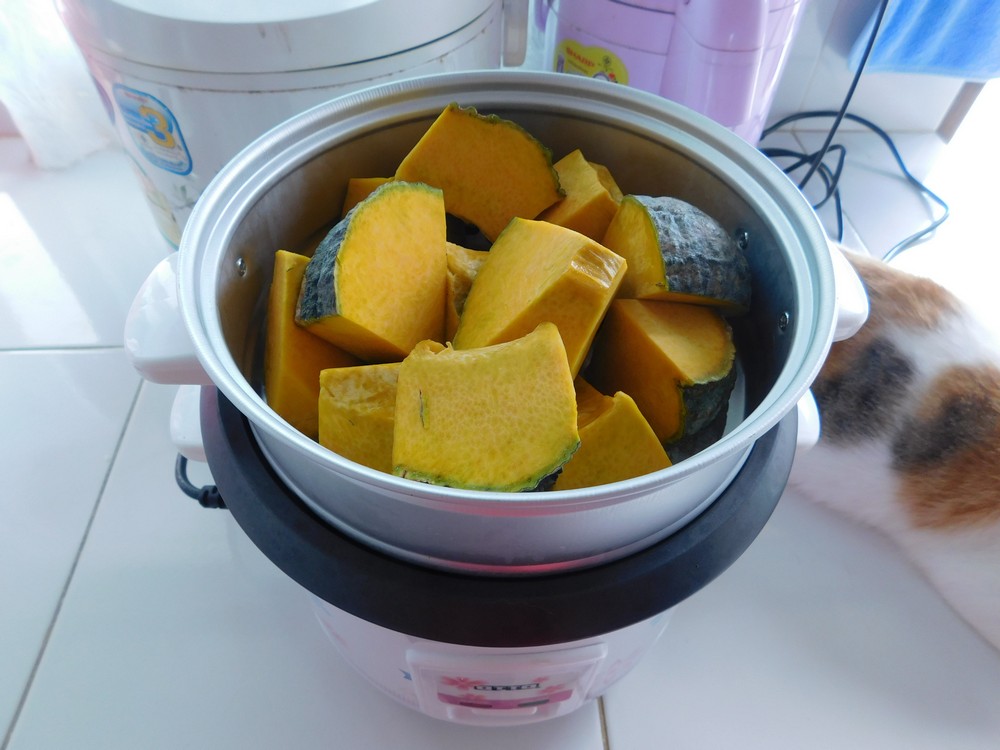
- First things first, you need to prepare then cook some pumpkin. If you have a preferred way, use that. Here are my steps I used. I bought a 3½ kilo (7 lb) pumpkin, yes, this is what is called a pumpkin here, not very attractive looking. I cut a section out, removed the seeds and weighed (I use a digital scale) and the piece was 770 g (27 oz).

- Cut the piece into large chunks. I used my little rice cooker to steam this, place the chunks in the steamer basket, add water to the pot, set to Cook setting. Use your preferred way to steam the pumpkin.

- About 10-15 minutes to bring the water in the rice cooker to a boil, and about 15 minutes steaming the pumpkin, done. It is cooked when it easily pierces with a fork. Turn off the rice cooker, remove the steamer basket and let the pumpkin cool, about another 20-30 minutes.
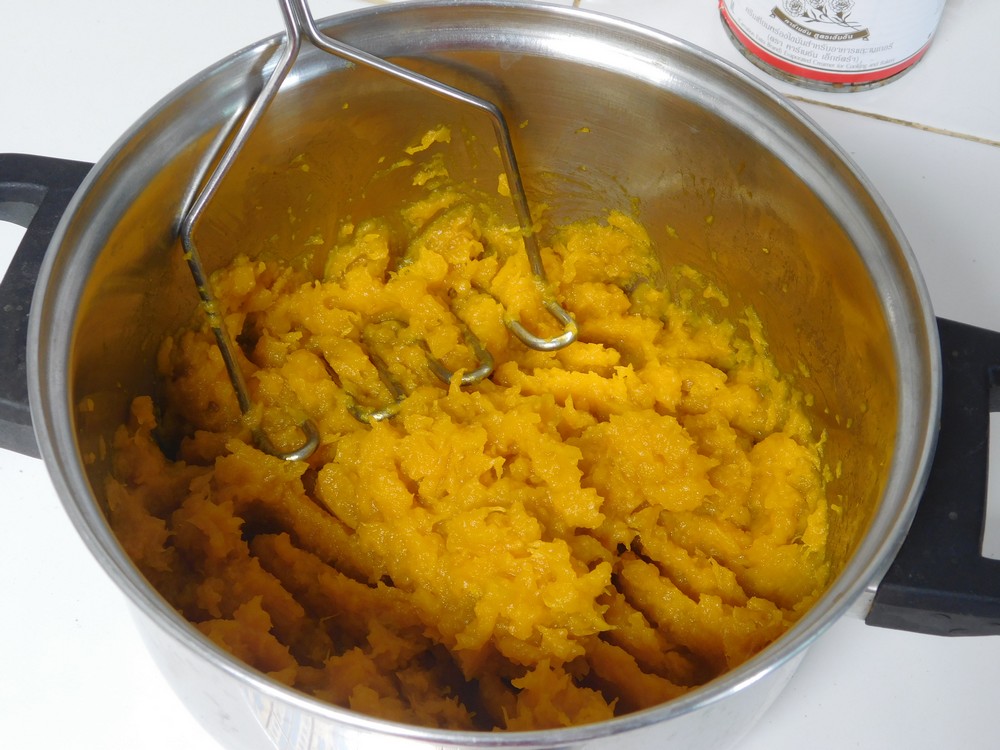
- Once the pumpkin has cooled, use a pairing knife and cut off all the green skin, it comes off very easily, takes 2 minutes if that. Place the trimmed pieces in a small pot. With a potato masher, fully mash the pumpkin well, takes just a minute or two, no need for a food processor or any other kitchen devices.


To Make the Filling
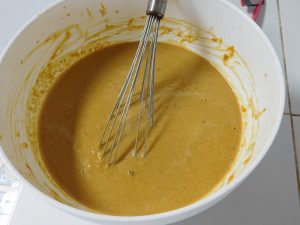
- Add the cooked and well mashed pumpkin to a large mixing bowl, add the rest of the Filling ingredients and mix well. I used a spoon at first then switched to a whisk, takes just a minute or two.
- Now is the time to preheat your oven to 200° C (390° F).

For the Crust
- Mix together the flour and salt from the Pie Crust ingredients, cut shortening, lard or butter, into the flour with a fork, add cold water 1 tablespoon at a time, mix until dough is moist enough to hold together. Shape into a ball and place on a floured work counter, roll to about 1/8 inch thick and larger than your pie dish. roll the dough on the rolling pin and transfer to the dish and unroll. Press the dough in, trim away excess, flute the edges.


Assemble the Pie
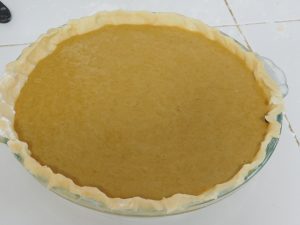
- Give the pumpkin another good stir, then pour into the prepared pie dish. As you can tell, I absolutely horrible at fluting a pie crust.
- When the oven is heated, bake for 40 minutes or until a knife inserted 1 inch from the edge comes out clean. Remove from oven, place on a rack, and allow to cool.

- Cut and top slices with whipped cream, serve and enjoy.


Notes
Variants: 1. Reduce sugar to ½ cup. 2. Use 1 can (15 oz / 425 g) of canned pumpkin in place of fresh pumpkin.

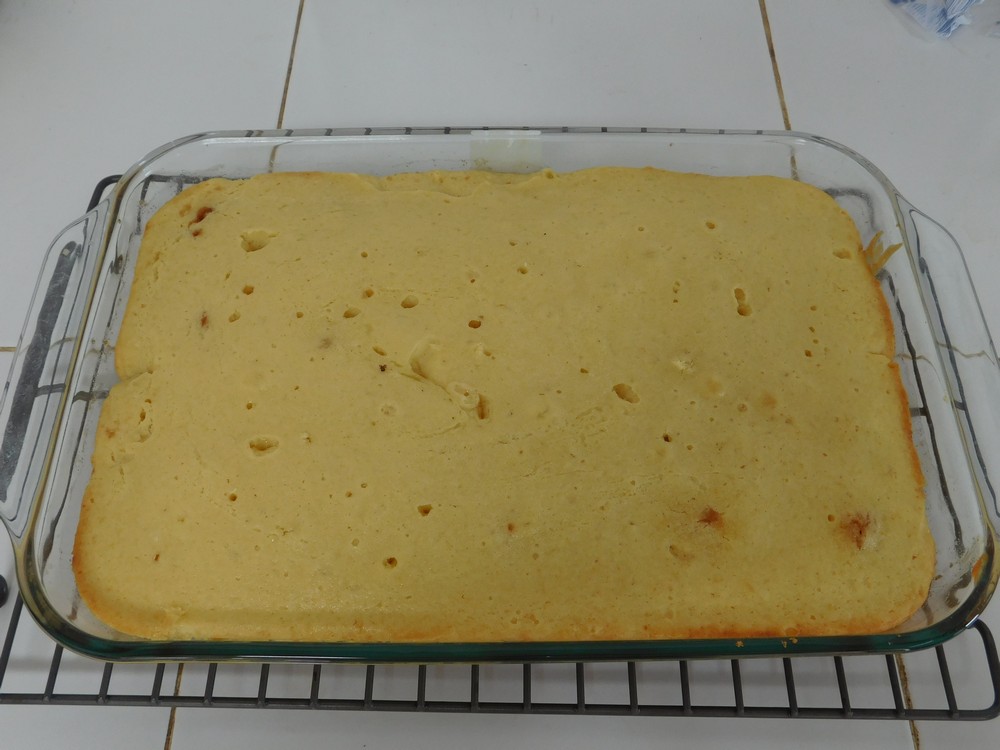
Pineapple Upside Down Cake
I made this using a shortcut yellow cake mix and fresh, not canned, pineapple. One pineapple, cleaned and sliced, provided 9 slices, perfect for a 9x13 pan. This does take longer to bake, I also cut back on the brown sugar from the original recipe. Link to the shortcut is listed in the Recipe Notes section.
Ingredients
- 1 yellow cake mix, OR make from a shortcut
- 1/2 cup butter, (1/2 block / 1 stick)
- 3/4 cup brown sugar, packed
- 1 fresh pineapple
- 1 jar maraschino cherries, stems removed, or glaced cherries
- eggs, butter or oil, as stated by the cake mix
Instructions
- For this cake I used the Yellow Cake Mix shortcut and the Yellow Cake Recipe also here on the site, links to those are in the Recipe Notes section. I used a fresh pineapple so no juice from a can, so I just made the yellow cake as it is stated on this site.
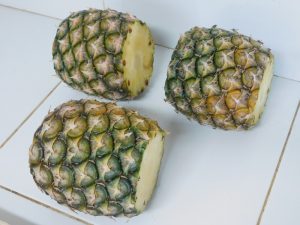
- First thing to do is prep the pineapple. Cut off the top and the bottom. Take the pineapple and stand it on its bottom, using a chef's knife, cut down the side to remove a strip of rind, follow the curve of the pineapple, continue to get all the rind off and and any of the dark spots as well. I used the pineapple in the foreground for this cake, the other two were just cut up for a plate of fruit to snack on.
- Now turn the pineapple on its side and cut into slices about 1/4 inch thick or so. Once you have all the slices, lay a slice flat and use a pairing knife to cut the core out, very easy to do this.
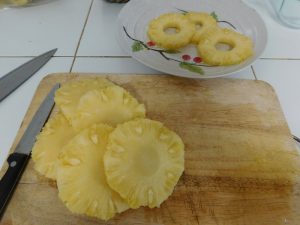
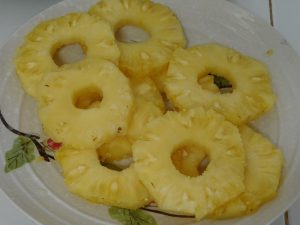
- Pineapple is now prepped, takes all of 5 minutes from start to finished rings.
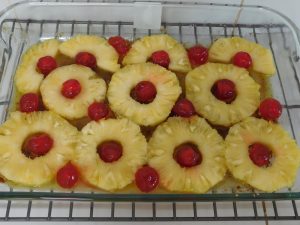
- Preheat your oven to 180 C (350 F). While it is heating, place the 1/4 cup of butter in the baking dish and put that in the oven to melt the butter. I used a 9x13 Pyrex dish. Once the butter is melted, takes just a few minutes, remove the dish from the oven, spread the butter evenly around the bottom of the dish then sprinkle the brown sugar evenly over the butter.
- Arrange the pineapple slices on the bottom of the pan, you can make any pattern you wish. Place a cherry in the center of each ring and in the open areas if desired.
- Here is my Homemade Yellow Cake Mix, does not look much, it is just flour, sugar, baking powder, and salt. Link is listed in Recipe Notes.

- To the Yellow Cake Mix, you need to prepare the batter, that link is in the Recipe Notes section as well. To the Mix, you will need to add 3 eggs, 1/2 cup butter, softened, 1 1/4 cups of milk, 1 tablespoon vanilla extract. Mix by hand, no need to dirty up a electric mixer. Just mix until the batter comes together for a fluffy and moist cake.

- Pour the batter into the pan to even cover the pineapple. Any butter that rises around the edges is perfectly fine and expected, just leave it as is, no mixing at this point, just place it in the oven for 25 to 40 minutes or until a toothpick inserted in the center comes out clean.

- Remove from the oven and run a butter knife around the edges, place a baking sheet over the cake and holding both the dish and baking sheet together, flip the cake over and leave the cake pan on the cake for about 5 minutes to allow the butter and brown sugar soak into the top.

- Remove the dish, let the cake cool for about 30 minutes, serve warm or cooled completely. Store leftovers in the fridge.


Notes

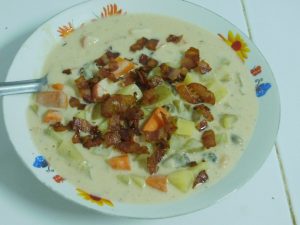
Clam Chowder
This is delicious, and very easy to make, and very versatile. I made this on 16 Nov 2017 and substituted oyster meat for clams, which turned out perfect. The Thai family loved this.
Ingredients
- 6 slices bacon, chopped, fried crispy
- 1 carrot, halved and sliced
- 2 stalks import celery, finely diced
- 1 onion, finely diced
- 4 tablespoons all purpose flour
- 2 cups chicken or vegetable stock, fresh or from powder
- 1-2 cups canned chopped clams, see Step 1
- 1 bay leaf
- 1 1/2 teaspoons Worcestershire sauce
- 1/2 teaspoon tabasco sauce
- 1/2 teaspoon dried thyme
- 1 teaspoon salt, or to taste
- 1/4 teaspoon black pepper, or to taste
- 750 grams potatoes
- 2 cups milk
- 1 cup whipping cream
- fresh cilantro, chopped, for garnish
Instructions
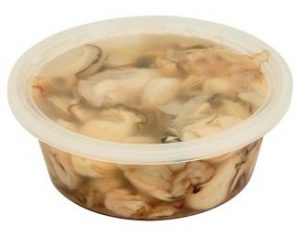
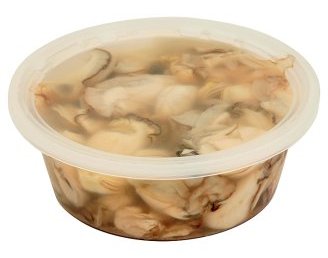
- The recipe calls for canned clams, chopped, with juice, not baby clams. If you have the chopped clams available in your location, very good. What I am going to do is use the small oyster meat available at Tesco here first. This is the oyster meat available at Tesco. These containers will be on ice with the fresh fish. Pour the oysters and liquid (no need to chop them as they will shrink when cooked) in a measuring cup, the amount of liquid is between 3/4 and 1 cup, I poured the liquid out to make is just 3/4 cup, and I used 3 containers for 2 1/4 cups of oysters and liquid.
- Heat a large pot on medium heat and add the bacon, cook until crispy, remove the bacon to a plate with paper towels to drain, set aside. Pour out the fat but leave 3 tablespoons in the the pot.
- Same pot, add the carrot, onion, and celery and cook on medium heat until the vegetables are starting to brown and soften, stir often. Mix in the flour and stir continuously for 1 minute, then add the broth, clams and their juice, bay leaf, Worcestershire sauce, Tabasco, thyme, salt, and pepper, and bring to a boil.
- Prep the potatoes now, diced, skin on or off is up to you. Add the potatoes to the soup and stir in the milk and cream, once boiling, reduce to a light simmer and cover, simmer until the potatoes are fork tender, about 20 minutes or so.
- Once the potatoes are tender, taste and adjust salt and pepper to your liking, serve with bacon and cilantro sprinkled on top of each bowl.
Notes
I used 3 containers of oyster meat with liquid, 45 Baht per container, so 135 Baht for oysters. For 8 servings, this is about 50 cents per serving.
Variants: 1. Use oyster meat in place of chopped clams for the chowder base. 2. Add peeled and deveined shrimp, crab, imitation crab, whitefish, or mushrooms.
This recipe for Clam Chowder is from Natasha's Kitchen.
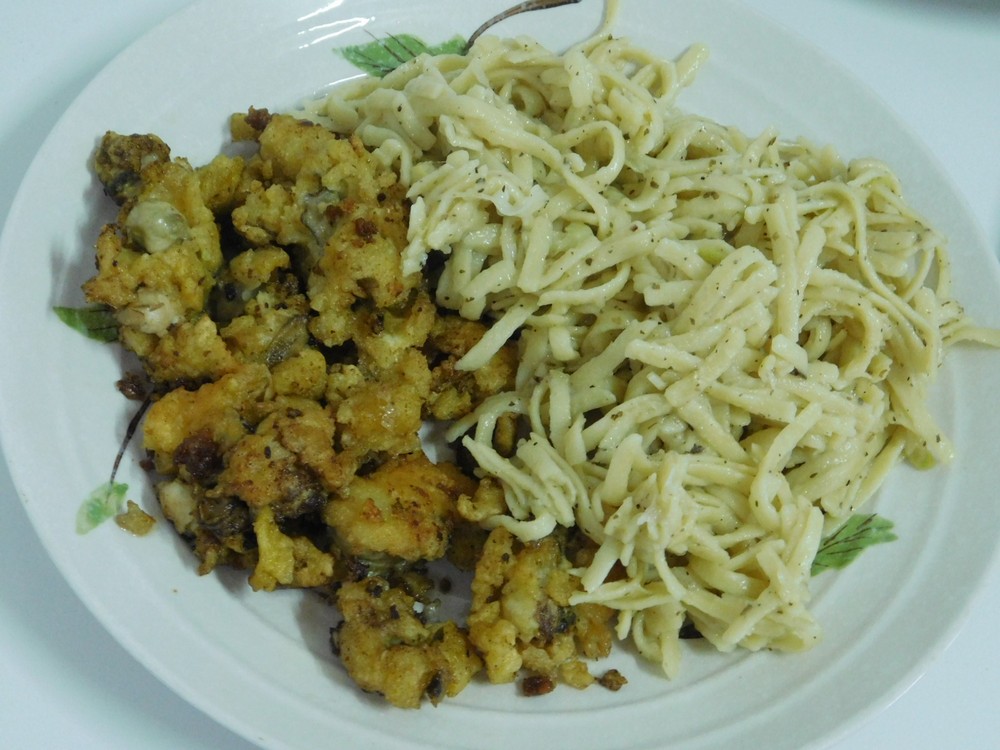
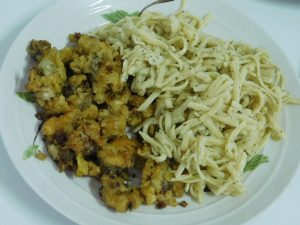
Skillet Pasta Limone
Simply delicious, and the beauty of this, it is all cooked at one time, in one skillet or a pot, how easy is that. Serve as a main or side dish. On my to cook list.
Ingredients
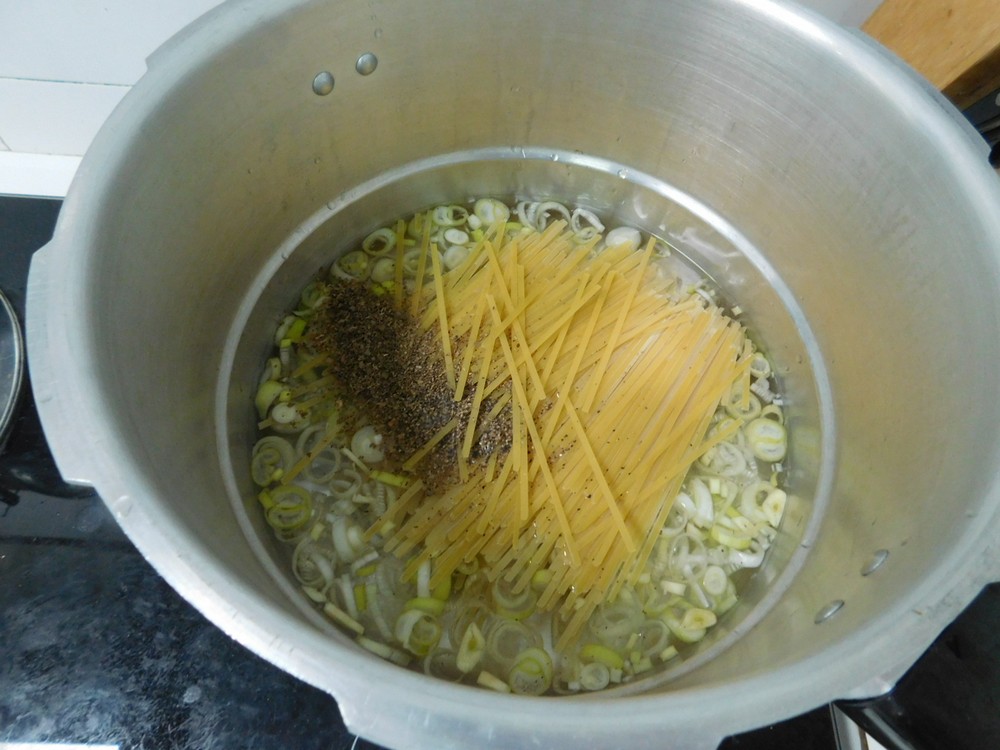
- 340 grams dry spaghetti, break in half
- 2 leeks, thinly sliced, rinsed well
- 2 cloves garlic, thinly sliced
- 1 lemon juice and zest, or a lime, for serving
- 3 sprigs basil, plus more for serving
- 1 teaspoon sea salt
- 3/4 teaspoon black pepper, plus more for serving
- 1 cup Parmesan cheese, grated, for serving
- 4 1/2 cups water
Instructions
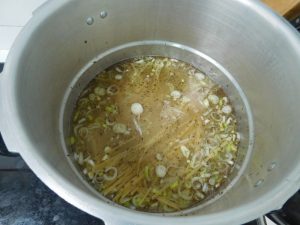
- You can use a heavy walled pot or a large deep skillet for this dish, either will work well. I used my pressure cooker pot due to being thick walled.
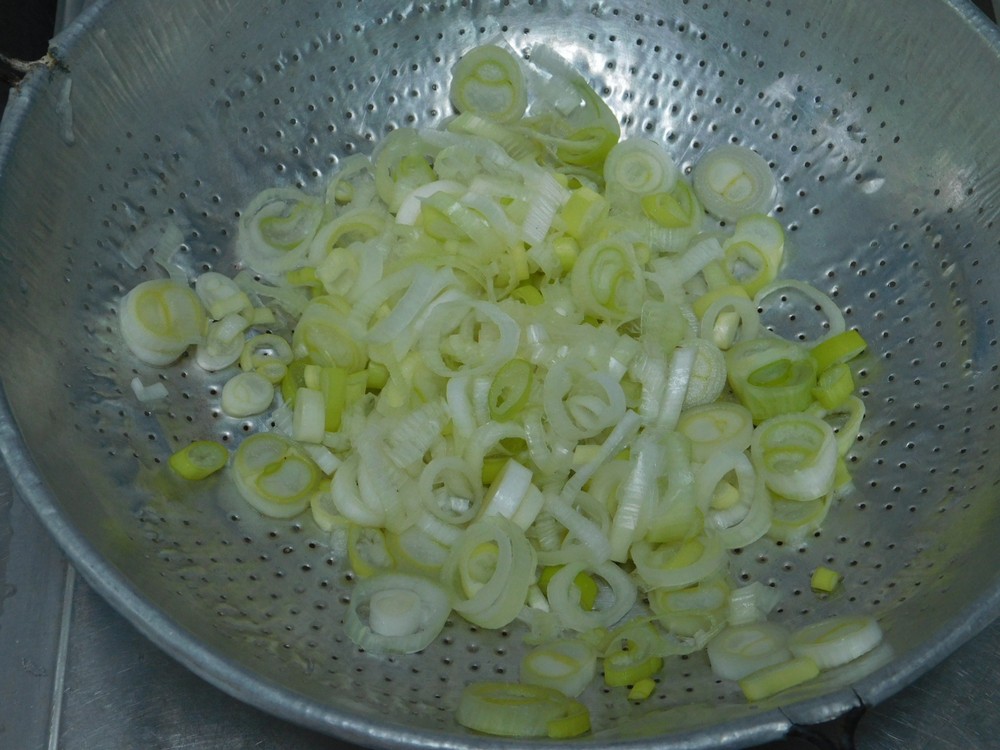
- Slice and rinse the leeks several times, reason for this is the way leeks grow, they can have sand in between the layers as it grows.

- To a large deep, non stick skillet or pot, add the water, pasta, leeks, garlic, lemon zest, basil, salt, and pepper.

- Bring to a boil then reduce to a high simmer and cook, stirring often, until the water is nearly gone and the pasta is cooked to tender, about 15 minutes.
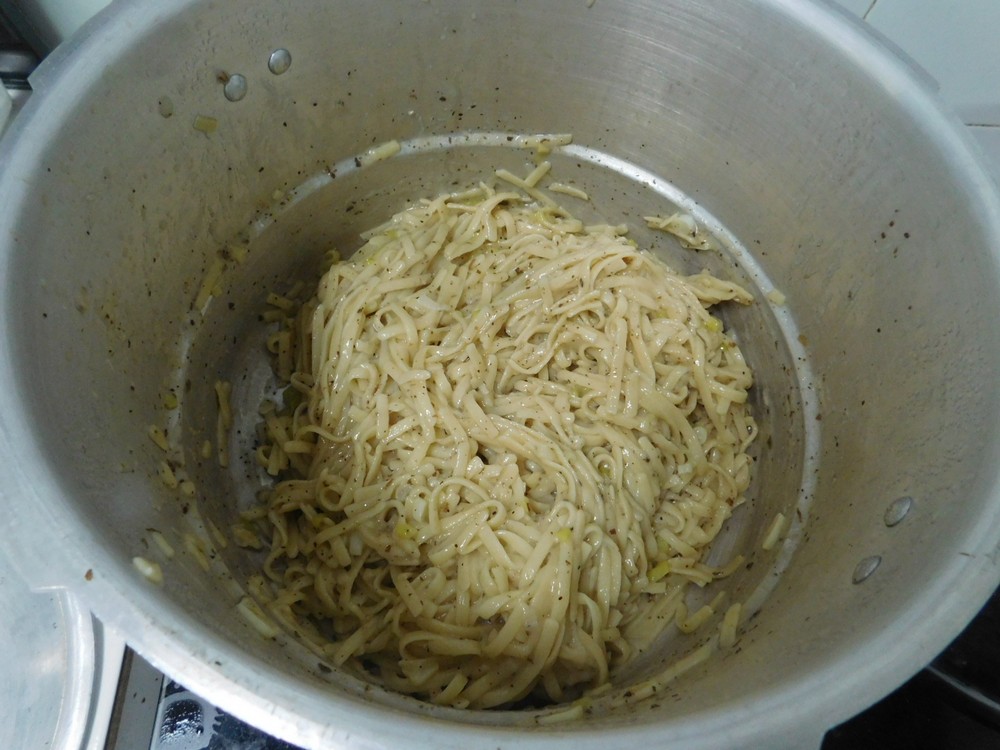
- Squeeze in the lemon juice and grated cheese and toss to combine.
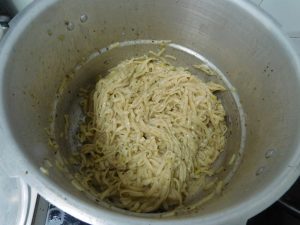
- Serve, garnish with chopped basil and lemon zest. Serve as a main or side dish.

Notes
Low cost.
Adapted from an internet recipe.
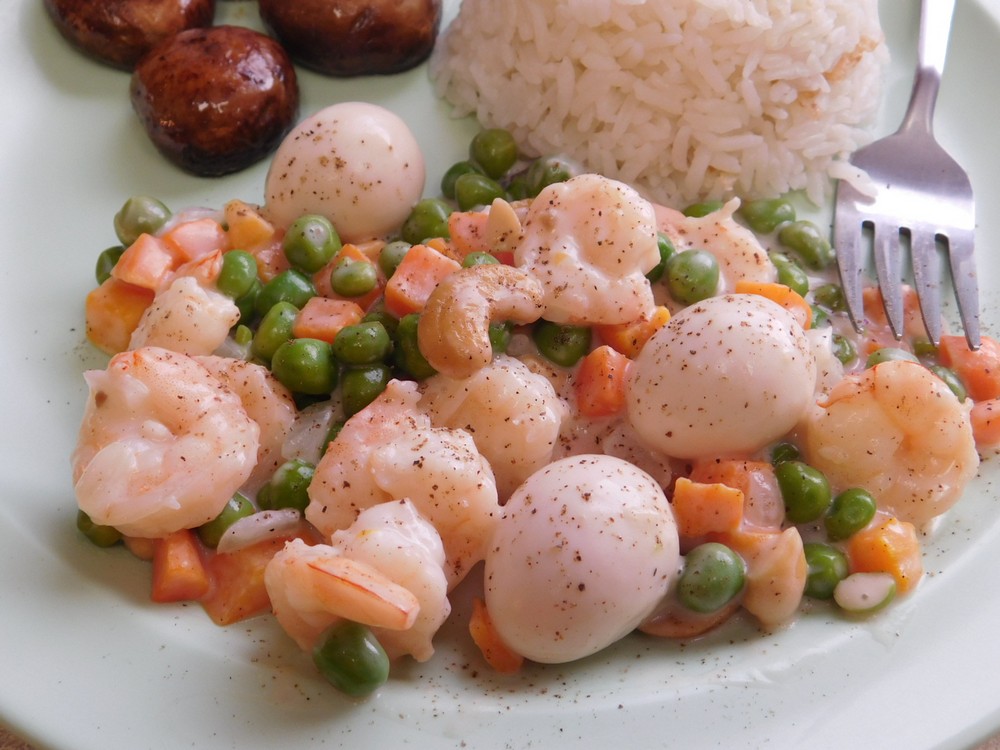
Sipo Egg II
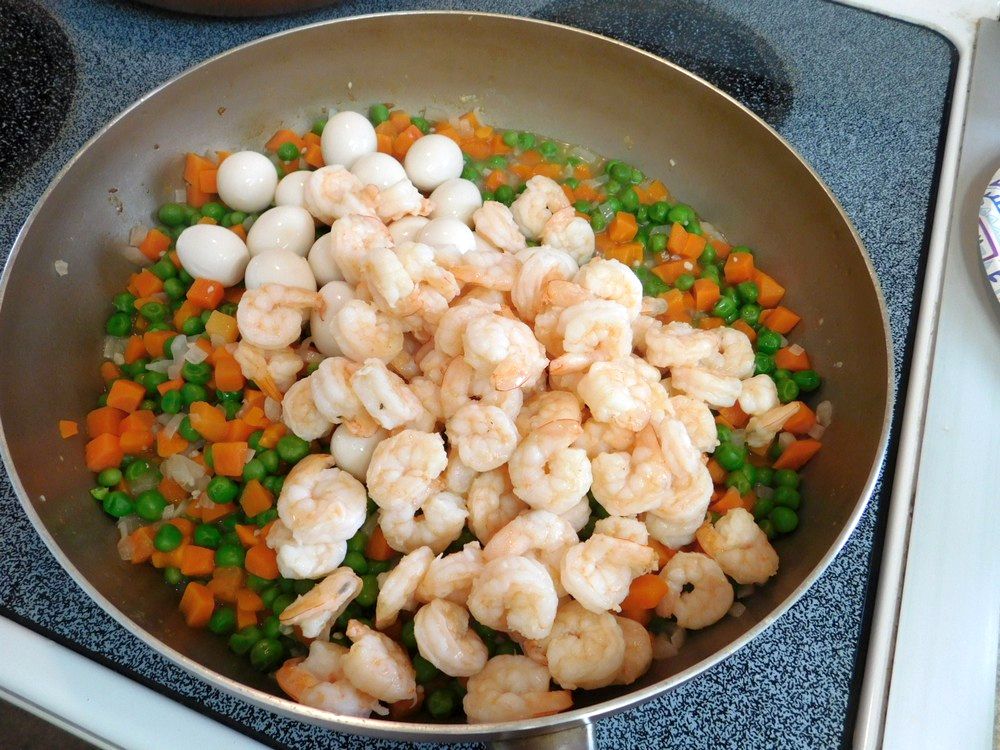
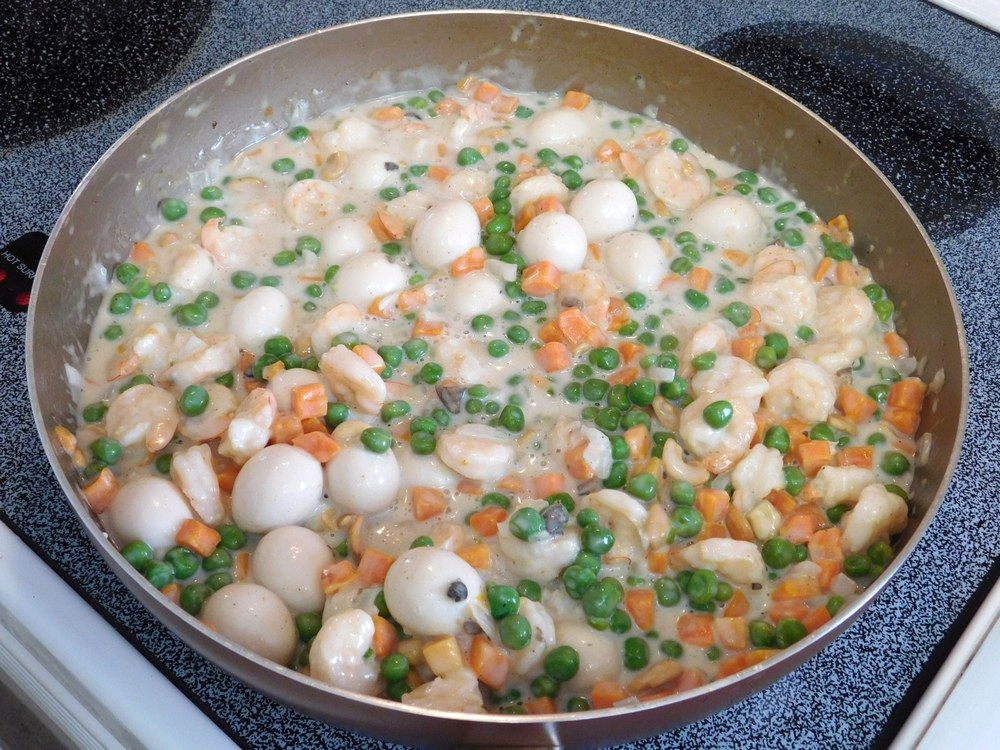
Sipo Egg is a Filipino quail egg and shrimp recipe that originated in Pampanga, Philippines and is normally served as a side dish, however, this makes a lot, and is delicious as a main dish, just serve with rice and you have an excellent meal. This is the creamy version of this dish, and it is easy to prepare, and is delicious. Links to the shortcuts are listed in the Notes section.
Ingredients
- 500 grams fresh shrimp, pealed, deveined, tail removed, (1 lb)
- 25-30 hard boiled quail eggs, peeled, Shortcut
- 1 onion, diced
- 1 clove garlic, minced
- ¼ cup butter
- 1 tablespoon cooking oil
- 3 cups frozen mixed vegetables, peas and carrots, thawed
- ¾ cup water
- 1 can condensed cream of mushroom soup, Shortcut
- ½ cup cashews, roasted
- ½ cup whipping cream
- salt and pepper, as desired, to taste
Instructions
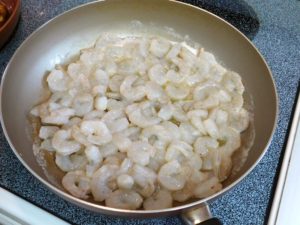
- In a large non stick pan, add the oil and butter, when hot, the shrimp, cook the shrimp about a minute on each side, remove the shrimp and set aside.
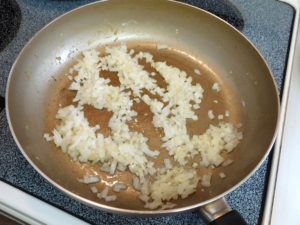
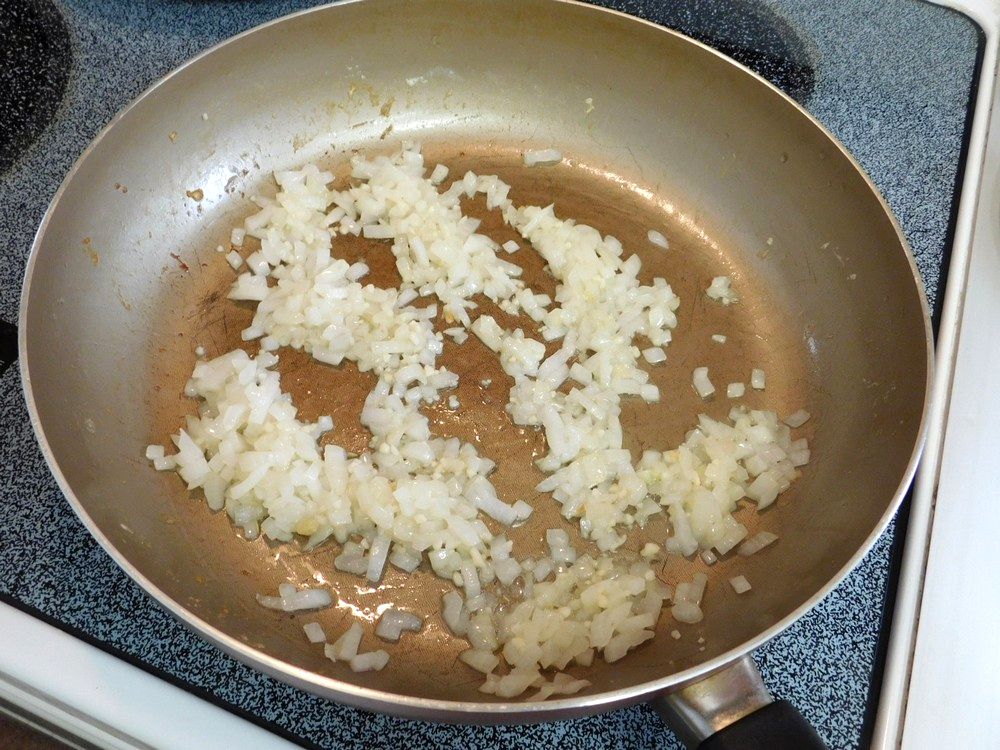
- Same pan, add a splash of oil if the pan is dry and cook the onion and garlic until the onion is soft.
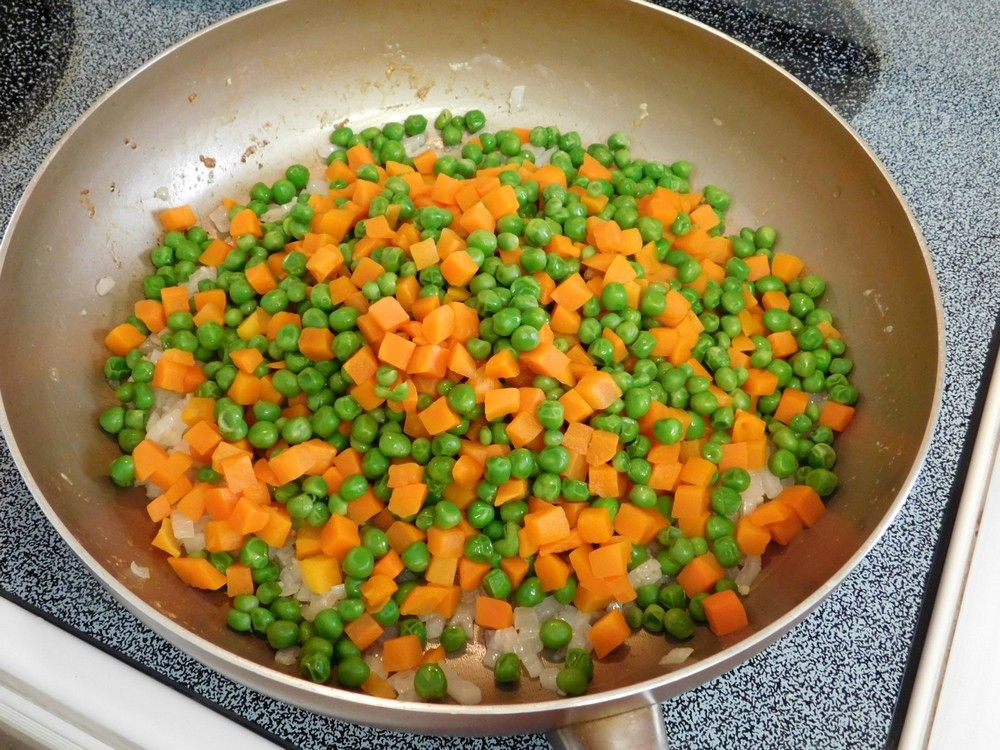
- Then add the carrots and peas and stir often and cook for 3 minutes.

- Pour in the water and bring to a boil, hold that for 1 minute then reduce to medium heat. Add the shrimp and quail eggs and stir in.

- Add the soup and cream, stir to mix well, add the cashews, season with salt and pepper. Simmer for a minute or two to heat everything through and thicken a bit.

- Serve as a side with any dish.


Notes
Figure about 20 Baht for the quail eggs, and about 75 Baht for the shrimp, both locally obtained in local markets. For 6 servings, this is about 44 cents per serving.
Shortcuts: Perfect Hard Boiled Quail Eggs, Condensed Cream of Mushroom Soup.
Variants: 1. Add diced ham or spam. 2. Use 4 cups of peas and carrots instead of 3 (I used two 340 g / 12 oz steamable bags).
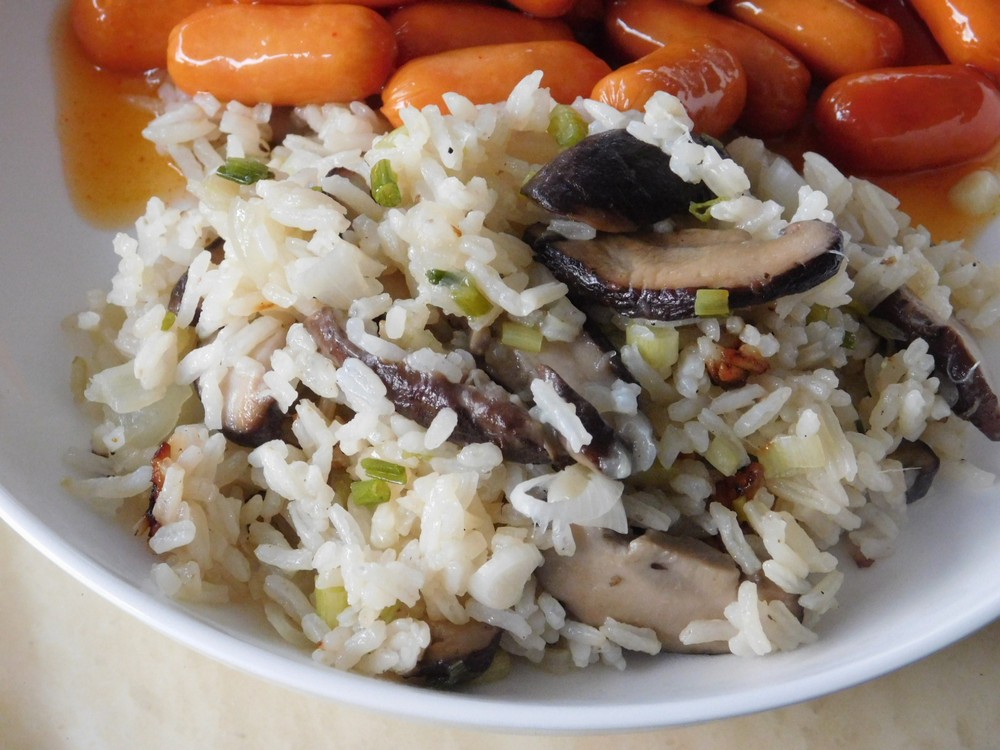
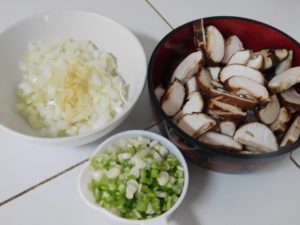
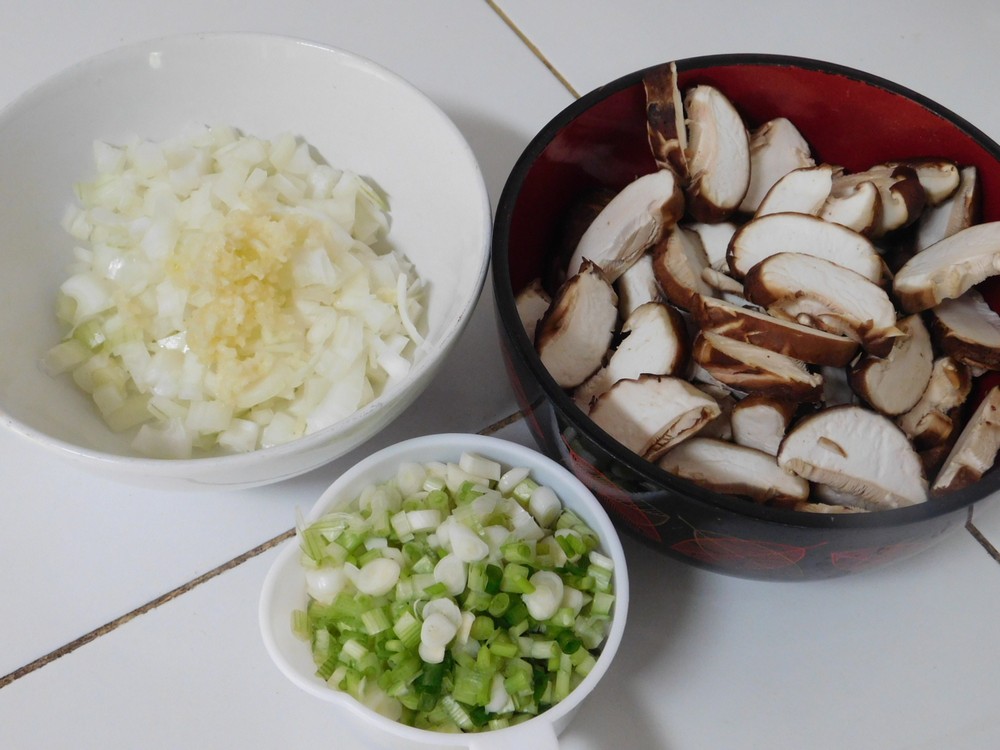
Mushroom Rice II
This is an excellent seasoned rice side dish, very flavorful. You can prepare this on the stove top or using a rice cooker. I prepared this on 17 Mar 2022 using my rice cooker and this was very much liked by the family, with no leftovers.
Equipment
- Rice Cooker
Ingredients
- 1½ cups dry long grain rice, Basmati or Jasmine would be great
- 2¼ cups stock, chicken or mushroom are good choices
- 3 tablespoons olive oil
- 2 tablespoons butter
- 200 grams fresh mushrooms, button, Cremini, Shiitake are perfect, (7 oz)
- 2 cloves garlic, minced
- 1 onion, finely diced
- 1 cup spring onion, sliced
- salt and pepper, as desired
Instructions
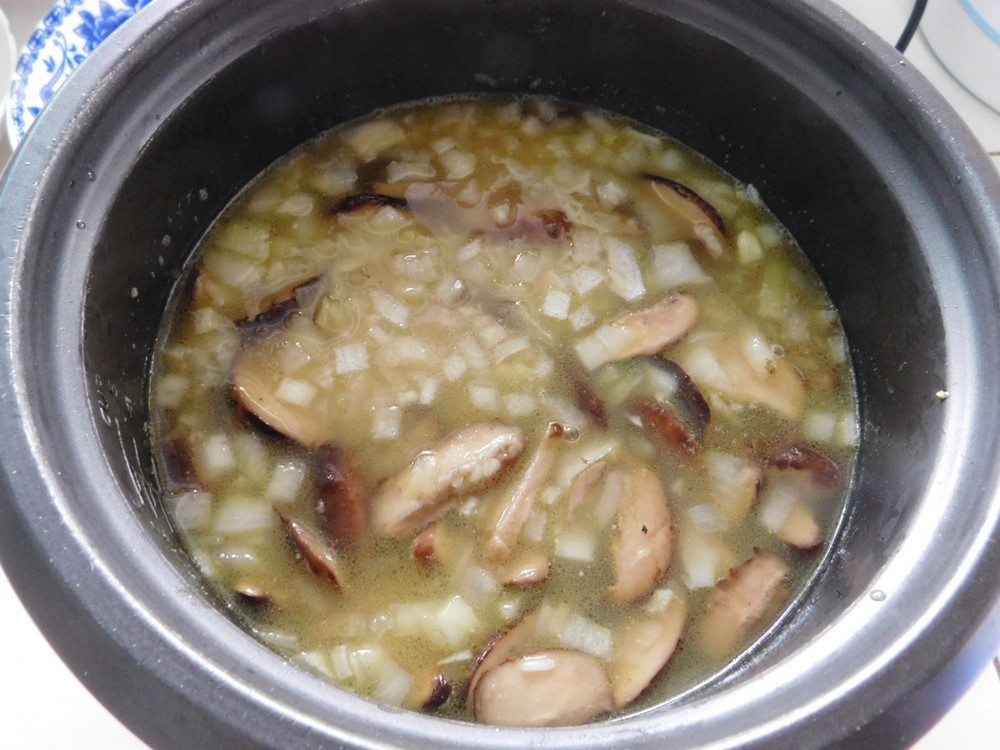
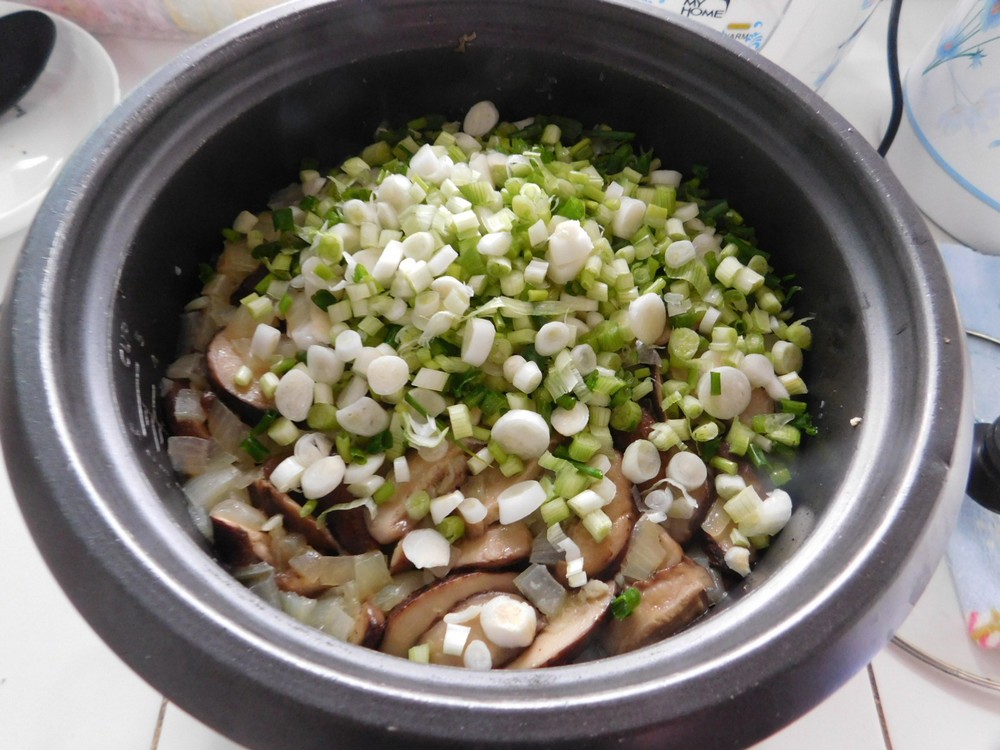
- Quickly rinse then slice the mushrooms, not too thin though. If using Shiitake, remove the stems and just use the caps. Then prep the onion, garlic, and spring onion, I used Shiitake mushrooms.
Stove Top Method
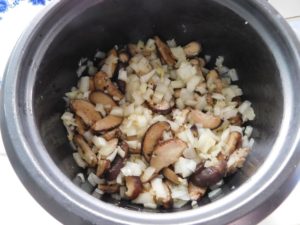
- Heat 2 tablespoons of oil in a large pot over medium high heat, when hot, add the mushrooms, season with salt and pepper as desired and cook until browned, stirring often.
- Add another 1 tablespoon of oil plus the butter. When the butter is melted add the garlic and onions, cook for about about 3-4 minutes or until the onion is softened, stirring often.
- Add the stock and rice to the pot and mix together. Cover the pot with a lid and bring to a simmer, then reduce the heat to low. Cook for 15 minutes or until there is no liquid, tilt the pot to verify this.
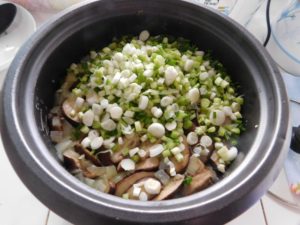
- Remove from the stove, quickly remove the lid, dump in the spring onion, and place the lid back on and let this sit for 10 minutes. No stirring, this will steam the spring onion.
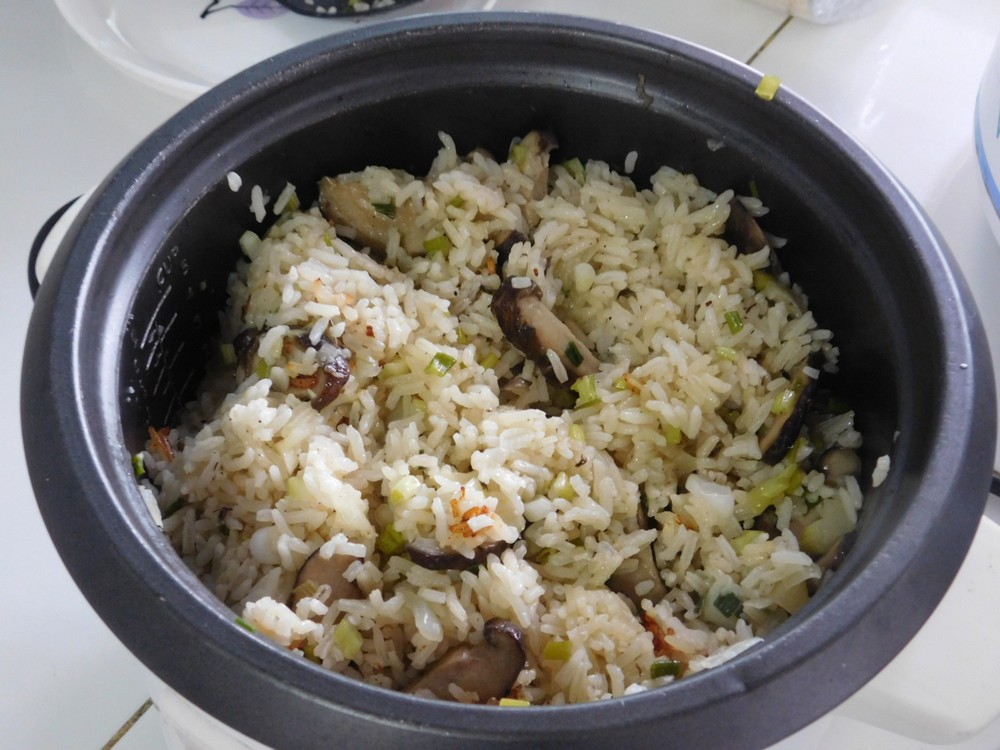
- Fluff rice with a spoon, and optionally stir in more butter if desired. Serve.
Rice Cooker Method
- Heat 2 tablespoons of oil in your rice cooker pot set on Cook. When hot, add the mushrooms, season with salt and pepper as desired and cook until browned, stirring often.

- Add another 1 tablespoon of oil plus the butter. When the butter is melted add the garlic and onions, cook for about about 3-4 minutes or until the onion is softened, stirring often.
- Add the stock and rice to the pot and mix together. Add the cover to the rice cooker pot and let the Cook function now complete its cycle.

- When the rice cooker switches to Warm setting, quickly remove the lid, dump in the spring onion, and place the lid back on and let this sit for 10 minutes on Warm setting. No stirring, this will steam the spring onion.
- Unplug the cooker, fluff rice, and optionally stir in more butter if desired.

- Serve as a side dish, enjoy.


Notes
Updated on 17 March 2022.

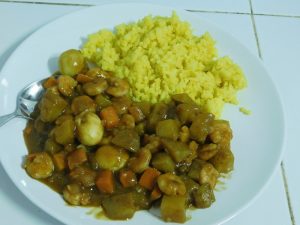
Japanese Curry with Shrimp
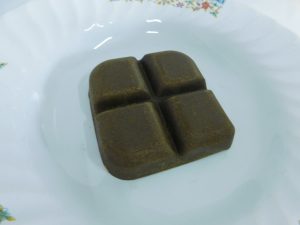
For Japanese curry, you cannot go wrong with the packaged Golden Curry brand, it is exceptional. This is the recipe from the package. If you have never used this before, when you take it out of the package, it looks like a chocolate bar. No salt is needed in this dish, there is plenty in the curry. I made this on 7 Oct 2017 and outstanding as expected.
Ingredients
- 500 grams shrimp, peeled, deveined, tail removed, (1 lb)
- 4 tablespoons butter, divided
- 2 1/2 cups water
- 1 onion, med to large, diced
- 1-2 potatoes, diced
- 1 carrot, diced
- 100 grams Japanese Curry paste, Golden Curry Brand
- cooked rice, for serving
Instructions
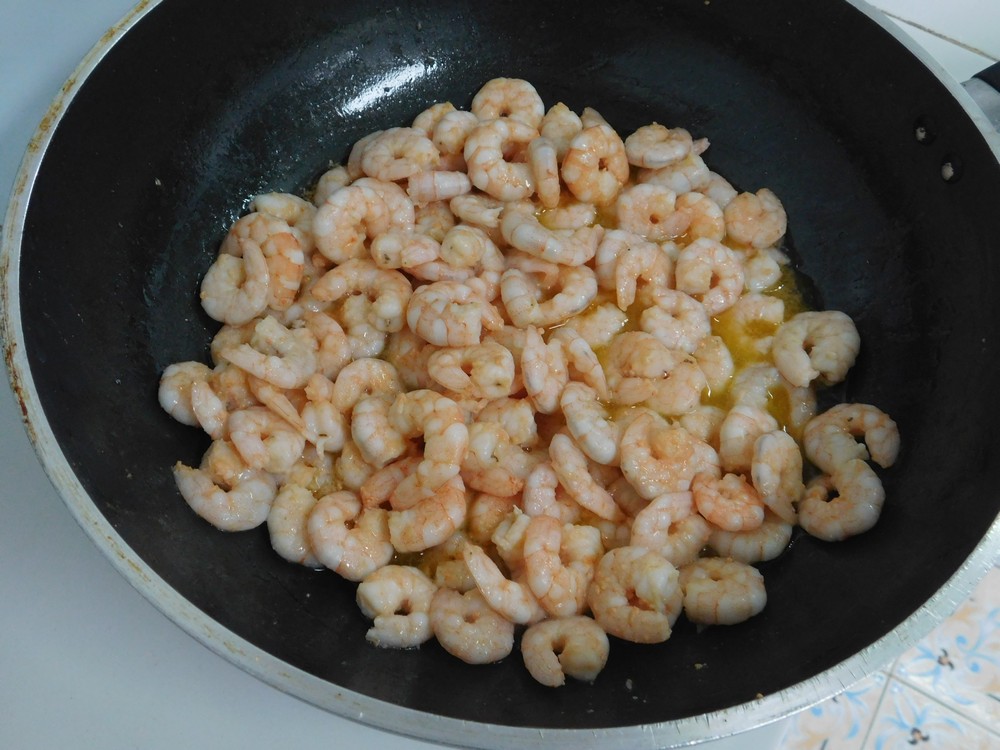
- First thing to do is to saute the shrimp, heat a splash of olive oil and two tablespoons of butter in a large non stick skillet and add the shrimp, I used medium size whites, these are not deveined.
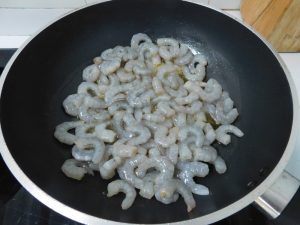
- Stir often as the shrimp start turning pink.
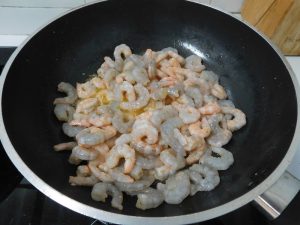
- When all the shrimp are pink, remove the pan from the stove (this is sitting on my counter top) and remove the shrimp to a bowl or plate.

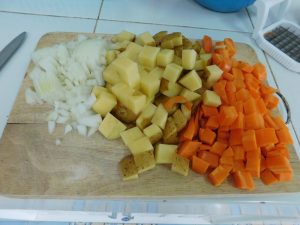
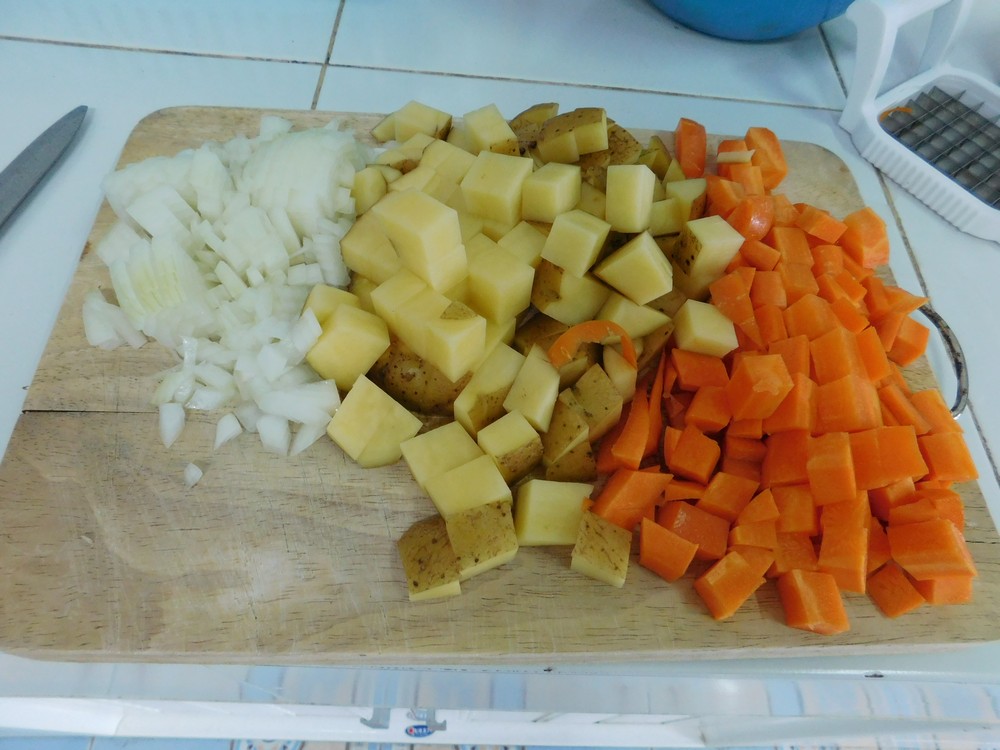
- Prepare the vegetables. I used one each, onion, potato, and a carrot. Good way to dice potatoes and carrots, use a french fry cutter, cut the vegetables into strips then chop with a knife to dice.
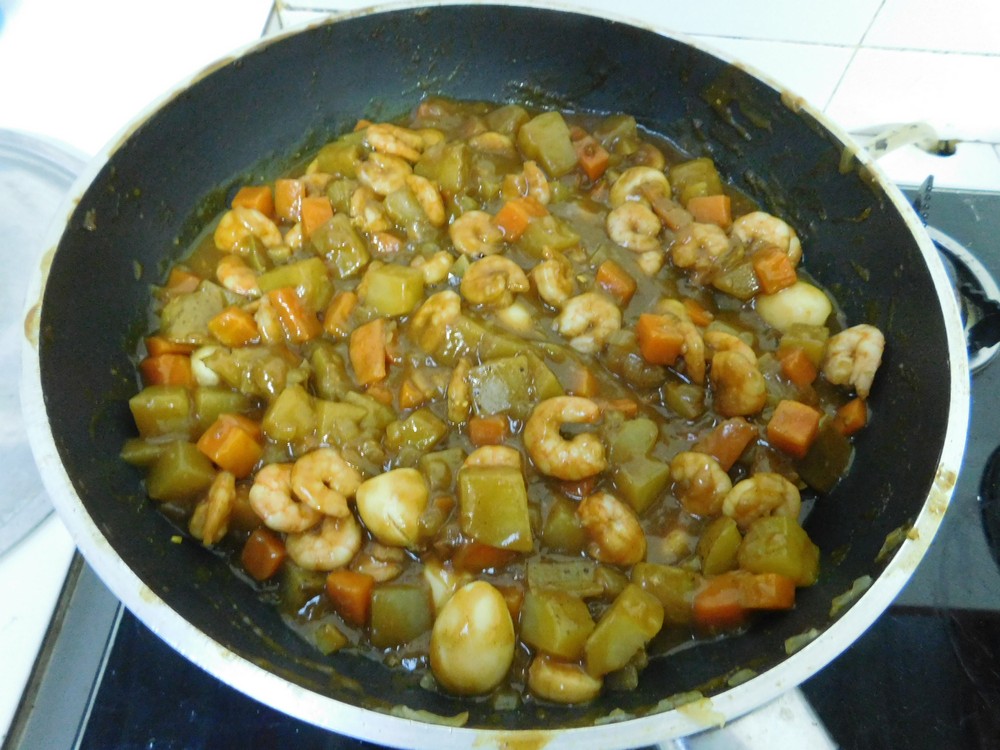
- Using the same pan, discard the liquid, heat another two tablespoons of butter then add the onion until softened and starting to brown, then add the rest of the vegetables and the water. Bring to a boil, and reduce to a simmer and cover, stirring occasionally, for about 10-15 minutes or until the vegetables are tender, then add the shrimp back to the pan and let the shrimp warm through for a few minutes. Remove the pan from heat.
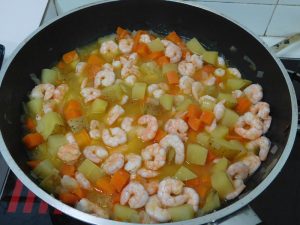
- Stir in the curry paste block and stir until it is dissolved and mixed in. Return to heat and gently simmer for another 5 minutes. I also added hard boiled quail eggs.

- This is the only brand of Japanese Curry I use, Golden Curry and is what I am using here.

- And no kidding, it looks like a chocolate bar. This 100 grams of curry paste, it is solid not a paste you are familiar with. Golden curry comes in 100 gram and 200 gram packages.
- Serve with rice. For the rice I used a yellow Saffron rice. Delicious!


Notes
The Japanese curry is 80 Baht/100 grams. The shrimp is local sourced, not from Tesco, is 75 Baht/500 grams. For 4 servings, this is about $1.14 per serving.
Variants: 1. Serve with hot cooked pasta. 2. Top with chopped spring onions when serving. 3. Add hard boiled quail eggs when serving.
From the package, I received a package from the US, the instructions are in English and Japanese, for the import here to Thailand, the instructions are only in Japanese.

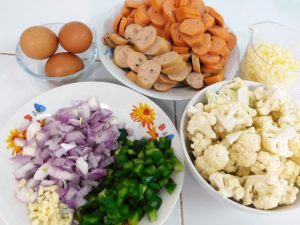
Skillet Sausage & Vegetables
Simple and delicious! The eggs and cheese give this dish a nice flavor.
Ingredients
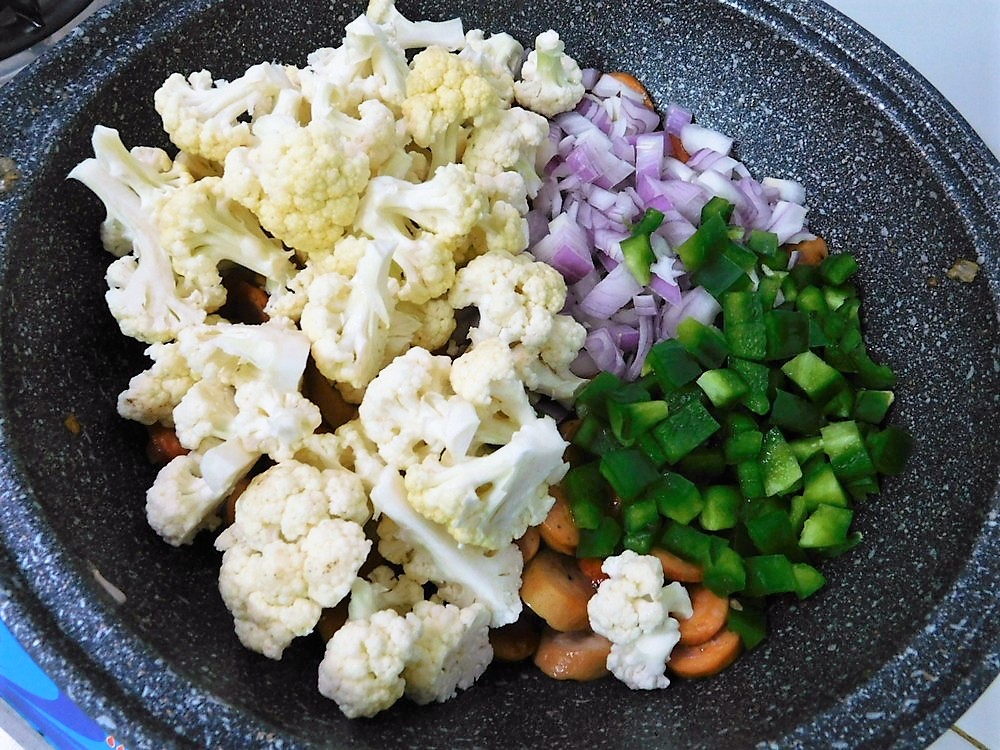
- 500 grams smoked sausage, sliced into 1/2 inch pieces
- 2 tablespoons extra light olive oil, and as needed
- 1 tablespoon butter
- 2 cloves garlic, smashed and minced
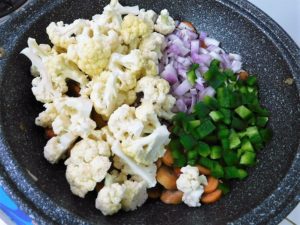
- 1 onion, sliced thin
- 1 bell pepper, any color, diced
- 1 head fresh cauliflower, cut into bite size pieces
- 2 eggs, 3 if small eggs, lightly beaten
- 1/2-3/4 cup Mozzarella Cheese, shredded
- 1/3 cup water, as needed
- rice or pasta or mashed potatoes, for serving
Instructions
- Everything prepped and ready to start cooking.
- In a large non stick skillet, on medium heat, heat the olive oil and add butter, when hot, add the sausage and saute until just starting to brown. Add a bit more olive oil if needed.

- Add the cauliflower, onion, bell pepper, and garlic. Stir that into the sausage, pour in the water and place a lid on the pan, now you are going to steam the cauliflower. Stir occasionally.
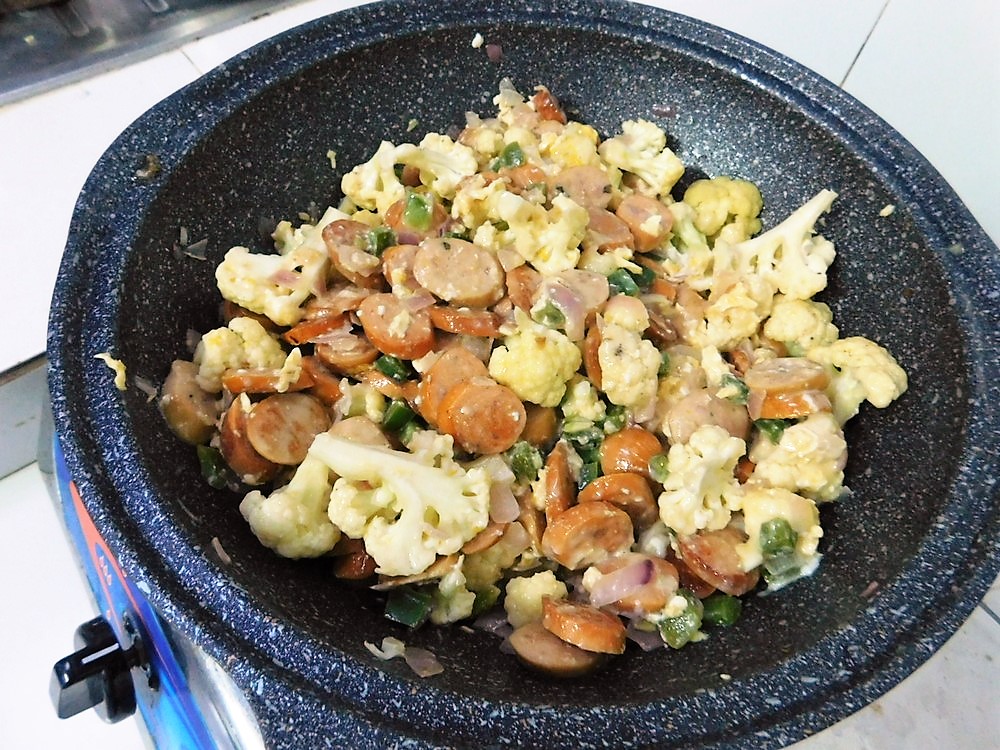
- When the cauliflower is just tender remove the lid and let simmer until the liquid is evaporated, then pour in the eggs and stir, then add the cheese and stir again.
- Simmer until the eggs are set and the cheese melted.

- Serve and enjoy.


Notes
I will price this when I buy smoked sausage again, it is reasonable so I will say fair value for now.
Provided courtesy of good friend, Stephen Connell.
United States.
United States.