Archive for the ‘#1 Go-To Recipes’ Category
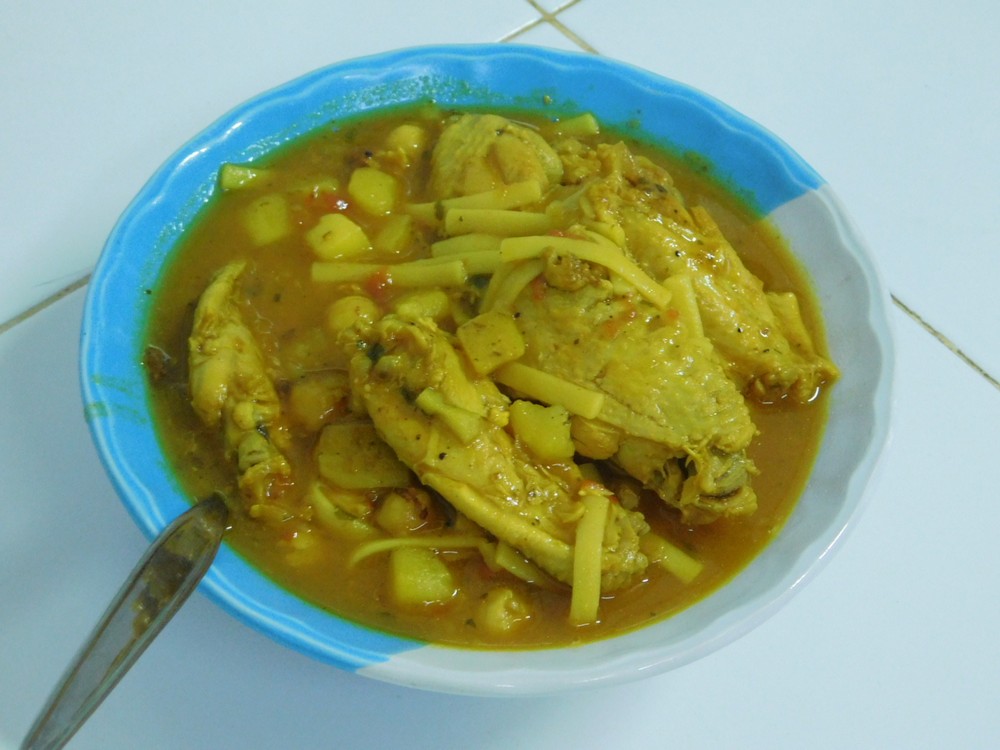
Chicken Chorba
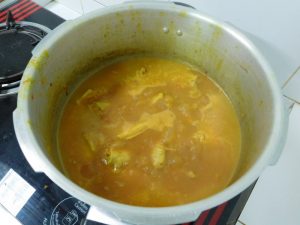
This is Moroccan in origin and popular across North Africa. Simple ingredients and delicious! I made this on 18 July 2018, very well liked by the family. Although the photos show my pressure cooker, this is NOT a pressure cooker dish, I was simply using the cooker as a thick walled, heavy pot.
Ingredients
- 1 tablespoon olive oil
- 2 onions, halved and finely sliced
- 1 kilo chicken wings, (2 lbs)
- 2 teaspoons ground turmeric
- 1 pinch saffron threads, (6-7 threads)
- 1 teaspoon salt, or to taste
- ½ teaspoon black pepper
- 150 grams dry chickpeas, (5 oz), see Step 1
- 2 medium tomatoes, grated, if using plum tomatoes, use 4-5
- 1½ tablespoons tomato paste
- 2 large potatoes, scrubbed and diced
- 100 grams dry spaghetti, broken into 1½ inch pieces, (3 1/2 oz)
- 3 tablespoons fresh parsley, chopped, and more for serving
- 6⅓ cups water
Instructions
- For the dry chickpeas, 150 grams (5 oz), soak overnight then drain. For canned chickpeas, use a 400 g / 14 oz can, drained.
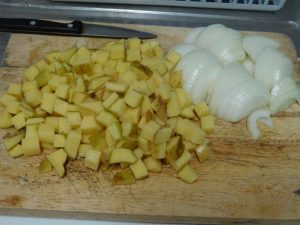
- Potatoes and onions prepped. For the potatoes, I use a french fry cutter first, then a knife to cut the cubes from the "fry" shapes.
- This was a first for me, grating tomatoes, and I will say, it does a perfect job. Simply cut the end opposite the stem end, off and start with the cut end on the largest holes on a box grater. The tomato is grated and the leftover part is the skin and stem end. I grated 3 plum tomatoes.

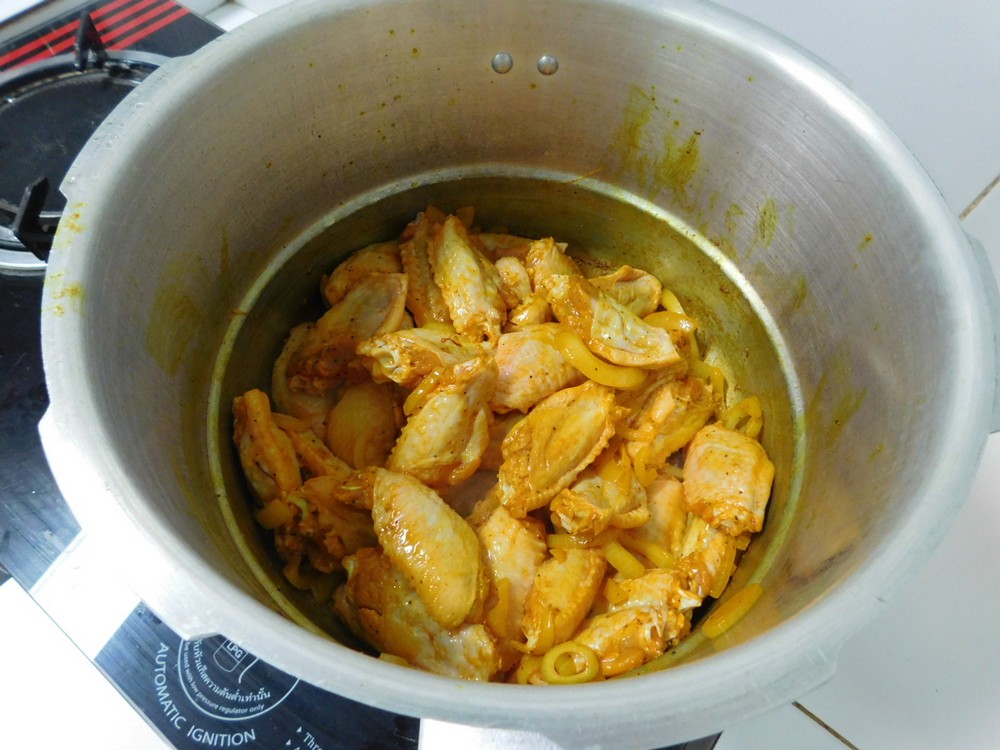
- In a large pot, heat the oil on medium high heat, when hot, add the onion, turmeric, saffron, salt, pepper, and chicken, and give the pot a stir. Cook the chicken for 8-10 minutes, stirring the chicken once in a while, this is to just brown the chicken a bit, not trying to cook them through.

- Add the chickpeas, potatoes, and water and bring to a boil then reduce to a low simmer. Cover the pot and let simmer for about 40 minutes, stirring occasionally. (I cheated and cooked the chickpeas first in the pressure cooker and used those, not cooked in the liquid.)

- Add the grated tomatoes and tomato paste to the pot and stir in. Bring to a boil, then reduce to a low simmer for 15 minutes to blend that in.
- Stir in the broken spaghetti and parsley and let simmer until the spaghetti is tender. Here, the pasta is done, I used linguine, and the kitchen was smelling great!

- Ladle into bowls, garnish with parsley if desired, and serve.


Notes
Chicken wing sticks (the drumettes) cost about 66 Baht/kilo. The chickpeas, canned are 69 Baht. When I get dry chickpeas I will do a price comparison between canned and dry. For 6 servings, this is about 71 cents per serving.
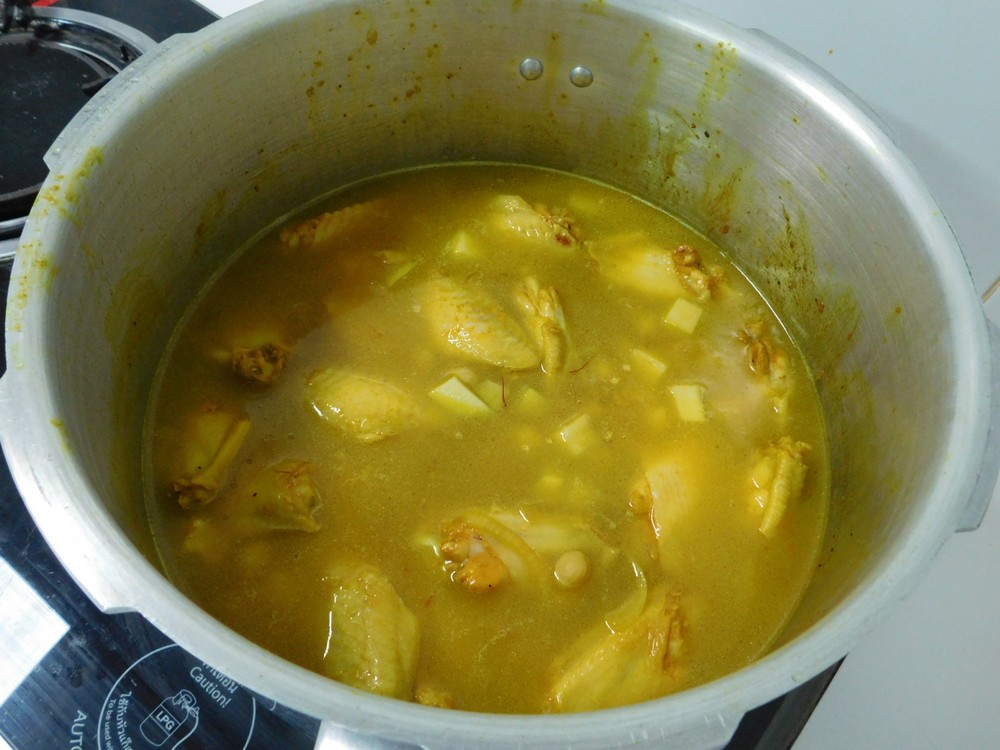
Japanese Curry (Pressure Cooker) (カレーライス)
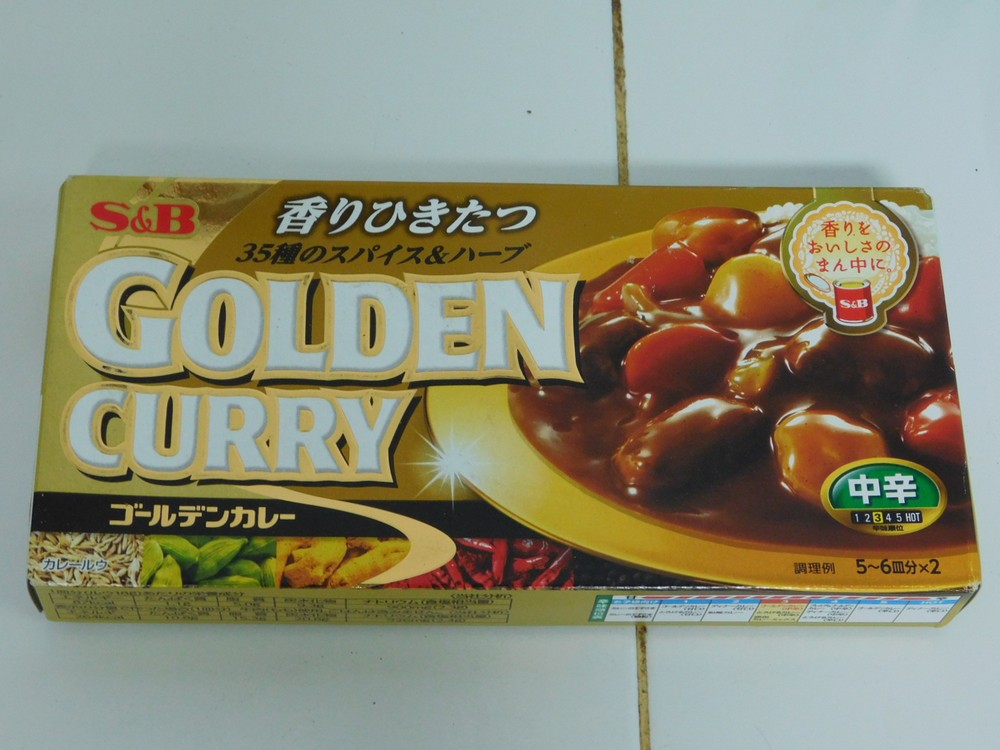
This not only sounds incredibly good, it really is! A Japanese curry roux is used, brand is up to you, Golden Curry, Vermont House, House, etc. I will be using medium spicy Golden Curry which is excellent. I used my large 9 liter (9½ quart) stove top pressure cooker for this. Follow the safety procedures for your model of pressure cooker at all times. This will be the only way I make this from now on, hands down. This works equally well with pork or beef in the same amount stated for the chicken. For the photos below, I used fresh pork loin.
Equipment
- Pressure Cooker (6 quart or more)
Ingredients
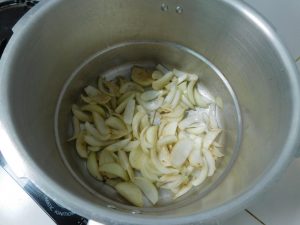
- 3 onions, halved, then each 5 wedges
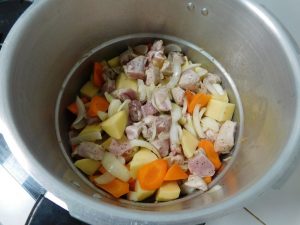
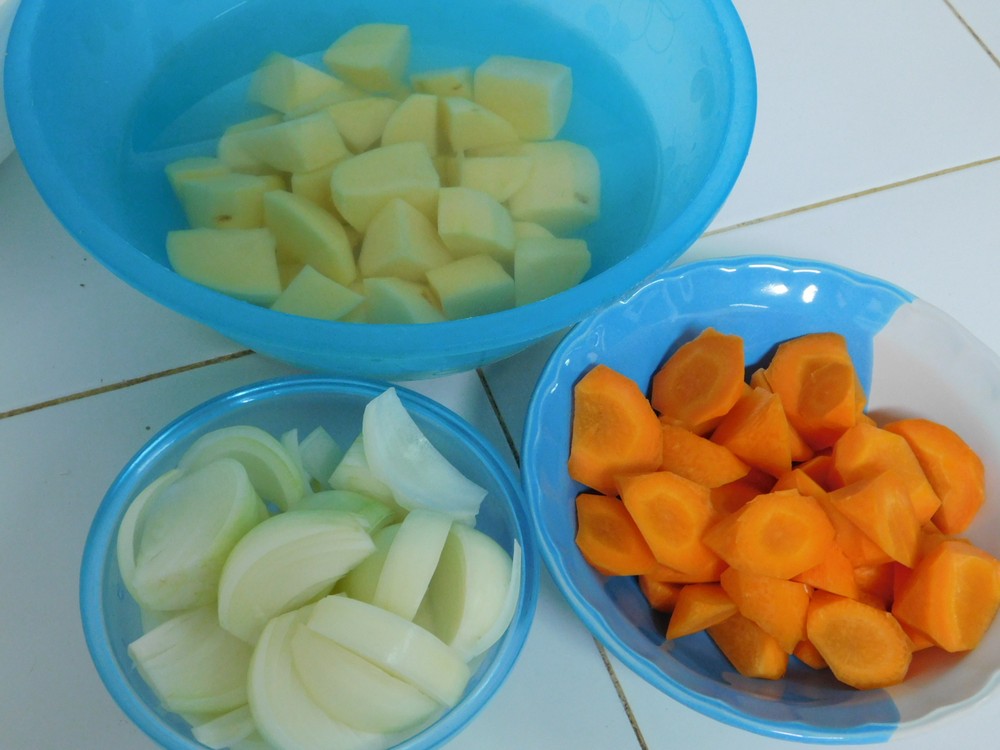
- 1½ carrots, peeled, see Step 2
- 3 medium potatoes, peeled, cut into quarters
- 2 cloves garlic, smashed and finely mined
- 1 teaspoon fresh ginger, grated, or ½ teaspoon ginger powder
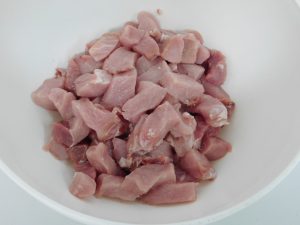
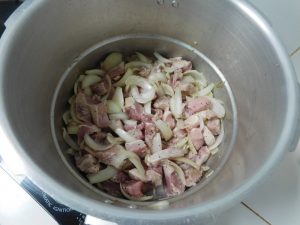
- 750 grams chicken thighs, boneless, skinless, (1½ lb)
- salt and pepper, as desired
- 1 tablespoon vegetable oil
- 3 cups chicken stock, fresh or from powder
- 240 grams Japanese Curry paste, large package is 240 grams, small is 120 grams
- 1 tablespoon ketchup
- 1 tablespoon soy sauce
- 1 tablespoon oyster sauce
Instructions
- Place the peeled and quartered potatoes in a bowl of water to remove some of the starch. Keep them in the water until they are needed.
- To chop the carrots, this is pretty cool. Cut a piece of the carrot off at an angle, then rotate the carrot ¼ turn, cut another piece off at an angle, repeat the turning and cutting. This makes for bite size pieces and the technique is Japanese in origin, called Rangiri.

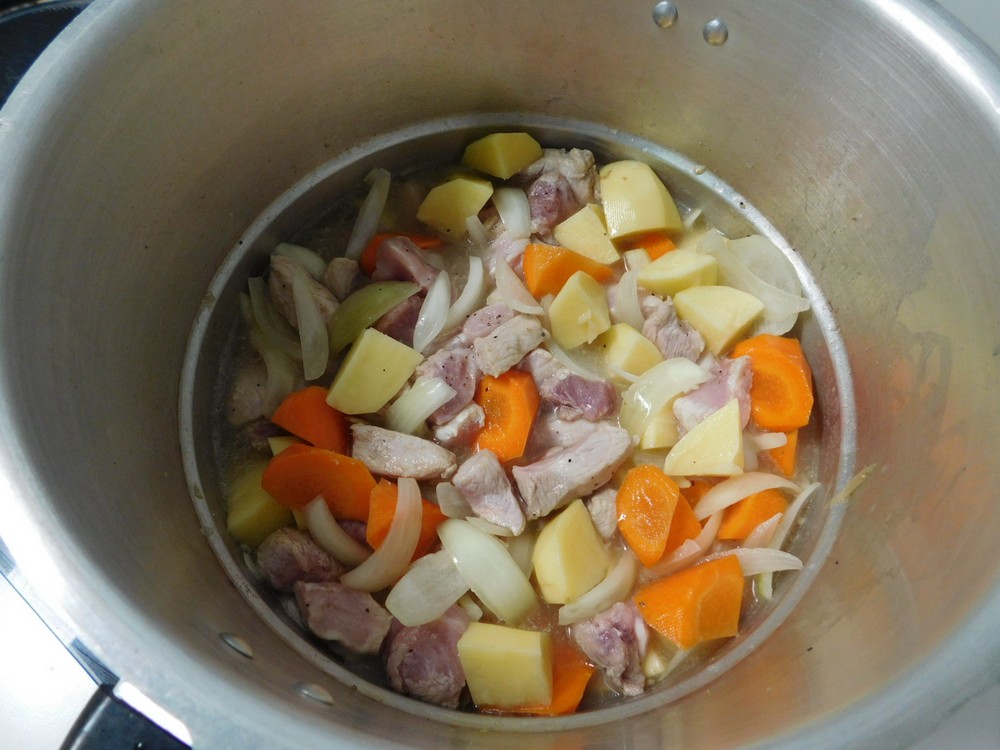
- Cut the chicken into bite size pieces. Once everything is prepped, we're ready to start.
- Place your stove top pressure cooker on a burner on medium heat, lid off, and add the cooking oil. When the oil is hot, add the onion, garlic, and ginger. Saute for just a minute or two until the garlic and ginger is fragrant.
- Add the chicken to the cooker and mix around to coat the pieces with some of the oil. Season with salt and pepper as desired.
- Drain the potatoes and add those and the carrots to the cooker, mix everything together.
- Pour in the stock and stir into the mixture, it is not necessary to have everything covered with stock.

- I used a large, 240 gram package of Golden Curry.
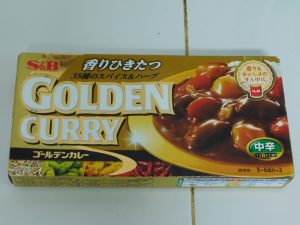
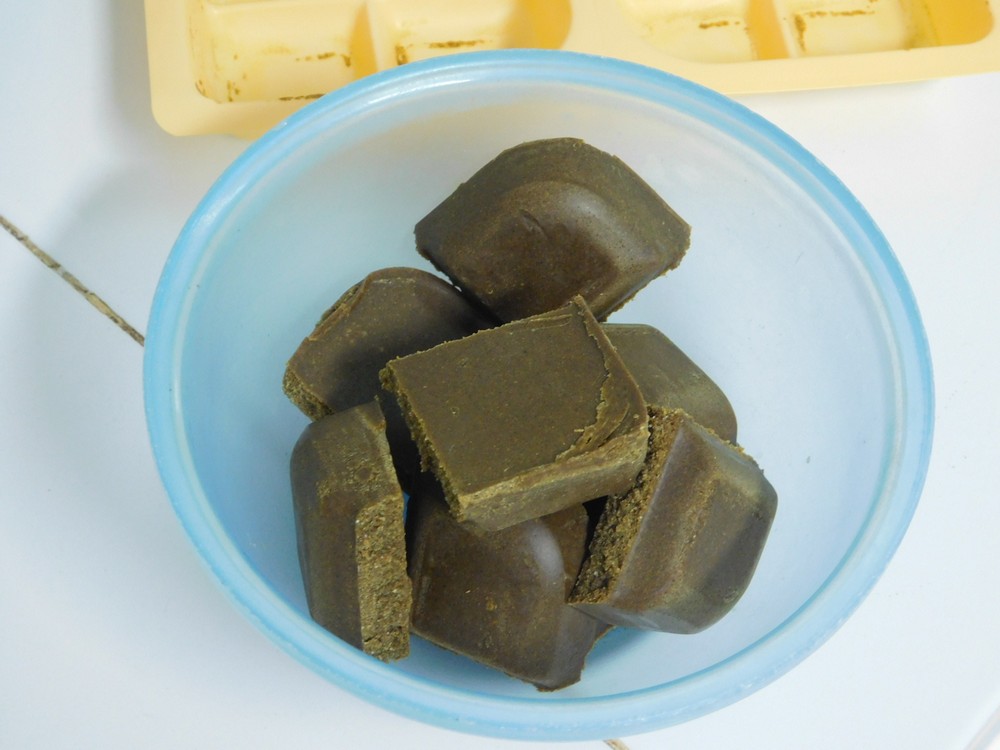
- Japanese curry comes in 110 gram and 240 gram packages, it looks very much like a chocolate bar. Use either 2 small packages or 1 large package. Open the foil seals and break the sections into the pieces as indicated by the packaging. For Golden Curry, large pack, you will use the entire pack, it is in two sections, and each section has 4 pieces, so 8 pieces total.
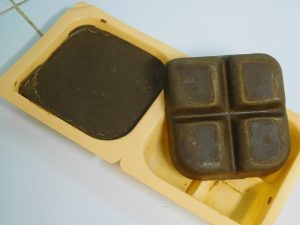
- Break the curry up as shown by the markings, very much like a chocolate bar.

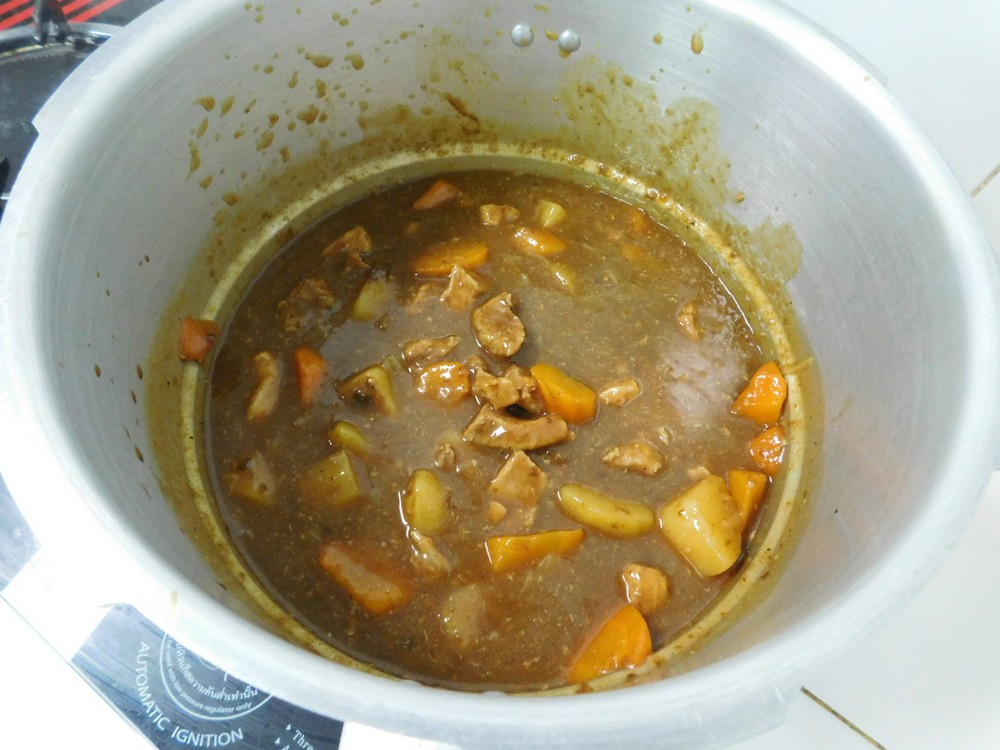
- Place the curry cubes on the top of the cooker contents, do not mix these in, but you can push down into the stock.
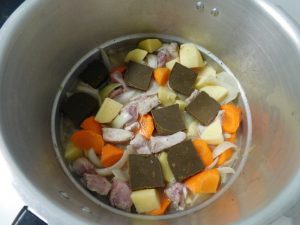
- Now place the lid and jiggler on the cooker and lock the lid. Bring the temp to high. Once the jiggler starts moving and venting pressure, start your timer for 5 minutes. (For those using an electric type pressure cooker, select meat/stew setting and change the time for 15 minutes and press start.) Note: if using bone in wings set your timer for 7 minutes, if using bone in legs and or thighs set your timer for 10 minutes.
- When the time has has passed, remove from heat to an unused burner to allow a natural release, about 10-15 minutes.
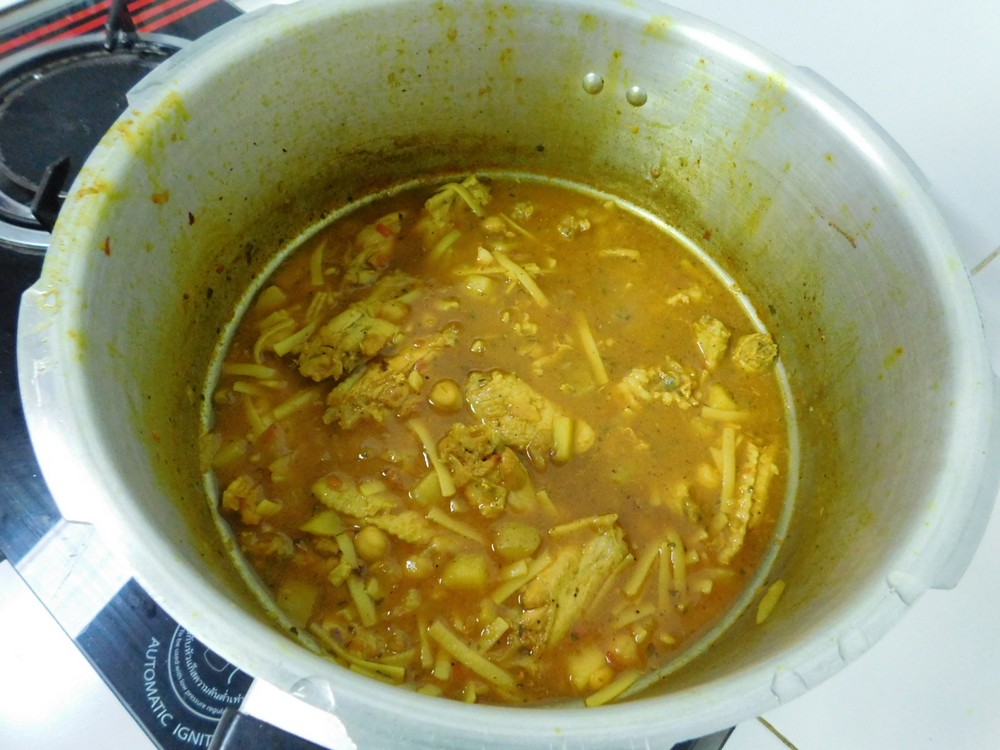
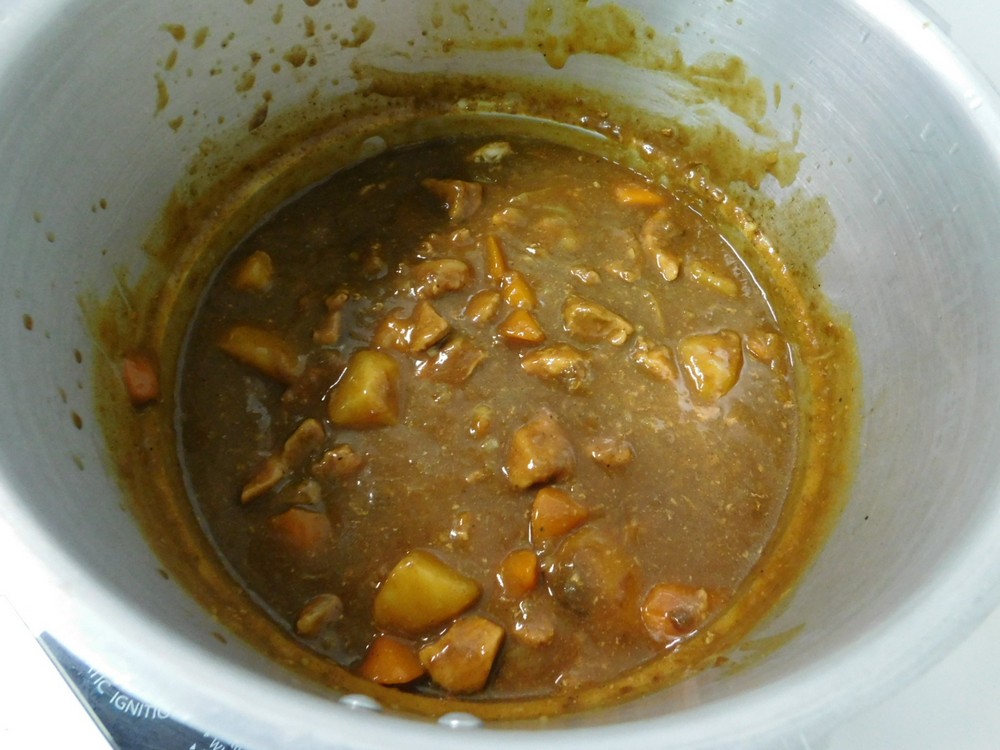
- When it is safe to remove the lid, remove that, and stir in the ketchup, soy sauce, and oyster sauce.

- Place the cooker, no lid, on low heat and simmer the curry for about 5 minutes, making sure all the curry blocks are dissolved and mixed in. Perfect!

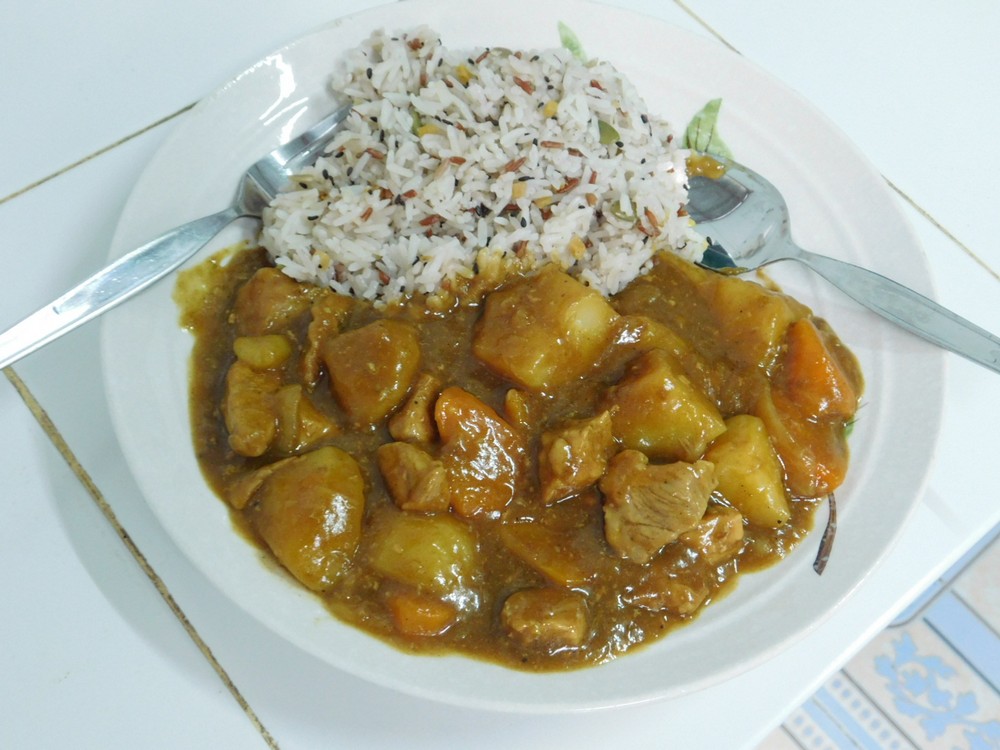
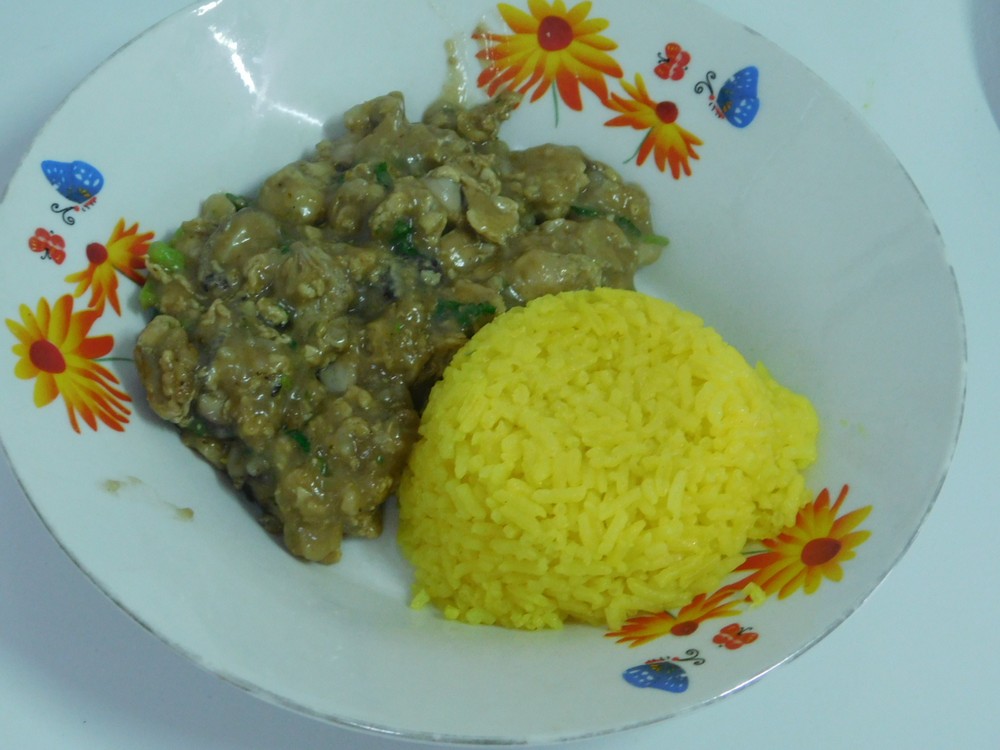
- To serve, spoon rice into half a bowl, and ladle in some curry on the other side. Enjoy.


Notes
Low cost per serving.
Variant: 1. Use beef or pork, same weight as chicken.
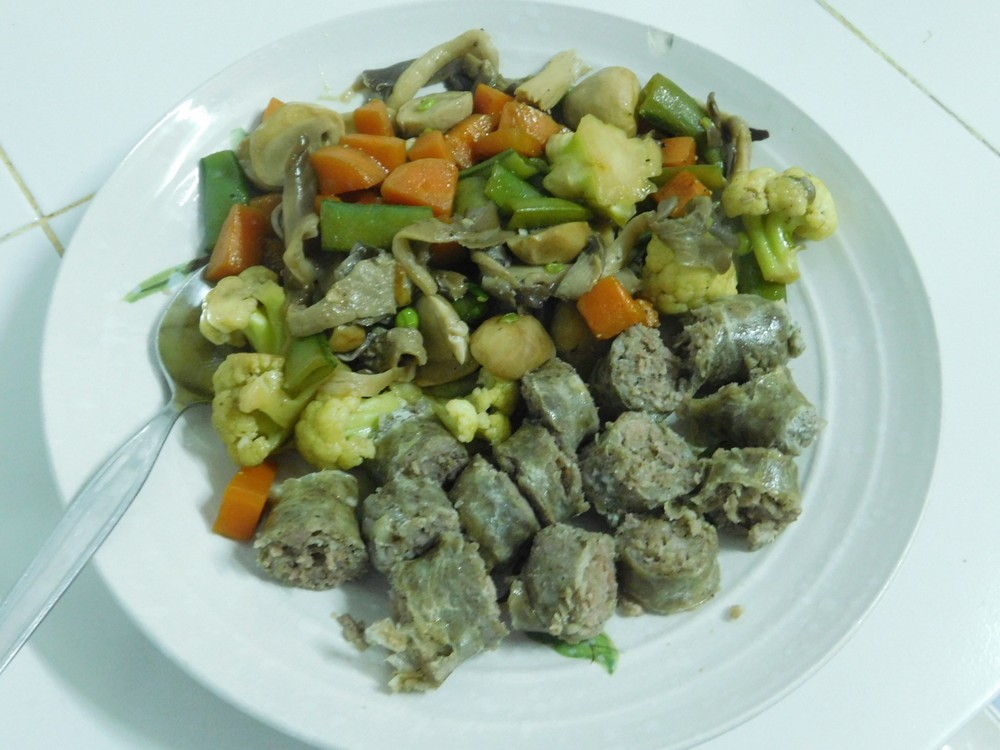
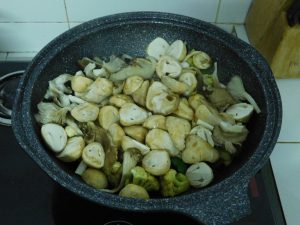
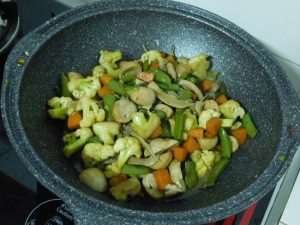
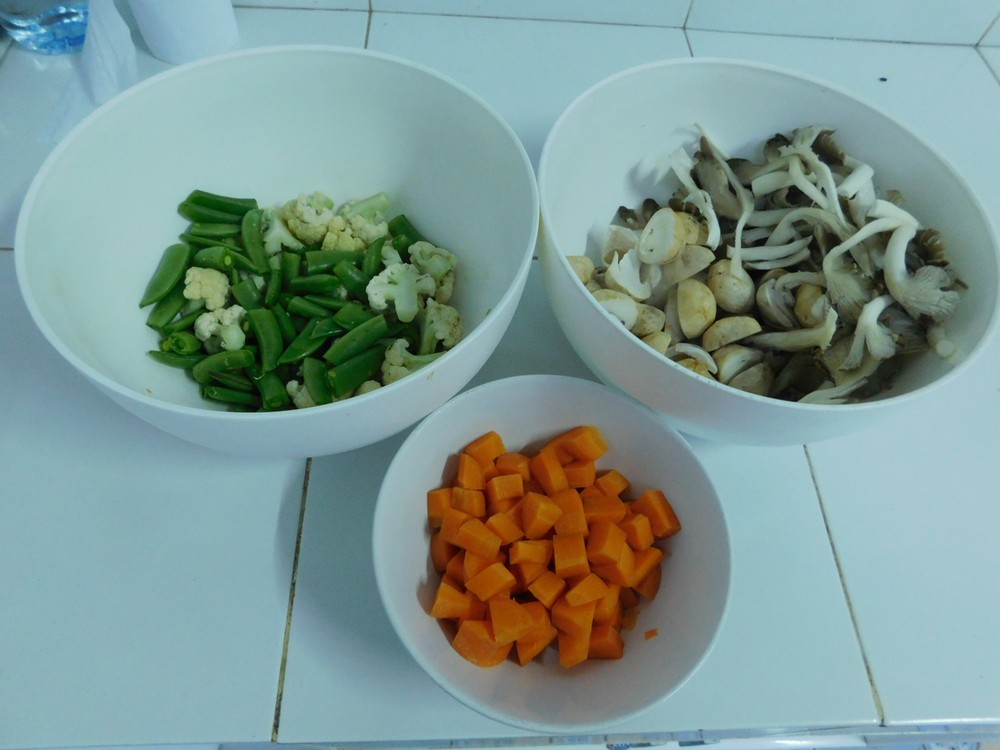
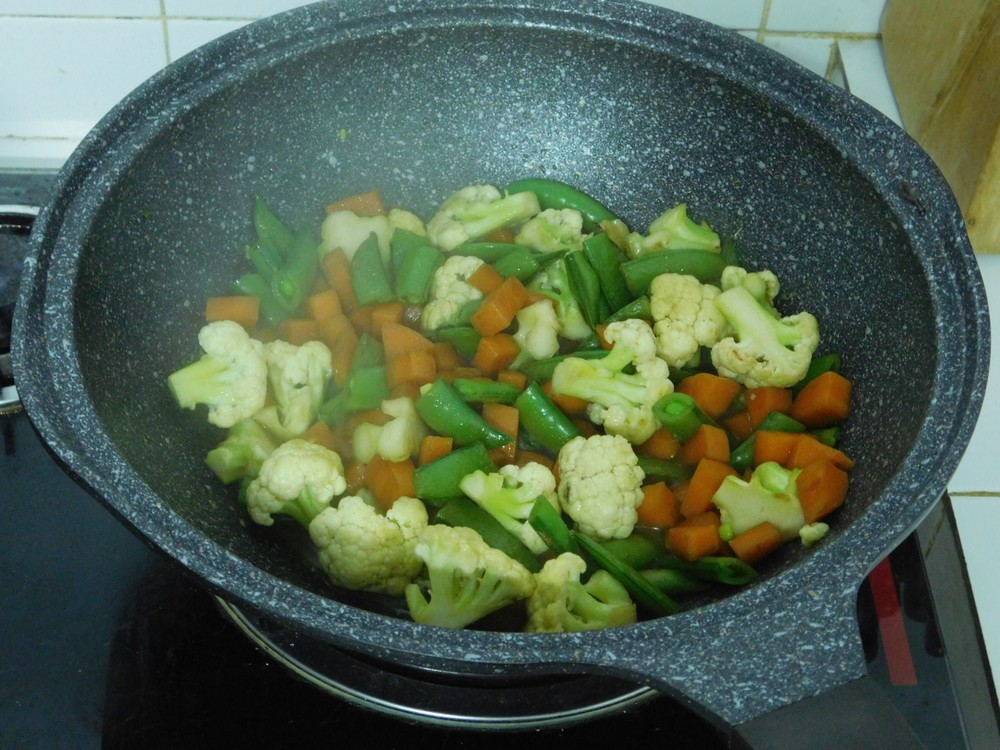
Mushroom Stir Fry
A good stir fry needs at least 2 things, good fresh vegetables and a sauce. For this recipe, ingredients and even the types used are up to you, but the mushrooms are key here, and for this I am using fresh Straw and Oyster mushrooms and fresh vegetables. So with Mushroom Stir Fry, we are going to use mushroom sauce, soy sauce, and oyster sauce. The ingredients listed is exactly what I used for this dish, feel free to change the amounts as desired.
Ingredients
- 1 head fresh cauliflower, 260 grams (9 oz), chopped
- 1 carrot, diced
- 2 packs snap peas, 160 grams (6 oz) total, trimmed, cut in half
- 275 grams fresh Straw mushrooms, (10 oz), cut in half lengthwise
- 130 grams fresh oyster mushrooms, (5 oz), torn into 2-3 pieces each
- light soy sauce, as needed
- mushroom sauce, as needed
- oyster sauce, as needed
- black pepper, to taste
- white pepper, to taste
- water, as needed
- cooking oil, as needed
Instructions
- Prep all the veggies and put them in bowls according to cook time needed. Sauces and peppers are also line up on the counter for ready use. First item to cook will be the carrots, then the peas and cauliflower, then lastly the mushrooms.

- Heat a non stick pan with a tablespoon or two of oil. When hot, add the carrot and stir fry for about 5 minutes or so until they are starting to soften. Then add the peas, cauliflower, a few dashes of soy sauce, mushroom sauce, and season with black and white pepper as desired. Stir fry for about 5 minutes or so. Add about 1/4 cup of water to help steam them and let them cook for a few more minutes, stirring often to soften them up.

- Add the mushrooms, and other dash or so of soy sauce, mushroom sauce, and season with black and white peppers as desired. Stir everything together to mix the sauces in and let the mushrooms cook down, stirring often, as they release water.
- When the mushrooms have cooked down and nearly all the water is cooked off, taste and adjust seasoning with a dash or so of oyster sauce and peppers as desired and mix together.
- Serve as a side with a meat dish or simple with rice.


Notes
Low cost.
Common Asian method for cooking vegetables, nothing new here.

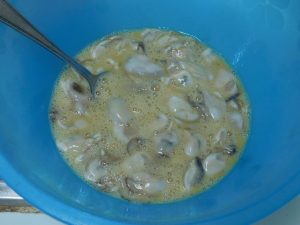
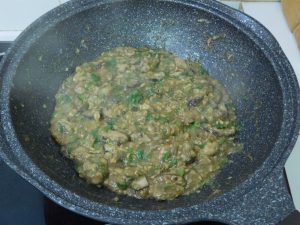
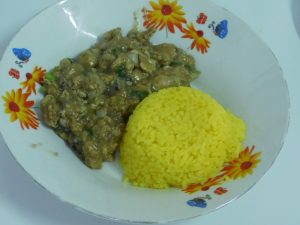
Sticky Mushrooms & Oysters
Excellent dish that goes together quickly. Perfect use for oyster meat, and you can use any fresh mushrooms you prefer.
Ingredients
- 1 pint fresh oyster meat, drained, (2 cups)
- 75-150 grams fresh mushrooms, your choice, (3-5 oz)
- 2 eggs
- 3 tablespoons rice flour
- 1 tablespoon corn starch
- ⅔ cup water
- ¼ cup light soy sauce, or more to taste
- ½ teaspoon white pepper powder
- ½ teaspoon sugar
- 6 cloves garlic, smashed and minced
- ¼ cup spring onion, sliced, white and green. or chopped coriander
- 2-3 tablespoons cooking oil
Instructions
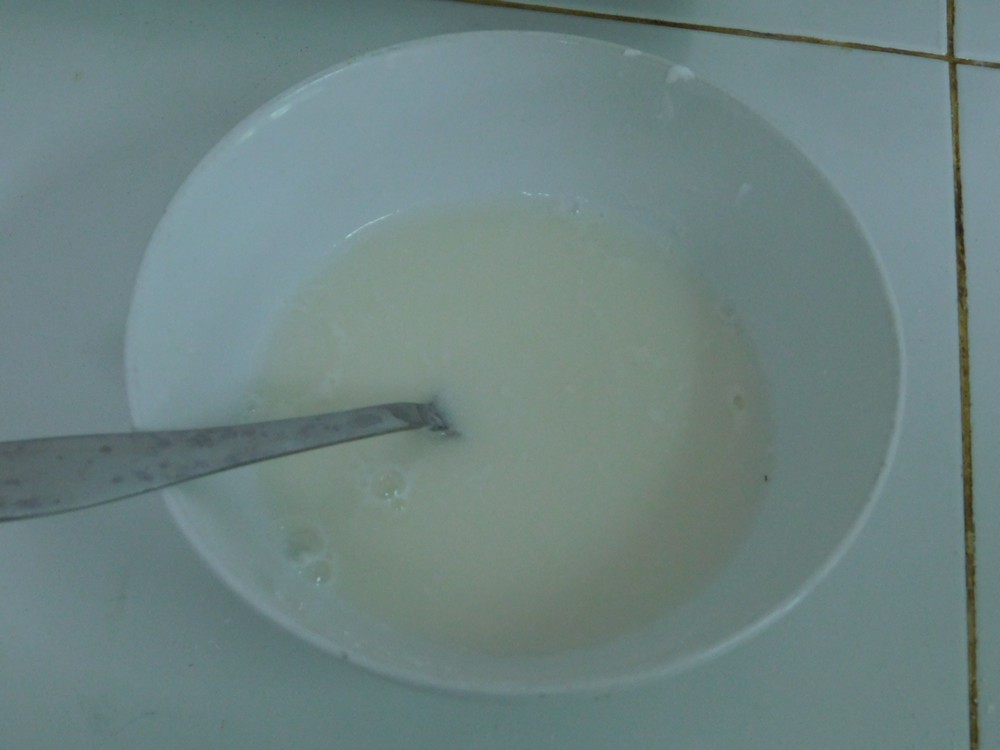
- Mix together the rice flour, corn starch and water to make a slurry. Set aside.

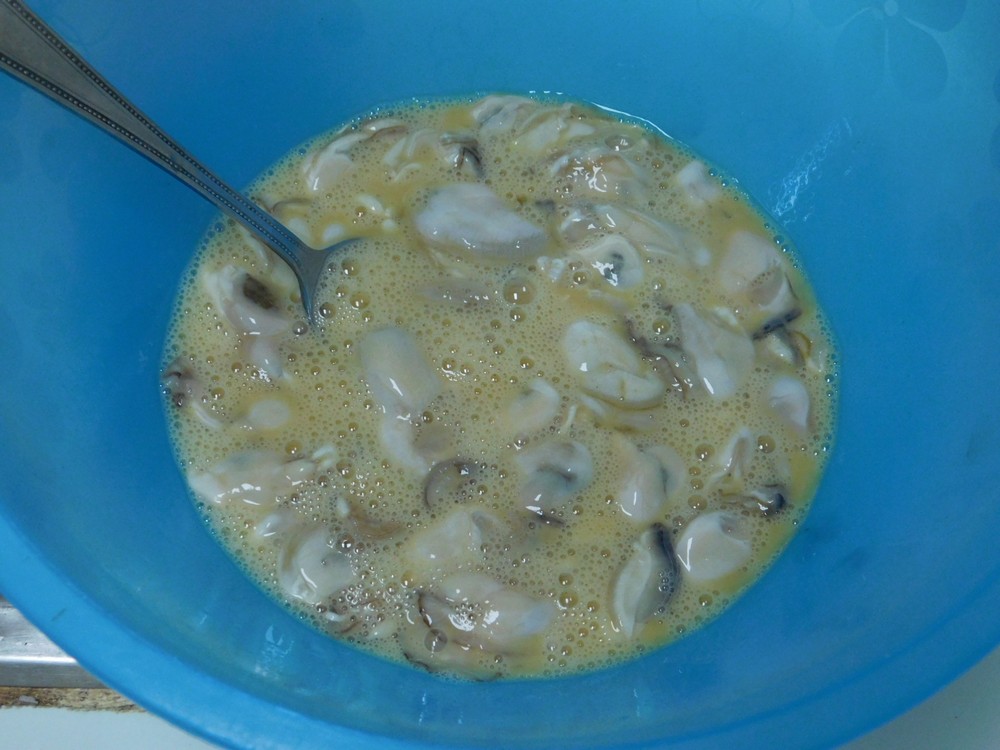
- Place the well drained oyster meat in a mixing bowl. Add the eggs and mix together well.
- Mushrooms, coriander, and garlic all prepped. I used 75 grams of Shiitake mushrooms, stems removed and sliced, and coriander in place of the spring onion.

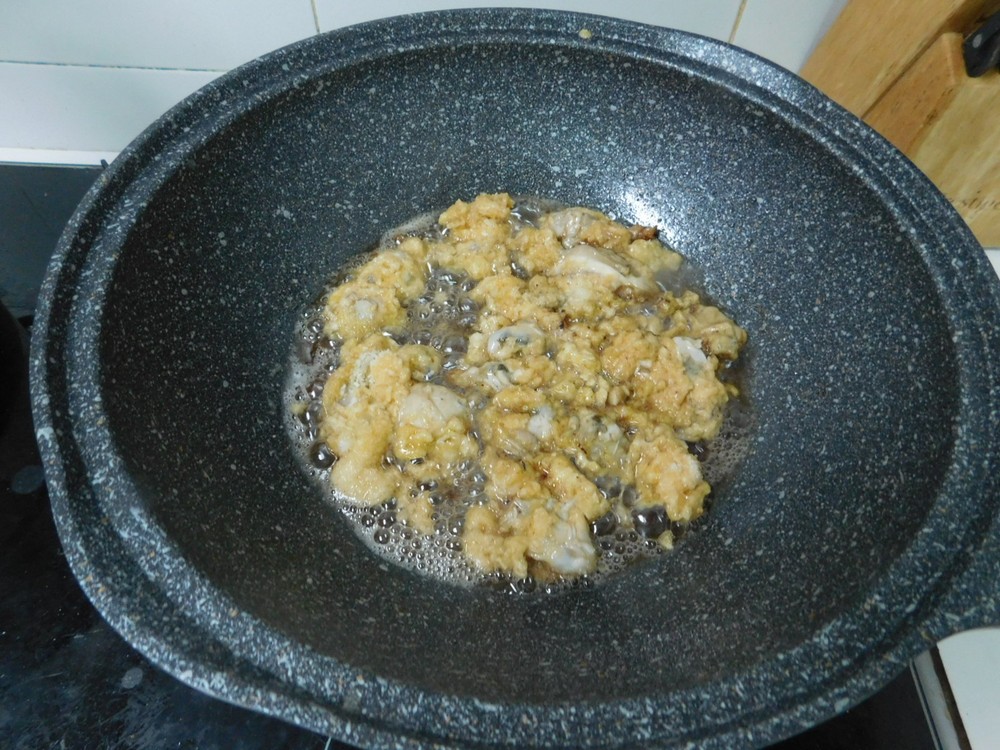
- Heat the oil in a large non stick pan then add the garlic and fry until fragrant, about 1-2 minutes.
- To the pan, add the mushrooms and oysters and stir in the flour slurry, stir to remove any lumps.
- When the mixture is lump free, add the soy sauce, sugar, white pepper, and spring onions, cook, stirring often, for about 30 seconds to a minute. Remove from heat.
- Serve with rice on the side.

Notes
I buy oysters from local fishermen for 50 Baht/pint. This is low cost. If sourcing from Tesco, you might be over $1 per serving. I will verify the Tesco cost.
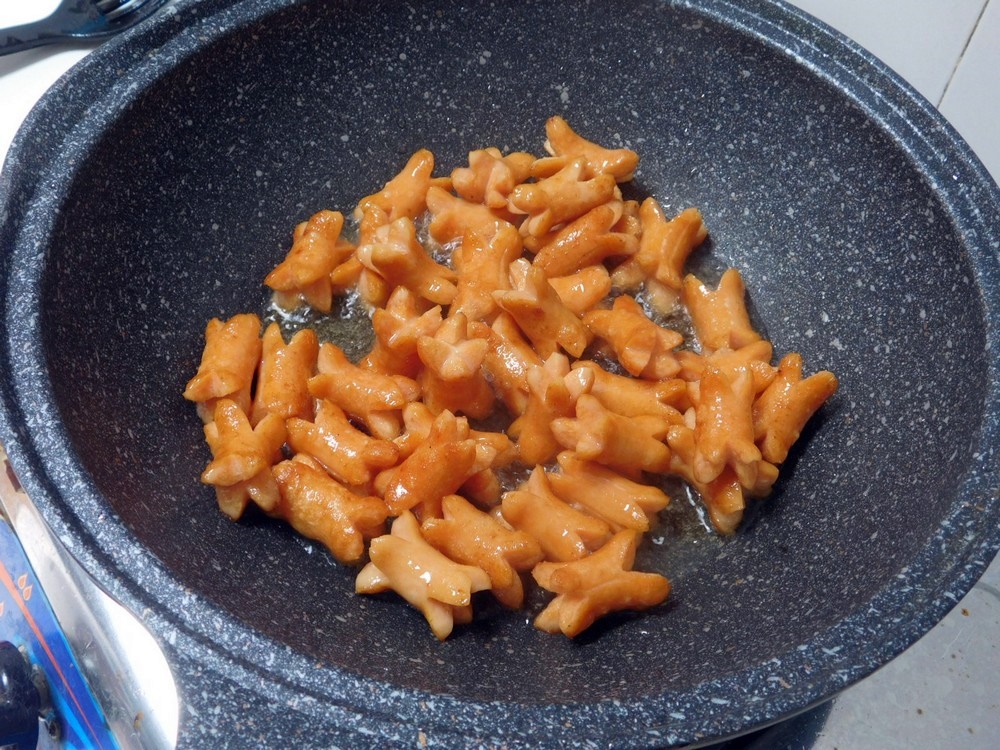
Thai Style Hotdogs
Thais love hotdogs, they have as many brands of hotdogs as they do brands of rice and canned fish. Now 90% of the Thai hotdogs are pure rubbish, but there is a few very good brands out there. Hotdogs are nothing more than sausages, however with modern processing and the poor choices of fillers and casings, the consistency in taste is quite lacking. For those in Thailand and the rest of the world, use good quality beef or chicken hotdogs. Thais do not normally eat hotdogs with a bun or bread, they are either grilled on a stick or deep fried. And the best hotdogs to use are the small ones labeled as cocktail hotdogs or sausages, there is no casings on these, bonus!
Ingredients
- 1 package quality hot dogs, or 2 small packages of cocktail sausages
- lard, or cooking oil for frying
- sweet chili sauce, for serving
Instructions
- Remove the casings on hotdogs, cut each hotdog into 3 equal pieces, then cut an X in each end, about ¼ inch deep. I used 2 packages of chicken cocktail sausages so just cut the X into each end.

- Heat the lard or oil in a large deep pan, you are going to shallow fry them. When the lard is hot but not smoking, carefully add the hotdogs. Fry for a few minutes, basically stir frying but be careful of the oil.
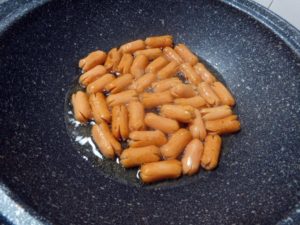
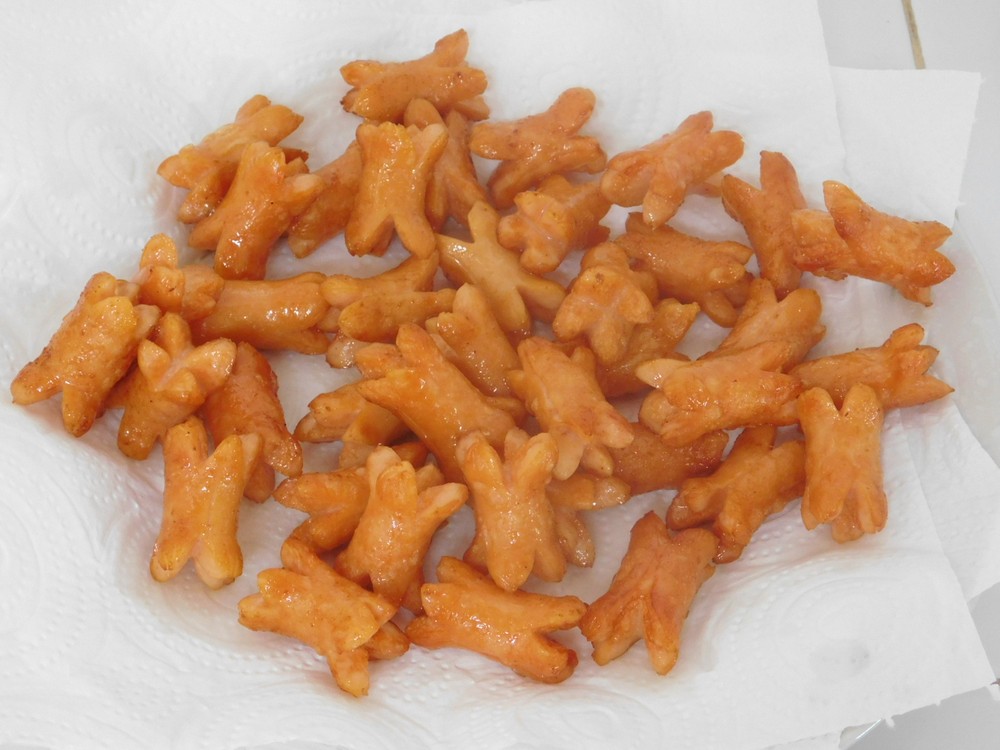
- As they fry, the ends open giving each hotdog more surface area, more surface area means more crispy. When lightly browned and crispy, remove to paper towels to drain.

- Serve with sweet chili sauce for dipping.


Notes
Low cost.
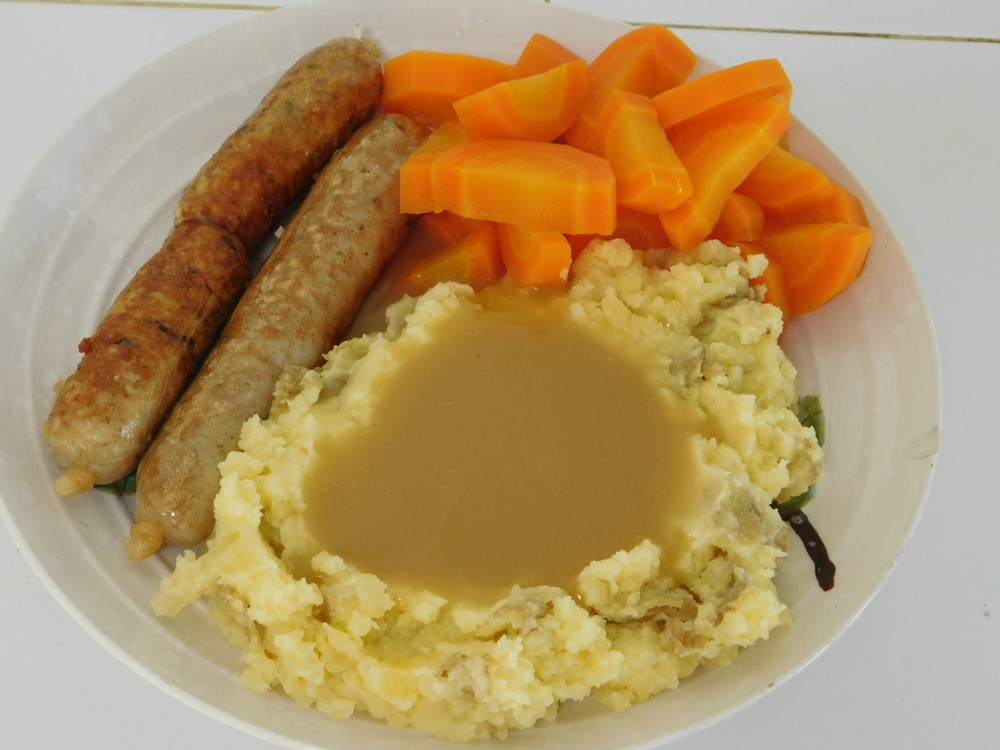
Chicken & Basil Sausage
This is an excellent Thai sausage. Easy to make and flavorful.
Ingredients
- 500 grams ground chicken, (1 lb)
- 2 cups cooked white rice
- 2 teaspoons white pepper powder
- 2 teaspoons fresh coriander, chopped
- 15-20 Thai basil leaves, chopped
- 10 cloves garlic, peeled
- 10 coriander roots, or 1 teaspoon coriander root powder
- 2 tablespoons oyster sauce
- 2 tablespoons light soy sauce
- 1 teaspoon salt
- sausage casings, see Step 1
Instructions
- If using hog casings packed in salt, you will need to soak and rinse them following the suppliers instructions. If using dry hog casing, set them aside until needed, the just need a minute or two in water and can be used. You can also use collagen casings if you prefer.
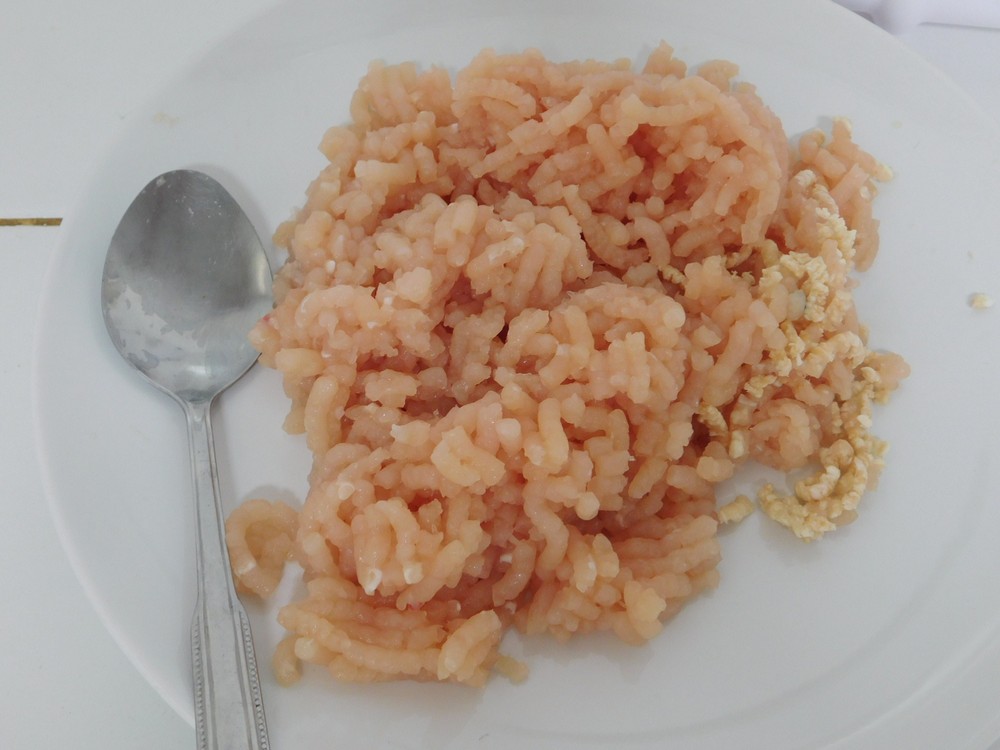
- You can use store bought ground chicken (which is rare in the town near me) or you can grind your own. For this I used breasts, an ideal mixture would be breasts and thighs. The white bits on the right is from bread. To get the remaining amount of meat out of your grinder, tear up a slice of bread and run that through last.
- In a mortar, add the white pepper, garlic, and coriander and pound with a pestle to combine. You can also use a blender for this if you desire. If using mostly powders, just pound the garlic.
- Mix the pounded garlic mixture with the remaining ingredients, except the casings, by hand until fully mixed.

- You can taste the sausage mixture and adjust as needed by first pan frying a small amount or microwaving a small amount.
- Shape the mixture into 5 sort of equal balls. Here I have the balls shaped, my funnel and pusher from my meat grinder, as well as 5 collagen casings.
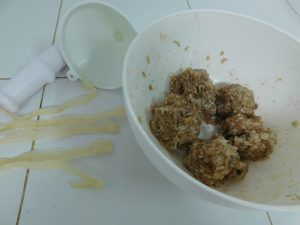
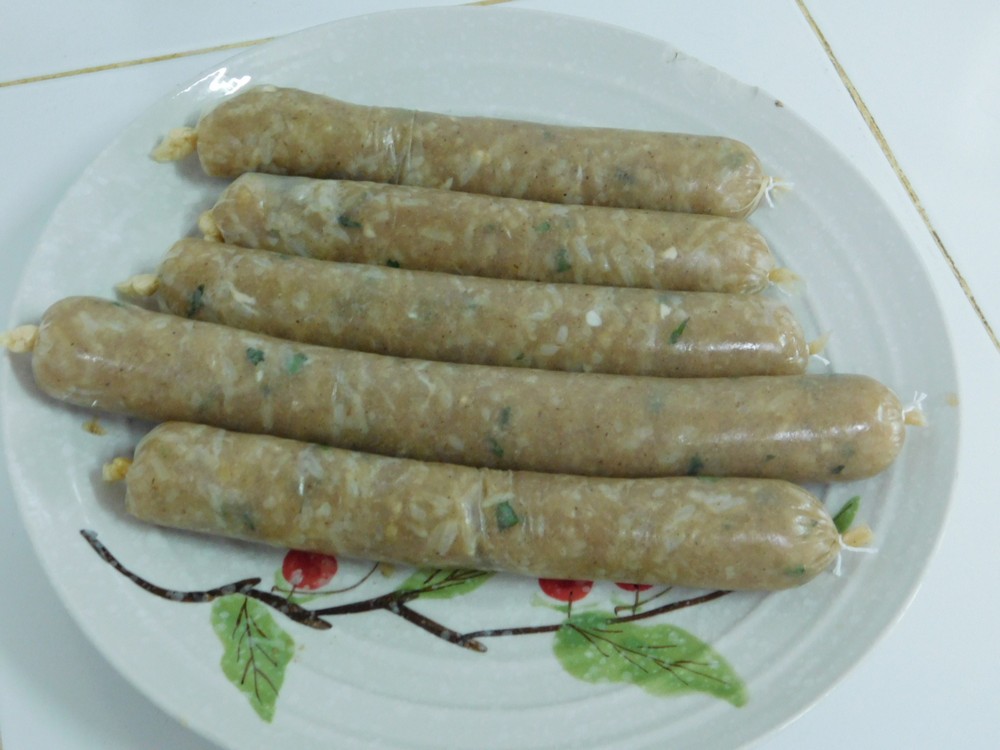
- Pipe the meat mixture into the hog casing as you prefer, such as a funnel, sausage maker, hand or electric grinder with sausage tube. Tie off the ends of each link with string.

- The sausage is ready now, but to firm it up, place the sausage in the fridge overnight, totally optional to do this but recommended.
- Poach then pan fry on low heat until cooked through and browned, turning often to prevent burning, or grill until cooked through.

- Serve and enjoy.


Notes
Low cost.

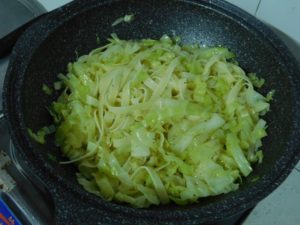
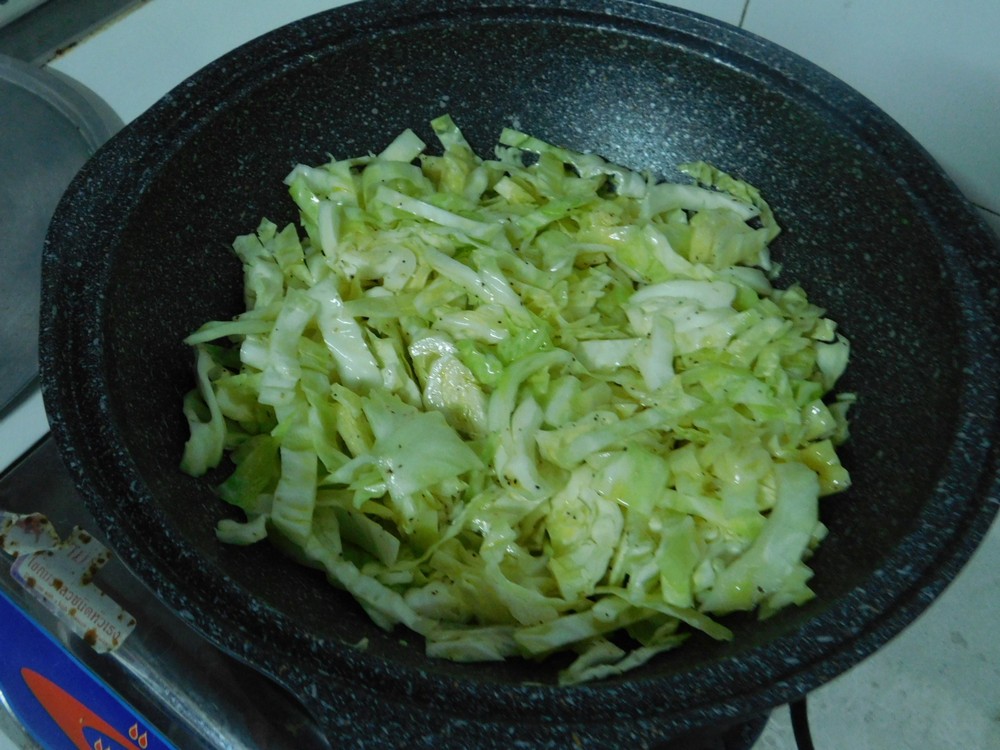
Fried Cabbage & Egg Noodles
This is German in origin, and is probably the reason fried cabbage is prevalent in the US, migrants bring their common dishes with them, then prepare them using ingredients from the local region. This is a simple dish with only four ingredients, and it is delicious.
Ingredients
- 500 grams egg noodles, (1 lb)
- ½ cup butter
- 1 head cabbage, medium size, cored and chopped
- salt and pepper, to taste
Instructions
- Cook the pasta in a pot of boiling salted water until just tender, drain.
- While the pasta is cooking, melt the butter in a large non stick pan on low heat then add the cabbage and season with salt and pepper to taste, cover and cook the cabbage, turning often, until it starts to just turn brown.

- Add the pasta to the pan and toss with the cabbage to mix. Cook until the pasta starts to turn brown, maybe 5 minutes, turning and mixing often.
- Serve as a side dish. Enjoy.


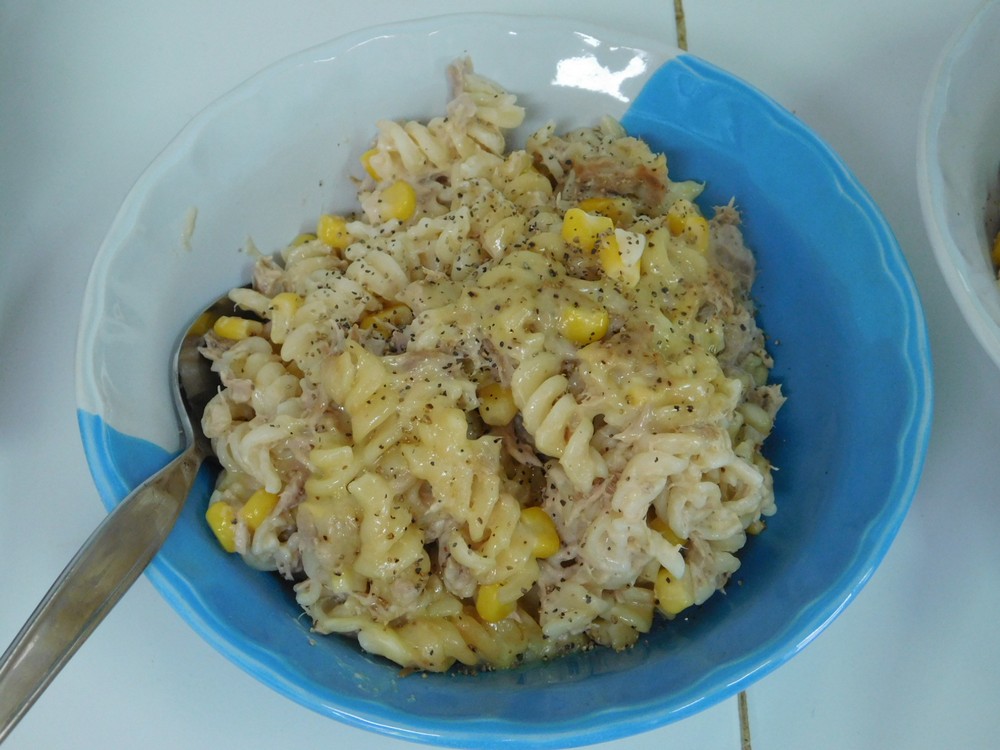
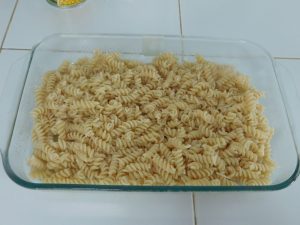
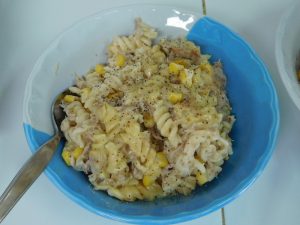
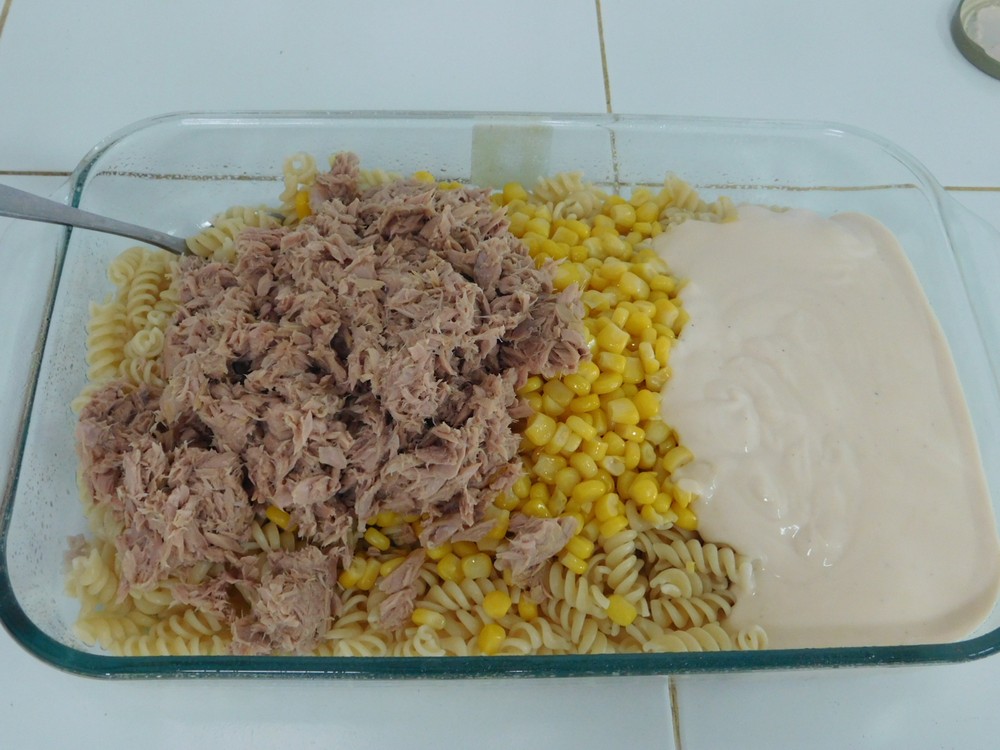
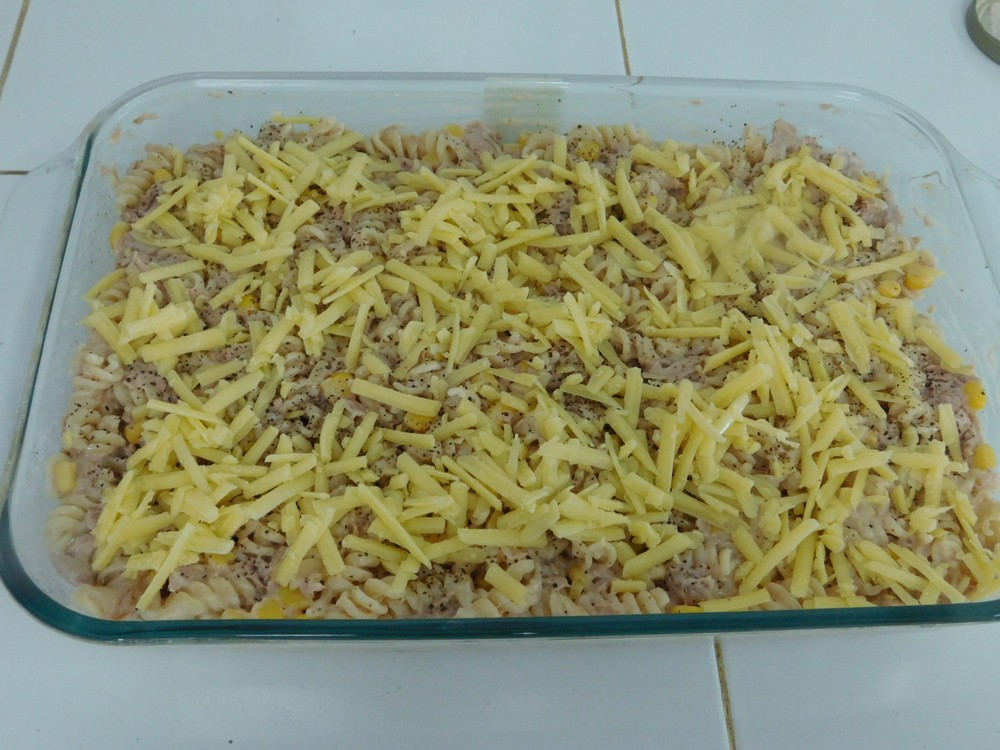
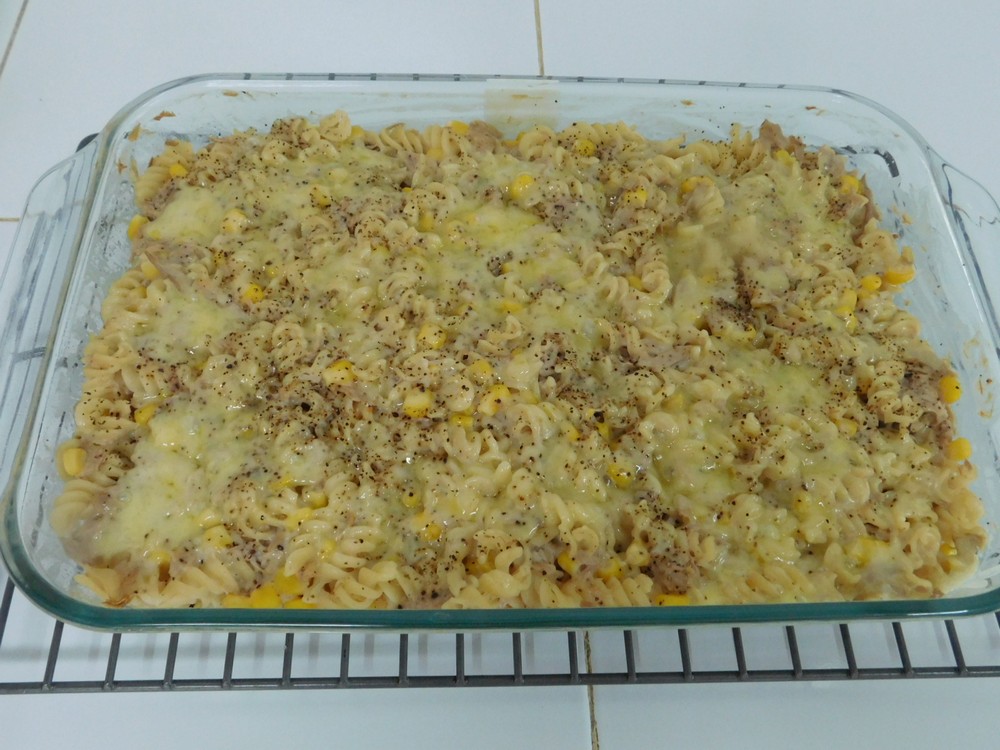
Tuna Casserole IV
This comes from a good friend in Thailand and is highly recommended. I like the use of the cheese pasta sauce. I made this on 27 June 2018, outstanding! Link to the shortcut is listed in the Recipe Notes section.
Ingredients
- 3-4 cups bow tie pasta, or any bite size pasta
- 2-3 cans tuna, drained, or 1 - 1 1/2 cups fresh cooked
- 1/2 can corn nibblets, or 3/4 cup fresh cooked
- 1 jar Artisan 3 Cheese Pasta Sauce, 411 gram jar
- 1-2 cups Cheddar cheese, shredded
- salt and pepper, as desired
Instructions
- Preheat your oven to 200 C (400 F). Spray a 9x13 baking dish with olive oil.
- Cook the pasta in a pot of boiling salted water until just tender. Drain and add pasta to the baking dish.
- Add the tuna, corn, cheese pasta sauce and mix together well. Season with salt and pepper as desired.

- Spread the mixture out evenly and sprinkle the shredded cheese on the top, use as much cheese as you like.

- Bake for 15-20 minutes or until the casserole is bubbly.

- Serve and enjoy.

Notes
The cheese sauce, in Thailand, is available from Lazada if you reside outside of a major city, cost is 178 Baht for a jar, which is not bad, it is a very good sauce. The Cheddar cheese will use 1/2 of a 200 gram block, about 90 Baht for that. For 6 servings, this is about $1.40 per serving.
Shortcuts: Fresh Tuna, Fresh Corn (Pressure Cooker).
Variants: 1. Use peas in place of the corn. 2. Use the higher quantities of Cheddar and tuna (highly recommended). 3. Add some sauteed onions. 4. Add some sauteed diced red bell pepper. 5. (Highly recommended.) Use the following measurements: 10 oz / 285 g dry bow tie pasta, 22 oz / 624 g jar Prego Homestyle Alfredo Sauce, 3 cups of shredded Cheddar cheese, 1 standard can of peas, I made this combination on 4 Aug 2019 and it was perfect.
Recipe and variants 3-4 provided by good friend, Kurt Hammerschmidt.
Thailand.
Thailand.
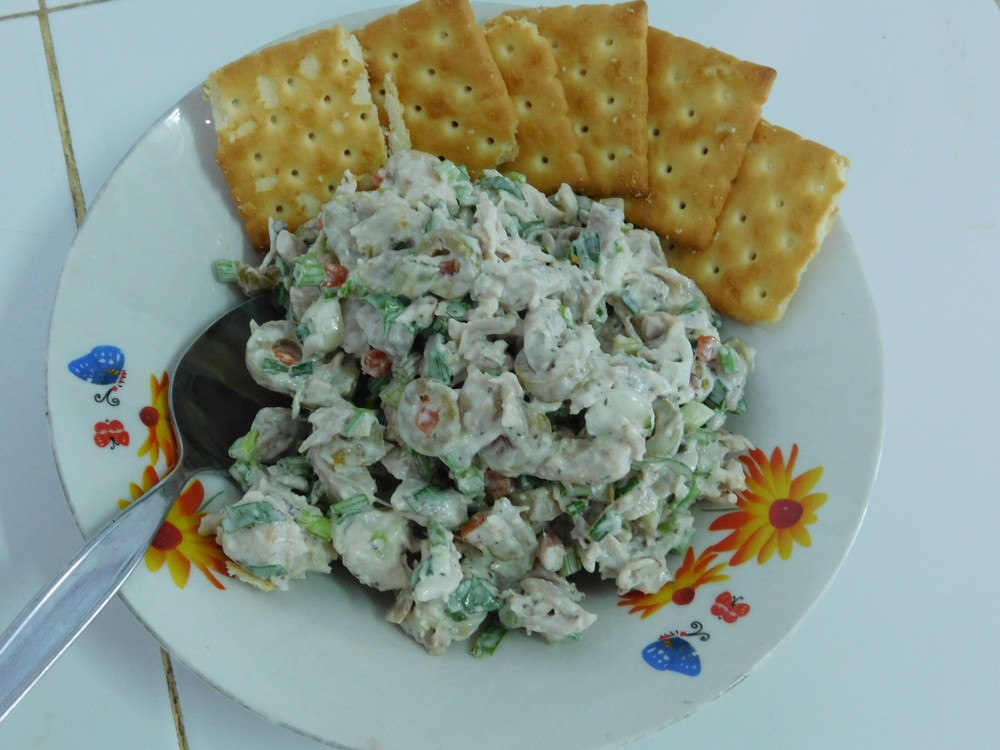
Chicken Salad with Green Olives
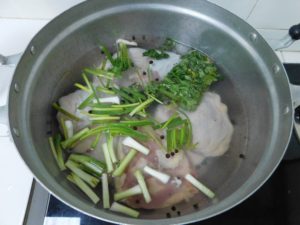
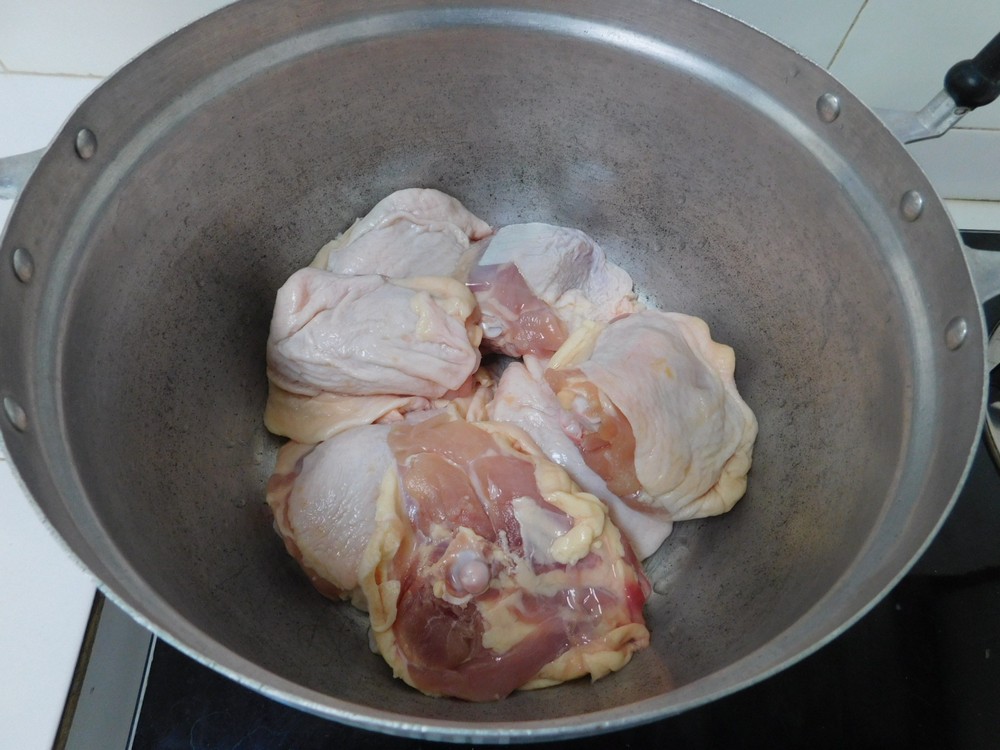
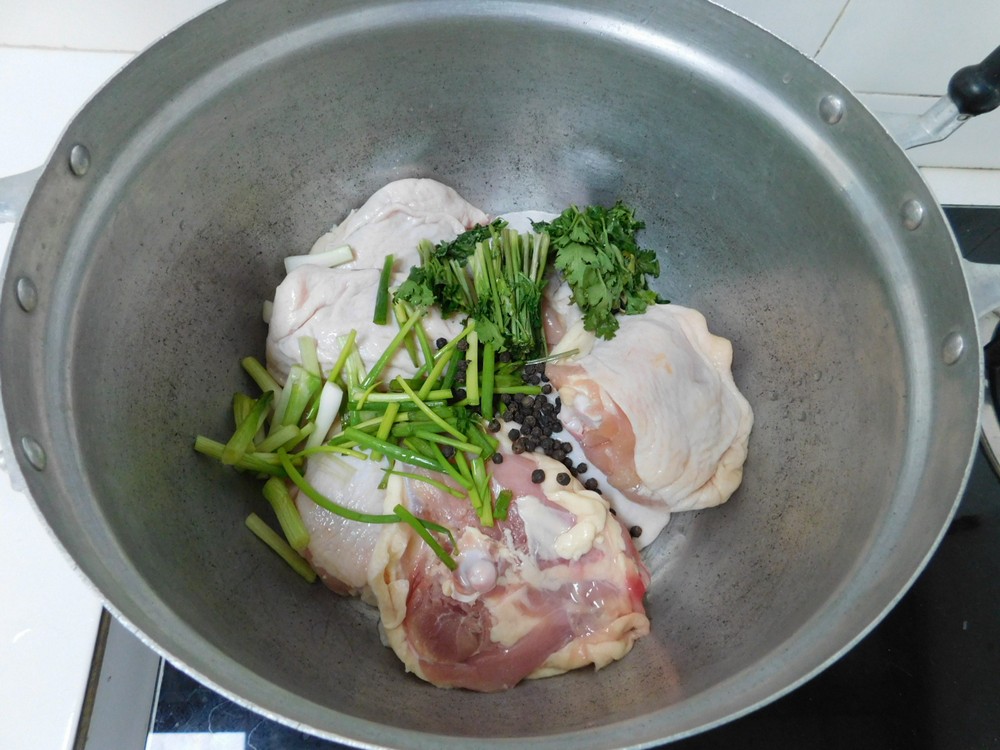
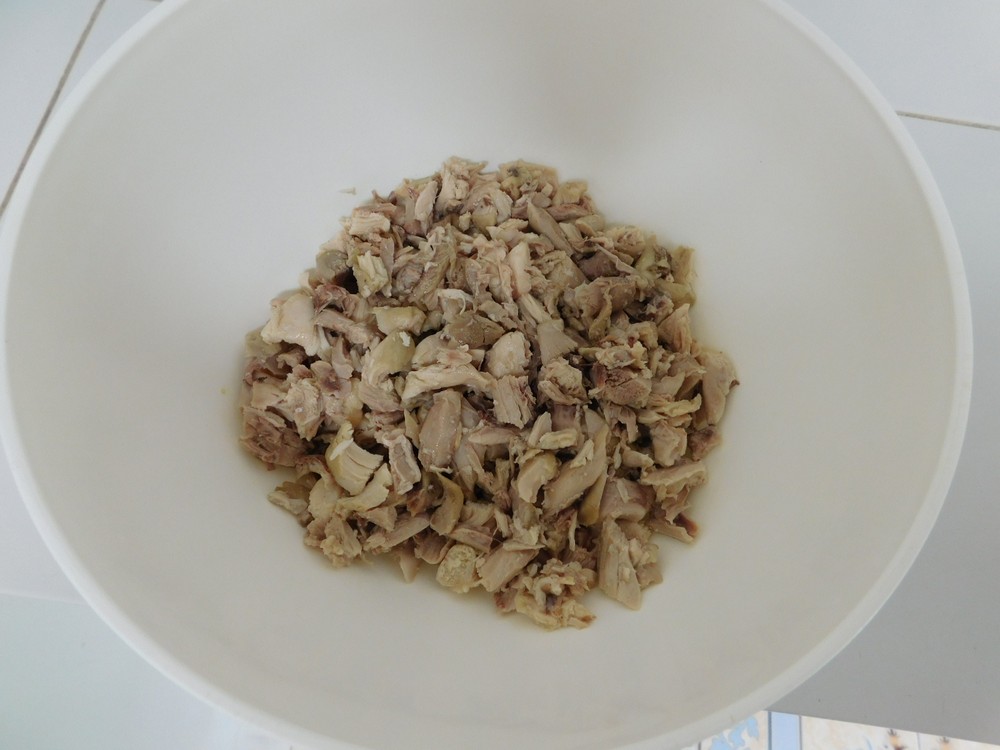
This is an excellent tasting salad with just chicken, green olives, celery, and spring onions with a mustard mayo dressing. I made this on 20 Aug 2018, very well liked by the family. This is a 2 for 1 recipe, we are going to cook the chicken and make broth at the same time for use in other recipes. And the chicken we are going to use, thighs, which are very flavorful. The cook and passive times are based on making the broth and getting some nice juicy chicken as well.
Ingredients
- 3 cups chicken thighs, cooked and chopped, 8 was perfect
- 1 cup celery, diced
- 1 cup green olives with pimento, sliced
- ½ cup spring onion, sliced
- ⅔ cup mayo
- 2 teaspoons olive juice, from the jar
- 2 teaspoons lemon or lime juice
- 1 teaspoon Dijon mustard
- 1 teaspoon celery seed, optional
- black pepper, as desired
To make the Broth
- 8 chicken thighs, bone in and skin on
- 1 bunch spring onion, chopped
- 1 bunch fresh coriander, chopped
- palmful black peppercorns
- water, as needed
Instructions
To cook the Chicken and make Broth
- Now I have a lot of time on my hands and put a lot of care into what I make. So for this I started with 8 fresh chicken thighs, bone in and skin on.

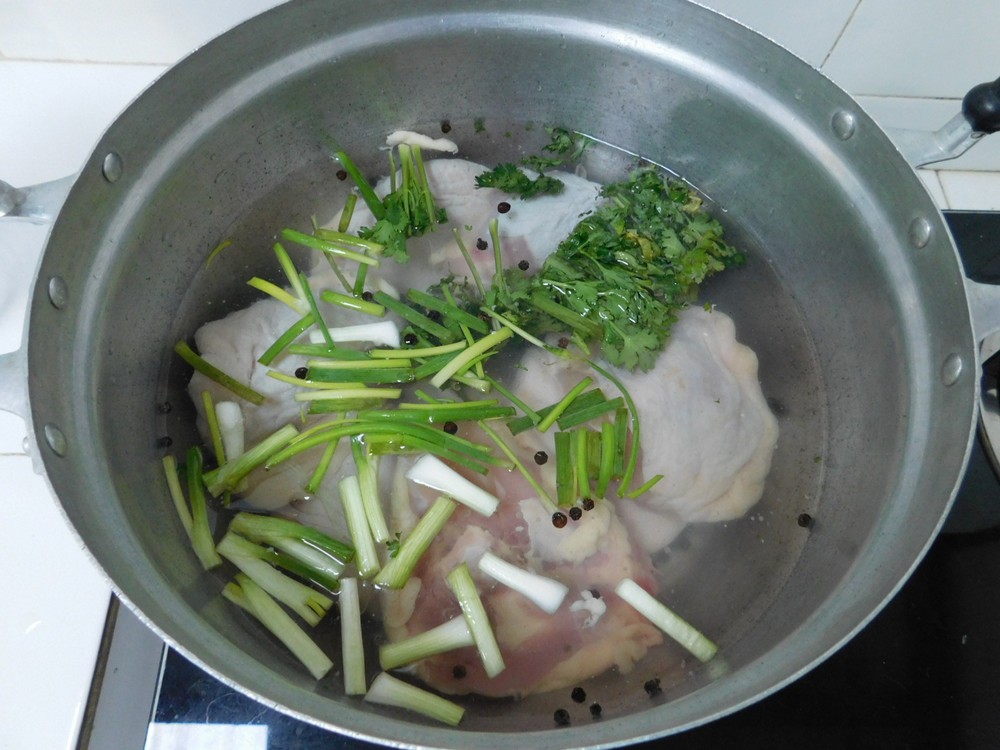
- For the broth, I went with what I had on hand, a bunch of spring onions and a bunch of cilantro. Chop those and add to the pot with the chicken. Add a palmful of black peppercorns. (You can certainly use trinity if you desire.)
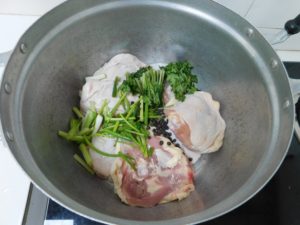
- I needed 2 quarts of broth for another recipe, so I added 2 1/2 quarts of water to the pot. Bring the pot to a boil, then reduce heat to a simmer. Simmer for an hour and check the chicken, cut a thigh in half, it will be cooked through and tender.
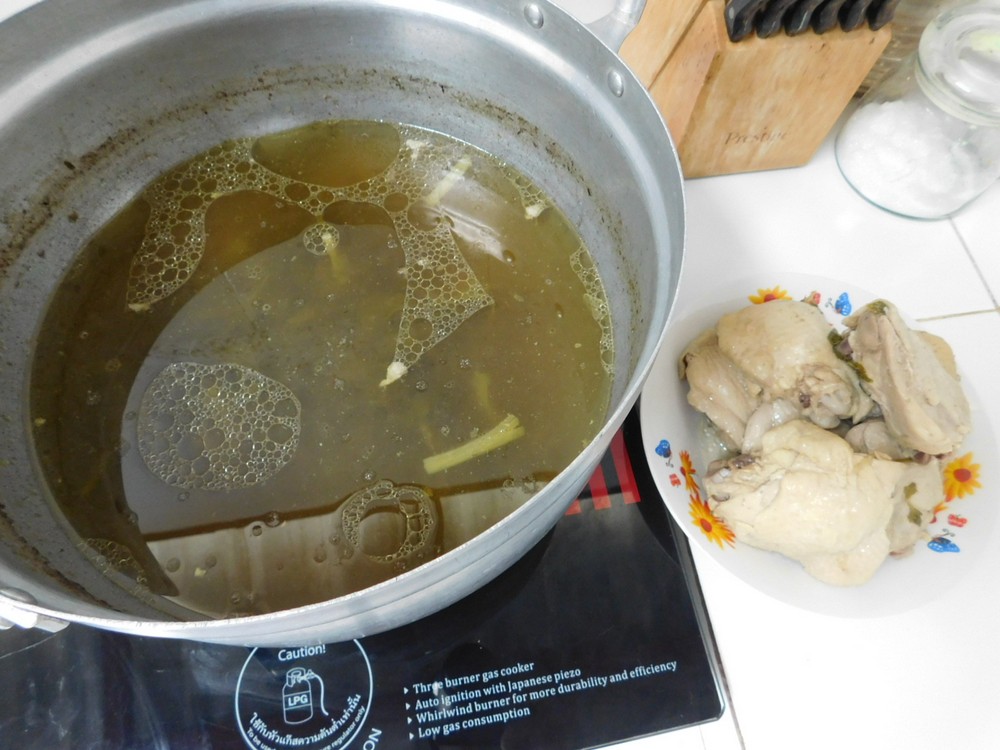
- Remove the pot from the heat and set aside to cool to room temperature, leaving the chicken in the broth. can take a few hours to cool. This is the important step for juicy chicken. After a few hours when the broth has cooled, remove the chicken. Remove the skin and bones from the chicken, your hands work perfect for this. Chop the chicken. Strain the broth and place that in the fridge for another recipe.

For the Salad
- In a bowl, whisk together the mayo, mustard, olive juice, lemon or lime juice, and the celery seed. Taste and season with black pepper as desired.
- Add the chopped chicken to a large mixing bowl,

- Add the celery, spring onion, and most of the dressing to the chicken.
- Gently mix to coat everything, add the rest of the dressing as needed until everything is coated well but not dripping in dressing.
- Now gently fold in the olives and mix until they are distributed and lightly coated with dressing.
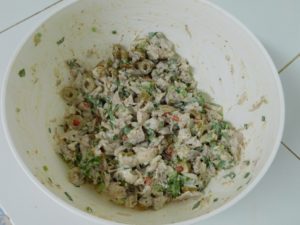
- Cover and place in the fridge for several hours before serving with crackers. Enjoy.


Notes
Low cost per serving.
Variant: 1. Use 3 cans of chicken (10 oz / 283 g each), drained, in place of cooking the chicken from scratch.

Fried Oysters
Excellent as written, and can be tailored in many ways. I will be using the smaller oyster meat, larger than what Tesco offers and what I use is sourced from a local fisherman. Links to the shortcuts are listed in the Recipe Notes section.
Ingredients
- 1 pint oyster meat, drained, (2 cups)
- ½ cup all purpose flour
- 1 teaspoon salt
- ½ teaspoon black pepper
- 2 eggs, lightly beaten
- ¾ cup fine breadcrumbs, and as needed, Shortcut
- lard, or cooking oil, as needed, Shortcut
Instructions
- Heat some lard or cooking oil of your choice in a large non stick pan, you want about 1/2 inch or so for shallow frying, no need to deep fry these. Heat to just before smoking.
- In a shallow bowl, mix together the flour, pepper, and salt. Add the eggs to another shallow bowl and lightly beat them. Place the breadcrumbs in another shallow bowl. The pan is to my left out of view, so you can see the progression from right to left.

- Coat the oysters in flour, then coat with egg, then coat with breadcrumbs.
- Place in the hot oil, but do not over crowd the pan, work in batches, and cook until golden brown.

- Turning the larger ones if not covered in oil.
- Drain on paper towels.
- Serve with a dipping sauce as desired and sides of your choice. Enjoy.


Notes
I get fresh shucked oysters, about a pint, for 50 Baht, with no math involved this is low cost for 4 servings.
Shortcuts: Rendering Lard, Bread Crumbs.