Archive for the ‘#1 Go-To Recipes’ Category
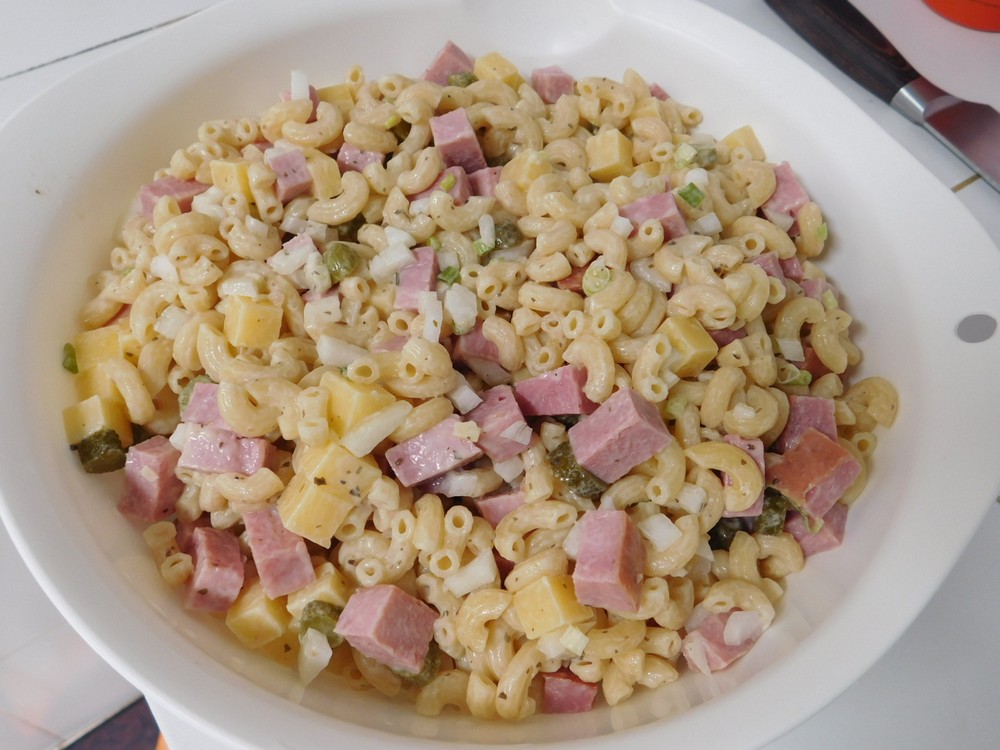
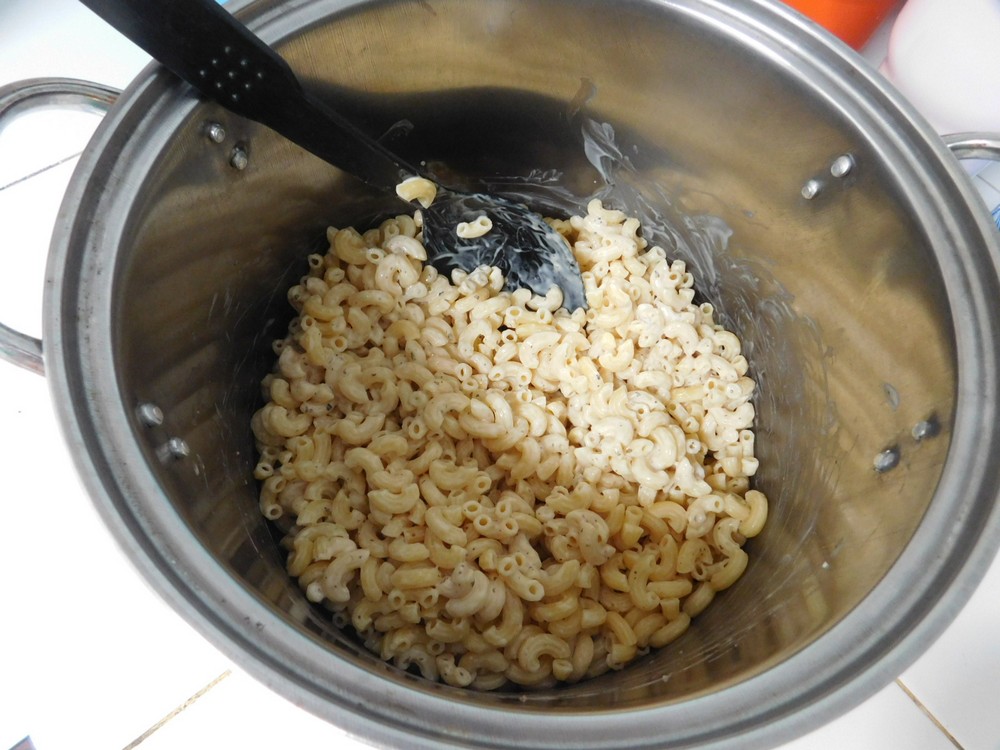
Ham & Cheese Macaroni Salad
A basic macaroni salad that can be a light lunch or dinner, or a nice side dish. On my to make and taste list. This is a versatile macaroni salad that can be tailored to your taste or made a different way each time it is prepared.
Ingredients
- 340 grams dry macaroni, (12 oz)
- ½ cup creamy Caesar salad dressing, and as needed
- 750 grams cooked ham, cubed, (1-1½ lb)
- 250 grams Cheddar cheese, cubed, (8 oz)
- 1 onion, diced, red or yellow
- ½ cup gherkins, chopped
- salt and pepper, as desired
Instructions
- Heat a pot of salted water to a boil, add the pasta. Cook, stirring occasionally until tender.
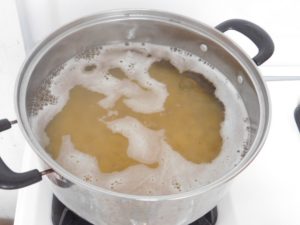
- Drain well and place in a mixing bowl to cool.

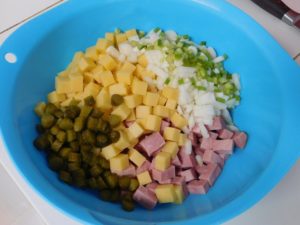
- Cube the ham and cheese, dice the onion, chop the gherkins, and prep any additional items you want to add. (I added some chopped spring onion.)
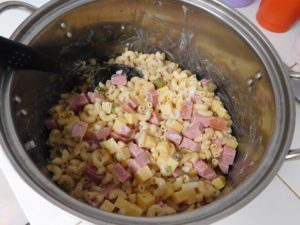
- When the macaroni has cooled, add that to a larger mixing bowl or large pot, then add the dressing and mix together.

- Now add cubed and the diced/chopped items, fold into the pasta to coat everything with dressing, adding more dressing as needed for your desired consistency.
- Transfer to a more manageable container, cover and place in the fridge to chill and blend the flavors for 2-3 hours.

- Serve as a lunch, light dinner, or a nice side dish with any main dish. Enjoy.


Notes
Low cost per serving.
Variants: 1. Use Ranch or Bleu Cheese dressings. 2. Add veggies you like, such as sliced spring onion, green olives, or diced bell pepper. 3. Add some chopped hard boiled eggs or whole hard boiled quail eggs.

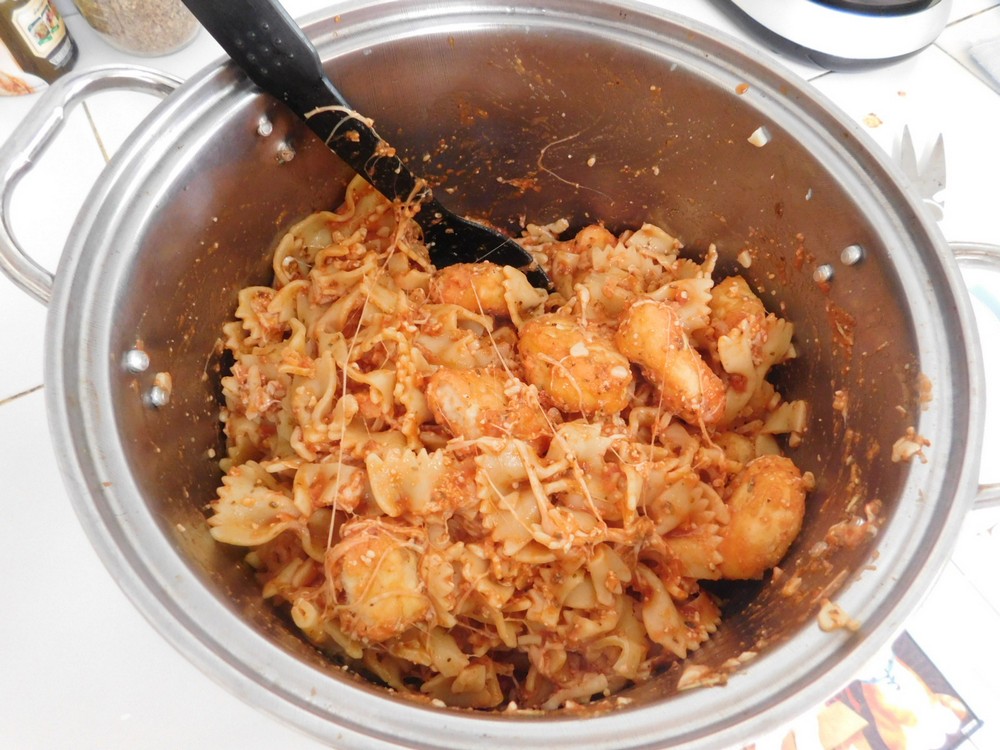
Chicken Nugget Casserole I
As a way to use chicken nuggets in a creative way, I thought why not a casserole. I made this on 8 Jul 2022, and it is delicious! This was loved by the whole family! I state using pasta sauce for this, but I am also going to experiment with adding diced tomatoes when I prepare this again. Links to the Shortcuts are listed in the Notes section.
Equipment
- Baking Pan (9x13 inch)
- Oven
Ingredients
- 750 grams frozen chicken nuggets, (1½ lb)
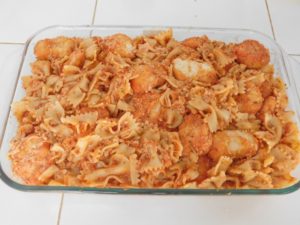
- 500 grams bowtie pasta, (1 lb)
- 2 cups pasta sauce, Shortcut
- 3 cloves garlic, minced
- 1 tablespoon Italian seasoning, Shortcut
- ½ teaspoon black pepper
- 3 cups Mozzarella cheese, shredded, divided
- 1 cup Parmesan cheese, grated, divided
Instructions
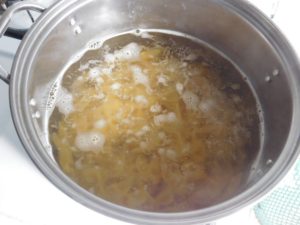
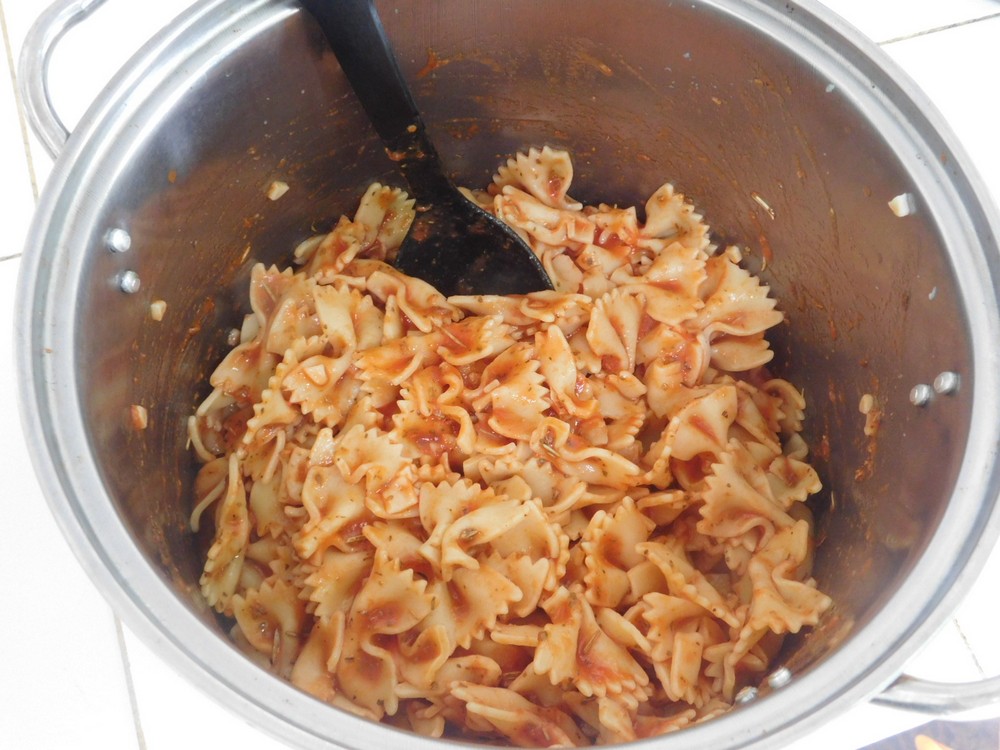
- Heat a large pot of salted water to boiling. Add pasta and cook until almost tender, as it will get cooked more while baking. Drain well. Return drained pasta to the pot.
- While the pasta is cooking, preheat your oven to 180° (350° F). Get out a 9x13 baking pan and grease with butter.
- To a mixing bowl, add the tomato sauce, garlic, Italian seasoning, and black pepper. Whisk together. Add the sauce to the drained pasta and mix with a large spoon.
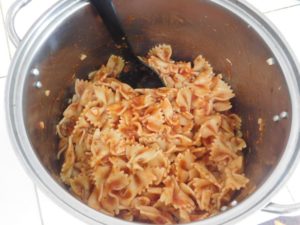
- Add 1½ cups Mozzarella cheese, and ½ cup Parmesan cheese. Mix together.

- Add the frozen chicken nuggets and mix together.
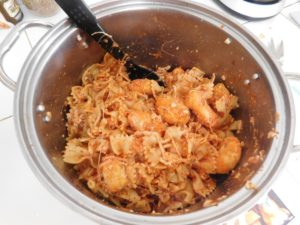
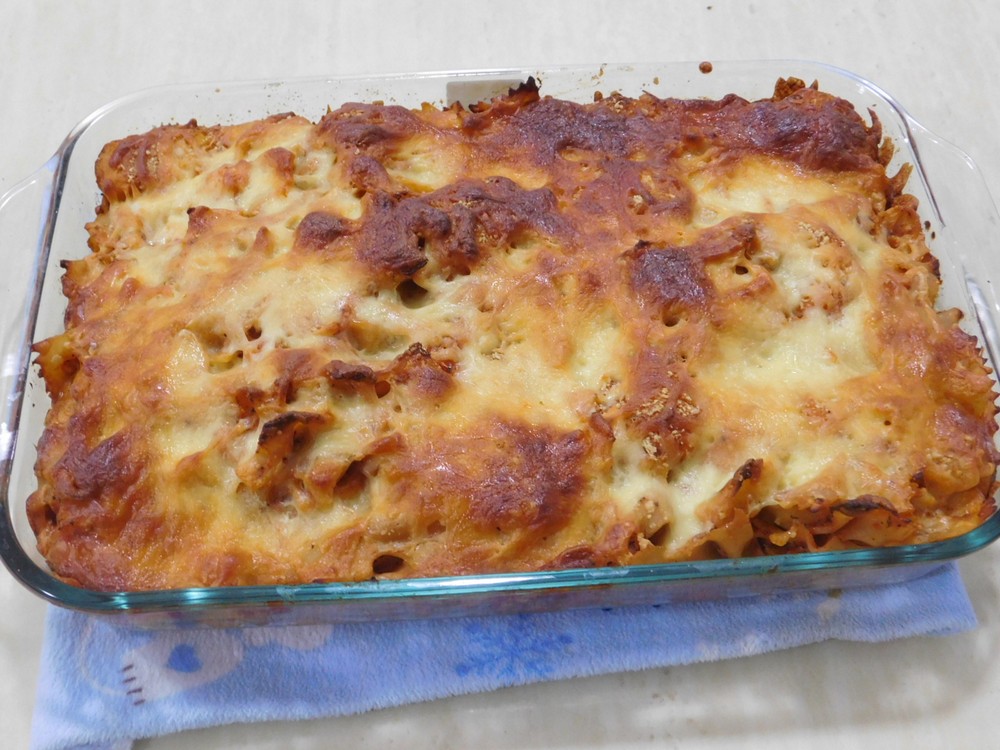
- Dump the mixture into the prepared baking pan and spread out evenly.
- Sprinkle with the remaining cheeses.
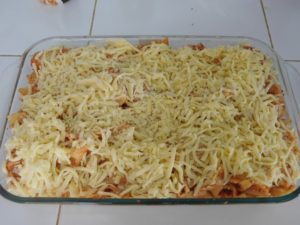
- Bake for 45 minutes or until the sauce is bubbly and cheese is browned.

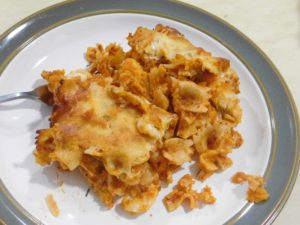
- I simply used a spatula and cut the casserole into 6 portions. Serve and enjoy.


Notes
Fair cost per serving based on the cheeses used, the nuggets are actually low cost.
Shortcuts: Pasta Sauce, Italian Seasoning.

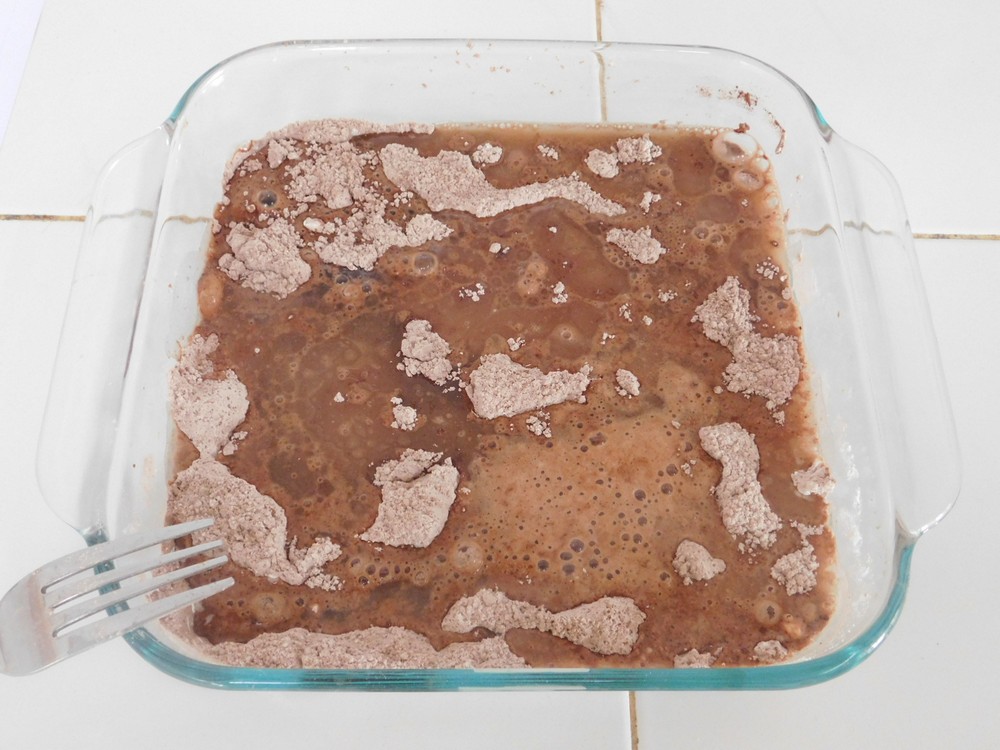
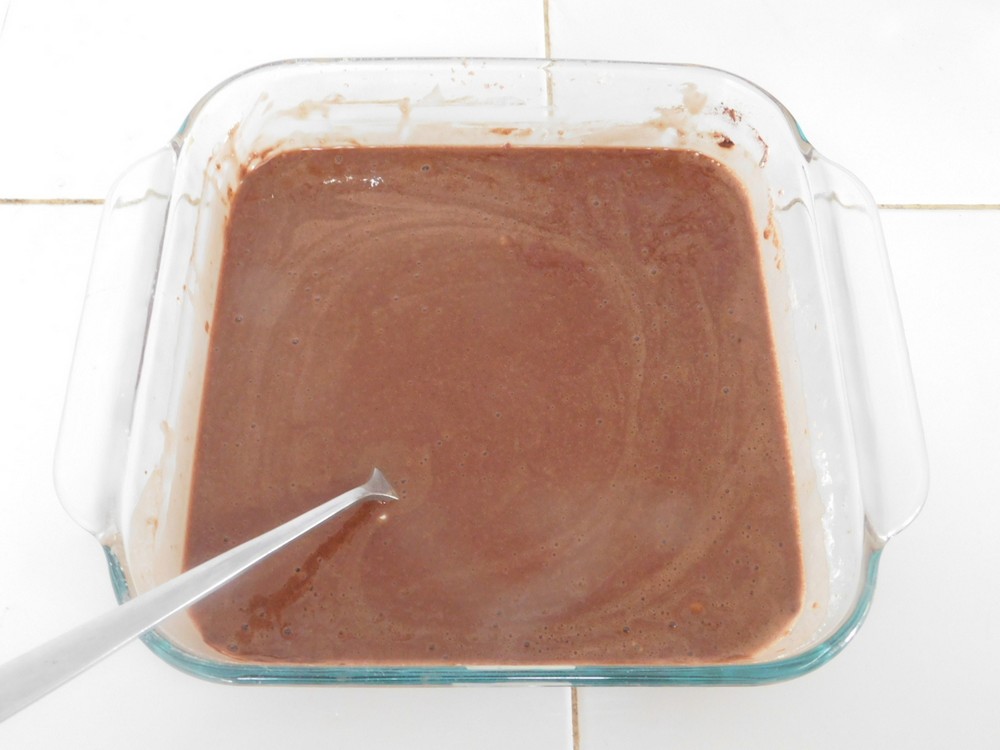
Wacky Cake
This is a mix right in the pan recipe, and uses no eggs, butter, or milk. I made this on 25 Jun 2022 and it is absolutely excellent chocolate cake, no frosting or whipped cream needed!
Equipment
- Pyrex Baking Pan (8x8 inch)
- Oven
Ingredients
- 1½ cups all-purpose flour
- 1 cup sugar
- ¼ cup cocoa powder
- 1 teaspoon baking soda
- 1 teaspoon salt
- 1 tablespoon white vinegar
- 1 teaspoon vanilla extract
- 6 tablespoons vegetable oil
- 1 cup water
- frosting, of your choice, if desired
Instructions
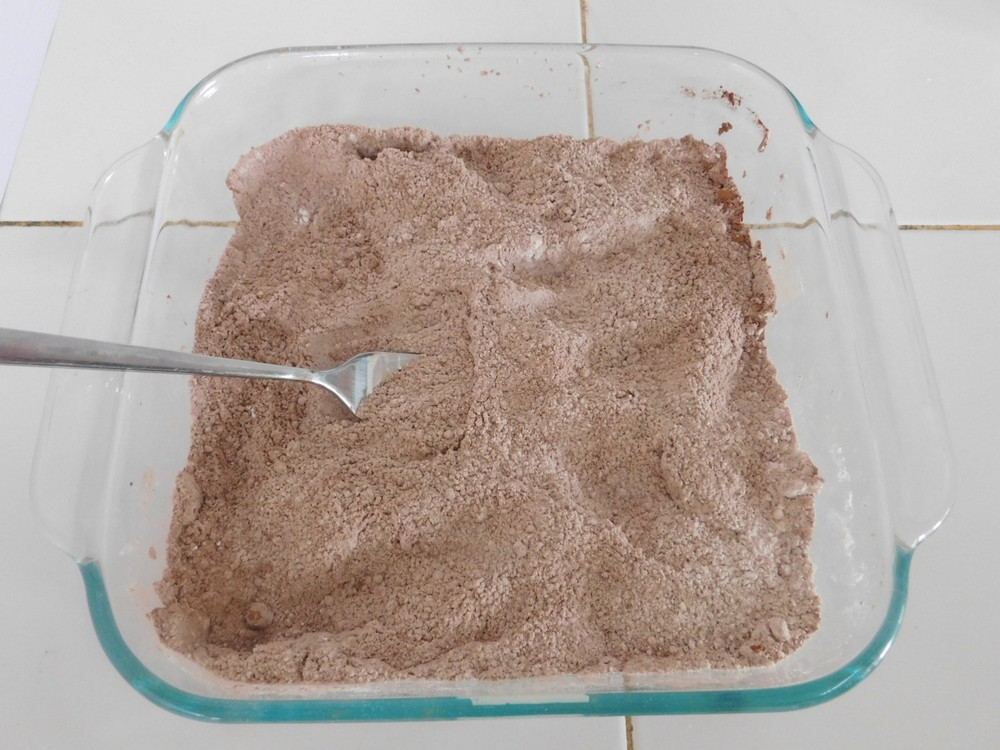
- Preheat your oven to 180° C (350° F), get out an 8x8 inch Pyrex or ceramic baking pan, do not use a metal pan for this.
- To the baking pan, add the first 5 ingredients.
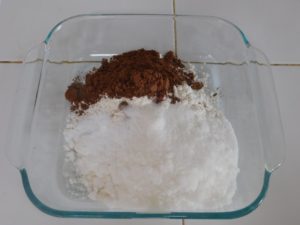
- Mix together with a fork. The reason of using a fork is it acts like a whisk.
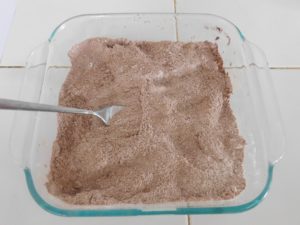
- Make 3 indentions in the flour mixture. To each one, add the vinegar, vanilla, and oil.
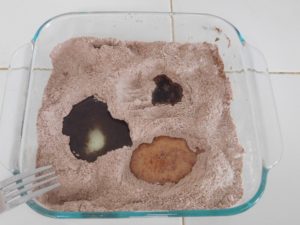
- Pour the 1 cup of water over that.

- Then mix everything together with fork until mixed and no dry ingredients are visible.

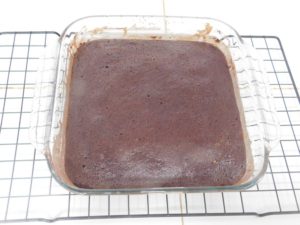
- Bake for 25-30 minutes or until a toothpick inserted in the center comes out clean. Place on a wire rack to cool completely.
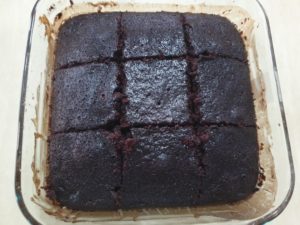
- Once cooled, frost if desired with your choice of frosting, or enjoy without.
- Cut into 9 squares, serve and enjoy. Excellent cake even without the frosting.


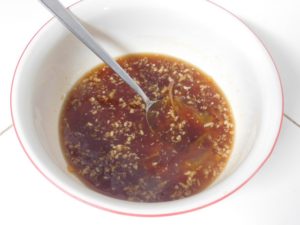
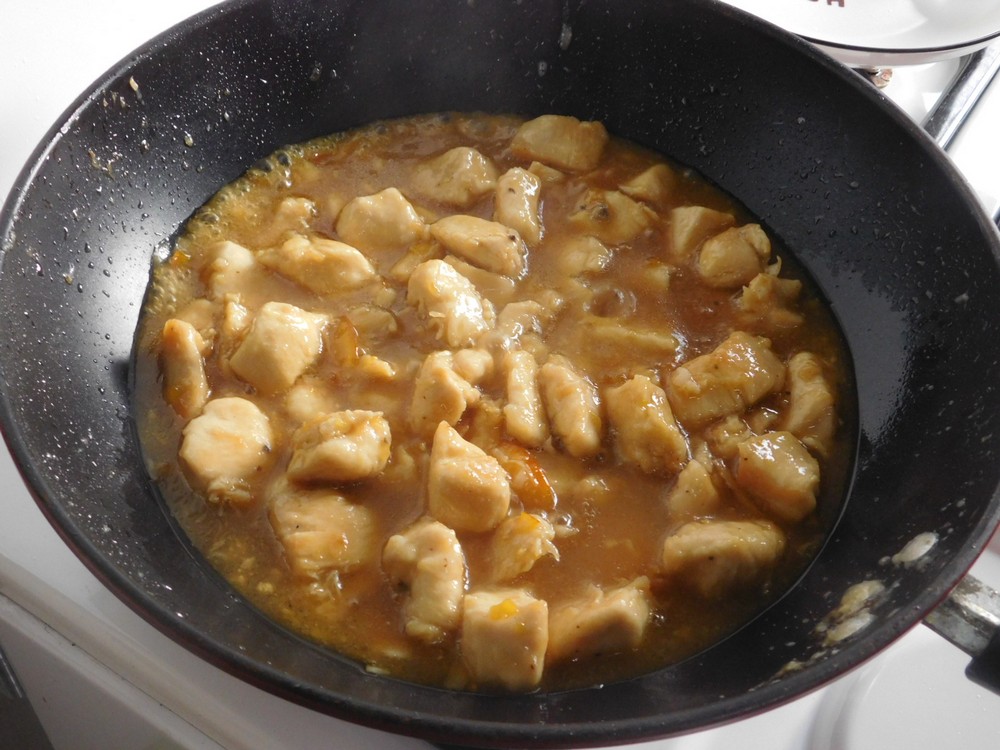
Super Easy Orange Chicken
This recipe comes from a good friend on the Just a Pinch Recipe Club website. I made this on 23 June 20222, and it is excellent chicken, great flavor. My family really enjoyed this dish.
Equipment
- 1 Gallon Zip Lock Bag
Ingredients
For the Orange Sauce
- ¾ cup orange marmalade
- 3 tablespoons rice vinegar
- 3 tablespoons light soy sauce
- 2 teaspoons fresh ginger, grated
- 3 cloves garlic, minced
For the Chicken
- 750-1000 grams chicken breasts, boneless, skinless, (1½-2 lb), I used 4 breasts
- ¼ cup corn starch
- ¼ teaspoon garlic powder
- ¾ teaspoon salt
- ¼ teaspoon black pepper
- cooking oil, for frying
Instructions
- Add all the Orange Sauce ingredients to medium bowl and mix together. You can prepare this two different ways. Prepare the sauce right before cooking the chicken, or make the sauce a few hours before, or even in the morning before cooking the chicken, to let the flavors blend together.
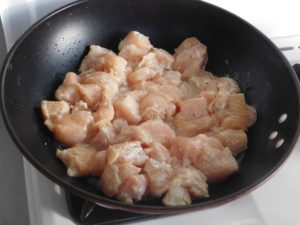
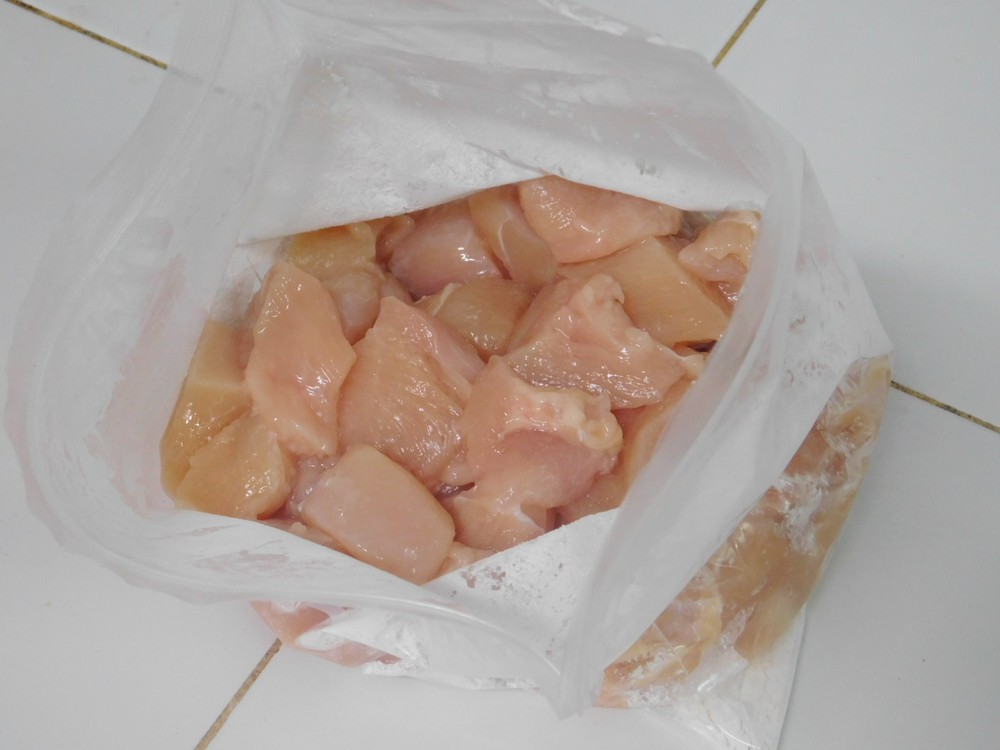
- Prep the chicken by cutting into large bite size pieces.
- When ready to cook the chicken, add the corn starch, garlic powder, salt, and pepper to the gallon size zip lock bag. Seal the bag and shake to mix together. Add the chicken to the bag.
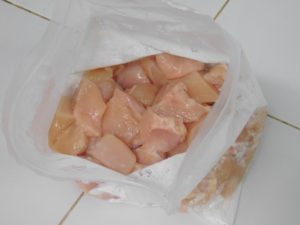
- Seal, and shake and mix the the chicken with the corn starch mixture to coat the chicken.
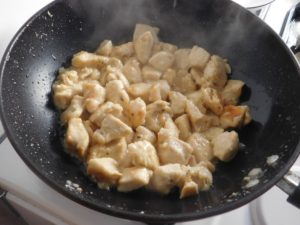
- To a large skillet, heat 3-4 tablespoons of cooking, when hot, remove chicken from the zip lock bag and add to the pan. (I use a wok pan which is a flat bottomed wok - works perfect for this.)
- Cook until golden brown, turning the chicken often, about 10-15 minutes. Do not overcook or you will have tough chicken.
- While the chicken is cooking, if you made the sauce earlier and let the flavors blend in the fridge, take that out and microwave to just warm it up.
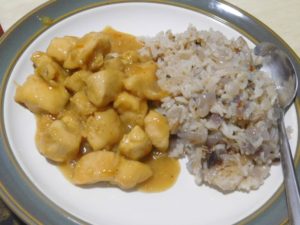
- With the chicken still in the pan, pour in the sauce, stir with the chicken pieces and cook until hot and slightly thickened, it thickens more as it cools, about 3-5 minutes.

- When the sauce is hot and thickened, remove from heat, sprinkle with white poppy seeds if desired.
- Serve with rice of your choice and a vegetable for a delicious meal. Enjoy.


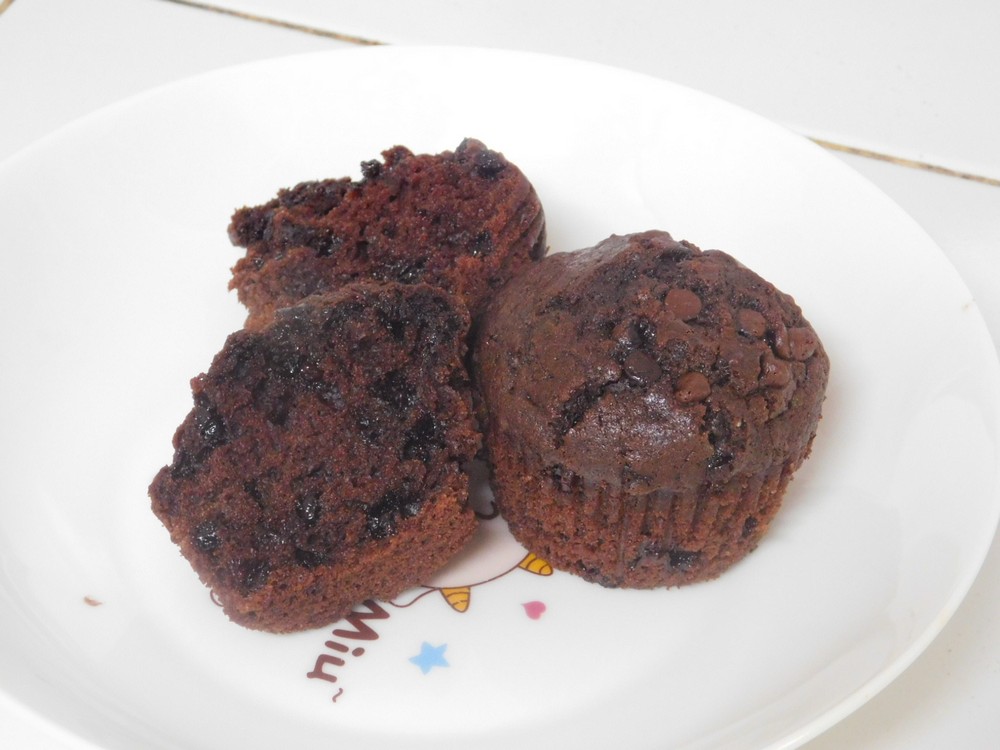
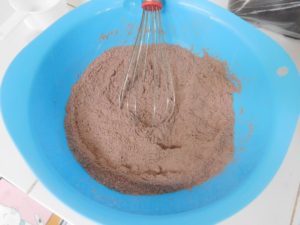
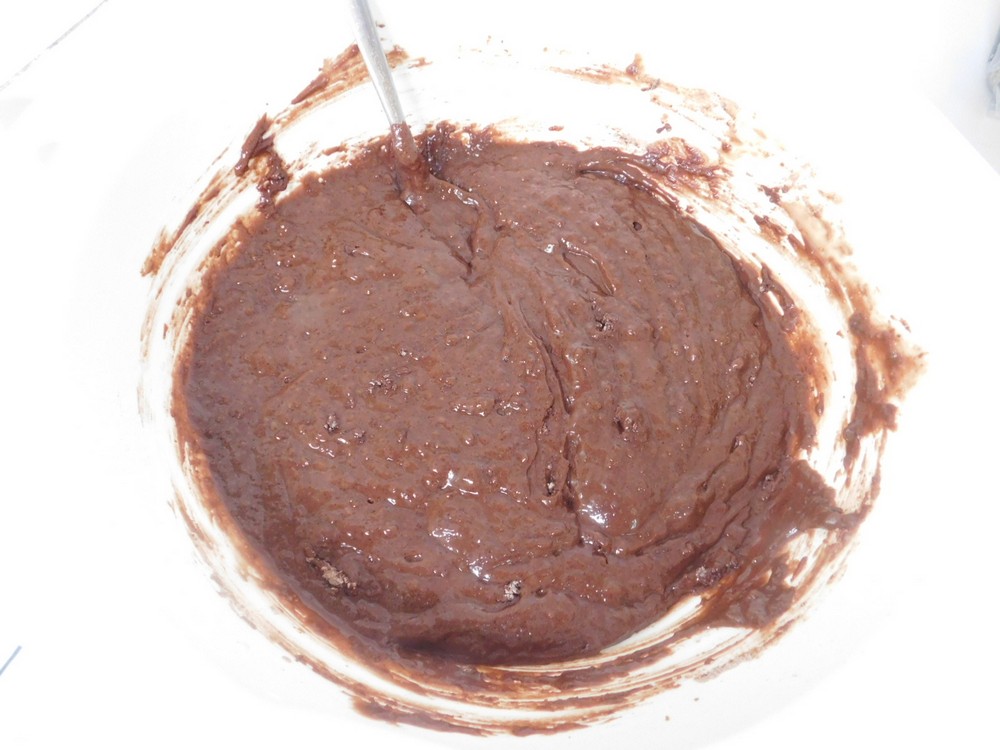
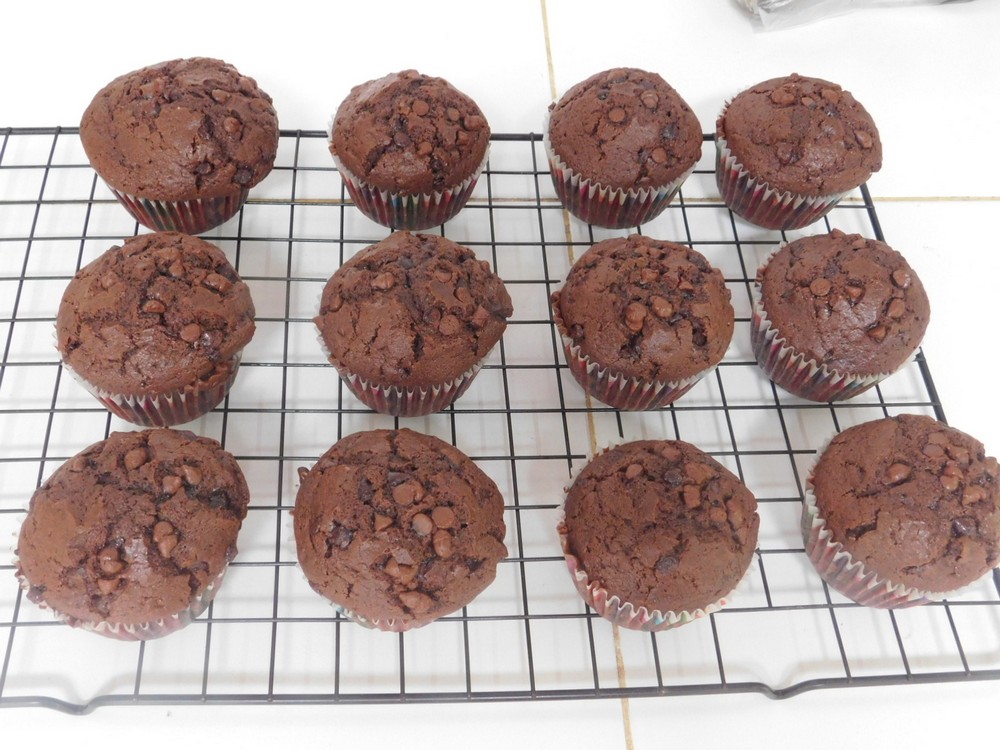
Chocolate Chocolate Chip Muffins
This recipe comes from a friend, and these are excellent muffins! I made these on 16 Jun 2022 exactly as written, and these were very well liked my the family and I. Highly recommended.
Equipment
- Muffin Pan (12 cell)
- Paper Cupcake Liners
- Oven
Ingredients
- ¾ cup milk
- 1 tablespoon white vinegar, or lemon juice
- 2 cups all-purpose flour
- ¾ cup sugar
- ½ cup cocoa powder
- 1 teaspoon baking powder
- ½ teaspoon baking soda
- ¼ teaspoon salt
- 2 eggs
- ⅓ cup vegetable oil
- ¼ cup butter, melted
- 1 cup mini chocolate chips, rounded, plus additional for topping if desired
Instructions
- Preheat your oven to 220° C (425° F), line a 12 cup muffin pan with 12 paper liners.
- In a mixing bowl, add the milk and vinegar, stir together. (You are making buttermilk.)
- In another mixing bowl, add the flour, cocoa powder, sugar, baking powder, baking soda, and the salt. Whisk together.
- To the milk mixture, add the melted butter, eggs, and oil. Whisk together.

- Add the wet mixture to the dry mixture and mix until almost combined.

- Add the chocolate chips and mix in. Now the batter is very much like a cake batter.

- Spoon the batter into the 12 cup cake liners equally. Sprinkle a few chocolate chips on top of each cup.

- Bake for 5 minutes then reduce heat in the oven to 180° C (350° F) and continue baking for another 13 to 16 minutes or until a toothpick inserted in the center of a muffin comes out clean. (Mine were perfect at 13 minutes.)
- Remove muffins to a rack to cool completely.

- Serve and enjoy.


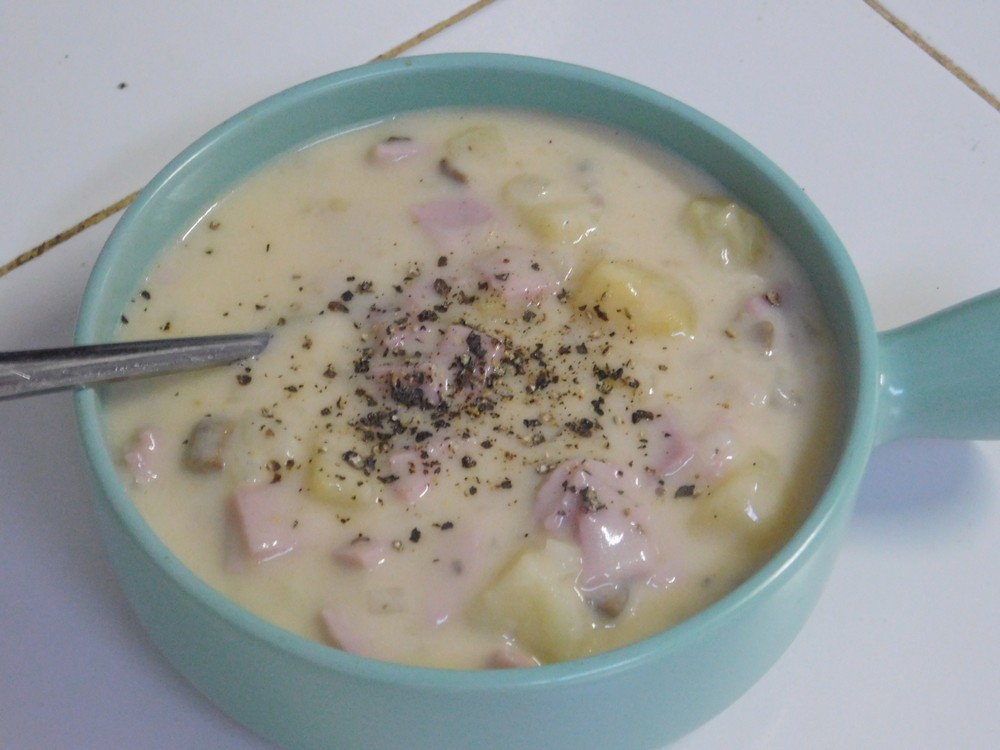
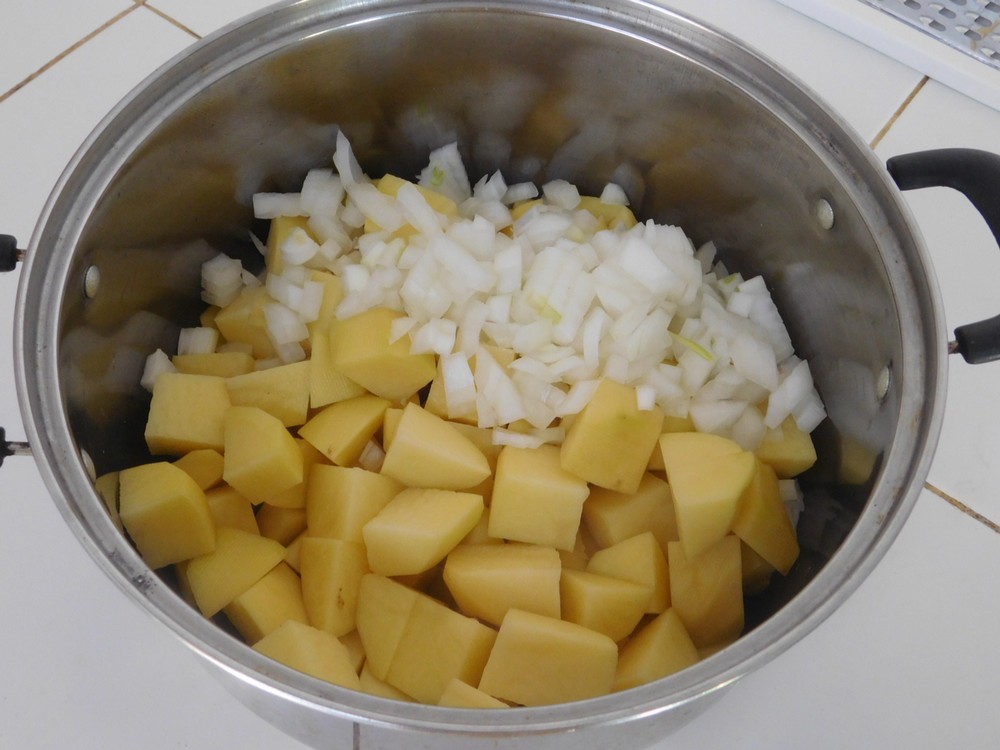
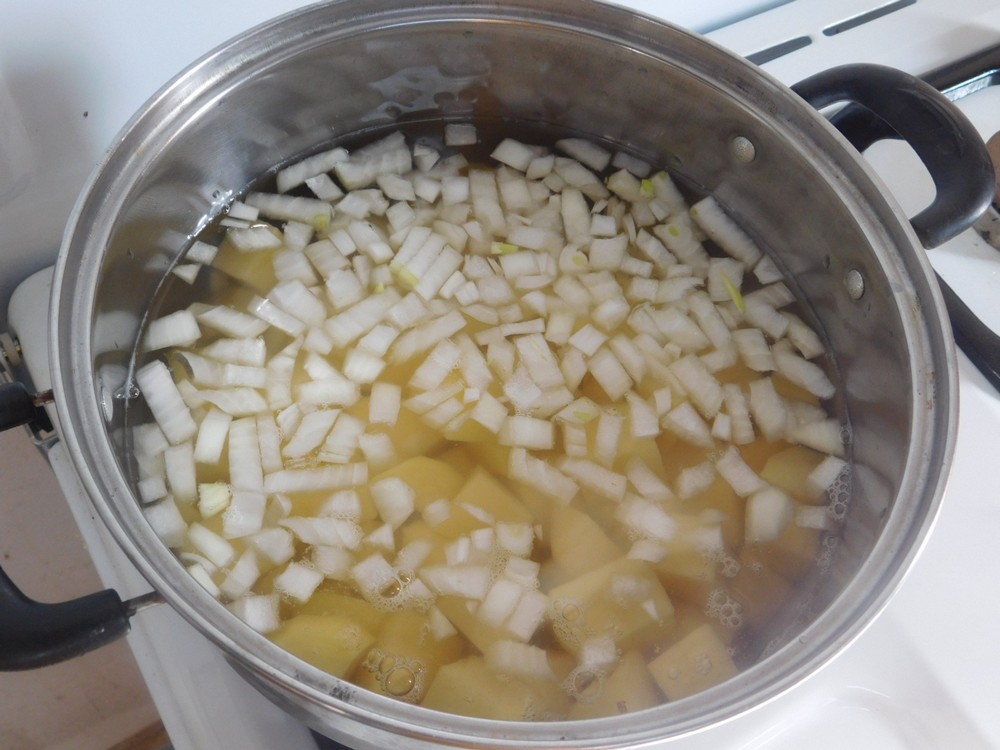
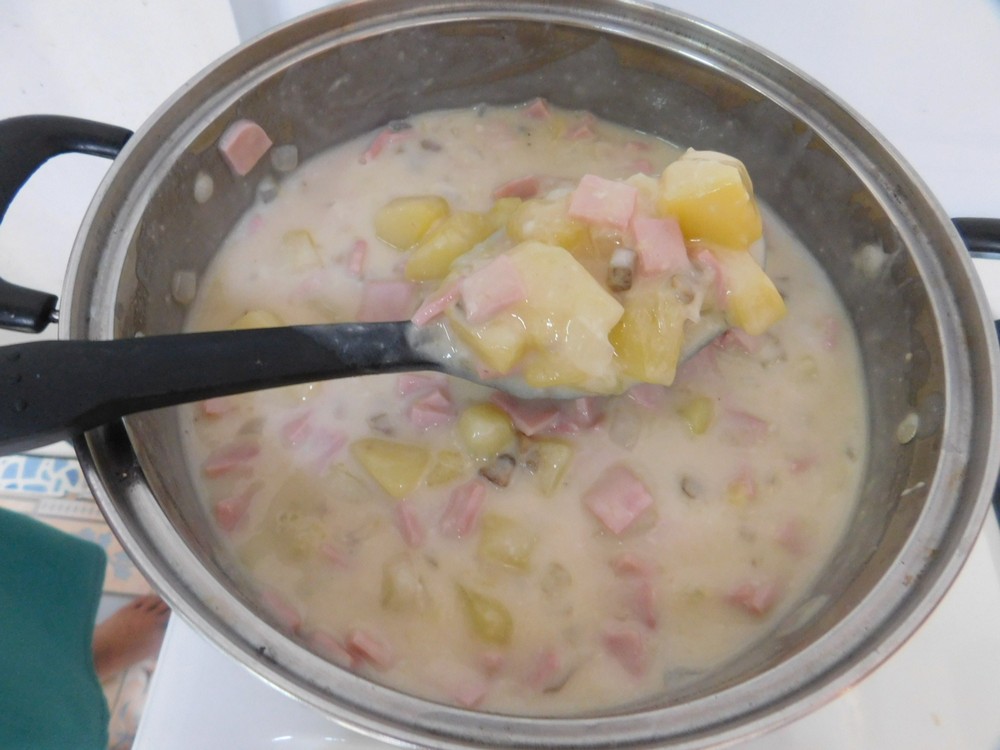
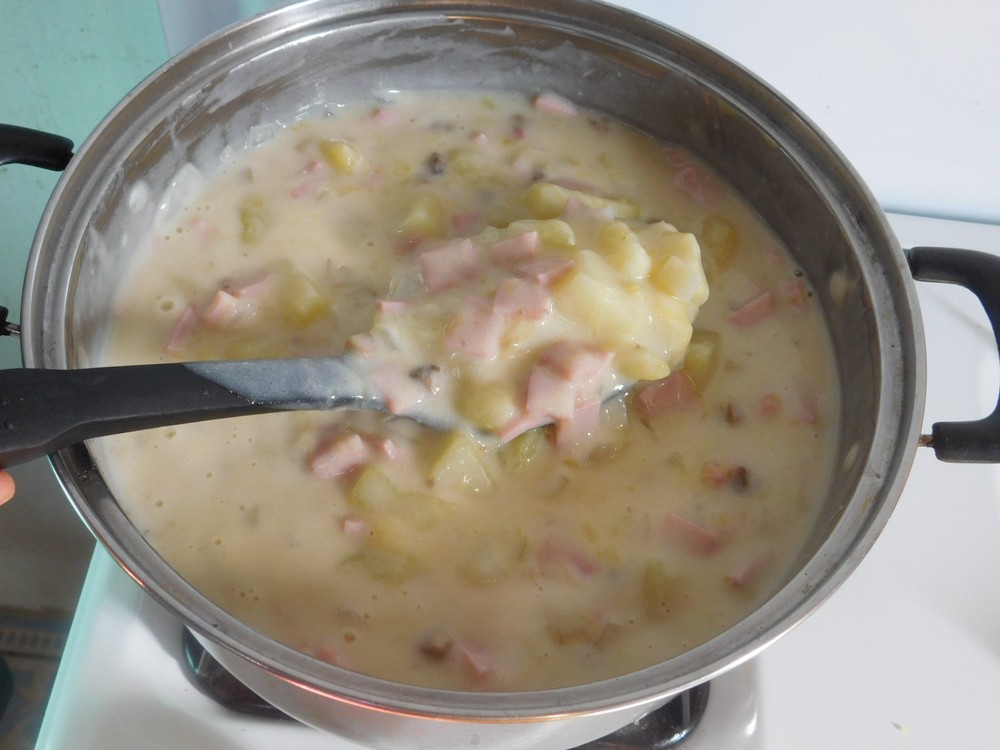
Creamy Ham & Potato Soup
This recipe was inspired from a recipe on the Just a Pinch Recipe Club that was a ham and bean soup. My wife suggested potatoes instead of the beans, and it worked perfectly! I made this on 27 Jun 2022 and it was devoured by the 5 of us.
Ingredients
- 800 grams potatoes, peeled and cubed, (1¾ lb)
- water, as needed
- 1 onion, diced
- 500 grams sliced sandwich ham, cubed, (1 lb)
- 2 cans condensed cream of mushroom soup, (10½ oz / 298 g each)
- 500 grams Cheddar cheese, shredded, (1 lb)
- salt and pepper, as desired
Instructions
- Add the potatoes and onion to a large pot.

- Add water to cover the potatoes by 1 inch. Set on medium high heat. Cook until the potatoes are fork tender, stirring occasionally.

- While the potatoes are cooking, take the sliced ham and set the entire stack on a cutting board, then cut into ½ strips. Once you have the stack cut into strips, just turn the cutting board 90 degrees then then cut the strips crosswise into ½ inch cubes, there, the stack of ham is now diced. Using sliced ham allows more ham to be distributed throughout the soup.
- When the potatoes are tender, reduce heat to low. Scoop out some of the water so the water is just at the top of the potatoes, reserve the water to add if needed if you want a thinner consistency. Now add the soup, ham, and cheese, stir together.

- Simmer until the cheese is melted and the soup and cheese is mixed in well. Season with salt and pepper as desired. Stir in some of the reserved potato water if you want thinner soup.

- Ladle into bowls, serve, and enjoy.

Notes
Low cost per serving.
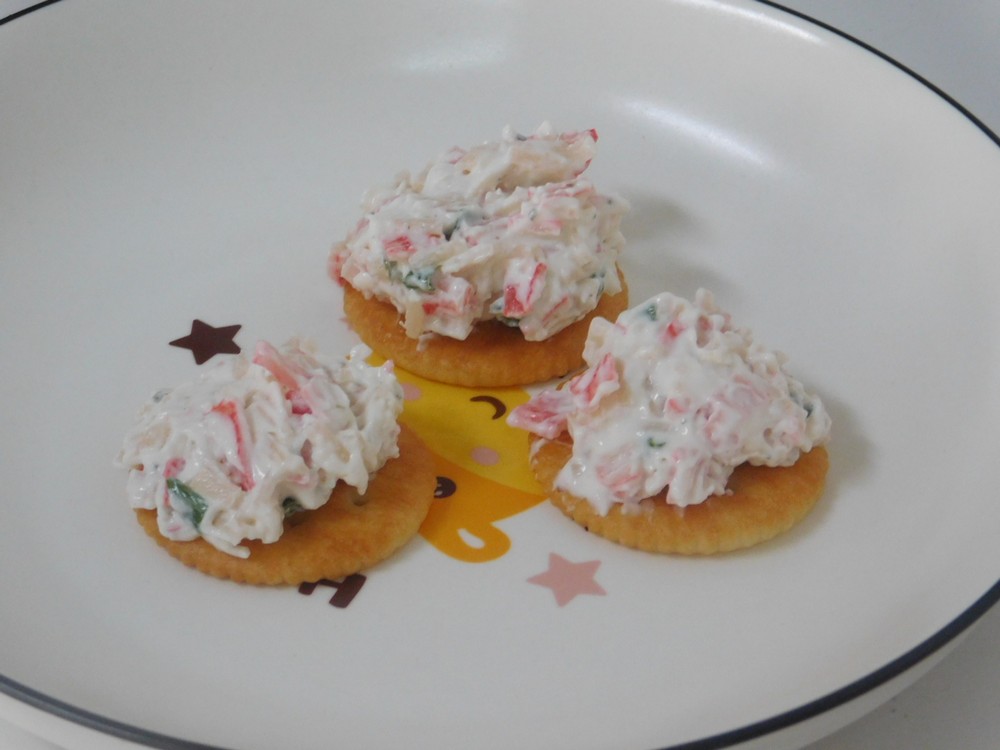
Imitation Crab Dip
This is from the Just a Pinch Recipe Club website, it is easy to make and tastes delicious. To be honest, I do not know what a good crab dip is supposed to taste like, but I will say, this is an excellent tasting dip! This is a cold dip, not a hot dip.
Equipment
- Electric Mixer
Ingredients
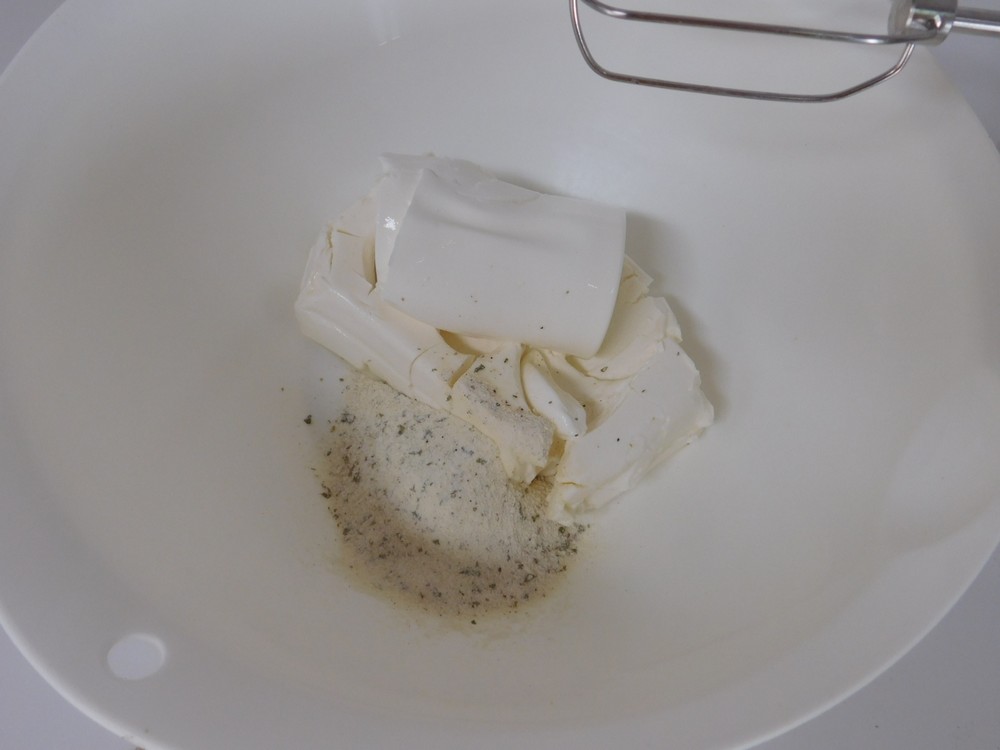
- 250 grams cream cheese, room temperature, (8 oz)
- 150 grams sour cream, this is the small container, (about ⅔ cup)
- 1 packet dry ranch dressing, Shortcut
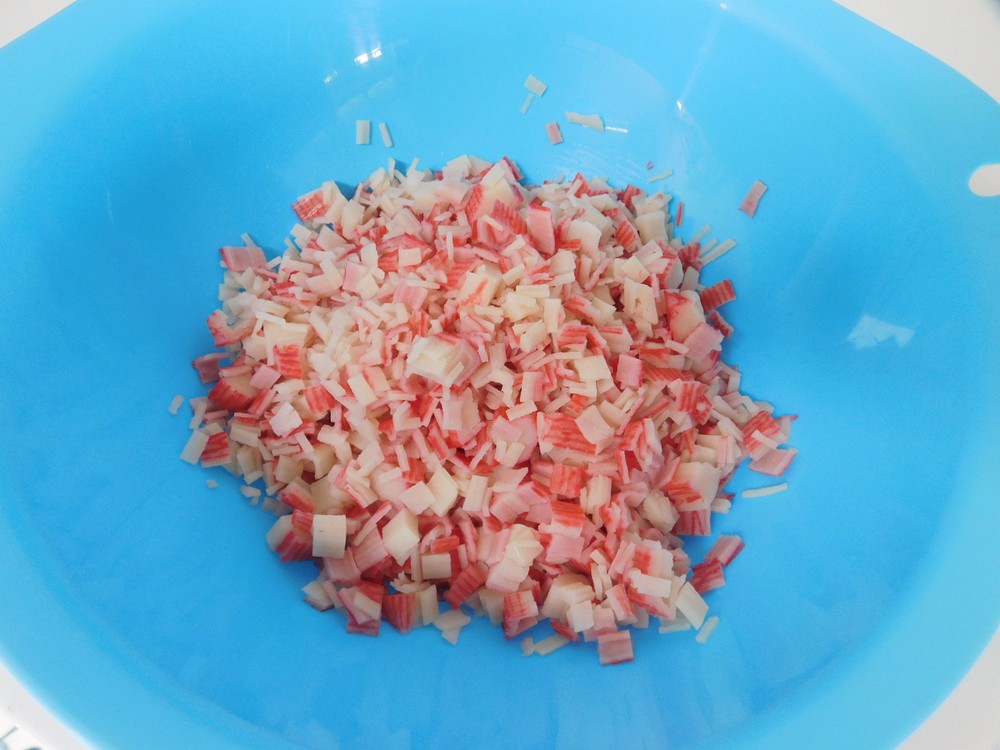
- 500 grams imitation crab sticks, (1 lb)
- 2 tablespoons spring onion tops, sliced
- butter crackers, for serving
Instructions
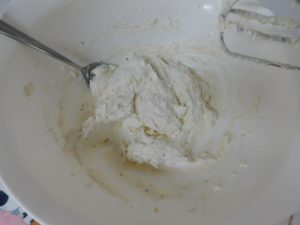
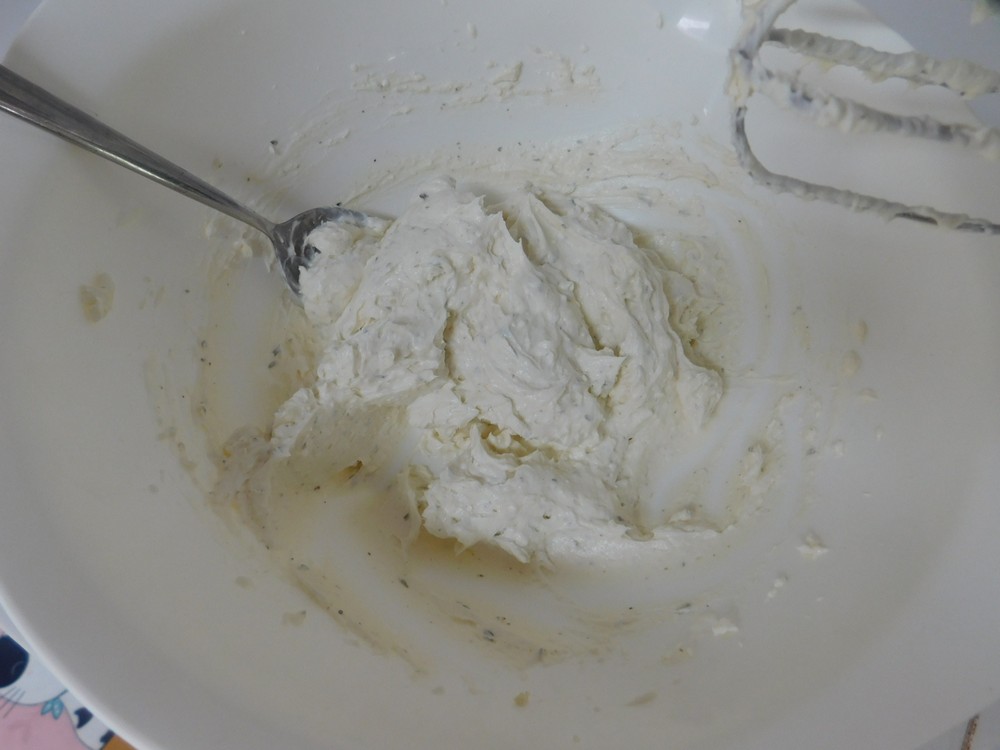
- Add the cream cheese, sour cream, and dry ranch dressing to a mixing bowl.
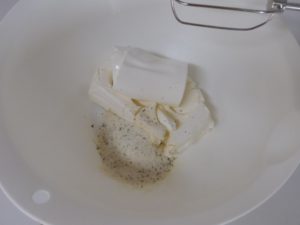
- Use an electric mixer to thoroughly mix together.
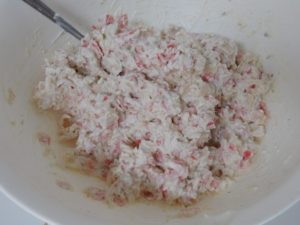
- Cut the crab sticks into ¼ inch slices and place in another mixing bowl. Then use your hands to break the pieces up a little.

- Add the crab sticks to the cheese mixture and use a spoon to mix together. Sprinkle in the spring onion tops and mix in. Cover and place in the fridge to chill for a 2-3 hours.
- Serve with butter crackers, enjoy.


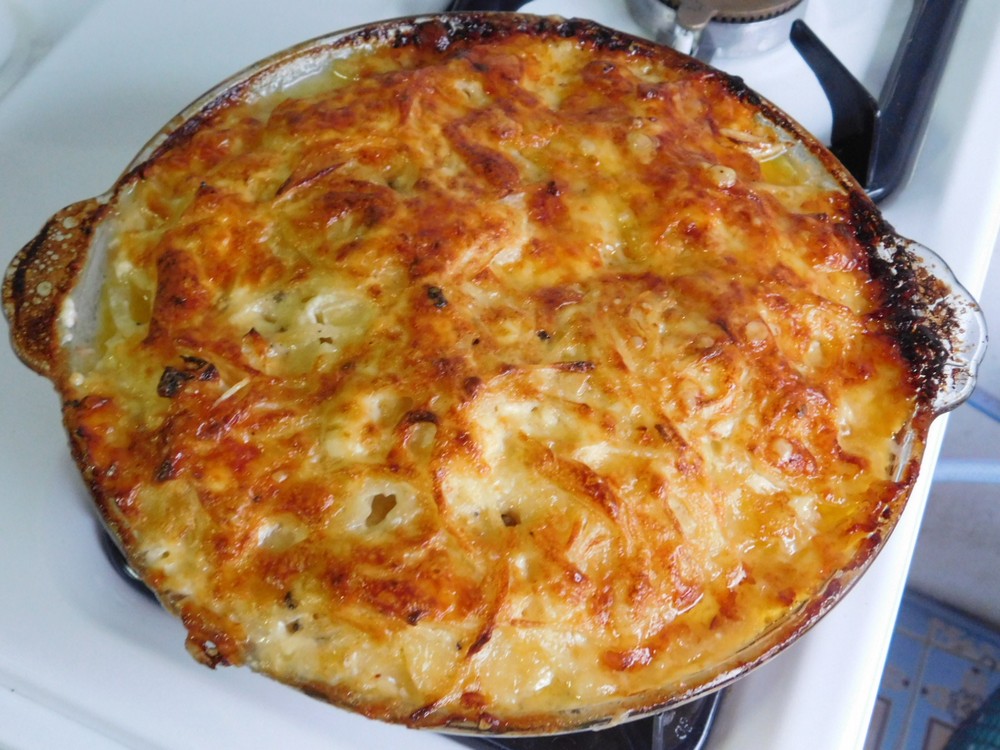
Bonnie's Potato & Onion Pie
This is from a friend on the Just a Pinch Recipe Club website. Easy to put together and it is delicious!
Equipment
- Mandoline
- Pie Dish (9 inch)
- Oven
Ingredients
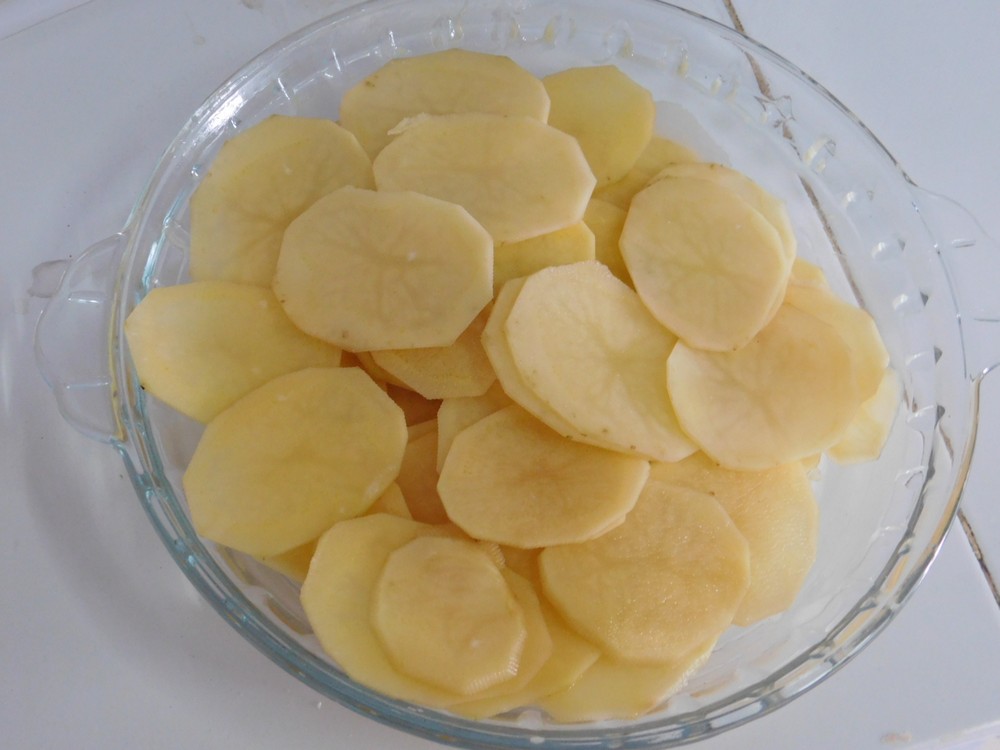
- 1 kilo potatoes, peeled, sliced thin, (2 lb), a mandoline would be perfect for this.
- 1 onion, peeled, cut in half, sliced thin
- salt and pepper, as desired
- 4 cloves garlic, minced
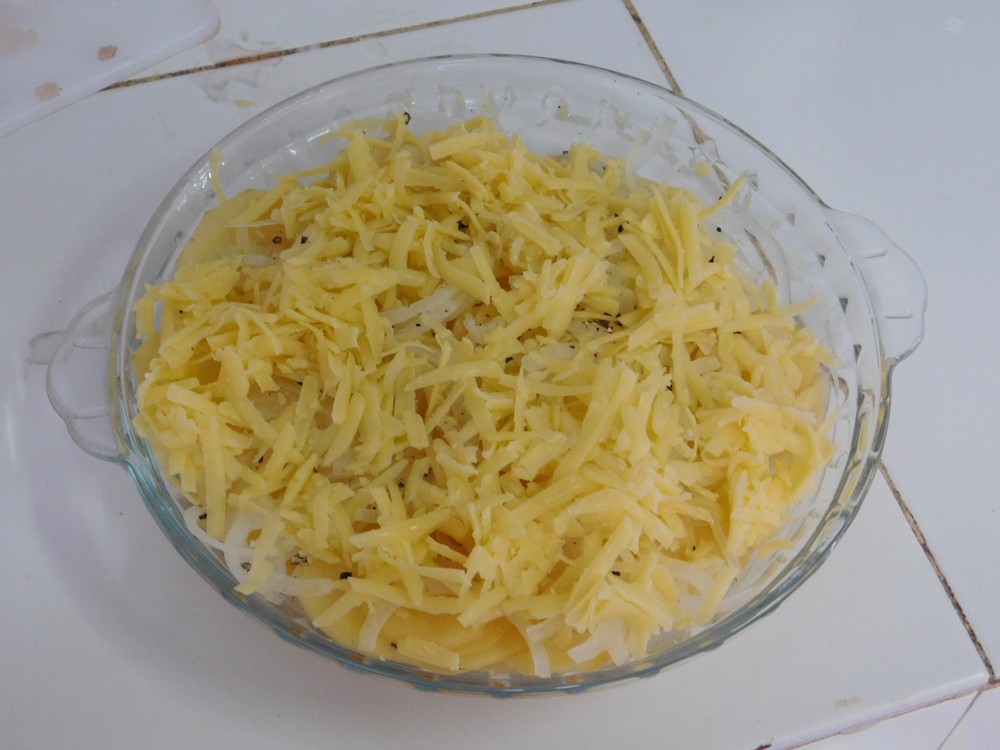
- 2 cups cheese, your choice, shredded
- ⅔ cup sour cream, or whipping cream, or milk, or a combination of any listed
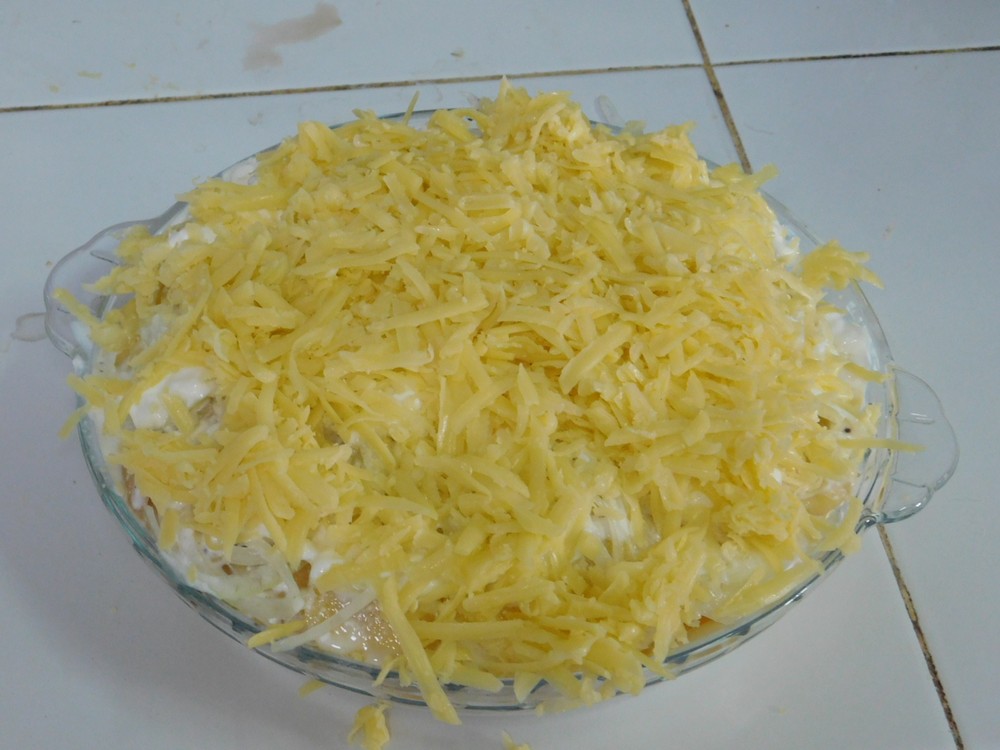
- ¼ cup Parmesan cheese, grated
Instructions
- Prep the potatoes and onion. I used 5 medium potatoes for the 1 kilo and used a mandoline to slice the potatoes and onion.

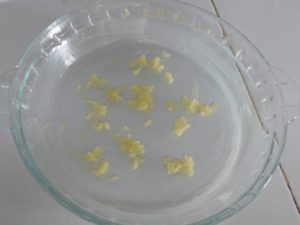
- Preheat your oven to 190° C (375° F), grease a large pie dish with butter. Sprinkle ½ the garlic in the pie dish. I used a 9 inch pie dish.
- Add ½ the potatoes overlapping the slices.

- Add ½ the onion slices on top of the potatoes, and sprinkle with salt and lightly with pepper, as desired.
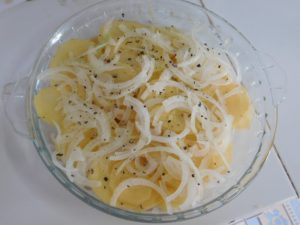
- Sprinkle ½ of the shredded cheese over the onion.

- Repeat the layers starting with the remaining garlic, then potatoes, onion, salt and pepper. Add the sour cream, whipping, or milk, or any combination of these evenly over the top. I used ½ cup sour cream then added milk to bring it to ⅔ cup.

- Sprinkle remaining shredded cheese over the top, then sprinkle on the Parmesan cheese.

- Cover the dish with foil and bake for 30 minutes. Then uncover and bake for 30 minutes more.

- Slice into wedges, serve as a side dish, enjoy.


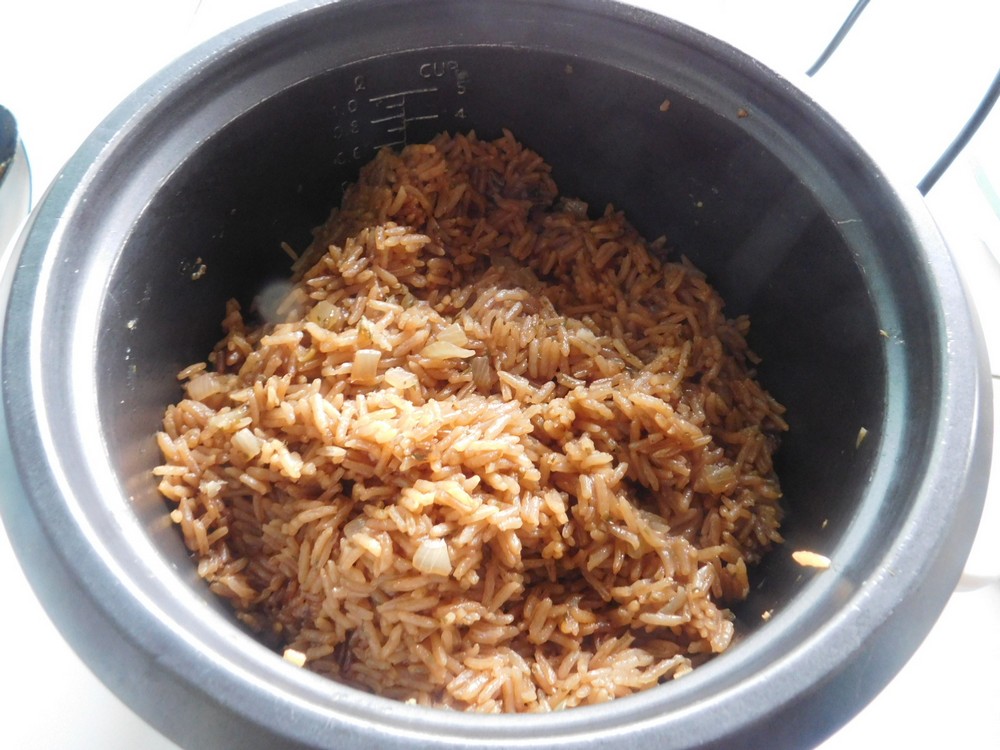
Seasoned Rice II
This recipe comes from a friend with amazing recipes. I made this on 17 Jun 2022, and it was very well liked by the family, this will be a regular now. I use my basic Cook/Warm, 1 liter (1 quart), rice cooker to prepare this.
Equipment
- Rice Cooker
Ingredients
- 3 tablespoons butter, divided
- ¼ cup onion, diced
- 2 cloves garlic, minced
- 1 cup dry Jasmine rice
- 2 cups beef broth, (I use OXO brand)
- 2 tablespoons light soy sauce
- 1 teaspoon Worcestershire sauce
- 1 teaspoon dried parsley
Instructions
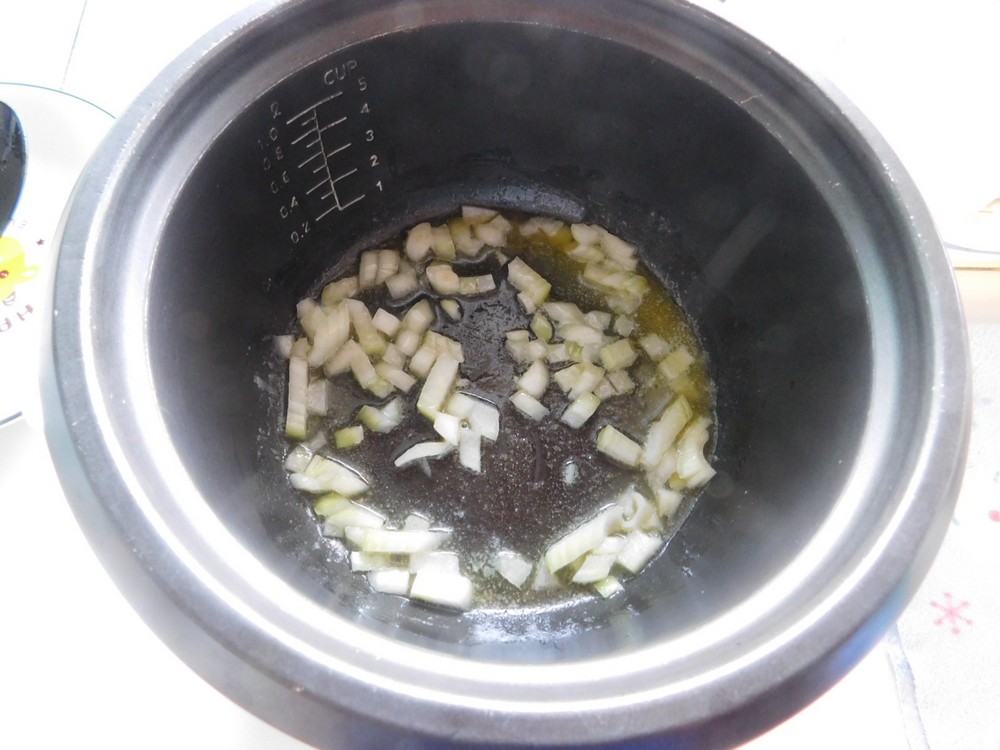
- Add 2 tablespoons of the butter to your rice cooker and set to Cook setting, leaving cooker uncovered. When the butter is melted, add the onion. Cook, stirring often, until the onion is almost softened.
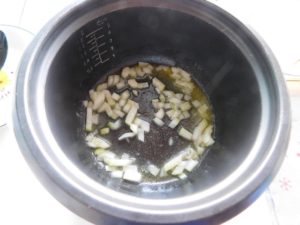
- Stir in the garlic, then add the rice. Stir to coat with the butter and continue cooking uncovered until the rice is just starting to toast and slightly brown.

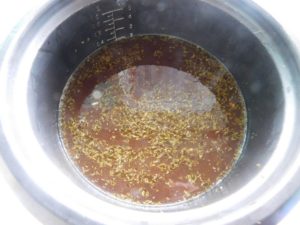
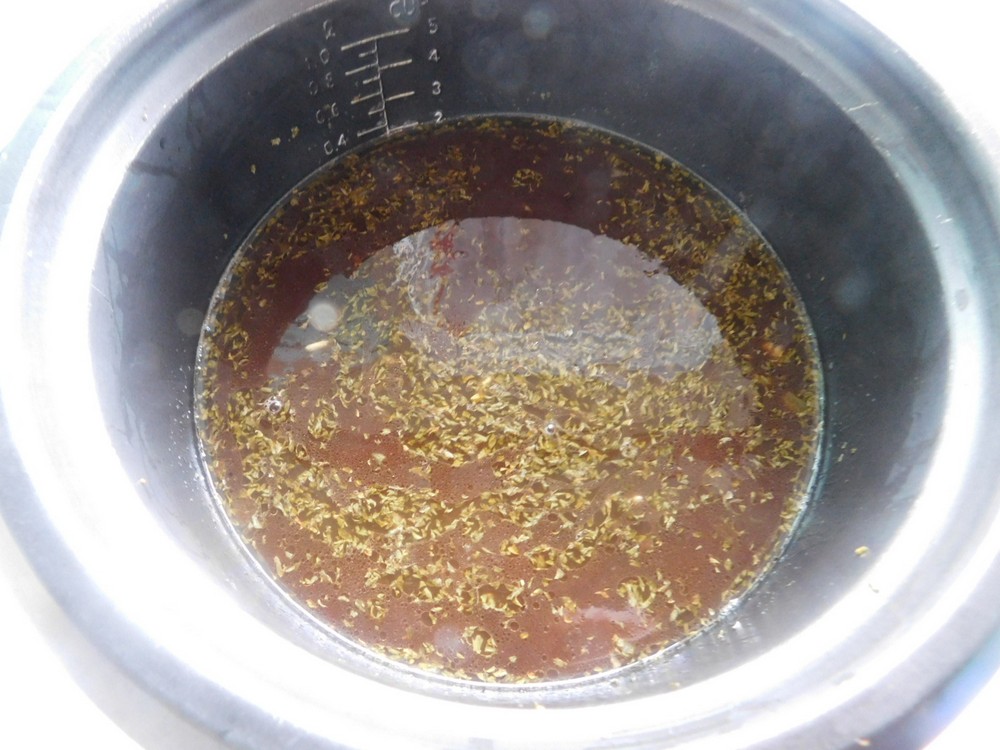
- Add the broth, soy sauce, Worcestershire sauce, and parsley. Stir together. Cover and let the cooker complete the Cook cycle.
- When the cooker switches to Warm setting, unplug or turn off cooker and let rice sit, still covered, for another 5 minutes.
- Open the lid, add the remaining 1 tablespoon of butter, and fluff with a rice paddle.

- Serve as a side dish with any main dish. Enjoy.

Notes
Variants: 1. Added a diced bell pepper. 2. Add sautéed mushrooms.

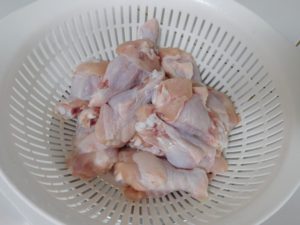
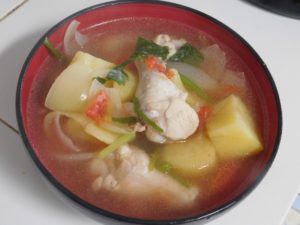
Thai Chicken & Potato Soup
My wife and niece make this soup often, and it is delicious! I was intrigued when I first saw this made as I have rarely seen Thais use potatoes. This is a basic non spicy soup made with fresh and common ingredients. This is normally served with rice on the side but can certainly be enjoyed as is.
Ingredients
- 2 quarts water
- 3 cloves garlic, peeled
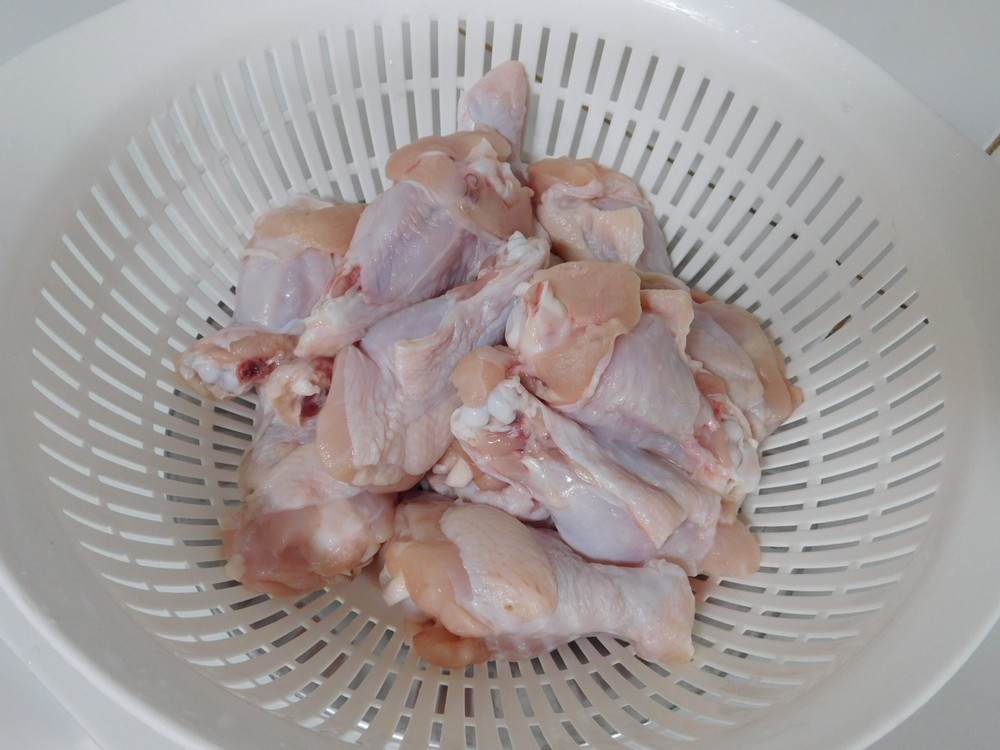
- 1 kilo chicken wing sticks, (drumettes), (2 lb)
- 1 cube chicken stock
- 4 potatoes, peeled, cut into chunks
- 3 onions, peeled, cut into wedges
- 4-5 plum tomatoes, cut into wedges
- 1 teaspoon salt
- 1 teaspoon MSG, optional
- 2 tablespoons thin soy sauce, (light soy sauce)
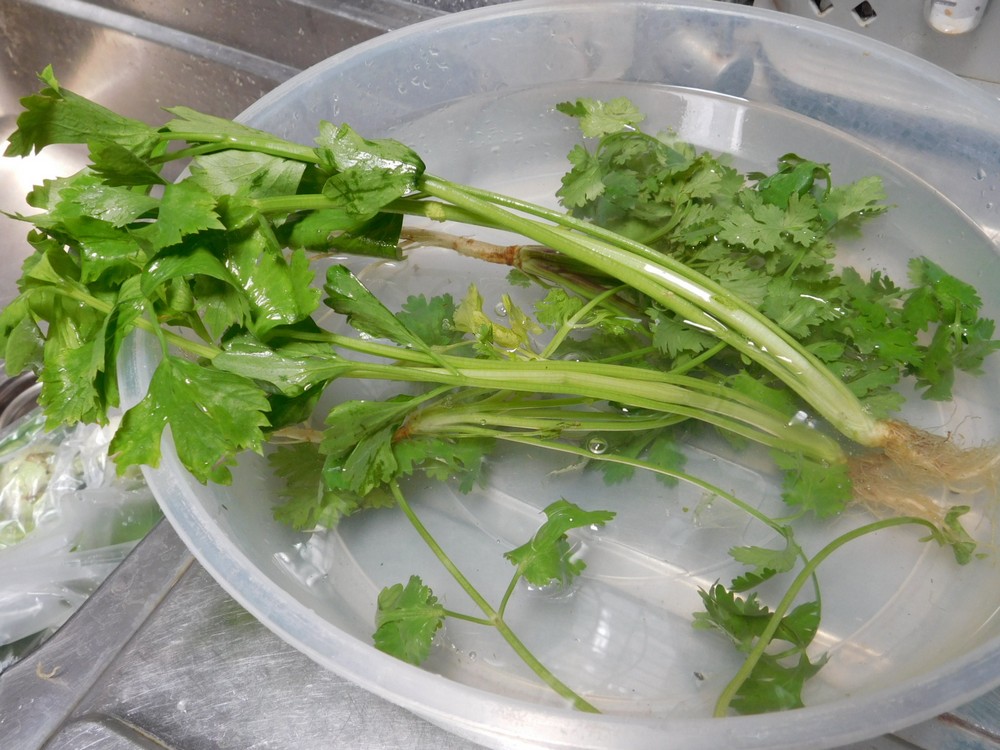
- 2-3 bunches Chinese celery
- 2-3 spring onions
- hot cooked rice, for serving, optional
Instructions
- Prep the wings. These were cut from full wings.
- Prep the potatoes and onion.
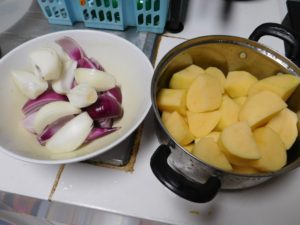
- Prep the tomatoes, and more onions were prepped as well.

- Chinese celery is quite thin, the stalks and leaves are used. The celery has the roots in this photo on right, two bunches were used. The coriander underneath was used in another recipe.

- Cut the celery and spring onion (white and green parts) into 2 inch pieces.

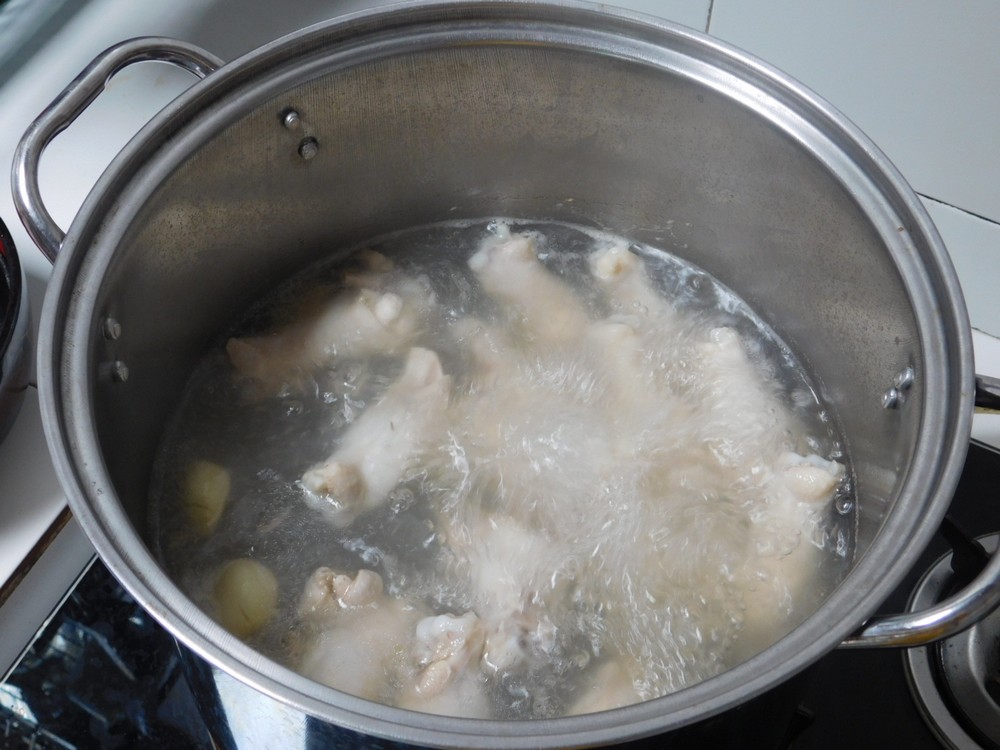
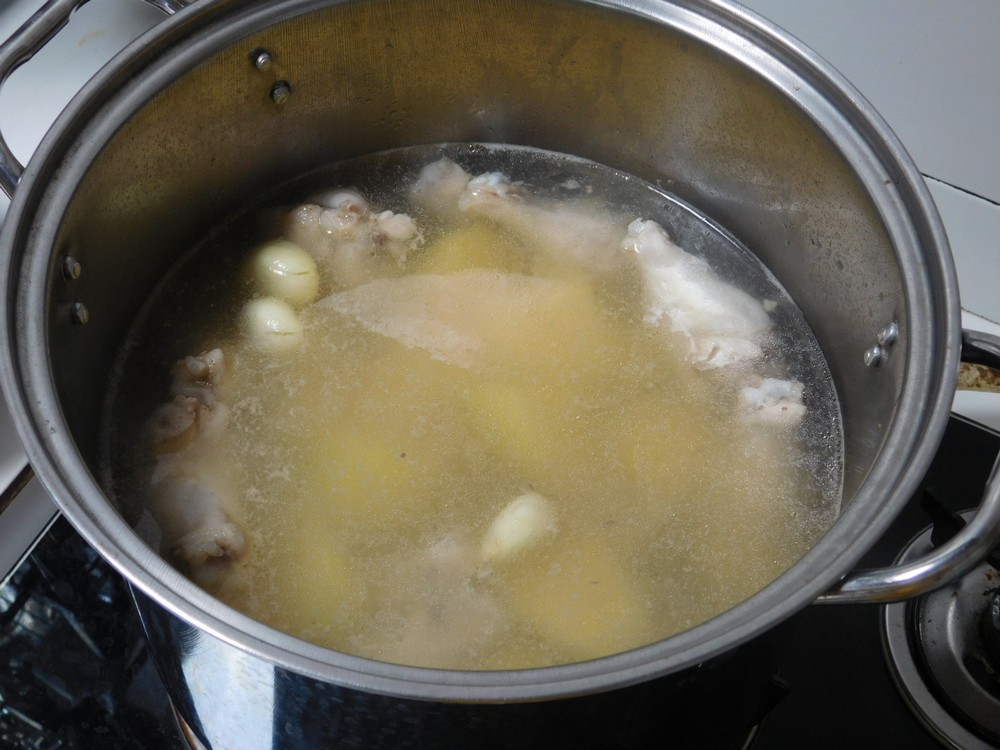
- Add the water and garlic to a large pot, bring to a boil.

- After a few minutes, add the stock cube and the wing sticks. Let the pot come to boil, and occasionally skim any foam off the top. Cook until the wings are just cooked through.
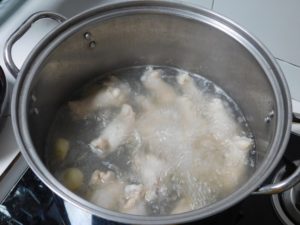
- Now add the potatoes and let the pot come to a boil again, cook until the potatoes are just fork tender.

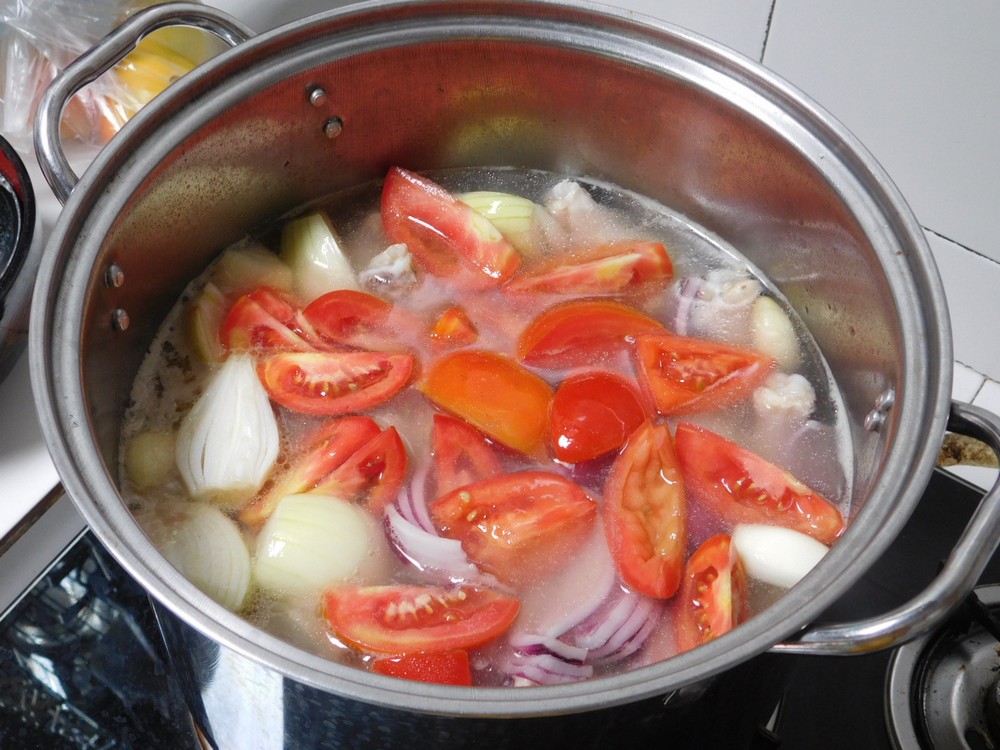
- Then add the onions and tomatoes, reduce heat to medium low and cook until the onion is tender.

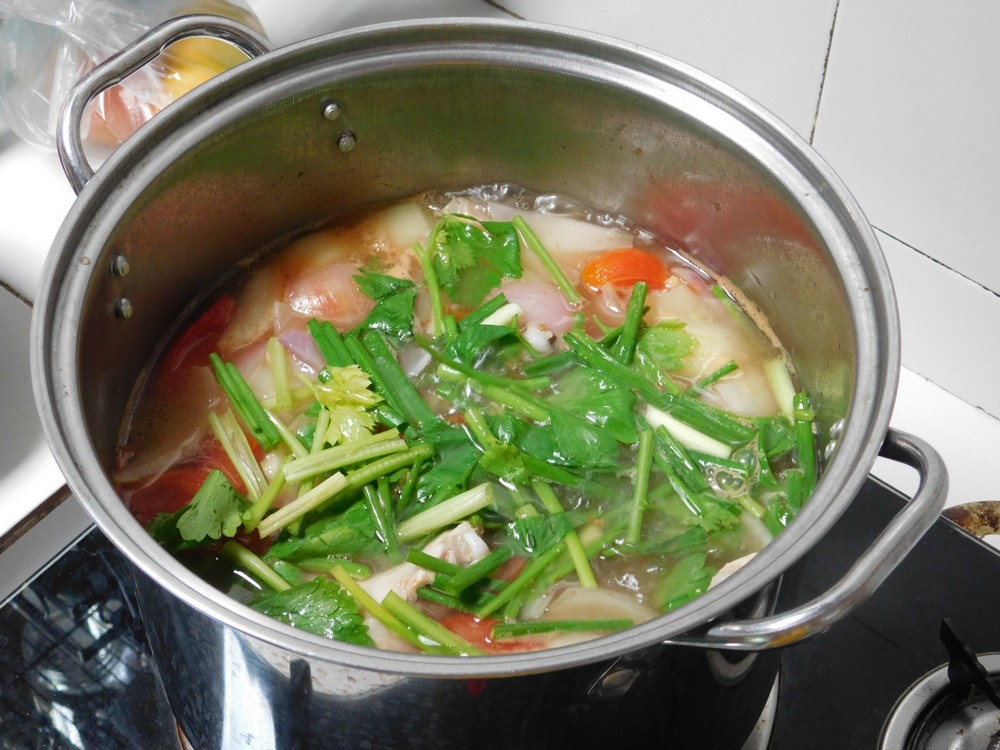
- Once the onion is tender, add the salt, MSG (if using), and soy sauce, stir and taste, adding salt as desired. Then turn off the heat, leaving pot on the same burner, and add the celery and spring onion.

- Once the celery and spring onion is wilted, give the soup a stir.
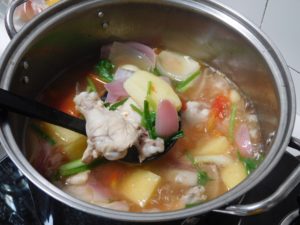
- Ladle into serving bowls, enjoy. Serve as is or with rice on the side.


Notes
Low cost per serving.